Category Archives: Hawk Epoxy

The different uses for Hawk Epoxy

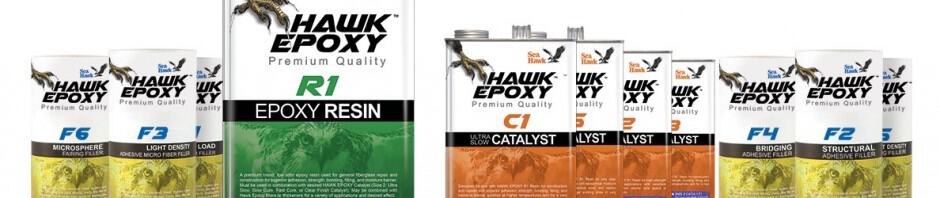
If you’re a boat owner, there’s a good chance you’re familiar with Hawk Epoxy by SeaHawk Paints; however, did you know there are several diverse ways to use it? In this post, we’ll take a look at some of the different ways Seahawk Hawk Epoxy can be used to keep your boat in top condition. So, whether you’re a beginner or an experienced boater, read on for some helpful tips!


What is epoxy?


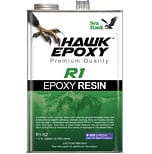
Epoxy is a type of adhesive that is commonly used to bond two surfaces together. It is made up of a resin and a hardener, which are mixed together to form a tough, durable bond.

Unlike other sealants, epoxy is able to form a strong bond with the surface it is applied to, making it an ideal choice for sealing concrete, metal, and glass. Epoxy is also resistant to temperature changes and UV light, making it ideal for use in outdoor applications. In addition to its practical benefits, epoxy can also be used to create interesting visual effects. When applied to a surface in thin layers, epoxy can create a marbled or even tie-dye effect. As a result, epoxy is a versatile material that can be used for both functional and decorative purposes.Epoxy is typically used for repairing metal, plastic, and glass.

It can also be used for bonding wood, concrete, and ceramic. Epoxy is available in both liquid and powder form. The liquids are typically used for small repairs, while the powders are better suited for larger projects. Epoxy is typically applied with a brush or roller. Once it has been applied, it needs to be allowed to cure for 24 hours before it can be used.

Hawk Epoxy can be used as a sealant to protect surfaces from water and other elements.

Hawk Epoxy

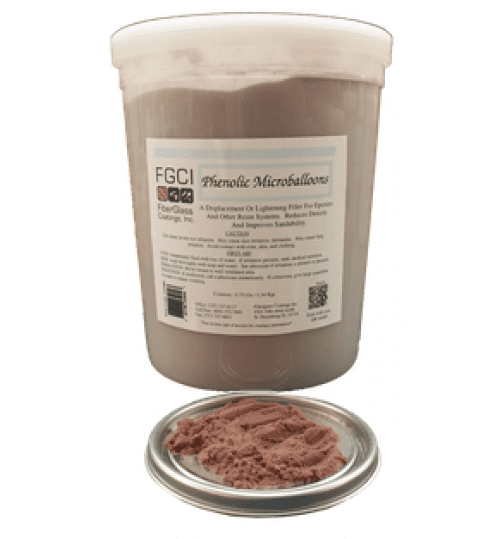
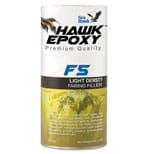
Fairing Hull Imperfections with Hawk Epoxy


Let’s face it, our boats take a beating. They’re exposed to the sun, the salt, the waves, and the wind on a daily basis. So, it’s no wonder that even the best-kept boats can start to show their age after a few years. One of the most common problems is fairing hull imperfections. These are small cracks or indents in the gelcoat that can make your boat look old and worn. But don’t despair, there is a simple way to fix this problem with hawk epoxy.
Hawk epoxy is a two-part epoxy resin that you mix together to create a putty-like substance. Once it’s mixed, you can use it to fill in any cracks or indentations in your hull. It dries hard and sets fast, so you can sand and paint over it once it’s dry. And best of all, it’s very affordable. So, if your boat is starting to look a little worse for wear, don’t worry, just grab some hawk epoxy, and give your boat a facelift.

Patching Holes in a Boat with Hawk Epoxy


There’s nothing worse than getting your boat out on the water only to find that it’s taking on water. Fortunately, patching holes in a boat is relatively easy to do, as long as you have the right materials.

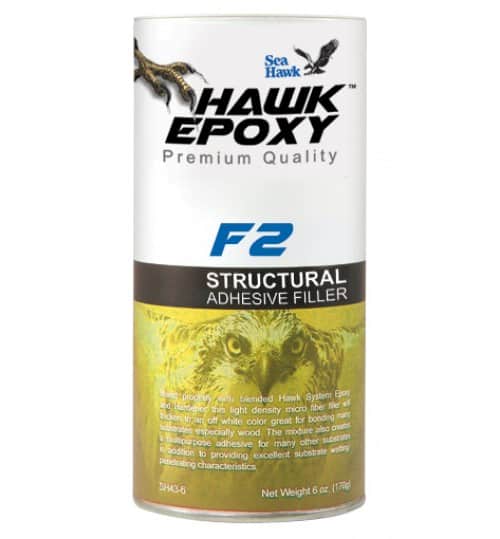
Hardware Replacement Adhesion with Hawk Epoxy


Hawk epoxy’s two-part epoxy provides a strong, permanent bond and can be used on a variety of materials, including metal, glass, ceramic, and plastic. And it sets in just minutes, so you won’t have to wait around for hours for it to dry. Plus, it’s easy to use – just mix the two parts together and apply it to the surfaces you want to bond.

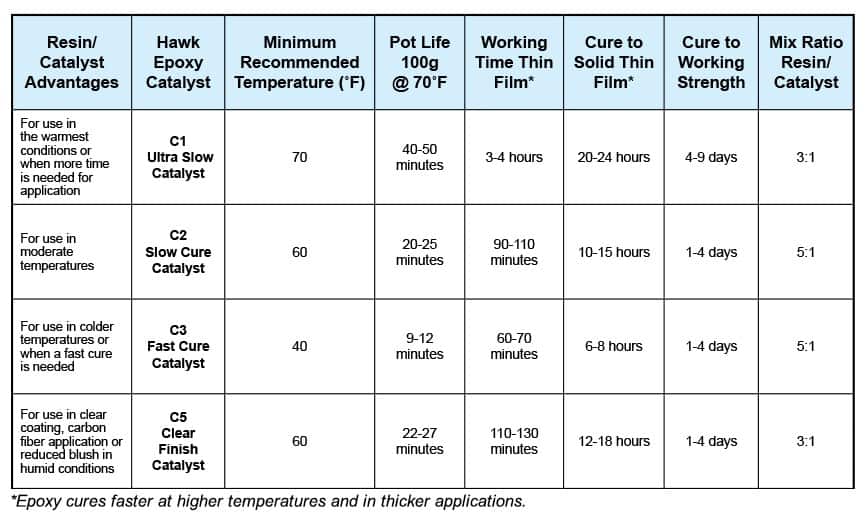
Hawk Epoxy Proper Measuring and Mixing


Anyone who has ever worked with epoxy knows that it is crucial to get the measuring and mixing process exactly right. Too much or too little of either ingredient can ruin the entire batch, and that can be a costly mistake. Hawk Epoxy strives to make the measuring and mixing process as simple and foolproof as possible. Our epoxy products come with clear instructions and easy-to-use tools that make it easy to get the perfect mix every time. If you follow the provided instructions, you can be confident that your epoxy project will turn out just the way you want it to.

Applying Hawk Epoxy


Hawk epoxy is specifically designed for use on boats, and it’s perfect for patching small holes. The epoxy comes in two parts that you mix together, and then it can be applied directly to the hole.
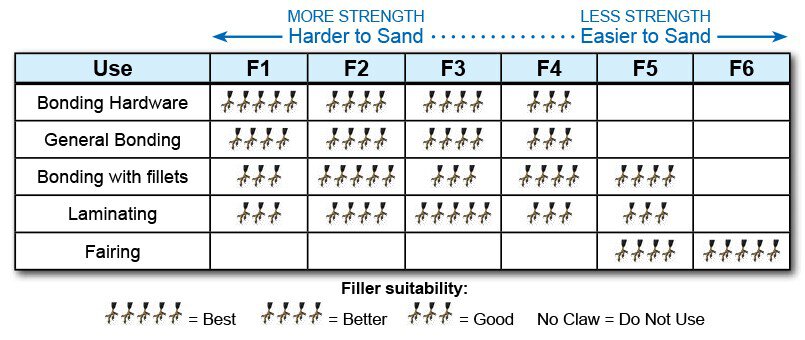
Sometimes, you need something more than just epoxy resin. That’s where Hawk epoxy fiberglass cloth and mat come in. The cloth and mat help to reinforcing the epoxy, making it stronger and more durable. They can be used to repair cracks, leaks, or holes in a variety of surfaces, including concrete, metal, glass, and wood. Best of all, the cloth and mat are easy to apply and can be cut to fit any size or shape. So, whether you’re patching up a small crack or fixing a large hole, Hawk epoxy fiberglass cloth and mat can help you get the job done right.
First, clean the area around the hole with sandpaper to make sure that the epoxy will adhere properly. Then, mix the epoxy according to the instructions and apply it to the hole. Once it dries, the epoxy forms a strong bond that will keep the hole sealed. It is important to note that the curing time may vary depending on your temperature and humidity levels.
Once properly applied and cured your boat will be good as new – no leaks guaranteed!

Sealing a Fiberglass Hull with Hawk Epoxy


Sealing a fiberglass hull with epoxy is a great way to extend the life of your boat. Epoxy is a strong, durable material that will create a waterproof barrier between the hull and the water. It is important to properly prepare the surface before applying the epoxy, and to follow the manufacturer’s directions closely. Once the epoxy has been applied, it is important to allow it to cure properly before using the boat. With proper preparation and care, sealing a hull with epoxy will help to keep your boat in good condition for many years to come.


How to apply Hawk Epoxy


Epoxy is a type of synthetic resin that is often used as an adhesive or coating. It is typically made up of two parts that are mixed together and then cured to form a hard, durable finish. Hawk Epoxy by SeaHawk paints is a two-part epoxy that can be used for a variety of applications, including bonding, coating, and laminating. Before using Hawk Epoxy, it is important to read the instructions carefully and to follow all safety precautions. Once you have mixed the two parts of the epoxy together, you will have a limited time to apply it before it begins to set. For best results, apply the epoxy to a clean, dry surface and use a brush or roller to spread it evenly. Once it has been applied, the epoxy will need to cure for 24 hours before it is fully cured. However,

Hawk Epoxy is a versatile product that can be used in many different ways. We’ve highlighted just a few of the potential applications for this amazing adhesive. If you have questions for how to use Hawk Epoxy or need help bringing your boat painting project to life, contact the Bottom Paint Store customer service team Monday through Friday 9-5 EST 888-505-2313.

Filler Options for Gelcoats and Resins

There are many common fillers used with gelcoat and resin and here we’ll help you pick the one that is right for you.

When using putty, a good rule is not to go higher than 1/8″ thick without adding a layer of glass to prevent any issues. With the various fillers, for the right working consistency, you’ll want about 60-70% mix to resin ratio.

Milled Fibers: Finer than chopped glass, makes a harder putty that is strong and coarse.

Walnut Shells: Brown in color and preferred for wood putty or nonskid since it has large particles. Good Strength and darker pigment.

Phenolic Microballons

Microballoons or Microspheres: Phenolic spheres are generally plastic or glass and hollow, intact spheres that are lightweight. This is ideal for making fairing compounds. The Microballoons are a more expensive option for filler.

Fumed Silica: Also known as Cabosil FIller or Aerosil Filler. This is a hydrophilic fumed silica. Fumed Silica provides little change to weight, color, or physical properties after cure, used in resins and gelcoats to make them hang on vertical surfaces, (too much can cause porosity.)

Cotton Flock: Made from pieces of cotton and thickens to an off-white color. Great for bonding many substrates, especially wood. The mixture also creates a multipurpose adhesive for many other substrates in addition to providing excellent substrate wetting and penetrating characteristics. Increases impact and abrasion resistance.

Chopped Glass Fibers

Chopped Glass: These are the biggest pieces of fillers and are most popular for use with resin putty. Perfect for corners, crack resistant, and doesn’t affect pigmented gelcoat. 1/4″ glass fibers make the strongest glass reinforced putty.

How to repair a hole on the side of your boat

Repairing a hole on the side of your boat is possible by following this guide and using epoxy resins for wooden boats.

Begin by inspecting the hole for any cracks that extend away from the
hole and clearly mark the entire area that needs to be patched. You want to be sure to extend your mark out beyond the damaged area by a few inches.

Hawk Epoxy f2 Structural Adhesive Filler

Cut the marked area with a hand saw making sure the hole is beveled in order to allow layers of fiberglass to fill the hole. Measure the thickness of the hull substrate and multiply it by 10. This is the distance from the hole edges that the bevel needs to accommodate.

Use a power sander with a 50 grit sanding disc to bevel from the whole edge out to your mark. Fiberglass layers are going to be placed on the outside of the hull. Use a flat backing on the inside of the hole to keep the wet fiberglass cloth from caving into the hole.

Next cut six pieces of fiberglass bi-axle cloth with the first piece being the size and shape of the outer edge of the bevel. The final sixth piece being the size of the hole itself. Remember it is important to use fiberglass bi-axle cloth for hole repairs.

Wet out the beveled area of the hole with a mixed epoxy. Lay the cut fiberglass bi-axle cloth on a piece of plastic going from large to small pieces. Make sure to wet each piece as you place them on top of the next piece. When wetted out properly the bi-axle cloth will become transparent. Put the wet out pile of fiberglass bi-axle cloth into a piece of peel ply, with the small pieces down. Next, mix the Hawk epoxy f2 filler and hawk epoxy resin catalyst until you reach a soft butter consistency.  

Hawk Epoxy Resin Catalyst

Brush this mixture onto the beveled area of the hull and be sure to center your filler. Wipe off any extra leftover epoxy from the hull, squeegeeing out the air pockets and wiping with a clean cloth that has been dampened with solvent. This will be a lot easier than sanding it off later. Allow the patch to cure for the recommended cure time (overnight is typically sufficient) per the instructions on the hawk epoxy resin can label.

Once it has cured, remove the repair area backing on the inside of the hull. The repair area on the inside of the hull can be left untreated if it will not be exposed to sunlight. Remove blush with soap and water. Next sand off any rough areas on the outside of the hull with 80 grit sandpaper and then sand with 100 grit sandpaper the entire repair area so it is completely smooth (this may require a disc sander if it’s too difficult to sand by hand). You can dust off the area a clean cloth, air gun or brush it off with a clean brush.

F5 Light Density Fairing Filler

Prepare a batch of Hawk epoxy resin and catalyst. Apply coats to the repair area with wet epoxy, with the remainder of the Hawk epoxy resin mixed in the Hawk epoxy f5. Lightly mix filler until density is a medium thickness
with no sag consistency.

Next, spread the mixture onto the repair area and squeegee the area until as smooth as possible. Allow the area to cure until you can push the corner of the squeegee into the surface and only a slight indentation remains. Repeat the process with Hawk epoxy mixed resin and f5 light density filler, adding another coat of this mixture onto the repair area. Let this cure for 10 to 12 hours.

Remove the blush with soap and water and sand the repair area with a smooth 80 grit sandpaper.

To add color, mix another small batch of Hawk epoxy and introduce the liquid dispersion as this will seal and fill any low areas. Now that you have a strong and
sturdy hull side you are ready for paint!

How To Patch a Hole in a Fiberglass Boat

A fiberglass boat is a great investment. They are durable and can last for years with proper care. But like anything else, they are not indestructible and will eventually need to be repaired. One of the most common repairs is patching a hole in the hull. Fortunately, this is a relatively easy repair that can be done by anyone with basic fiberglass repair skills.

The first step is to clean the area around the hole. This will remove any dirt or debris that could prevent the patch from adhering properly. Next, cut a piece of fiberglass cloth that is slightly larger than the hole. Apply a generous amount of fiberglass resin to the cloth and then place it over the hole. Use a roller or brush to smooth out the cloth and remove any air bubbles. Allow the resin to cure for 24 hours before sanding down the area and painting over it. With a little time and effort, you can have your fiberglass boat looking like new again.

A major fiberglass repair, such as patching a hole, can be a daunting task. Watching a professional do the job can help you get on the right track and be confident in doing the repair yourself. This step-by-step video tutorial produced by Sea Hawk Paints will show exactly what needs to be done when patching a hole in your fiberglass boat.

Note: Before attempting a repair by yourself, get a professional opinion. Always wears Personal Protective Equipment when sanding or working with chemical compounds! Respirator, safety glasses and gloves are always recommended.

Here is a list of products you will need for the repair:

  1. Hawk Epoxy Resin Kit – It contains the epoxy resin, catalyst and filler for the job.
  2. F5 Light Density Filler
  3. Biaxial Fiberglass matting
  4. 50 grit, 80 grit, and 100 grit sandpaper or grinding pads

Hawk Epoxy Video Tutorial

For more information see these other How To Articles:

Filling a Hole in Fiberglass

How Do I Choose Hawk Epoxy Catalyst and Fillers?

How to Mix Hawk Epoxy Resin Properly

Fairing Hull Imperfections


How to Get Strong Hardware Adhesion with Hawk Epoxy

epoxy repair kitWhat is the best way to achieve maximum adhesion when replacing your boat’s hardware? This How To article will give you the basic knowledge you need to get your repair done correctly.

Note: Before attempting a repair by yourself, get a professional opinion. Always wears Personal Protective Equipment when sanding or working with chemical compounds!

Here are some simple steps to follow when bonding hardware to your boat:

  1. Sand both the surface and the hardware to get maximum adhesion.
  2. Wet out the surface with Hawk Epoxy.f2-filler-large-may-2014-150x150
  3. Wait a few minutes for it to soak in.
  4. Wet out the Hardware base with Hawk Epoxy.
  5. Mix another batch of Hawk Epoxy with F2 Structural Adhesive Filler.
  6. Coat the hardware base, screw threads, and surface mount with the epoxy/filler compound.
  7. Tighten hardware bolts until some epoxy mixture squeezes out.
  8. Use your finger to fillet the excess mixture around the hardware base for extra strength.
  9. Before using the hardware, allow the bond to cure overnight.

Hawk Epoxy Video Tutorial

For more information see these other How To Articles:

How Do I Choose Hawk Epoxy Catalyst and Fillers?

How to Mix Hawk Epoxy Resin Properly

Filling a Hole in Fiberglass

Fairing Hull Imperfections

Fairing Hull Imperfections

hawk-epoxy-Large-May-20141What is Fairing?

Fairing is process of smoothing out and restoring the damaged surface of the hull. A fairing compound such as Epoxy resin can be used to fill in divots or gouges and then be sanded to a smooth finish. This restores the surface to its original shape and also prepares it for painting.

Note: Before attempting a repair by yourself, get a professional opinion. Always wears Personal Protective Equipment when sanding or working with chemical compounds!

Here are some guidelines to fairing out imperfections in your hull:

  1. Sand all loose surface debris and hard edges.f5-filler-large-may-2014
  2. Rid surface of debris with clean cloth.
  3. Wet out surface with Hawk Epoxy.
  4. Mix another batch of Hawk Epoxy with F5 Light Density Filler and apply to repair area.
  5. Use long strokes to spread out filler compound over the damaged hull. Apply until the mixture is slightly raised above the hull surface. Make sure the compound extends beyond the repair area.
  6. Let cure 6 hours.
  7. Add skim coat of F5 Filler / Epoxy compound to achieve a very smooth surface. Let cure.
  8. Sand the repair to the desired shape with 80 grit sandpaper.
  9. Finish by applying another 2 or 3 layers of Hawk Epoxy Resin.
  10. The surface is ready to be painted!

Hawk Epoxy Video Tutorial

For more information see these other How To Articles:

How Do I Choose Hawk Epoxy Catalyst and Fillers?

How to Mix Hawk Epoxy Resin Properly

Filling a Hole in Fiberglass

How to Get Strong Hardware Adhesion with Hawk Epoxy


How to Mix Hawk Epoxy Resin Properly

Sea Hawk’s Epoxy Pump Kit makes it easier than ever to measure the Resin to Catalyst ratio very accurately, and get the same result every single time! But how are the pumps intended to be used?

hawk-epoxy-pump-kit-large-152x154
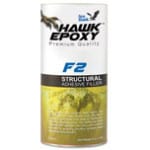
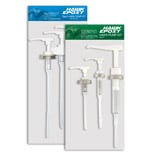
The Pump Kits come in two sizes, one kit accommodating the Size 1 and 2 Resin and Catalysts, and one kit accommodating the Size 3 Resin and Catalysts. Be sure to get the right size kit for the amount of resin and catalyst you plan on using. The Kit contains a total of 3 pumps; one for R1 Resin, one for C2 & C3 Catalyst, and one for C1 & C5 Catalyst.

The Hawk Pump Kit User Manual and instructional video explain how to use the pumps for accurate measuring, how to prime the pumps, pump cleaning and storage, and how to use the pumps with various Hawk Epoxy System Sizes.

Click here for Hawk Epoxy Size 1 and 2 User Manual

Click here for Hawk Epoxy Size 3 User Manual

Hawk Epoxy Video Tutorial

Filling a Hole in Fiberglass

When you are trying to repair a small hole in fiberglass, the best type of product to use is a premium epoxy. This will insure a proper repair and will not allow for shrinking of the material and create a water tight seal.

We recommend the Hawk Epoxy Kit. It contains the epoxy resin, catalyst and filler for the job. Watch the video below to see the steps needed to perform a small hole repair.

How to sand fiberglass for paint

Whether you’re trying to give your boat a new paint job or just touched up a few scratches, properly sanding fiberglass is an important step to ensure a smooth, even finish. Here’s a quick guide on how to sand fiberglass for paint:

  1. Start with a coarse grit paper (40-60) to remove any existing paint or surface imperfections.
  2. Progress to a medium grit paper (80-100) to smooth out the surface.
  3. Finally, use a fine grit paper (200+) to achieve a glass-like finish.
  4. For best results, wet sanding is recommended – simply soak the sandpaper in water for 10-15 minutes before use. This will help to prevent deep scratches and gouges.

How to prep fiberglass for paint

One way to do that is to make sure the fiberglass is properly prepared for painting. Here are some tips for prepping fiberglass for paint:

First, wash the area with boat soap and a soft brush. This will remove any dirt or grime that could prevent the paint from adhering properly.

Next, sand the area with fine-grit sandpaper. This will create a smooth surface for the paint to adhere to.

Finally, wipe down the area with a tack cloth to remove any dust from sanding.

If you have additional questions feel free to reach out to the Botton Paint Store technical team 888-505-2313.

West System to Hawk Epoxy Cross Reference Guide

Hawk EpoxyBelow shows the comparison of the West System products to the Hawk Epoxy products. Hawk Epoxy is comparable to the West System with how it works and its uses. West System is known for A/B/C/D selection system size (Size A resin with Size A hardener) the Hawk Epoxy uses 1/2/3/4 (Size 1 resin with Size 1 catalyst). The pumps are sold separate with West System and Hawk Epoxy, this works where 1 pump of resin is mixed with 1 pump of catalyst, or more depending on instructions. West SystemThis is just to make it easier and less chance for error for the customer and it doesn’t mean a 1 to 1 ratio because the pumps are calibrated differently and each pump size can distribute different amounts.

Please Note: This chart simply shows the likely equivalent product by brand. It is not recommended to mix the products brands.

CLICK HERE: West System to Hawk Epoxy Cross Reference Guide.

West System and Hawk Epoxy are trade marks of Gougeon Brothers, and New Nautical Coatings, respectively.

Hawk Epoxy System

How do I choose Hawk Epoxy Catalyst and Fillers?

R1 Epoxy Resin – a smooth, low-viscosity liquid epoxy resin. With a variety of Hawk Epoxy Catalysts, it can be cured under a wide range of temperatures and environmental conditions to form a high strength plastic with superior moisture barrier characteristics. Hawk Epoxy repair kit is available in four system sizes color coded on each label. Note: Mix ratios vary by catalyst. For optimal product utilization, be sure to choose the same Size for both the resin and catalyst. I.e Size 1 Resin with Size 1 Catalyst.

ChooseCatalyst

C1 ULTRA SLOW CURE CATALYST: Designed for use with HAWK EPOXY R1 Resin for construction and repairs with superior adhesion, strength, bonding, filling, and moisture barrier qualities at higher temperatures and for an ultra slow cure. Do not use under Sea Hawk marine wood varnish.

C2 SLOW CURE CATALYST: Designed for use with HAWK EPOXY R1 Resin for construction and repairs with superior adhesion, strength, bonding, filling, and moisture barrier qualities at higher temperatures and for a slow cure. Do not use under Sea Hawk marine wood varnish.

C3 FAST CURE CATALYST: Designed for use with HAWK EPOXY R1 Resin for construction and repairs with superior adhesion, strength, bonding, filling, and moisture barrier qualities at cooler temperatures and for a fast cure. Do not use under Sea Hawk marine wood varnish.

C5 CLEAR FINISH CATALYST: Designed  for use with HAWK EPOXY R1 Resin for very clear fiberglass cloth and coating applications with exceptional moisture barrier characteristics. Perfect for natural wood and carbon fiber clear coats with no blush. Longer working times in very warm temperatures. May be used under Sea Hawk marine wood varnish.

TIP* For easy accurate measuring be sure to use the Hawk Epoxy Pumps that are calibrated to dispense the correct amount of resin and catalyst. This is much easier and leave little room for mistakes.

Next choose the best Hawk Epoxy Filler depending on the application:


Choose Hawk Epoxy FIller

F1 High Load Adhesive Fiber Filler – Thickens to a light grey color creating an easy to use adhesive designed for bonding hardware and other applications with dissimilar materials. This mixture will maximize bond strength for anticipated high loads.

F2 Structural Adhesive Filler – Thickens to an off white color, creating a general purpose thickening additive for bonding, gap filling and filleting. Mix to a workable consistency allowing sag-free and easy flow properties for vertical and overhead applications.

F-3 Light Density Adhesive Micro Fiber Filler – Thickens to an off white color. Great for bonding many substrates, especially wood. The mixture also creates a multipurpose adhesive for many other substrates in addition to providing excellent substrate wetting and penetrating characteristics. Increases impact and abrasion resistance.

F4 Bridging Adhesive Filler – Thickens to a brown color, creating an easy to use adhesive with excellent gap filling and filleting qualities. This mixture blends with many different types of wood to allow for a natural looking fillet or gap fill.

F5 Light Density Fairing Filler – Thickens to a reddish brown color, achieving an easy to sand and carve fairing compound while still remaining strong and light weight.

F6 MicroSphere Fairing Filler – Thickens to a white color, creating a lightweight fairing compound for small to large areas. This product holds a feathered edge very well and is suitable for nearly every substrate. This closed celled structure can also be used for increased acoustic and thermal insulation.

For the easiest way to choose your system, view our Hawk Epoxy Size 1 Kit