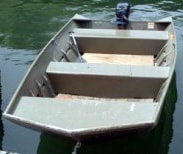
When painting a boat used for hunting/fishing, such as a Jon Boat, typically a flat finish is desired so you’ll want to use one of our camouflage paints. A primer coat is used to help the paint adhere to the aluminum surface and provides an extra layer of protection from corrosion. You may also use Aluma Hawk, which is a paint and primer in one.
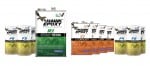
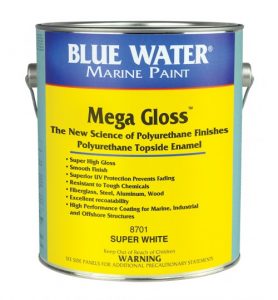
If you desire a gloss finish, look to theMega Gloss by Blue Water, available in quarts and gallons, is affordable, easy to apply, and only recommended for above the waterline or moderate use on the bottom (1-3 days in the water, not extended periods). This topside paint works best in very thin coats and can be used on fiberglass, wood, aluminum, and steel; see the prep recommendations found on the product page on the “how to use” tab. The Mega Gloss Primeris recommended when applied to bare metal, if you have concerns about sealing your aluminum, see the Bottom Protect by Blue Waterfor a barrier coat. See herefor more application tips.
You have many options when painting aluminum. Your use of the boat, the allotted budget, and the amount of time you want to spend on the project may help determine the right paint for you. For more information see our ‘topside boat paint options’.
Below shows the comparison of the West System products to the Hawk Epoxy products. Hawk Epoxy is comparable to the West System with how it works and its uses. West System is known for A/B/C/D selection system size (Size A resin with Size A hardener) the Hawk Epoxy uses 1/2/3/4 (Size 1 resin with Size 1 catalyst). The pumps are sold separate with West System and Hawk Epoxy, this works where 1 pump of resin is mixed with 1 pump of catalyst, or more depending on instructions. This is just to make it easier and less chance for error for the customer and it doesn’t mean a 1 to 1 ratio because the pumps are calibrated differently and each pump size can distribute different amounts.
Please Note: This chart simply shows the likely equivalent product by brand. It is not recommended to mix the products brands.
R1 Epoxy Resin – a smooth, low-viscosity liquid epoxy resin. With a variety of Hawk Epoxy Catalysts, it can be cured under a wide range of temperatures and environmental conditions to form a high strength plastic with superior moisture barrier characteristics. Hawk Epoxy is available in four system sizes color coded on each label. Note: Mix ratios vary by catalyst. For optimal product utilization, be sure to choose the same Size for both the resin and catalyst. I.e Size 1 Resin with Size 1 Catalyst.
C1 ULTRA SLOW CURE CATALYST:Designed for use with HAWK EPOXY R1 Resin for construction and repairs with superior adhesion, strength, bonding, filling, and moisture barrier qualities at higher temperatures and for an ultra slow cure. Do not use under Sea Hawk marine wood varnish.
C2 SLOW CURE CATALYST: Designed for use with HAWK EPOXY R1 Resin for construction and repairs with superior adhesion, strength, bonding, filling, and moisture barrier qualities at higher temperatures and for a slow cure. Do not use under Sea Hawk marine wood varnish.
C3 FAST CURE CATALYST: Designed for use with HAWK EPOXY R1 Resin for construction and repairs with superior adhesion, strength, bonding, filling, and moisture barrier qualities at cooler temperatures and for a fast cure. Do not use under Sea Hawk marine wood varnish.
C5 CLEAR FINISH CATALYST: Designed for use with HAWK EPOXY R1 Resin for very clear fiberglass cloth and coating applications with exceptional moisture barrier characteristics. Perfect for natural wood and carbon fiber clear coats with no blush. Longer working times in very warm temperatures. May be used under Sea Hawk marine wood varnish.
TIP* For easy accurate measuring be sure to use the Hawk Epoxy Pumps that are calibrated to dispense the correct amount of resin and catalyst. This is much easier and leave little room for mistakes.
Next choose the best Hawk Epoxy Filler depending on the application:
F1 High Load Adhesive Fiber Filler– Thickens to a light grey color creating an easy to use adhesive designed for bonding hardware and other applications with dissimilar materials. This mixture will maximize bond strength for anticipated high loads.
F2 Structural Adhesive Filler– Thickens to an off white color, creating a general purpose thickening additive for bonding, gap filling and filleting. Mix to a workable consistency allowing sag-free and easy flow properties for vertical and overhead applications.
F-3 Light Density Adhesive Micro Fiber Filler – Thickens to an off white color. Great for bonding many substrates, especially wood. The mixture also creates a multipurpose adhesive for many other substrates in addition to providing excellent substrate wetting and penetrating characteristics. Increases impact and abrasion resistance.
F4 Bridging Adhesive Filler – Thickens to a brown color, creating an easy to use adhesive with excellent gap filling and filleting qualities. This mixture blends with many different types of wood to allow for a natural looking fillet or gap fill.
F5 Light Density Fairing Filler– Thickens to a reddish brown color, achieving an easy to sand and carve fairing compound while still remaining strong and light weight.
F6 MicroSphere Fairing Filler – Thickens to a white color, creating a lightweight fairing compound for small to large areas. This product holds a feathered edge very well and is suitable for nearly every substrate. This closed celled structure can also be used for increased acoustic and thermal insulation.
How to Fix a Leaking Seam or Rivet on Aluminum Boat
As aluminum boats age they show various signs of wear and tear. One of these signs may be a leaking seam or rivet. Over time, rivets can stretched and loosen, causing a gap in the hull integrity and this results in a leak. The solution to this problem is fairly simple and may be fixed at home using just a few tools and know-how. So, how should this problem be addressed?
Locate the Leaking Rivet or Seam
The first step is to find the exact seam or rivet that needs repair. To do this, put the boat in water and observe carefully. You could also put water inside the boat and see where it allows the water to escape from.
Assess the Damage
The second step is assessing the extent of damage to the rivet or seam. If the seam is too wide to be filled or caulked, it will need additional rivets in combination with a sealant product. If the damage is easily visible a sealant or caulk will be sufficient.
Choose a Sealant or Epoxy Product
There are hundreds of products out there that claim to fix leaks and seal cracks. How do you know which to choose? The Bottom Paint Store has done most of the hard work for you and can confidently recommend 2 products that really work.
If your hull is bare aluminum you can cover the entire surface with a high build epoxy primer to help seal and protect it such as Tuff Stuff. For application details see our link for application of a marine epoxy.
Hawk Epoxy is an excellent product to repair aluminum hulls. We recommend getting one of the Hawk Epoxy Kitsthat will contain everything you need for filling in the aluminum. Hawk Epoxy is a versatile product that can be used for many other application too. Everyone should own this kit! See video for mixingand selecting fillers.
Another option is G/Flex 650 Epoxymade by West System. This liquid epoxy is more flexible and versatile than regular epoxies and will adhere to almost any surface. The bond that it creates can absorb shock, vibration, expansions and contractions. It will fully cure in 24 hours. Also, West System has created a detailed and comprehensive set of instructions for a wide variety of applications. They can be found atthis linkand below:
Now that your leaky rivets and seams have been repaired, you are ready to paint! Check out this How To Articlefor more information on how to paint your aluminum vessel. Aluma Hawk is a great option or any of our antifouling copper free paintfor aluminum.