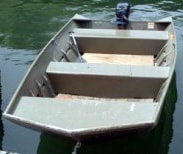
How to Fix a Leaking Seam or Rivet on Aluminum Boat
As aluminum boats age they show various signs of wear and tear. One of these signs may be a leaking seam or rivet. Over time, rivets can stretched and loosen, causing a gap in the hull integrity and this results in a leak. The solution to this problem is fairly simple and may be fixed at home using just a few tools and know-how. So, how should this problem be addressed?
Locate the Leaking Rivet or Seam
The first step is to find the exact seam or rivet that needs repair. To do this, put the boat in water and observe carefully. You could also put water inside the boat and see where it allows the water to escape from.
Assess the Damage
The second step is assessing the extent of damage to the rivet or seam. If the seam is too wide to be filled or caulked, it will need additional rivets in combination with a sealant product. If the damage is easily visible a sealant or caulk will be sufficient.
Choose a Sealant or Epoxy Product
There are hundreds of products out there that claim to fix leaks and seal cracks. How do you know which to choose? The Bottom Paint Store has done most of the hard work for you and can confidently recommend 2 products that really work.
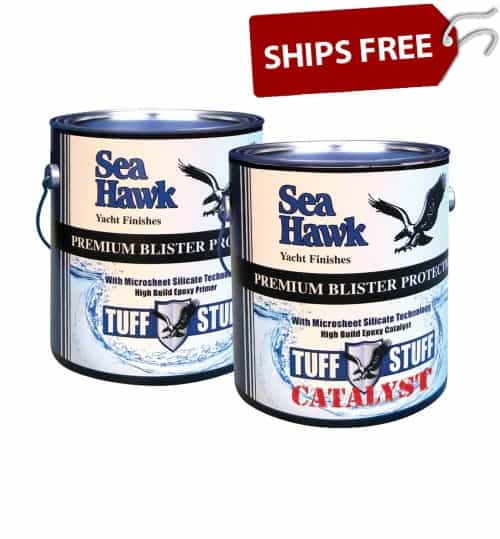
If your hull is bare aluminum you can cover the entire surface with a high build epoxy primer to help seal and protect it such as Tuff Stuff. For application details see our link for application of a marine epoxy.
Hawk Epoxy is an excellent product to repair aluminum hulls. We recommend getting one of the Hawk Epoxy Kitsthat will contain everything you need for filling in the aluminum. Hawk Epoxy is a versatile product that can be used for many other application too. Everyone should own this kit! See video for mixingand selecting fillers.
Another option is G/Flex 650 Epoxymade by West System. This liquid epoxy is more flexible and versatile than regular epoxies and will adhere to almost any surface. The bond that it creates can absorb shock, vibration, expansions and contractions. It will fully cure in 24 hours. Also, West System has created a detailed and comprehensive set of instructions for a wide variety of applications. They can be found atthis linkand below:
Now that your leaky rivets and seams have been repaired, you are ready to paint! Check out this How To Articlefor more information on how to paint your aluminum vessel. Aluma Hawk is a great option or any of our antifouling copper free paintfor aluminum.
When it comes to boat repair, epoxy and polyester resins are both popular choices. But which one is the best option? Epoxy resin is known for its strong bonding properties, making it ideal for repairing cracks and holes. It also has excellent waterproofing qualities, making it ideal for boats that spend a lot of time in the water. Polyester resin, on the other hand, is a bit more flexible than epoxy, making it better suited for repairs that require some give. It’s also less likely to yellow over time, making it a good choice for boats that will be spending a lot of time in the sun. Ultimately, the best choice of epoxy or polyester resin for boat repair depends on the type of project you are tackling.
Every household should own a Hawk Epoxy Kitlike this. You can use it to repair anything around your home or own your boat. This kit comes with the resin, catalyst and your choice of filler. Just mix them together and you have an excellent bonding, filling, or adhesive paste.
FGCI General Purpose Resin is used for laminating with fiberglass, kevlar and carbon reinforments. It can be tinted with pigment up to 3% and best results are when used at 70-85 degrees F. Hardener varies depending on thickness of fiberglass, the more fiberglass the less hardener as you will generate more heat-never go below 1%. Complete cure needs sanding aid added to resin or PVA while still hot.
Polyester resins are unsaturated resins that are combined with hardeners, such as MEKP.
Polyester resin is used more for fiberglass lay-up or if you’re going to finish a repair with gelcoat, as the polyester resin will bond to the gelcoat better than epoxy. It is also cheaper than epoxy and a great choice when casting deep molds.
Various Types of Polyester Resin:
Boatyard Polyester Resin is a non-specified resin that contains different types of polyester resins and wax. Boatyard Polyester Resin is not recommended for use below the waterline. The material may cure hard and tack-free due to the included wax. If so, the product will need to be sanded prior to adding another layer in order to promote good bonding.
Clear Casting Polyester Resin is used to cast small objects into a mold. This method can be used to create sculptures, crafts, or industrial prototypes.
Surfboard Polyester Resin is Clear & wax free. It is ideal for building & repairing surfboards because it cures to an almost clear color when applied in a film. Also it highlights underlying graphics.
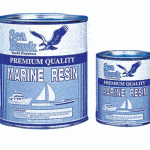
Iso Marine Resin is based on isophthalic acid. This resin is a step above the general purpose polyester resin and that is reflected in the price. Iso Resin is stronger, more durable, and is the best choice when applying in corrosion environments or elevated temperatures.
Vinyl ester resins are formulated with a base of polyester resin strengthened with epoxy molecules (a hybrid form of polyester and epoxy and aiding for gelcoat to bond with epoxy) and also use peroxides, such as MEKP, for hardening. These are cheaper than epoxy resins and more expensive than polyester. Ideal temp for use is 77 F, not applied over 1/8th thickness or it will generate too much heat.
Vinyl esters are more tolerant of stretching, less likely to show stress cracking and more resistant to water penetration. Vinyl ester is the choice when improved resistance to moisture is the goal (like repairing a blistered hull).
Long term water exposure (hull or water tank) or if impact resistance is important vinyl ester is usually chosen.
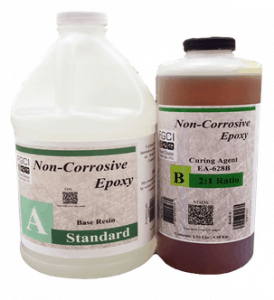
Epoxy resins are cured with the addition of a hardener. Unlike the polyester and vinyl ester resins, cured with a small amount of catalyst, epoxy resins usually require a lot more, often 1:1 or 2:1. A epoxy resin is the most expensive of these.
Epoxy resin has the best bonding strength as it will bond dissimilar or already cured materials for strong, reliable repair work. This is the most expensive resin but offers the most in its ability to flex, prevent delamination and ease of repair work.
If doing a repair and not overlaying with gelcoat then the epoxy will perform best as it tends to act as a stronger “glue” for the patch to the surrounding surface.
Laminating Epoxy Resin is the correct choice for repairing boats. It is super durable and has high resistance to water. Also, it has very good adhesion to a variety of surfaces including metals, plastics, fiberglass, wood, and glass. The ratio is well suited for use with high-solids marine, maintenance coating and bonding agents. The cure time is three days in the sun or a week if it is not. Set time changes with activator and film thickness. If there is an excessive amount of activator applied , the laminating epoxy will be soft and rubbery. In contrast, if there is not enough activator, the epoxy will not cure hard. Laminating Epoxy is available in 3 different ratios that provide different working and cure times.
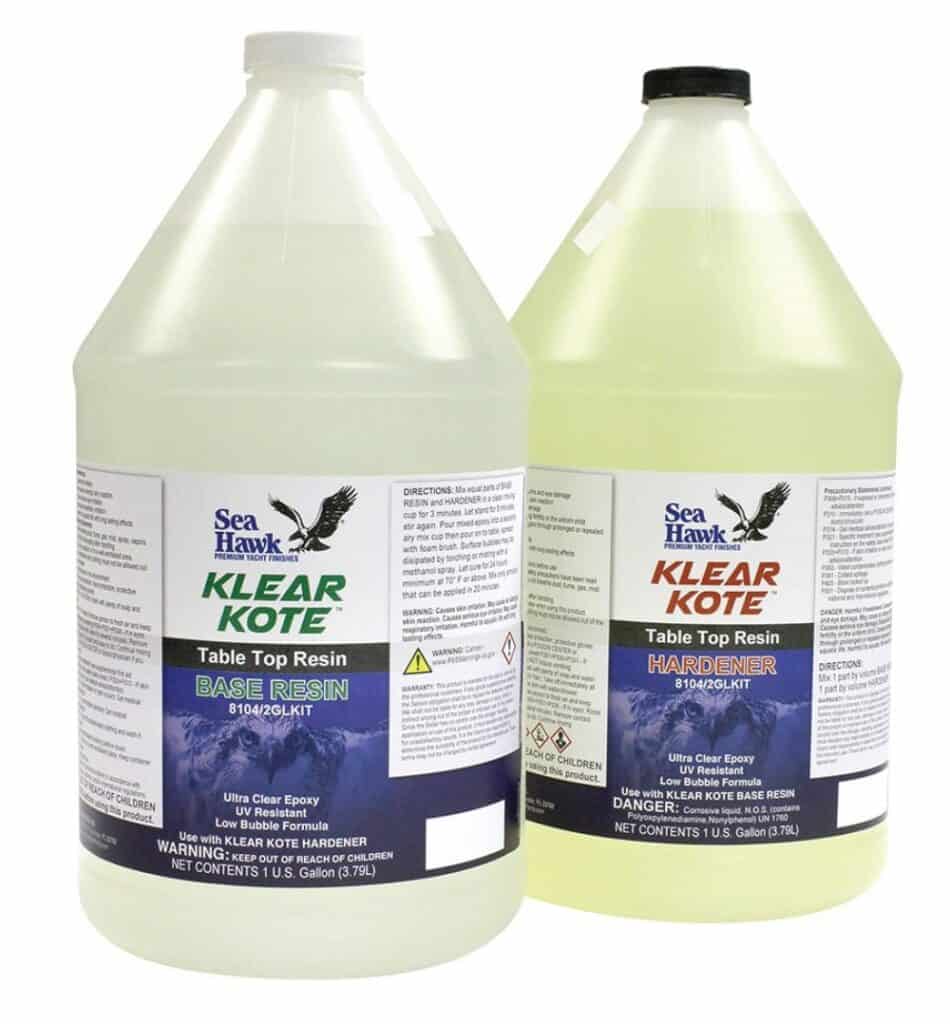
A Premium Commercial Grade Clear Epoxy Resin – Klear Kote Epoxy Resinis used extensively in coating surfaces and in table tops where a clear, hard and durable coating is required. Commonly seen on bar tops and restaurant tables. Easy to use 1:1 mixing ratio of resin and hardener. Items coated with it will become permanently preserved and protected for your enjoyment throughout a lifetime. The epoxy resin will not exhibit blushing or sweat out under high humidity conditions.
Epoxy resin kits are sold in two parts, A and B, which should be applied in two stages. The first stage is referred to as the seal coat. The seal coat is brushed on in a thin layer and is used to seal any pores on the surface and prevent air bubbles from forming in the following flood coats. This stage is followed by the flood coat, which will flow and self-level, clean brushes or squeegees can be used to help spread the epoxy. Flood coats are applied in 1/8″ layers at a time, as many as desired can be applied, however, one to three coats is average for most table or bar coatings. Resin kits are often applied on bar tops and tabletops in many bars and restaurants.
Superbond Standard Epoxy Glue
Superbond Standard Epoxy Glueis a two-part, 1:1 epoxy adhesive that has a Vaseline consistency. The product adheres to nearly everything and is a favorite among woodworkers. It’s offered in a fast curing agent, giving 8-15 minutes of working time; a medium, giving 20-30 minutes, and a standard, offering 30-45 minutes. SuperBond is offered in sizes from ½-pint tubs all the way to 5-gallon pails.
Rot Stop Epoxy
Rot stop epoxy is a 2-part epoxy that is 1:1 ratio and is very simple to mix. The coverage is similar to other epoxies, and like other epoxies, the product does vary in thickness based on temperature. The advantage of Rot Stop is it is NOT affected by moisture, making it excellent for deck or flooring and cracking repair, especially moisture damage.
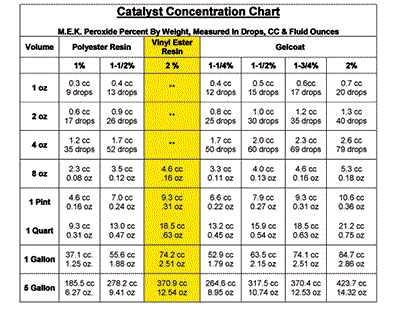
See catalyst chart for mixing guidance:
The weight of MEKP is 1/125 grams per CC. 30 Drops is approximately equal to one CC (Cubic Cementer) NOTE: Using drops for catalyst is only an estimate. In Critical applications MEKP should be measure by using CC’s or Fluid Ounces which are volume measurements. The percentages in the chart: 1% thru 2% are percentages of gelcoat by weight.The CC’s and OZ’s values in the chart have been converted from weight of MEKP to volumes of MEKP.
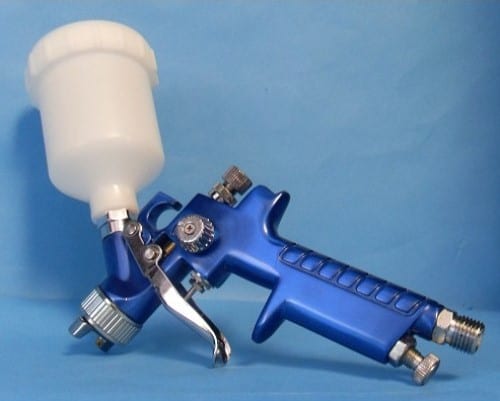
Gelcoat and resin spray guns are ideal for large surface spraying, such as new mold construction, composite refinishing and large boat surfaces. Look for a resin gun with a blue die cast body which will ensure a long life. Most HVLP cup guns use nylon flat seal just behind the threads that the air cap attaches to.
If you have used a spray gun with a nylon flat seal just behind the threads that the air cap attaches to and cleaned it with acetone, the seals disintegrate so it is best to use one with a plastic seal.
Epoxy paint is a latex acrylic substance that may have a small amount of epoxy in the mix and provide a tough, durable protective coating that’s effortless to maintain. Putting a water-based bottom paint (WBP) over a solvent based primer can be done with some modified application procedures. You do NOT want to make the window, or hot coat the water based paint over the solvent based primer such as Tuff Stuff high build marine epoxy primer. If you do, it will mud crack. So instead of putting on the WBP over the Solvent Primer in the same day, you need to wait for the primer to totally cure. Then you have to sand it with 80 grit sandpaper before apply WBP. This is a lot of extra work and very difficult to sand = extremely hard surface. So the best thing to do when using a high build solvent based epoxy is to coat it with a solvent based paint. That way you skip the extra time and labor with sanding.
Marine Epoxy systems on the bottom of bare fiberglass is the best way to protect your boat against blisters. It also provides added adhesion of the bottom paint to the hull. Here are the steps that you need to take for proper application of a marine epoxy primer (barrier coat system) to the bottom of a boat.
Preparation
Clean When painting a bare fiberglass / gel coat hull for the first time, it is extremely important that all contaminants such as grease, oil, wax, salt, or other foreign material are completed removed prior to sanding or application of a Sea Hawk System. Scrub the surface with a detergent soap and stiff bristle brush.
A. Clean and de-wax fiberglass hull with S-80 Wax N’ Grease Killersolvent based dewax. Saturate cheesecloth rag and wipe thoroughly to remove any cleaner and contaminants. Be sure to remove any residue before it dries and change rags frequently to insure contaminants are completely removed.
OR
B. Apply S-90 De-Wax Etch & Cleanerwith a maroon 3M Scotch-Brite® padscrubbing thoroughly. Do not allow cleaner to dry on the surface and remove by flushing with water.Rinse entire surface with water and check for any beading on the surface which will indicate that wax is still present. If necessary repeat step 2 again until the surface is contaminant-free. Choose your system below.
Apply Marine Epoxy Primer Seal the surface with 2-3 coats of Tuff Stuff Epoxy Primer. Apply the first coat of marine epoxy primer and allow the surface to dry to become tacky. Temperature and humidity affect the dry time, but you will know when to apply your next coat of marine epoxy primer once the paint film becomes “tacky”. You should be able to firmly press your thumb into the paint film and leave a thumbprint without any high build marine epoxy primer coming off the surface. You should use this method in between coats of marine epoxy primer and your first coat of bottom paint.
Tip: When applying marine epoxy primer over multiple days, it is always best to go overnight between coats of marine epoxy primer instead going overnight between the final coat of marine epoxy primer and the first coat of bottom paint. When over coating Tuff Stuff Epoxy Primer it is important to meet the required over coating times in order to achieve the best adhesion because temperature and humidity control dry times. It is hard to give exact times of cure. An easier rule in epoxies is when the coating is dry to the touch, yet still has some tack, it is ready to be over coated. However, if the coating is completely cured (after 24 hours) it needs to be thoroughly sanded with 80 grit sand paper to remove shine. If the marine epoxy primer is not sanded after full cure, bottom paint will not adhere.
Apply Bottom Paint to Marine Epoxy Primer Apply minimum of two coats of bottom paint. Allow 3 to 6 hours between coats and a minimum overnight dry. See the specific Technical Data Sheet for bottom paint being used. Some bottom paint may require more than 2 coats.

 How to Fix a Leaking Seam or Rivet on Aluminum Boat
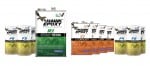 Hawk Epoxy is an excellent product to repair aluminum hulls. We recommend getting one of the Hawk Epoxy Kits that will contain everything you need for filling in the aluminum. Hawk Epoxy is a versatile product that can be used for many other application too. Everyone should own this kit! See video for mixing and selecting fillers.