Category Archives: Prop Coatings

Link

Are you experiencing a drop in RPM on your high-performance boat? Your propeller might be the culprit. Understanding propeller troubleshooting is essential for maintaining peak performance on the water. Here are five signs indicating fouling issues that could be impacting your propeller’s RPM:

1. Reduced RPM without Engine Changes

If you notice a decrease in RPM without any changes to the engine or throttle settings, it could indicate fouling. This sign often points to a propeller clogged with debris or marine growth.

2. Vibrations During Operation

Excessive vibrations during operation are a clear indicator of propeller issues. Fouling, such as tangled fishing lines or seaweed wrapped around the propeller, can cause these vibrations, affecting RPM.

3. Unusual Noise Levels

An increase in unusual noise levels, such as rattling or humming, could signal fouling problems. Inspect the propeller for foreign objects or damage that might be hindering its performance.

4. Sluggish Acceleration

Fouling can lead to sluggish acceleration, impacting your boat’s ability to reach optimal speeds. If you’re experiencing delayed acceleration despite full throttle, it’s time to inspect the propeller.

5. Decreased Fuel Efficiency

An unexpected decrease in fuel efficiency could be linked to fouling issues with the propeller. When the propeller struggles due to fouling, it requires more power, resulting in increased fuel consumption.

Conclusion: Addressing Fouling Issues for Peak Performance

Maintaining a high-performance boat involves regular propeller maintenance and troubleshooting. If you’re encountering reduced RPM or any of the mentioned signs, promptly inspect the propeller for fouling issues. Clearing debris, cleaning the propeller, or seeking professional assistance can restore optimal RPM and performance.

In summary, understanding the signs of fouling issues affecting your propeller’s RPM is crucial for ensuring your high-performance boat operates at its best. Keep an eye out for these indicators and address any fouling promptly to enjoy smooth and efficient sailing experiences.

PropGlide® provides a highly effective solution to address propeller problems caused by fouling. PropGlide® specialized product is designed to prevent marine growth from adhering to propellers, significantly reducing fouling-related issues and their impact on propeller performance.

PropGlide™ Reviews

PropGlide USA Corp began its innovative approach to solving the issue of fouling on the props and running gear of vessels back in 2006. Since then PropGlide has perfected the formulation, achieved remarkable results, and has become the best affordable solution for boaters worldwide.

PropGlide™ Customer Reviews

The following reviews are provided by actual customers who have purchased either the PropGlide™ 250ML Foul Release Small Kit, PropGlide™ 625ML Foul Release Medium Kit, or the PropGlide™ 1250ML Foul Release Large Kit and have submitted a product review through Verified Reviews, an independent, trusted third party review provider that specializes in the collection, moderation and display of ratings and reviews. The reviews can be found on each of the respective product pages or on the Bottom Paint Store Verified Reviews account page.

“Highly rated product”.- Scott H

“Great tried something last year and came back to PropGlide this year.- Carl R.


PropGlide is an excellent protective coating for my propellers.- Louis S.


Easy to use. Too soon to comment on how it works. My boat is not yet in the water.-
Goes on as described, the prep is the hard part. We will see how it works when I drop it in the water in the new few weeks. Expect it to work as advertised. I ended up with the medium kit and it was way too much for me. 2 – 3 bladed props about 12 inch blades plus the shafts. Better to have too much than too little I guess but next time I will order the small instead of medium.”

“I have used it before and (it) works great.”

“Easier to apply than Propspeed. Almost twice as long between the primer and the top coat.”


“It’s always nice to be able to order and receive in a timely fashion what you need for your boat running gear.”- Curtis S.


“Easy to apply, looks good.”- Greg D.

“Just applied it. We will see how it works during the coming season”.- Shawn H.

“Product works great and is a reasonable price.”


“Excellent. Love this product. Strongly recommend.”

“I have not had time to apply the Prop glide yet. I just received it this evening.” – Mike Z

“Good product. Less expensive than PropSpeed. Great price”!

“Product works well on running gear when applied properly. Follow instructions on application”.- Charles O.


“Works as advertised”.- Raymond R.

The following testimonial was provided outside of Verified Reviews.

“We applied PropGlide to the propellers and rudders on our 42′ power catamaran in March 2016. We have found excellent results so far with very little growth appearing on the running gear. We have been able to maintain great boat speed, excellent economy and no vibrations unlike previous years with using other products. Our Applicator has even commentated how much easier PropGlide is to apply compared to its competitors.” – Mick M.

If you have any questions about foul-release coating systems for your underwater propellers and running gear please see our numerous how to articles on PropGlide or you can call our technical support team 888-505-2313.


Antifouling Paint or Prop Glide for Outdrives?

Which method of protective propeller coating is best for your boat? While there is no right or wrong solution, there are a few things to consider before making your decision.

Important questions to ask:

  1. Do you haul and repaint your boat every year?
  2. Does the prop see regular use?

Antifouling Paint – If you answered NO to the second question, you will likely be better off with traditional antifouling paint protecting your outdrive. Slick film coatings need to see regular use in order to repel fouling successfully. And if you answered YES to the first question, the additional cost of slick film coatings may not be worth it for you.

Which antifouling products are recommended for outdrives? Here are two good options.

Option 1 – Apply Tuff Stuff epoxy primer (or similar primer) direct to the metal. Paint over with a copper free bottom paint such as Colorkote. (It is very important to only use a copper-free bottom paint. Copper-based paints on underwater metals will experience galvanic corrosion.) This option guarantees the best protection and longest lasting coverage, but the paint will need to be recoated each season depending on prop usage.

Option 2 – Apply an aerosol underwater metal coating such as Barnacle Blocker or Pettit Barnacle Barrier. These are relatively inexpensive coatings that could provide a large amount of pay off.

PropGlide™ Propeller and Running Gear Coatings – If you answered YES to the second question above then you may want to give foul-release systems a try. These are non-toxic, slick coatings that prevent growth from attaching itself to the prop and running gear, thus improving your boat speed and fuel efficiency. It is important to note that for PropGlide to keep its slick quality and repel fouling, the prop needs to see regular use. Without the pesticide coatings of traditional bottom paint, a stationary prop is an easy target for barnacles and other organisms. While slick film coatings may not be the solution for all boaters, many have tried it and had great success. Note what some PropGlide users have stated below.

“For over a year, we at the Big Boat Shed ship repair and storage yard for vessels up to 60ft have been trialing out PropGlide. We have found it very user friendly and has a better finish when compared to its competitors. With our tropical humid conditions we could not have asked for a better drying time then what PropGlide offers. This allows us to plan prepare and execute any prop coating task with PropGlide such a breeze. PropGlide is now our main recommended brand for propeller and running gear antifouling coatings.” 3/8/2017

“We applied PropGlide to the propellers and rudders on our 42′ power catamaran in March 2016. We have found excellent results so far with very little growth appearing on the running gear. We have been able to maintain great boat speed, excellent economy and no vibrations unlike previous years with using other products. Our Applicator has even commentated how much easier PropGlide is to apply compared to its competitors.” Mick Malone 9/28/2016

Click this link to compare the price of Propspeed kits and PropGlide™ Propeller Paint Kits.
Click this link to read about Painting an Aluminum Outdrive

PropOne Vs. PropGlide

It is widely accepted that a build up of marine life on the surface of a boat’s propeller and drive shaft negatively impacts engine efficiency and performance. Even if the prop has a thin layer of growth on it’s surface area, fuel efficiency is reduced by a significant amount. To counter this problem, engineers have turned to developing “super-slick” coatings. When the drive is engaged, and the prop begins to move, any organisms attempting to adhere to the prop simply slide right off! No chemicals are used to poison or kill the organisms in the environment.

How do PropOne* and PropGlide compare?

Which coating gives you the most bang for your buck?

PropGlide is much newer to the market than PropOne, but has been in development for over ten years. Being new to the slick coating market, PropGlide appears to be able to avoid slipping into the same ruts that their competitors have. The biggest obstacle for PropOne is the cost. Comparing the two products at price point, PropGlide is about 30% less expensive and offers 25% more product. That’s 2 strikes for PropOne right off the bat. PropOne is available in the following sizes: 1000mL, 500mL, and 250mL. On the other hand PropGlide offers a size larger than PropOne’s 1000mL and still manages a lower cost. Also PropGlide offers a size smaller than PropOne’s 250mL for sailboat owners who don’t need the larger quantities of product. (For more information on choosing the right size of PropGlide, see this Coverage Chart.)

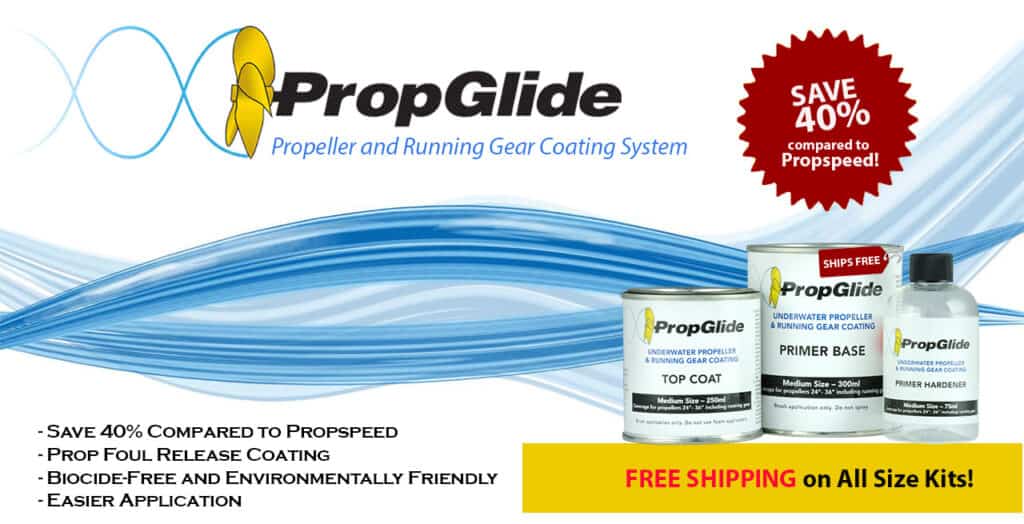
In terms of performance, both slick coatings are equally good. They do the job and do it well. It is too early to say which product will outlast the other in the minds of consumers. But for right now, we recommend PropGlide as opposed to PropOne. The savings alone makes PropGlide worth every penny.


*PropOne was formerly known as PropGold. It is essentially the same product, just a different brand name.

**This PropOne review and PropGlide review is the sole opinion of BottomPaintStore.com

***Above PropOne prices and PropGlide Prices are based on internet web search December 2016.

PROPGLIDE TECHNICAL DATA & APPLICATION GUIDE

PropGlide is an environmentally friendly foul release coating for boat propellers and running gear which prevents the attachment of marine growth by low critical surface tension. PropGlide does not contain cuprous oxide or TBT compounds or any other toxic substances which might cause environmental pollution. PropGlide is sold in 4 size kits. Sailboat, Small, Medium and Large. For the best size kit for your application see: Which PropGlide Kit Size Do You Need?

Each PropGlide Kit contains various sizes of Primer Base (Part 1), Primer Hardener (Part 2), and a Clear Top Coat.

  • propglide foul release coatingSailboat Kit 175ML Kit (#PCK-175) Contents: 60ML Primer Base, 15ML Primer Hardener, 100ML Clear Topcoat
  • Small Kit 250ML Kit (#PCK-250) Contents: 120ML Primer Base, 30ML Primer Hardener, 100ML Clear Topcoat
  • Medium Kit 625ML Kit (#PCK-625) Contents: 300ML Primer Base, 75ML Primer Hardener, 250ML Clear Topcoat
  • Large Kit 1125ML Kit (#PCK-1125) Contents: 2-300ML Primer Base, 2-75ML Primer Hardener, 2-250ML Clear Topcoat

This PropGlide Technical Data & Application Guide will detail how to apply any size kit of PropGlide by detailing the best preparation of the surface and application of the etching primer, and the final application of the Clear Topcoat.

Preparation of the Surface

The preparation of the surfaces to be coated with PropGlide is the key for the product to work effectively.

1. Remove previous coatings, fouling organisms/marine growth from metal surfaces. All substrates that are to be coated with PropGlide must be bare metal. These areas should be machine sanded with a Dual Action sander fitted with a soft pad and 60-80 grit abrasive discs sandpaper. Sanding the surface by hand is recommended at hard-to-reach areas where the dual action sander cannot reach. Use 60 – 80 grit wet/dry sandpaper, with water as a lubricant. Make sure the sand paper is changed frequently to ensure the necessary profile is achieved. Hand sanding these hard-to-reach areas is required to ensure the surface is properly abraded. The shaft should be done with hand sanding rather than using a machine. From this point forward, there shouldn’t be any direct hand contact to areas which are to be coated with PropGlide. It is advisable to wear latex gloves as it will ensure the areas to be painted remain clean and sound.

2. Once the surface sanding process is completed, wash all the areas with clean fresh water and wipe with clean, lintfree cotton rags soaked in water to wipe off sanding residue. Continue doing this until the rags don’t show any sign of residue, contaminants or discoloration.

3. After cleansing with water is completed, use a rag soaked in acetone or denatured alcohol to remove water on the sanded surface.

Continue to use the rag until it becomes dry from evaporation of the acetone or denatured alcohol. Use one or more rags as required, until the rag looks white clean, as there will be no contaminants when the rag is white clean. Again, care should be taken not to touch cleaned surfaces with bare hands. This is because fingers and hands contain oils which can transfer to the cleaned surfaces and therefore would inhibit the adhesion of the coatings.

Apply the Etching Primer

There is a Primer Base (Part 1) and a Primer Hardener (Part 2) to activate the primer base. This two-component etching primer dries chemically by reaction of the mixed components and provides protection against corrosion and increases the adhesive property of the subsequent coats. It may be used as a pre-treatment primer on non-ferrous metals such as bronze and aluminum as well as zinc and galvanised iron. May also be used as pre-treatment primer on blast-cleaned steel plates.

Temperature Limitations: Primer and Topcoat should be brought to 70-80°F (21-27°C) temperature range prior to mixing and application. Apply in good weather conditions when air and surface temperatures are above 50°F (10°C). Surface temperature must be a least 50°F (10°C).

PropGlide Etching Primer Physical Properties

  • Mixing Ratio: Primer Base (Part 1) : Primer Hardener (Part 2) = 4 : 1 by volume
  • Colour: Primer Base (Part 1) : Yellow, Primer Hardener (Part 2) : Clear
  • Dry Film Thickness: 8 microns
  • Drying Time: 5-15 minutes touch dry (temperature dependent)- 1 hour hard dry @ 20°C/68°F

Painting Interval: Apply PropGlide Clear TopCoat when Etching Primer is just touch dry Pot Life: 8 hrs @ 20°C/68°F

1. Agitate the Primer Base (Part 1) contents by scraping the bottom and sides of the can, as there will be settling. Mix contents of primer until the settled parts are incorporated back into solution and uniformly blended. Do not strain material, even if particles are present.

2. Stir Primer Hardener (Part 2) then add entire contents to the Primer Base (Part 1) container. Mix primer base and hardener for 30 seconds and apply mixture to sanded surface immediately after mixing.

3. Application of the Primer Base/Hardener mixture should be thin. The film should be thin enough, so that it is barely coating the surface, yet it does not provide sections or lines on the sanded surface that are not coated. Do not touch the primer mixture as it dries. The method of application of the primer may be done by using either a natural bristle brush or foam roller. 4. Apply a second coat of Primer Base/Hardener mixture after the first coat dries.

Apply the Clear Top Coat

The Clear Top Coat that should be applied to the last coat of Etching Primer within 5-15 minutes. The Clear Top Coat serves as a slick finish that will inhibit marine growth from attaching to the surface.

PropGlide Clear Top Coat Physical Properties:

  • Binder type: Silicone Polymer
  • Solvent: Xylene
  • Colour: Clear coating
  • Finish: Glossy
  • Dry time: 45 minutes touch dry ; 8 hours hard dry @ 20°C
  • Recommended film build: 75 microns per coat
  • Thinning: N/A
  • Clean up: Acetone
  • Shelf life: 12 months

1. After 5 to 15 minutes (depending on temperature) of applying the 2nd coat of Primer/Hardener mixture promptly apply the Top Coat. Application of Top Coat should be thicker than Primer/Hardener mixture, yet not thick enough so that the Top Coat produces runs. The Top Coat is to be applied with brush only, NO foam applicators are to be used.

2. Let the Top Coat dry overnight before launching.

Propspeed Vs. PropGlide

Propspeed ReviewFoul Release Systems Like Propspeed and PropGlide provide the best solution to keeping growth of your props and running gear. While these are not antifouling prop paints, they do keep the growth off buy creating a super slippery surface that the marine growth cannot stick to. Propspeed recommends that their kits by applied by a professional Propspeed applicator. On the other hand, PropGlide is available for any DIY applicator and is 30%+ less and more product for the money. If you want to apply this yourself, be sure to follow the details in the respective application manuals.   You can find these on any of the Propeller Foul Release Kit listed on our website.
PropGlide is newer to the market, but been in development for over ten years, while Propspeed  has been available for many years and is the leading brand name in the market place. The biggest issue with Propspeed is the cost. Very expensive!  PropGlide is also expensive but 30% less than Propspeed. In addition, you get 25% more product with PropGlide , so be sure to get the right size. You might be able to use a smaller size kit with PropGlide  which could then save you over 50%! You can find the comparison on PropGlide’s web site: Propspeed Compared


Performance of both coatings has been comparable, with much fewer complaints about PropGlide   Either they are just newer in the market with less complaints, or they truly have improved performance. Time will tell. At this point we recommend trying PropGlide  as a Propspeed alternative – since there is comparable performance with Propspeed, the cost savings alone is worth it! And PropGlide offers a sailboat size kit making it affordable now for sailboat owners.

This Propspeed review and PropGlide review is the sole opinion of BottomPaintStore.com

Note: Propspeed™ is a registered trademark of Oceanmax. Bottom Paint Store is not affiliated with Propspeed or Oceanmax in anyway. Above Propspeed prices and PropGlide prices are based on internet web search October 2016 .

PropGlide Frequently Asked Questions

logo-200x43 How does PropGlide work? PropGlide is a coating system that is applied to the props and underwater running gear of any vessel. Once applied, the PropGlide system reduces friction to the metal surface which greatly improves efficiency by not allowing growth to stick to the underwater metals. The result is an improvement in prop speed and fuel efficiency.

Is PropGlide toxic? Not at all. PropGlide contains no toxic biocides. It works be creating a super slippery surface not allowing growth to attach to the props and underwater metal.

Does PropGlide prevent barnacles and zebra mussels? No. It does not prevent from occurring. Barnacles and Zebra mussels will still grow. However, they will NOT attach. As soon as the vessel starts moving, the growth slides off with ease!

What can I expect after applying PropGlide to my props and running gear? You should expect growth not to stick to the properly prepared and kept surface while experiencing greater fuel efficiency and speed.

Can PropGlide be used in salt water and fresh water? Yes, PropGlide may be used in any type of water, including fresh water, salt water and brackish water conditions.

propglide foul release coatingHow long does it take to apply Propglide? The application time varies by the size of the prop(s) and running gear that you are covering, but typical application can be done in a few hours. Please see our application guidelines for detailed information. Note: Remember to wait overnight before launching your vessel!

Who can apply PropGlide? Unlike many other foul release coatings, you may apply PropGlide yourself by following the application guide, or you can contact a local boatyard or dealer in your area to apply it for you.

If I haul my boat after I have applied Propglide, will it still work after leaving the boat of the water? Yes, PropGlide can be left out of the water without affecting any performance of the system.

How long will PropGlide last? There are many factors that can affect the longevity of PropGlide including number of hours and kilometers traveled, various environmental factors including water temperature and purity. PropGlide will last 1-2 years depending on the above factors.

Can I recoat PropGlide during my next haul out? You must remove all of the old PropGlide by sandblasting, sanding, scraping, wire wheel or grinder. After all old PropGlide is removed down to the metal surface, clean the area to be primed with Xylol or Acetone. Recoat PropGlide using the application guidelines.

How to Apply Propspeed

Propspeed ReviewPropspeed is a coating system designed and proven to increase vessels’ speed and fuel efficiency and greatly reduce marine growth from bonding to metal surfaces below the waterline. Propspeed works because it’s slick, not because it’s toxic.

The Propspeed system can be applied to any metal surface below the waterline, including propellers, shafts, bow thrusters, rudders, trim tabs, struts, stabilizers, sea chests, sea strainers, keel coolers and through hull fittings. The Clear Top Coat without the use of the etching primer can be used on plastic based items such as underwater lights, composite propellers and plastic bow thrusters.

Propspeed System Limitationspropspeed application

The Propspeed  system has been developed over many years of trial and error and has been refined to give exceptional performance throughout the world.

• The preparation and application instructions should be followed to ensure you get a satisfactory result. Taking shortcuts will reduce the durability and longevity of the system.

• Propspeed should only be applied by a qualified applicator.

• As with any coating systems, environmental influences will vary the cure rate of the coatings and this needs to be taken into account by the applicator.

• We recommend a minimum application temperature of 5°C or 40°F with recommended humidity not exceeding 85%.

• Electrolysis of a vessel or even a vessel moored nearby can adversely affect the coating system of the running gear. Marinas with 400 volt supply to vessels are more prone to neighbors’ vessels being affected.

• Propspeed clear coat is a soft coating and is easily damaged by mechanical abrasion, fi shing tackle or ropes around the running gear. Vessels used in shallow, sandy areas are also prone to mechanical abrasion of the clear coat.

• Vessel owners using a dive service should inform their diver that Propspeed has been applied to the running gear, and any other areas, so that the diver can use proper cleaning methods to avoid damaging the Prospeed system.

• The Propspeed system is not recommended nor approved for use in aquaculture or contact with food products.

Propspeed Application Process

The Propspeed  application is a simple process, involving surface preparation, metal conditioning and a catalyzed etching primer, followed by a silicone based topcoat.

The process to apply Propspeed to your running gear isn’t difficult, but the process must be strictly adhered to in order to get a superior result. For this reason we strongly recommend using a Propspeed approved applicator, or an experienced marine painter.

Propspeed doesn’t require any special equipment in its application. All you need is: a dual action sander, some 80 grit sandpaper, both wet and dry, plenty of rags, plastic mixing containers, disposable brushes, disposable foam rollers, disposable plastic paint trays, mixing sticks, paper paint suits, disposable gloves, eye protection and dust sanding mask.

The application of Propspeed  can be broken down into five separate stages:

1. Metal surface preparation – sanding the surface or using Propstrip

2. Initial clean – using Propclean

3. Metal conditioning – using Propprep

4. Metal etching primer

5. Clear coat top coat

—————————————-

1. Metal surface preparation – sanding the surface or using Propstrip

As is the case with all surface coatings the preparation of the surface to be coated for the application of Propspeed is key. The old Propspeed coating needs to be removed completely before the new system can be applied.

Any previously applied Propspeed on propellers, rudders and drive shafts should be high pressure cleaned, removing all marine foul from surfaces, then be allowed sufficient time to thoroughly dry.

Propspeed can be removed by sanding using 80-grit sandpaper. A dual action or air driven sander can be used and difficult areas wet sanded by hand.

Propstrip Option

New to our range is the revolutionary Propstrip. This is a safe, low toxicity remover that is totally water neutralized. The product can reduce the labour cost to remove Propspeed by up to 70%, as well as reducing dust and noise in the boat yard, and cutting the expense of abrasives.

For yards without a water catchment process, this system also enables all of the waste and removed product to be captured and processed to a waste container. For this process we recommend the use of hessian or burlap sacking placed under the area, so the removed product washes off onto the sacking. The water will drain through the hessian sacking, capturing the old Propspeed, and the hessian sacking can be rolled up and all waste placed in the waste container.

Good work practice is always recommended with the wearing of protective hand and eyewear.

Mask off any surface of the vessel that the Propstrip could splash or drip onto.

Propstrip does the hard work for you. It’s easy to apply and easy to remove following these simple instructions:

• Make sure the area you are working with is totally dry: Propstrip DOES NOT like any moisture. Water de-activates the Propstrip completely.

• Ensure any areas that are not being treated are adequately protected from Propstrip.

• Dependent on the remaining wear layer of the silicone topcoat the Propspeed may first need to be abraded with 80 grit sandpaper. This enables the Propstrip to work more effectively by penetrating the silicone faster.

• Apply Propstrip liberally with a brush ensuring there is a thick coating on 100% of the surface being treated allowing for complete saturation of the part.

• In cold conditions, 10-15°C or 50-60°F, it could take up to 3 hours to release the old Propspeed or if colder, it may take longer than 3 hours.

• In hot conditions above 35°C or 95°F it may be necessary to ensure the treated area is in shade to prevent the application from drying out while performing its action. The product works faster in hot conditons, so within 1 to 3 hours you should begin to visually observe the discoloration of the old Propspeed.

• When the product has started to bubble and change colour, this is a good sign that it is doing its job. Test a small area with a scraper to see if it will freely release from the substrate. Once ready, wash with a hose or a bucket of water and a Scotch-Brite pad.

• Any remaining product is removed using a wet Scotch-Brite pad or wet/dry sandpaper.

2. Initial clean – using Propclean

Once the surface to be coated has had the old Propspeed chemically or mechanically removed its now time to clean the surface with the Propclean solution.

From this stage of the application forward there should be no direct hand contact with the areas that are to be coated with Propspeed. The reason for this is that the oils on your fingers and hands will be transferred to the surface that is to be coated and this may cause the coating to fail. Plastic or latex gloves should be worn at all times. If you need to change  gloves frequently then do so. Make sure you have an abundance of rags on hand for the next two steps.

Clean the surface with Propclean. Immediately wipe the surface with a clean dry rag. Repeat until there is no residue left.

3. Metal conditioning – using Propprep

Apply Propprep solution liberally with a clean rag or use the Propprep wipes. Immediately wipe the surface with a clean dry rag to ensure no residue is left.

Propprep is essential in the chemical preparation of the metal substrate to be coated with Propspeed. It contains ingredients that react with the metal creating a surface porous layer. This porous layer is key to ensuring penetration and completion of the self etching reaction of the primer to the metal substrate. Propprep also ensures that no free alkalinity, as a result of various soap/detergent washing, is present to interfere with the self etching primer reaction and adhesion to the metal substrate.

4. Metal Etching Primer

Ambient temperature has an effect on the application of Propspeed and the drying times of the Metal Etching Primer and the Clear Top Coat. We recommend a minimum temperature of 5°C or 40°F.

It is recommended to avoid applying the product in direct sunlight or humidity above 85%.

Open the can of etching primer. The yellow pigment in the bottom of the can must be thoroughly

mixed before adding the etching primer hardener. This can be done quite easily using a mixing stick or Propspeed Paint Stir Wheels. This usually takes no more than two or three minutes.

Note: Failure to thoroughly mix the etching primer base, as described above, may lead to premature hardening, inconsistencies and short life expectancy of the final coating system.

Once the etching primer base has been thoroughly stirred and there are no solids left in the bottom of the can you can now add the etching primer hardener to the etching primer base. The mixing ratio of etching primer base to etching primer hardener is four parts base to one part hardener. However we recommend that you mix the etching primer hardener right into the etching primer base container thereby ensuring an accurate measurement. Once mixed together, use immediately. Any product not being used immediately can be left in the sealed can in the shade for up to six hours. You can apply your primer with brushes and or foam rollers. For spray applications, please consult your Propspeed Technical Representative regarding specialized projects such as keel coolers and sea strainers.

The application process must be well planned due to times in between coats and may require two applicators. The timing of each coat is essential to enable the required chemical bond between coats.

The Propspeed system requires two generous coats of etching primer. To access all parts of the propeller and shaft we recommend turning the prop using a brush, wooden stick, or gloved hands. Once you have applied the first coat of etching primer wait approximately 3 to 5 minutes before applying the next coat.

To test if it is ready use the dry-to-touch test method.

If you take your index finger in a glove and touch the wet etching primer and it leaves a small print on the primed surface but no etching primer transfers to your fingertip of your glove, then you can begin applying the next coat. The wait between coats of etching primer is very important and must be adhered to. Make sure you have some idea of how time is progressing.

Using 27°C or 80°F as a benchmark you have 3 to 5 minutes from the start of applying the fi rst coat of etching primer to the start of applying the second.

Cooler temperatures will slow down the recoat time between the two coats, as will warmer temperatures and windy conditions speed-up the recoat time between the two.

5. Clear Top Coat

Before applying the clear coat take another paint stick and stir the clear coat so you have a smooth, homogeneous mixture in the can. The 3 to 5 minute wait between coats applies here too – use the dry to touch test to check if the etching primer has dried suffi ciently before applying the clear coat. Apply the clear coat with a brush only, NO foam roller application is to be used here. The clear coat is applied and brushed much like conventional varnish. As with the etching primer to access all parts of the propeller and shaft we recommend turning the prop using a brush, wooden stick or gloved hands.

Make sure there are no heavy runs or sags in the clear coat. You’ll have anywhere from 5 to 10 minutes to touch these up. Any drips that harden on the edges of the propeller blades can be carefully cut off the following day.

Make sure the surface is completely coated with clear coat. Any missed areas will appear dull in luster.

When you have fi nished coating the entire propeller with clear coat, give the propeller one more visual inspection just to make sure there are no areas that you might have missed and to check again that there are no runs in the clear coat.

Once the running gear has been coated clean up the contaminated waste products and dispose of as required by your local council or marine laws.

Propspeed requires a minimum of eight hours to dry before launching. In cold conditions, 5-13°C / 40-60°F, we recommend at least 24 hours drying before launching. Unlike traditional bottom paints Propspeed’s effectiveness is not adversely affected by sitting out of the water for extended periods of time in warm or cold climates. Any coated areas will need to be protected from damage.

Propspeed Tips

• Application of Propspeed requires planning so make sure you have all of the required application equipment and thoroughly understand the process.

• Wear protective respiratory, eye and skin protection.

• Remember to remove all of the solids at the bottom of the primer container and stir it into a homogeneous mixture before applying the primer hardener.

• Be sure to keep track of time between etching primer coats and the clear coat. The 3 to 5 minute re-coat windows are critical and subject to your ambient application temperature.

• Be sure and brush out sags or drips in the etching primer before applying the clear coat.

• Install all zincs or tape off areas where zinc anodes will be placed before applying Propspeed. Be sure to carefully remove any tape that has been applied before the Prospeed is fully cured.

• When coating the blades of the propeller remember to start in the hub area and work your way out to the end of the blade.

• The Propprep solution does not contain corrosive inhibitors so the treated surface should be primed and coated with the clear coat as soon as possible after being treated, and defi nitely within 4 hours.

• When applying the clear coat be sure to stretch the material out just as you would on the last coat of varnish on any bright work.

• We highly recommend two people work together on each application.

• After completing the application of the clear coat, visually observe all areas, ensuring there are no misses or gaps. The clear coat will dry to a glossy fi nish, helping the applicator fi nd any uncoated areas.

• During cleaning of your hull only use a soft cloth on the Propspeed. If the wiping cloth collects shells remove them before proceeding with the wipe down so as not to damage the Propspeed. Avoid any abrasive cleaning materials or direct high-pressure water.

• When hauling your vessel assess the Propspeed condition and reapply if necessary. Most owners reapply Propspeed at the same time as antifoul.

Propspeed Frequently Asked Questions

How does Propspeed work? Propspeed’s unique “foul release” formulation produces a surface that does not allow marine growth to permanently attach.

• What are the benefits of Propspeed? Propspeed will keep your running gear free from marine growth and will increase your vessel’s speed and reduce your fuel consumption.

• Is Propspeed environmentally friendly? Yes. Propspeed contains no tin, copper, biocides or pesticides.

• Is Propspeed good value? Absolutely! For years boaters have asked for a coating to keep their running gear free of marine growth. Propspeed not only delivers a coating that answers this call, but will deliver higher speeds and fuel savings, when compared with unprotected running gear.

• How long should Propspeed last on my vessel? Propspeed should last at least one year but many customers report up to two years of service.

• Do I need anything to maintain my Propspeed application? Propspeed’s unique “foul release” formulation is self-cleaning. However, it is acceptable if your diver gently wipes Propspeed with a non-abrasive cloth, rinsing frequently to avoid collecting shells.

• Can I haul my vessel multiple times without having to re-apply Propspeed? Yes. Propspeed can be hauled and launched multiple times without affecting its performance.

• Who should apply Propspeed to my vessel? We recommend that you have a certified applicator apply Propspeed to your vessel.

• Can I use Propspeed on my Kiwi Props? Yes you can. Preparation is similar to any other Propspeed application, except you do not need to apply the etching primer, just apply the Clear Coat after normal preparation.

• Can I spray Propspeed? We do not recommend the spraying of the clear top coat as it is a silicone based product which can easily contaminate other vessels in the yard if not handled correctly.

• Where can I find the Safety Data Sheets and the Technical Data Sheets on Propspeed products? See the links below.

The above information was obtained via the Propspeed Application Manual and updated 8/29/2016. For the most up-to-date information please review the Propspeed OceanMax website.

Helpful Links:

Propspeed Application Guidelines

Propspeed Coverate Rates

Propspeed Technical Data:

Propspeed Etching Primer Techincal Data Sheet

Propspeed Clear Coat Techincal Data Sheet

Propspeed Safety Data

Propspeed Etching Primer SDS (MSDS)

Propspeed Clear Coat SDS (MSDS)

Note: Propspeed™ is a registered trademark of Oceanmax. Bottom Paint Store is not affiliated with Propspeed or Oceanmax in anyway. Above Propspeed prices and PropGlide Prices are based on internet web search October 2016 .

How to Prevent Growth on Boat Propellers and Running Gear

So you have gone to the expense of applying bottom paint to your boat, and now you have to ask the question “what about propeller paint and running gear paint? Just like the rest of the bottom of the boat, marine growth will cover the props and running gear if left unprotected. This will lead to loss of power and speed. With severe growth, you can even lose the ability to get the boat on plane.

There are a few options for keeping growth off your propellers and running gear and we will explore advantages and disadvantages for applying various coatings to your propellers and running gear. Keep in mind that when you paint props and running gear they are under extreme conditions with speed, cavitation, electrolysis and environmental conditions ( like running through sand or hitting ground or objects). These can cause the same result as sandblasting your running gear – something you will want to avoid after you choose a coating!

Foul release coatings are very smooth, extremely low friction coatings typically based on silicone or fluoropolymers. The combination of low friction and low surface energy is the physical mechanism behind its fouling release. In addition to preventing biofouling, they increase fuel efficiency  by providing more efficiencies to the engine and therefore less fuel is burned resulting in cost savings.

1. PropGlide Foul Release Coating | The Best Solution for Preventing Growth on Props and Running Gear

Advantages: Best adhesion, best performance, actual increase in speed, lowest risk of electrolysis issues, non-toxic
Disadvantages: Higher Cost, Environmental Variables (sand, running aground), Detailed application

Foul Release Systems provide the best solution to keeping growth of your props and running gear. While these are not antifouling prop paints, they do keep the growth off buy creating a super slippery surface that the marine growth cannot stick to. Propspeed recommends that their kits by applied by a professional Propspeed applicator. On the other hand, PropGlide is available for any DIY applicator and is less costly and more product for the money. If you want to apply this yourself, be sure to follow the details in the respective application manuals.   You can find these on any of the Propeller Foul Release Kit listed on our website.

PropGlide and Propspeed are foul release systems that are applied to underwater metals including props and running gears. These foul release coatings are sold in kits ranging from 175ML, 200ML, 500ML, and 1000ML Kits. You can view the all of our Foul Release Coatings to determine which kit size if right for you.

2. Paint the Props and Running Gear with Bottom Paint

Advantages: Lower cost option
Disadvantages: Trouble staying on, electrolysis concerns, Environmental Variables (sand, running aground)

Applying bottom paint to your underwater gear is a little tricky because there are additional steps that must be taken before applying the bottom paint. Especially if you have a fiberglass boat. Most bottom paints contain copper that act as a biocide and prevent growth. However, when applying bottom paint (with copper) to metal, you create a battery effect with the metal on metal. This leads to electrolysis and pitting of your props and running gear. Follow these basic steps before going with this option.

Basic Steps

  1. Prep: Make sure to remove all prior coatings and contaminants prior to applying any coatings. The should be done by a sandblasting, soda blasting, or a good ole fashioned sanding. The recommended grit and profile should be 80 grit. This will provide a efficient surface for the new coating to adhere.
  2. Tuff Stuff Marine Epoxy PrimerPrimer: Apply a two part high build epoxy primer that is designed to prevent corrosion and enhance adhesion. The best we have found is Sea Hawk Tuff Stuff High Build Epoxy Primer. It is easy to use and works extremely well. Apply two coats!
  3. Bottom Paint: Apply a hard modified epoxy bottom paint with not too high a load of copper. Sea Hawk Sharkskin hard paint is a great choice! The epoxy primer will insulate the copper bottom paint from the metal of the props and Sea Hawk Smart Solution Outdrive Paintrunning gear (remember the battery effect!) If you are concerned about electrolysis or already have some issues, then you should use a copper free bottom paint. The only true metal free bottom paint that we found and that still is effective in preventing growth is Sea Hawk Smart Solution. Either way, be sure to apply the first coat of bottom paint the same day as the 2nd coat of epoxy primer. If you don’t, it will not stick!

3. Aerosol Sprays

Advantages: Lowest cost option
Disadvantages: Trouble staying on, ineffective antifouling performance, electrolysis concerns if copper based, Environmental Variables (sand, running aground).

There are a few aerosol spray systems that can be used, but these are generally ineffective for props and running gear, and are reserved for outdrive applications. These include Interlux Trilux 33 and Primocon, Pettit Alumaspray and Prop Coat Barnacle Barrier, and the Sea Hawk Premium Outdrive Kit that contains Smart Solution (brush on Pint) and Barnacle Blocker. Our advice is to save your money before applying these to props and running gear.

Note: Propspeed™ is a registered trademark of Oceanmax. Bottom Paint Store is not affiliated with Propspeed or Oceanmax in anyway. Above Propspeed prices and PropGlide Prices are based on internet web search October 2016 .