
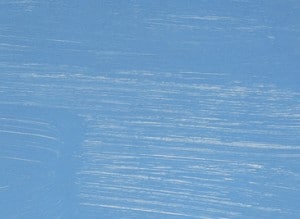
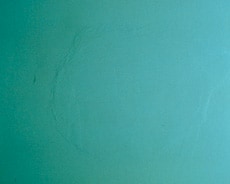
PAINT BLISTERING:
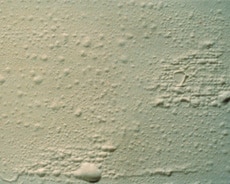 Bubbles may be seen resulting from localized loss of adhesion, and lifting of the paint film from the underlying surface.
POSSIBLE CAUSES: Applying solvent-based paint over a damp or wet surface. Moisture seeping into the substrate from the outside (less likely with water-based paint). Exposure to high to high humidity or moisture during application or shortly after paint has dried, especially if there was inadequate surface preparation. Entrapment of air in the pores of the substrate being painted. Entrapment of solvents which is commonly caused when paint is over coated before the solvents have sufficiently released.
SOLUTION: If blisters do not go all the way down to the substrate: Remove blisters by scraping, and sanding, and repaint. Be sure to apply when humidity is below 75% and with good ventilation. If blisters go down to the substrate: Remove the source of moisture. Repair loose coatings; install vents or exhaust fans where possible. Remove blisters as above, remembering to prime before applying the top coat. Seal porous substrates before priming or painting. This will prevent air from being trapped under the paint causing blisters or moisture intrusion.
NOTE: Always test for moisture and humidity to confirm the substrate is ready to prime or paint. Never overcoat paint that is still releasing solvents.
BLOCKING:
 Undesirable sticking together of two painted surfaces when pressed together (e.g., a door sticking to the jamb).
POSSIBLE CAUSES: Not allowing sufficient dry time for the coating before closing doors or windows. Use of low quality satin or gloss paints.
SOLUTION: Use top quality satin or gloss acrylic water-based paint. Low quality water-based paints can have poor block resistance, especially in warm, damp conditions. Follow paint label instructions regarding dry times. Acrylic water-based paints generally have better early block resistance than vinyl acetate co-polymer based paints or solvent-based paints; however, solvent-based paints develop superior block resistance over time. Application of talcum powder can relieve persistent blocking.
BURNISHING:
 Increase in gloss or sheen of paint film when subjected to rubbing, scrubbing or having an object brush up against it.
POSSIBLE CAUSES: Use of matte paint in high traffic areas, where a higher sheen level would be desirable. Frequent washing and spot cleaning. Objects (furniture, for example) rubbing against the walls. Use of lower grades of paint with poor stain and scrub resistance (see Poor Stain Resistance and Poor Scrub Resistance).
SOLUTION: Paint heavy wear areas that require regular cleaning (e.g., doors, window sills and trim) with a top quality water-based paint, because this type of paint offers both durability and easier cleaning capability. In high traffic areas, choose a satin or gloss rather than a matt sheen level. Clean painted surfaces with a soft cloth or sponge and non-abrasive cleansers; rinse with clean water.
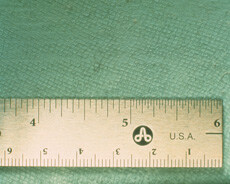
CHALKING:
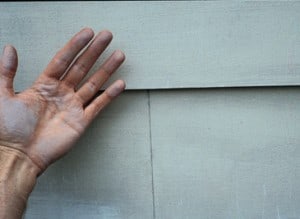 Formation of fine powder on the surface of the paint film during weathering which can cause color fading. Although some degree of chalking is a normal, desirable way for a paint film to wear, excessive film erosion can result from heavy chalking.
POSSIBLE CAUSES: Use of a low-grade, highly pigmented paint. Use of an interior paint for an outdoor application.
SOLUTION: First, remove as much of the chalk residue as possible, scrubbing with a stiff bristle brush (or wire brush on masonry) and then rinse thoroughly; or use power washing equipment. Check for any remaining chalk by running a hand over the surface after it dries. If noticeable chalk is still present, apply a quality oil-based or acrylic latex primer (or comparable sealer for masonry), then repaint with a quality exterior coating; if little or no chalk remains and the old paint is sound, no priming is necessary.
CRACKING / FLAKING:
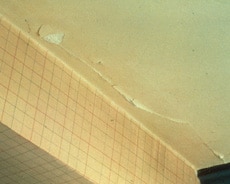 The splitting of a dry paint film through at least one coat as a result of aging, which ultimately will lead to complete failure of the paint. In its early stages, the problem appears as hairline cracks; in its later stages, flaking occurs.
POSSIBLE CAUSES: Use of lower quality paint that has inadequate adhesion and flexibility. Over thinning or overspreading the paint. Inadequate surface preparation, or applying the paint to bare wood without first applying a primer. Excessive hardening of solvent-based paint as the paint job ages.
SOLUTION: Remove loose and flaking paint with a scraper or wire brush, sanding the surface and feathering the edges. If the flaking occurs in multiple layers of paint, use of a face filler may be necessary. Prime bare wood areas before repainting. Use of a top quality primer and top coat should prevent a recurrence of the problem.
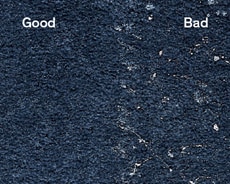
DIRT PICK UP:
 Accumulation of dirt, dust particles and/or other debris on the paint film; may resemble mildew.
POSSIBLE CAUSES: Use of a low quality paint, especially lower grades of satin or semi-gloss. Soil splashing onto siding. Air pollution, car exhaust and flying dust collecting on house body and horizontal trim.
SOLUTION: Wash off all surface dirt before priming and painting, using a scrub brush and detergent solution, followed by a thorough rinsing with a garden hose. Heavier dirt accumulations may require the use of a power washer. While dirt pickup can’t be eliminated entirely, top quality exterior latex paints typically offer superior dirt pickup resistance and wash-ability. Also, higher gloss paints are more resistant to dirt pickup than flat paints, which are more porous and can more easily entrap dirt.
FOAMING / CRATERING:
 Formation of bubbles (foaming) and resulting small, round concave depressions (cratering) when bubbles break in a paint film, during paint application and drying.
POSSIBLE CAUSES: Shaking a partially filled can of paint. Use of low quality paint or very old water based paints. Applying (especially rolling) paint too rapidly. Use of a roller cover with wrong nap length. Excessive rolling or brushing of the paint. Applying a gloss or satin paint over a porous surface.
SOLUTION: All paints will foam to some degree during application; however, higher quality paints are formulated so the bubbles break while the paint is still wet, allowing for good flow and appearance. Avoid excessive rolling or brushing of the paint or using paint that is more than a year old. Apply gloss and satin paints with a short nap roller, and apply an appropriate sealer or primer before using such paint over a porous surface. Problem areas should be sanded before repainting.
FROSTING:
 A white, salt-like substance on the paint surface. Frosting can occur on any paint color, but it is less noticeable on white paint or lighter tints. On masonry, it can be mistaken for efflorescence (see Efflorescence and Mottling).
POSSIBLE CAUSES: Forms mostly in protected areas (such as under eaves and on porch ceilings) that do not receive the cleansing action of rain, dew and other moisture. Use of dark-colored paints that have been formulated with calcium carbonate extender.
Application of a dark-colored paint over a paint or primer containing calcium carbonate extender.
SOLUTION: Frosting can be a stubborn problem. It often cannot be washed off readily. Moreover, the condition can recur even as a bleed-through when a new top coat is applied. In extreme cases, it can interfere with adhesion. The best remedy is to remove the frosting by wire brushing masonry or sanding wood surfaces; rinse, then apply an alkyd-based primer before adding a coat of high quality exterior paint.
INCOMPATIBILITY:
 Loss of adhesion where many old coats of alkyd or oil-based paint receive a latex top coat.
POSSIBLE CAUSES: Use of water-based latex paint over more than three or four coats of old alkyd or oil-based paint may cause the old paint to “lift off” the substrate.
SOLUTION: Repaint using another coat of alkyd or oil-based paint. Or completely remove the existing paint and prepare the surface – cleaning, sanding and spot-priming where necessary – before repainting with a top quality latex exterior paint.
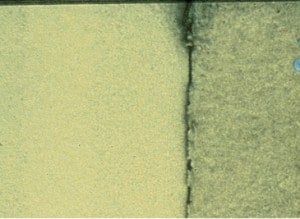
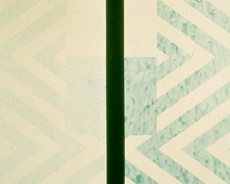
LAPPING:
 Appearance of a denser color or increased gloss where wet and dry layers overlap during paint application.
POSSIBLE CAUSES: Failure to maintain a “wet edge” when painting. Use of a low solids “economy” paint.
SOLUTION: Maintain a wet edge when painting by applying paint toward the unpainted area and then back into the just painted surface. This technique (brushing or rolling from “wet to dry” rather than vice versa) will produce a smooth uniform appearance. It is also wise to work in manageable size areas; plan for interruptions at a natural break, such as a window, door or corner. Using a top quality acrylic water based paint makes it easier to avoid lapping problems because higher solids (pigments and binder) content makes lapped areas less noticeable. If substrate is very porous, it may need a primer/sealer to
prevent paint form drying too quickly and reducing wet edge time. Solvent-based paints generally have superior wet edge properties.
FUNGAL CONTAMINATION:
Black, grey or brown spots or areas on the surface of paint or sealant.
POSSIBLE CAUSES: Forms most often on areas that tend to be damp, or receive little or no direct sunlight (e.g., bathrooms, kitchens and utility rooms). Use of a solvent-based paint, or lower quality water-based paint. Failure to prime bare wood surface before applying the paint. Painting over a substrate or coating on which fungal contamination has not been removed.
SOLUTION: Test for fungus by applying a few drops of household bleach to the area; if it is bleached away, the dis-colorant is probably fungus. Remove all fungus from the surface by scrubbing with a diluted household bleach solution (one part bleach, three parts water) or a fungicidal wash, while wearing rubber gloves and eye protection. Rinse thoroughly. To protect against fungal contamination, use a top quality water-based paint, and clean when necessary with bleach/detergent solution. Consider installing an exhaust fan (which is connected to a light switch) in high moisture areas. Some products, with fungicidal claims are available, which you may consider.
MOLD/MILDEW:
 Black, gray or brown spots or areas on the surface of paint or caulk.
POSSIBLE CAUSES: Forms most often on areas that tend to be damp, or receive little or no direct sunlight (e.g., bathrooms, kitchens and laundry rooms). Use of an alkyd or oil-based paint, or lower quality latex paint. Failure to prime bare wood surface before applying the paint. Painting over a substrate or coating on which mildew has not been removed.
SOLUTION: Test for mildew by applying a few drops of household bleach to the area; if it is bleached away, the dis-colorant is probably mildew. Remove all mildew from the surface by scrubbing with a diluted household bleach solution (one part bleach, three parts water), while wearing rubber gloves and eye protection. Rinse thoroughly. To protect against mildew, use a top quality latex paint, and clean when necessary with bleach/detergent solution. Consider installing an exhaust fan in high moisture areas.
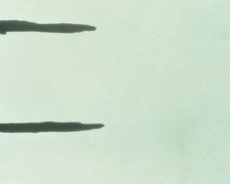
MUD CRACKING:
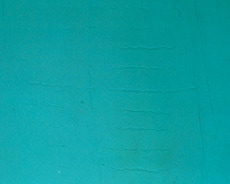 Deep, irregular cracks resembling dried mud in dry paint film.
POSSIBLE CAUSES: Paint applied too thickly, usually over a porous surface. Paint applied too thickly, to improve inherent poor hiding (coverage) of a lower quality paint. Paint is allowed to build up in corners upon application.
SOLUTION: Remove coating by scraping and sanding. Prime and repaint, using a top quality water-based paint. Mud-cracked areas can also be repaired by sanding the surface smooth before repainting with a top quality water-based paint. This type of paint is likely to prevent recurrence of mud cracking, because it is relatively more flexible than solvent-based paint, and ordinary water-based paint. Quality paints have a higher solids content, which reduces the tendency to mud crack. They also have very good application and hiding properties, which minimize the tendency to apply too thick a coat of paint.
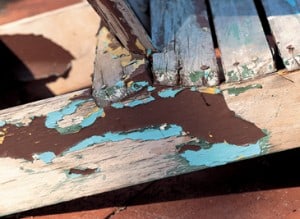
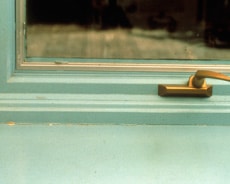
PEELING:
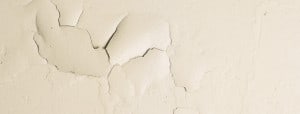 Loss of paint due to poor adhesion. Where there is a primer and top coat, or multiple coats of paint, peeling may involve some or all coats.
POSSIBLE CAUSES: Seepage of moisture through un-caulked joints, worn caulk or leaks in roof or walls. Moisture in the form of water, rain, dew or high humidity allowed on surface before it has fully cured. Excess moisture escaping through exterior walls (more likely if paint is oil-based). Inadequate surface preparation. Applying paint over a wet or contaminated surface. Improper application techniques. Earlier blistering of paint (see Blistering).
SOLUTION: Always make moisture assessment and planning part of paint preparation and application. Carefully schedule interior and exterior paint work during an acceptable weather window. Identify and eliminate moisture sources in advance. Prepare surface by removing all loose paint, contaminates and moisture. Strictly adhere to manufacturers application guidelines. Use paint and primer according to application instructions and standard industry practices. Thoroughly remove corrupted peeling paint, repaint with a top quality paint products.
PICTURE FRAMING:
 An effect of non uniform color that can appear when a wall is painted with a roller, but is brushed at the corners, architraves and cornices. The brushed areas generally appear darker, resembling the “frame” of a “picture”. Also, sprayed areas may be darker than neighboring sections that are brushed or rolled. Picture framing can also refer to sheen effects.
POSSIBLE CAUSES: Usually a hiding (coverage) effect. Brushing will generally result in lower spread rates than rolling, producing a thicker film and more hiding. Adding colorant to a non-tintable paint or using the wrong type or level of colorant, resulting in variation in color, depending on method of application.
SOLUTION: Make sure that spread rates with brushes and rollers are similar. Don’t cut in the entire room before roller coating. Work in smaller sections of the room to maintain a “wet edge.” With tinted paints, be sure the correct colorant-base combinations are used.
POOR FLOW / LEVELING:
 Failure of paint to dry to a smooth film, resulting in unsightly brush and roller marks after the paint dries.
POSSIBLE CAUSES: Use of lower quality paint. Application of additional paint to “touch up” partially dried painted areas. Re-brushing or re-rolling partially dried painted areas. Use of the wrong type of roller cover or poor quality brush.
SOLUTION: Use top quality water-based paints, which are generally formulated with ingredients that enhance paint flow. Brush and roller marks thus tend to “flow out” and form a smooth film. When using a roller, be sure to use a cover with the recommended nap length for the type of paint being used. Use of a high quality brush is important; a poor brush can result in bad flow and leveling with any paint.
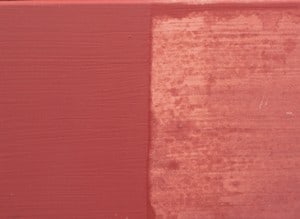
POOR HIDE:
 Failure of dried paint to obscure or “hide” the surface to which it is applied.
POSSIBLE CAUSES: Use of low quality paint. Use of low quality tools/wrong roller cover. Use of an improper combination of tinting base and tinting color. Poor flow and leveling (see Poor Flow/Leveling). Use of a paint that is much lighter in color than the substrate, or that primarily contains low-hiding organic pigments such as yellows, reds and blues. Application of paint at a higher spread rate than recommended. SOLUTION: If the substrate is significantly darker or is a patterned wallpaper, it should be primed before applying a top coat. Use a top quality paint for better hiding and flow. Use quality tools; use the recommended roller nap, if rolling. Follow manufacturer’s recommendation on spread rate; if using tinted paint, use the correct tinting base. Where a low-hiding organic color must be used, apply a primer first.
POOR IMPRINT RESISTANCE:
 The tendency of paint film to take on the imprint of an object that is placed on it (e.g., a shelf, table, window sill or counter-top with books, dishes and other objects on them).
POSSIBLE CAUSES: Use of low quality satin or gloss paint. Putting a painted surface back into use before paint has fully dried.
SOLUTION: Use top quality acrylic satin or gloss water-based paint. Low quality water-based satin and gloss paints can have poor print resistance, especially in warm, damp conditions. Acrylic water-based paints generally have better print resistance than vinyl acetate co polymer type paints. Fully cured solvent-based paints also have excellent print resistance. Make sure the recommended “cure” time is allowed for the paint before it is put into service. Cool or humid conditions require more curing time.
POOR SCRUB RESISTANCE:
 Wearing away or removal of the paint film when scrubbed with a brush, sponge, or cloth.
POSSIBLE CAUSES: Choosing the wrong sheen for the area. Use of a lower quality paint. Use of an overly aggressive scrub medium (see Burnishing). Inadequate dry time allowed after application of the paint before washing it.
SOLUTION: Areas that need frequent cleaning require a high quality paint formulated to provide such performance. High traffic areas may require a satin or gloss paint rather than a matte paint to provide good scrub resistance. Allow adequate dry time, as scrub resistance will not fully develop until the paint is thoroughly cured. Typically, this will be one week. Try washing the painted surface with the least abrasive material and mildest detergent first.
POOR SHEEN UNIFORMITY:
 Shiny spots or dull spots on a painted surface; uneven gloss.
POSSIBLE CAUSES: Uneven spread rate. Failure to properly prime a porous surface, or surface with varying degrees of porosity. Poor application resulting in lapping (see Lapping).
SOLUTION: New substrates should be primed/sealed before applying the top coat to ensure a uniformly porous surface. Without the use of a primer or sealer, a second coat of paint will more likely be needed. Make sure to apply paint from “wet to dry” to prevent lapping. Often, applying an additional coat will even out sheen irregularities.
POOR STAIN RESISTANCE:
 Failure of the paint to resist absorption of dirt and stains.
POSSIBLE CAUSES: Use of lower quality paint that is porous in nature. Application of paint to unprimed substrate.
SOLUTION: Higher quality water-based paints contain more binder, which helps prevent stains from penetrating the painted surface, allowing for easy removal. Priming new surfaces provides maximum film thickness of a premium top coat, providing very good stain removability.
“STIPPLE” / ROLLER MARKS:
 Unintentional textured pattern left in the paint by the roller.
POSSIBLE CAUSES: Use of incorrect roller cover. Use of lower grades of paint. Use of low quality roller. Use of incorrect rolling technique.
SOLUTION: Use the proper roller cover; avoid too long a nap for the paint and the substrate. Use quality roller to ensure adequate film thickness and uniformity. High quality paints tend to roll on more evenly due to their higher solids content and leveling properties. Pre-dampen roller covers used with water-based paint; shake out excess water. Don’t let paint build up at roller ends. Begin rolling at a corner near the ceiling and work down the wall in sections. Spread the paint in a zigzag “M” or “W” pattern, beginning with an upward stroke to minimize spatter; then, without lifting the roller from the surface, fill in the zigzag pattern with even, parallel strokes. On doors, if rolled, lay off with a brush.
SPLATTER:
 Tendency of a roller to throw off small droplets of paint during application.
POSSIBLE CAUSES: Use of exterior paint on an interior surface. Use of lower grades of water-based paints.
SOLUTION: Higher quality paints are formulated to minimize splattering. Using high quality rollers which have proper resiliency further reduce splattering. In some cases, a quality wall paint may be preferred for ceiling work, for maximum splatter resistance. Overloading the roller with paint will result in excess splatter, as will overworking the paint once it is applied to a substrate. Working in sections, applying the paint in a zigzag “M” or “W” pattern and then filling in the pattern will also lessen the likelihood of splattering.
SAGGING / RUNNING:
 Downward “drooping” movement of the paint film immediately after application, resulting in an uneven coating.
POSSIBLE CAUSES: Application of a heavy coat of paint. Application in excessively humid and/or cool conditions. Application of over thinned paint. Airless spraying with the gun too close to the substrate being painted.
SOLUTION: If the paint is still wet, immediately brush out or re-roll to redistribute the excess evenly. If the paint has dried, sand, and reapply a new coat of top quality paint. Correct any unfavorable conditions: Do not thin the paint; avoid cool or humid conditions; sand glossy surfaces. Paint should be applied at its recommended spread rate; avoid “heaping on” the paint. Two coats of paint at the recommended spread rate are better than one heavy coat, which can also lead to sagging. Consider removing doors to paint them supported horizontally.
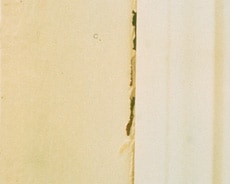
SEALANT FAILURES:
 Loss of sealant’s initial adhesion and flexibility, causing it to crack and/or pull away from the surfaces to which it has been applied.
POSSIBLE CAUSES: Use of lower quality sealant. Use of wrong type of sealant for a particular application. Substrate not dry.
SOLUTION: Use a top quality water-based pure acrylic or silicon acrylic sealant if prolonged contact with water is not anticipated. These sealants are flexible enough to adapt to minor fluctuations in the substrate, stretching in gaps that widen slightly over time. They also adhere to a wide range of interior and exterior building materials, including wood, ceramic tile, concrete, plaster, bare aluminum, brick and
plastic. With glass as the substrate silicon sealants are most suitable.
NOTE: Silicone sealant should not be painted.
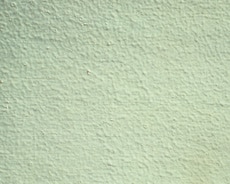
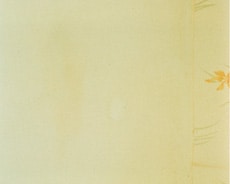
SURFACTANT LEACHING:
 Concentration of water-soluble ingredients on the surface of a water-based paint, typically on a ceiling surface in rooms that have high humidity (e.g., shower, bathroom, kitchen); may be evident as tan or brown spots or areas, and can sometimes be glossy, soapy or sticky.
POSSIBLE CAUSES: All water-based paint formulas will exhibit this tendency to some extent if applied in areas that become humid (bathrooms, for example), especially in ceiling areas.
SOLUTION: Wash the affected area with soap and water, and rinse. Problem may occur once or twice again before leaching material is completely removed. When paint is applied in a bathroom, it is helpful to have it dry thoroughly before using the shower. Remove all staining before repainting.
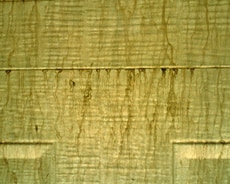
TANNIN STAINING:
 Brownish or tan discoloration on the paint surface due to migration of tannins from the substrate through the paint film. Typically occurs on “staining woods,” such as redwood, cedar and mahogany, or over painted knots in certain other wood species.
POSSIBLE CAUSES: Failure to adequately prime and seal the surface before applying the paint. Use of a primer that is not sufficiently stain-resistant. Excess moisture escaping through the exterior walls, which can carry the stain to the paint surface.
SOLUTION: Correct any possible sources of excess moisture (see Efflorescence and Mottling). After thoroughly cleaning the surface, apply a high quality stain- resistant oil-based or acrylic latex primer. Oil based stain-resistant primers are the best type to use on severely staining boards. In extreme cases, a second coat of primer can be applied after the first has dried thoroughly. Finish with a top quality latex paint.
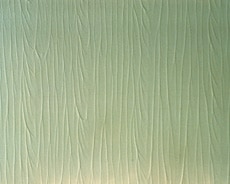
WRINKLING:
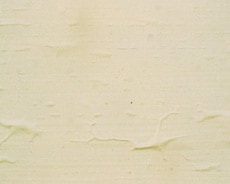 A rough, crinkled paint surface, which occurs when uncured paint forms a “skin”.
POSSIBLE CAUSES: Paint applied too thickly (more likely when using solvent-based paints). Painting during extremely hot weather or cool damp weather, which causes the paint film to dry faster on top than on the bottom. Exposing uncured paint to high humidity levels. Painting over a contaminated surface (e.g., dirt or wax).
SOLUTION: Scrape or sand substrate to remove wrinkled coating. If using a primer, allow it to dry completely before applying top coat. Repaint (avoiding temperature/humidity extremes), applying an even coat of top quality interior paint.
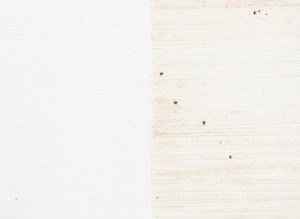
YELLOWING:
 Development of a yellow cast in aging paint; most noticeable in the dried films of white paints or clear varnishes.
POSSIBLE CAUSES: Oxidation of solvent-based paint or varnish. Heat from ovens, radiators and heating ducts. Lack of light (e.g., behind pictures or appliances, inside cupboards, etc.).
SOLUTION: Top quality water-based paints do not tend to yellow, nor does non-yellowing varnish. Solvent-based paints, because of their curing mechanism, do tend to yellow, particularly in areas that are protected from sunlight.