
Last Updated: January 26, 2026
Quick Recommendation
How to Repair a Fiberglass Boat: What to Do First
- Assess the damage: Cosmetic damage can be fixed with gelcoat repair, while cracks or soft spots require fiberglass and epoxy repair first.
- Prep thoroughly: Clean, grind, and feather damaged areas so new fiberglass and gelcoat bond properly.
- Repair in layers: Rebuild structure with fiberglass and resin, then finish with gelcoat for protection and appearance.
- Bottom line: Long-lasting fiberglass repairs depend on proper damage assessment, structural repair first, and careful surface finishing.
Tip: If the fiberglass flexes or feels soft, do not skip structural repair—gelcoat alone will not fix the problem.
Quick Answer: How Do You Repair a Fiberglass Boat?
To repair a fiberglass boat, first clean and sand the damaged area, remove loose or cracked material, then rebuild the surface using fiberglass cloth, resin, filler, or gelcoat depending on the severity of the damage. Small scratches and chips may only need gelcoat repair, while cracks, gouges, soft spots, and holes may require fiberglass reinforcement.
The most important part of any fiberglass boat repair is preparation. The damaged area must be clean, dry, sanded, and properly shaped before applying resin, fiberglass cloth, fairing compound, primer, or gelcoat. Skipping the prep work can lead to poor adhesion, visible repairs, or damage that returns later.
Best Repair Method by Type of Fiberglass Damage
| Type of Damage | Recommended Repair | Why It Works |
|---|---|---|
| Light scratches | Wet sanding, buffing, and polishing | Restores the surface when the damage has not cut deeply into the gelcoat. |
| Gelcoat chips | Gelcoat paste or gelcoat repair putty | Fills small surface chips and restores color and protection to the outer layer. |
| Hairline cracks | Open the crack, clean it, and fill with gelcoat or marine filler | Helps prevent the crack from spreading and creates a stronger repair than covering it only at the surface. |
| Deep gouges | Marine filler, fairing compound, and gelcoat | Builds the damaged area back to shape before finishing the surface. |
| Small holes | Fiberglass cloth or mat with resin, then fairing and gelcoat | Adds strength behind the repair instead of relying only on filler. |
| Larger holes or structural damage | Layered fiberglass cloth and resin repair | Rebuilds strength by replacing the missing or damaged fiberglass laminate. |
| Soft spots | Inspect the core, remove damaged material, and rebuild with fiberglass and resin | Soft spots may indicate deeper moisture or core damage that surface filler will not fix. |
| Cosmetic discoloration | Cleaning, compounding, polishing, or new gelcoat | Restores appearance when the fiberglass structure is still sound. |
Basic Fiberglass Boat Repair Steps
| Step | What to Do | Why It Matters |
|---|---|---|
| 1. Inspect the damage | Determine whether the damage is only cosmetic or goes into the fiberglass laminate. | The repair method depends on whether you are fixing gelcoat, filler, fiberglass, or structural damage. |
| 2. Clean the area | Remove wax, grease, dirt, salt, and loose material before sanding. | Resin, filler, and gelcoat need a clean surface to bond correctly. |
| 3. Sand and shape the repair area | Sand around the damage and taper the edges if fiberglass cloth will be used. | A properly sanded surface improves adhesion and helps the repair blend into the surrounding hull. |
| 4. Apply fiberglass, filler, or gelcoat | Use the correct repair material based on the depth and size of the damage. | Small cosmetic repairs and larger structural repairs require different products. |
| 5. Let the repair cure | Allow the resin, filler, or gelcoat to cure according to the manufacturer’s directions. | Rushing the cure time can weaken the repair or make sanding and finishing more difficult. |
| 6. Sand, fair, and finish | Sand the cured repair smooth, then apply gelcoat, primer, paint, or bottom paint as needed. | The final finish protects the repair and helps it match the surrounding surface. |
What to Consider Before Repairing Fiberglass
Before starting a fiberglass boat repair, identify whether the damage is above or below the waterline, cosmetic or structural, and whether the area is dry. Repairs below the waterline need special attention because the finished surface must resist water intrusion and may also need barrier coat or bottom paint after the repair is complete.
For small gelcoat chips, scratches, and surface cracks, a gelcoat repair product may be enough. For deeper gouges, holes, and impact damage, you may need fiberglass cloth, resin, hardener, fairing compound, sandpaper, masking materials, and a finishing product such as gelcoat, topside paint, or bottom paint.
Common Questions About Fiberglass Boat Repair
Can you repair a fiberglass boat yourself?
Yes, many small fiberglass boat repairs can be handled by a careful DIY boat owner. Scratches, chips, minor cracks, and small gouges are usually manageable with the right materials and preparation. Larger holes, soft spots, or structural damage may require more advanced repair skills or professional help.
What is the best product to repair fiberglass boat damage?
The best product depends on the type of damage. Gelcoat paste or gelcoat repair putty is often used for small cosmetic chips. Fiberglass cloth and resin are better for holes and structural repairs. Fairing compound is used to smooth and shape the repaired area before finishing.
What is the difference between gelcoat repair and fiberglass repair?
Gelcoat repair fixes the outer cosmetic and protective surface of the boat. Fiberglass repair fixes the laminate underneath when the damage is deeper, cracked, punctured, or weakened. Many repairs require both: fiberglass for strength and gelcoat for the finished surface.
Do you need fiberglass cloth for every boat repair?
No. Fiberglass cloth is usually not needed for very small surface scratches or shallow gelcoat chips. It is used when the repair needs added strength, such as holes, deeper cracks, gouges, or areas where the fiberglass laminate has been damaged.
Can you use Bondo on a fiberglass boat?
Automotive body filler is not usually the best choice for marine fiberglass repairs, especially below the waterline. Marine-grade fillers, epoxy fillers, polyester fillers, fairing compounds, and fiberglass repair materials are better suited for boats because they are designed for wet and demanding marine environments.
How do you repair a hole in a fiberglass boat?
To repair a hole in a fiberglass boat, grind or sand the damaged area, taper the edges, clean the surface, then rebuild the area with layers of fiberglass cloth or mat and resin. Once cured, the repair is sanded, faired smooth, and finished with gelcoat, paint, or bottom paint.
Can you repair fiberglass below the waterline?
Yes, fiberglass below the waterline can be repaired, but the repair must be sealed and finished correctly to prevent water intrusion. Depending on the job, the repaired area may need epoxy barrier coat, primer, and antifouling bottom paint after the fiberglass work is complete.
How long does fiberglass boat repair take to cure?
Cure time depends on the repair product, temperature, humidity, hardener ratio, and thickness of the application. Always follow the manufacturer’s instructions before sanding, fairing, painting, or putting the boat back in the water.
Should I use epoxy resin or polyester resin for fiberglass boat repair?
Both epoxy and polyester resin are used in fiberglass boat repair. Epoxy typically provides excellent adhesion and water resistance, while polyester resin is commonly used with gelcoat systems. The best choice depends on the repair location, existing material, and final finish.
Recommended Fiberglass Repair Products
Bottom Paint Store carries fiberglass repair materials for small cosmetic fixes and larger boat repair projects, including gelcoat repair products, fiberglass cloth, fiberglass mat, polyester resin, epoxy resin, hardeners, fairing compounds, fillers, primers, and finishing coatings. Choosing the right product depends on the size of the damage, whether the repair is above or below the waterline, and whether the final surface will be gelcoated, painted, or bottom painted.
If you’re a boat enthusiast, you know that there’s nothing quite like the feeling of cruising out on the open water. But what do you do when your beloved vessel starts to show signs of wear and tear? If you have a fiberglass boat, you’re in luck. In this blog post, we’ll walk you through everything you need to know about repairing your fiberglass boat, from small cracks to large holes. So, whether you’re a seasoned pro or a complete novice, read on for our step-by-step guide on how to repair a fiberglass boat.
KEY TAKEWAYS
- Clean the Area
The first step in boat fiberglass repair is to clean the area that needs to be repaired. This step is important because it will allow the repair materials to bond properly with the existing fiberglass. Use a mild soap and water solution to clean the area and then dry it thoroughly with a clean cloth. - Cut Out the Damaged Area
Once the area is clean, use a sharp knife or razor blade to cut out the damaged area. Be sure to cut away any loose or damaged fiberglass so that you have a clean, smooth surface to work with. - Apply the Repair Material
There are a variety of repair materials that can be used for fiberglass boat repair. The type of material you use will depend on the size and severity of the damage. For small repairs, you can use a fiberglass repair kit; for larger repairs, you may need to use a sheet of fiberglass cloth and some resin. Follow the instructions that come with your chosen repair material to apply it to the damaged area.
Repairing Small Cracks and Scratches
One of the most common problems that boat owners face is small cracks and scratches in the hull. While these may not seem like a big deal at first, they can quickly turn into larger problems if left unaddressed. The good news is that small cracks and scratches are relatively easy to fix with some basic supplies.
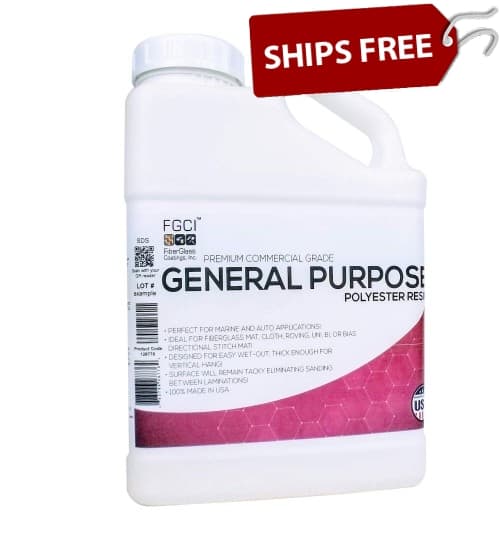
Here’s what you’ll need:
-Fiberglass cloth
-Resin
-Hardener
-Sandpaper
-Putty knife or spreader
-Measuring cup
-Gloves
-Eye protection
Once you have all of your supplies, follow these steps to repair small cracks and scratches in your fiberglass boat:
- Clean the area around the crack or scratch with sandpaper to rough up the surface and allow the resin to adhere better.
- Cut a piece of fiberglass cloth to size and lay it over the crack or scratch.
- Mix together the resin and hardener in a measuring cup, according to the application guidelines.
- Use a putty knife or spreader to apply the resin mixture over the fiberglass cloth, making sure to work it into any crevices.
- Allow the resin to cure for 24 hours before sanding down any excess material.
- Your fiberglass boat is as good as new!
Fixing Large Holes in Fiberglass Boats
While small cracks and scratches are relatively easy to fix, large holes can be much more challenging—but not impossible! With some patience and elbow grease, you can patch up even the biggest holes in your fiberglass boat hull. Here’s what you’ll need:
-Fiberglass cloth
-Resin mixture (resin and hardener)
-Putty knife or spreader -Sandpaper -Measuring cup -Gloves -Eye protection -Plywood (optional)
Fiberglass Boat Repair Supply Checklist
- Fiberglass cloth or fiberglass mat
- Polyester resin or epoxy resin
- Hardener or catalyst
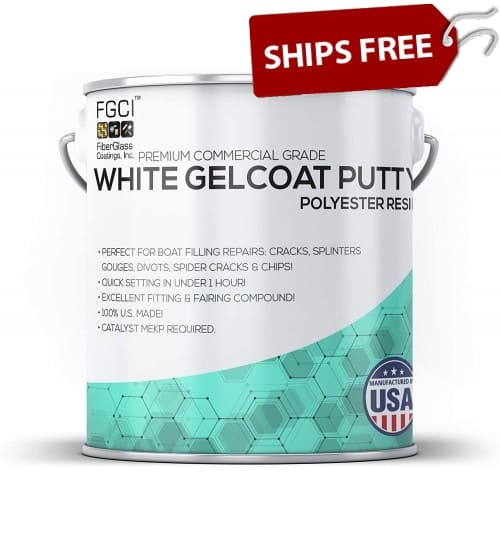
- Gelcoat paste, gelcoat repair kit, or marine filler
- Fairing compound for smoothing deeper repairs
- Sandpaper in multiple grits
- Mixing cups, stir sticks, spreaders, and gloves
- Primer, topside paint, barrier coat, or bottom paint when needed
Follow these steps to repair large holes in your fiberglass boat hull:
- If necessary, use plywood to create a temporary patch for the hole until the resin has cured. This will help keep water out of the hole while you’re working on it.
- Cut a piece of fiberglass cloth to size and lay it over the hole.
- Use a putty knife or spreader to apply the resin mixture over the fiberglass cloth, making sure to work it into any crevices.
- Allow the resin to cure for 24 hours before sanding down any excess material and removing any plywood patches.
- Your fiberglass boat is as good as new!
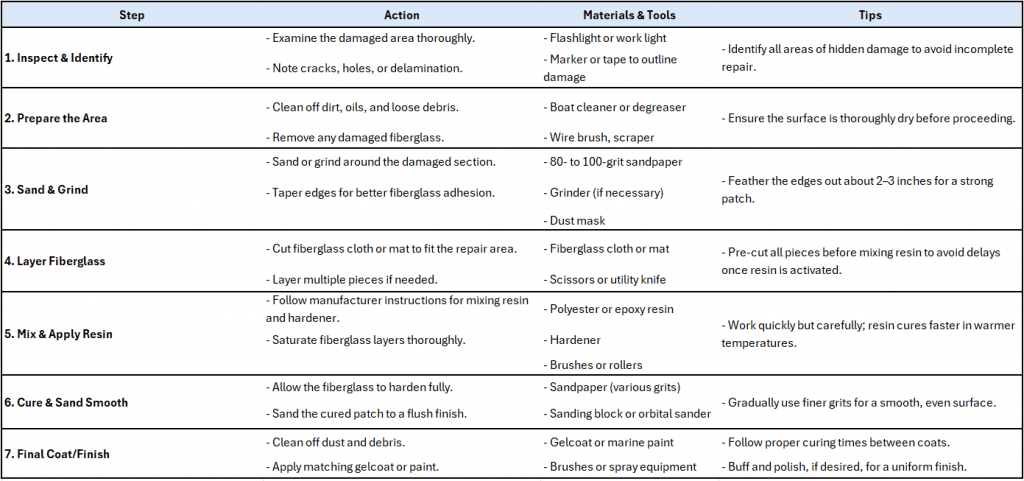
Performing each step carefully—from inspection to final finishing—ensures a strong, durable fiberglass repair and restores your boat’s structural integrity and appearance.
Conclusion:
No matter how experienced you are as a boat owner, sooner or later you’re going to need to make some repairs—and if you have a fiberglass boat, that means getting familiar with some basic repair techniques. In this blog post, we’ve walked you through everything you need to know about repairing small cracks and scratches, as well as large holes in your hull. So, whether you’re dealing with cosmetic damage or something more serious, now you know how to fix it!
If you have any questions about how to repair your fiberglass boat, please feel free to reach out to the Bottom Paint Store technical assistance team by phone at 888-505-2313, or via Live Chat found on the website. We have a wide selection of fiberglass and gelcoat putties, resins, restoration solutions, repair kits, and tools/materials.