Any boat cruising off shore needs an emergency ditch bag for unplanned situations. Being prepared means never assuming that rescue will come before you would need things in a bag, one can never predict circumstances or weather. Having a life raft or kit that comes with your vessel may not have everything you want or need as minimal gear is all that is included so building your own insures your needs are met.
The bag should be water resistant to insure it doesn’t fill immediately with water and sink. Purchase one that is yellow or international orange and you can attach reflector strips for added visibility with a flashlight. A throw bag can be back up as needed.
Clearly label the bag so everyone on board knows what it is keep it in a handy place.
Rescue items can include:
Functioning EPIRB (emergency position indication rescue beacon)
Handheld VHF radio (in sealed pouch with extra batteries)
Flares, water dyes, and/or smoke signals
Strobe Light/flashlight
Whistle/horn
Signal mirror
Survival Items can include:
Water (sealed packets better than jug)
medical kit
Food rations (high calorie bars or squeeze packets)
First aid kit
Extra medications
Patch kit for dinghy or life raft/ inflatable repair
Knife
Matches
Other items depending on space:
Handheld GPS
Solar blanket
Fishing gear
Sunscreen
Sunglasses
Binoculars
Life vest/inflatable PFD
Check your bag every season and before a long voyage for charged items and batteries needed. For added information on boat safety, please see the available DVD’s.
First Identify the paint that is there. Is it compatible?
If yes – Sand, Primer, Paint
If no – the previous coating needs to be taken down. Sand with 80 grit paper until the coating is gone. Sand blasting is not recommended because it takes away the aluminum itself.
How do you know if previous paint is compatible with Awlgrip? Perform this test:
Need a rag and some Lacquer thinner
Sand the surface with 80 grit sand paper
Apply lacquer thinner to the rag and hold it on the sanded area.
Put a piece of plastic on to to hold the rag so the Lacquer thinner doesn’t evaporate.
Hold rag for 35-45 min.
Remove rag slowly. Is surface bubbling or lifting? If no, scrape surface with the blade of a knife. If the paint comes off with the blade or the paint feels rubbery you have identified an acrylic based paint. Awlgrip may be applied on top of it. If the surface was bubbling or lifting, the paint is not compatible and must be removed.
II. Apply Awl-Wash Primer CF (Mix Part A and Part B) within 4 hours of cleaning the surface. This provides excellent adhesion to the aluminum surface. Awl-Wash CF can be overcoated with primers after 1 hour of application. Maximum recoat time without sanding is 6 months.
III. Apply a Primer to the Awl-Wash Primer CF. There are 2 main choices.
545 Epoxy Primer – Thin, building primer. Usually applied when there is no need to fill scrapes or gouges.
Awlquick – a medium build, primer/surfacer. Applied to a surface that needs to be filled where there are scrapes or gouges. Awlquick Base + Converter.
IV. Apply a topcoat.
Awlgrip – may be brush rolled or sprayed – usually lasts 7-10 years.
Awlcraft – must be sprayed only – usually lasts 4-6 years.
For more information on Awlgrip vs. Awlcraft, click this link.
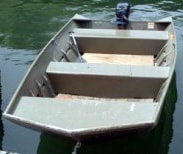
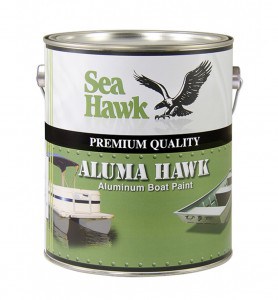
When painting a boat used for hunting/fishing, such as a Jon Boat, typically a flat finish is desired so you’ll want to use one of our camouflage paints. A primer coat is used to help the paint adhere to the aluminum surface and provides an extra layer of protection from corrosion. You may also use Aluma Hawk, which is a paint and primer in one.
The Aluminum Boat Paint Greenor Aluma Hawk (available in Black, Jon Boat Green, Blue, Sand, White or Aluminum Grey), will serve as paint and primer in one so no need to purchase a primer! Aluma Hawk is one of the easiest and most popular paints for your aluminum boat, and available in (white, blue, Jon boat green, black, aluminum grey, and sand). These are both a paint/primer in one that can be applied to most surfaces with little preparation needed. For more application details see our ‘how to paint an aluminum Jon Boat’ article.
How do you paint Aluma Hawk on a boat?
You can use a brush, roller, or spray gun. Most applications will need 2 coats of Aluma Hawk following the proper dry time requirements. No sanding is necessary between coats of Aluma Hawk if less than 48 hours between applying coats. If needed, MEK (Methyl Ethly Ketone) can be used for thinning, as well as clean up.
If you desire a gloss finish, look to theMega Gloss by Blue Water, available in quarts and gallons, is affordable, easy to apply, and only recommended for above the waterline. This topside paint works best in very thin coats and can be used on fiberglass, wood, aluminum, and steel; see the prep recommendations found on the product page on the “how to use” tab. The Mega Gloss Primeris recommended when applied to bare metal, if you have concerns about sealing your aluminum, see the Bottom Protect by Blue Waterfor a barrier coat. See herefor more application tips.
You have many options when painting aluminum. Your use of the boat, the allotted budget, and the amount of time you want to spend on the project may help determine the right paint for you. For more information see our ‘topside boat paint options’.
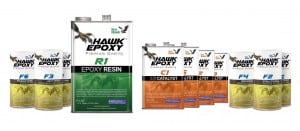
Below shows the comparison of the West System products to the Hawk Epoxy products. Hawk Epoxy is comparable to the West System with how it works and its uses. West System is known for A/B/C/D selection system size (Size A resin with Size A hardener) the Hawk Epoxy uses 1/2/3/4 (Size 1 resin with Size 1 catalyst). The pumps are sold separate with West System and Hawk Epoxy, this works where 1 pump of resin is mixed with 1 pump of catalyst, or more depending on instructions. This is just to make it easier and less chance for error for the customer and it doesn’t mean a 1 to 1 ratio because the pumps are calibrated differently and each pump size can distribute different amounts.
Please Note: This chart simply shows the likely equivalent product by brand. It is not recommended to mix the products brands.
R1 Epoxy Resin – a smooth, low-viscosity liquid epoxy resin. With a variety of Hawk Epoxy Catalysts, it can be cured under a wide range of temperatures and environmental conditions to form a high strength plastic with superior moisture barrier characteristics. Hawk Epoxy repair kit is available in four system sizes color coded on each label. Note: Mix ratios vary by catalyst. For optimal product utilization, be sure to choose the same Size for both the resin and catalyst. I.e Size 1 Resin with Size 1 Catalyst.
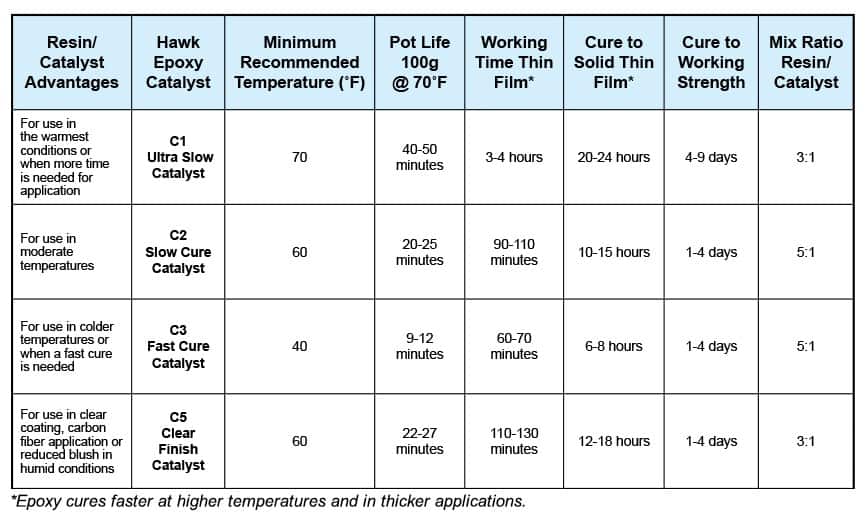
C1 ULTRA SLOW CURE CATALYST:Designed for use with HAWK EPOXY R1 Resin for construction and repairs with superior adhesion, strength, bonding, filling, and moisture barrier qualities at higher temperatures and for an ultra slow cure. Do not use under Sea Hawk marine wood varnish.
C2 SLOW CURE CATALYST: Designed for use with HAWK EPOXY R1 Resin for construction and repairs with superior adhesion, strength, bonding, filling, and moisture barrier qualities at higher temperatures and for a slow cure. Do not use under Sea Hawk marine wood varnish.
C3 FAST CURE CATALYST: Designed for use with HAWK EPOXY R1 Resin for construction and repairs with superior adhesion, strength, bonding, filling, and moisture barrier qualities at cooler temperatures and for a fast cure. Do not use under Sea Hawk marine wood varnish.
C5 CLEAR FINISH CATALYST: Designed for use with HAWK EPOXY R1 Resin for very clear fiberglass cloth and coating applications with exceptional moisture barrier characteristics. Perfect for natural wood and carbon fiber clear coats with no blush. Longer working times in very warm temperatures. May be used under Sea Hawk marine wood varnish.
TIP* For easy accurate measuring be sure to use the Hawk Epoxy Pumps that are calibrated to dispense the correct amount of resin and catalyst. This is much easier and leave little room for mistakes.
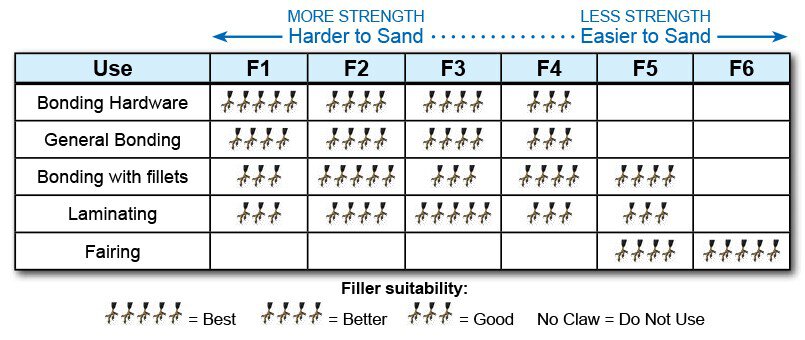
Next choose the best Hawk Epoxy Filler depending on the application:
F1 High Load Adhesive Fiber Filler– Thickens to a light grey color creating an easy to use adhesive designed for bonding hardware and other applications with dissimilar materials. This mixture will maximize bond strength for anticipated high loads.
F2 Structural Adhesive Filler– Thickens to an off white color, creating a general purpose thickening additive for bonding, gap filling and filleting. Mix to a workable consistency allowing sag-free and easy flow properties for vertical and overhead applications.
F-3 Light Density Adhesive Micro Fiber Filler – Thickens to an off white color. Great for bonding many substrates, especially wood. The mixture also creates a multipurpose adhesive for many other substrates in addition to providing excellent substrate wetting and penetrating characteristics. Increases impact and abrasion resistance.
F4 Bridging Adhesive Filler – Thickens to a brown color, creating an easy to use adhesive with excellent gap filling and filleting qualities. This mixture blends with many different types of wood to allow for a natural looking fillet or gap fill.
F5 Light Density Fairing Filler– Thickens to a reddish brown color, achieving an easy to sand and carve fairing compound while still remaining strong and light weight.
F6 MicroSphere Fairing Filler – Thickens to a white color, creating a lightweight fairing compound for small to large areas. This product holds a feathered edge very well and is suitable for nearly every substrate. This closed celled structure can also be used for increased acoustic and thermal insulation.
How to Fix a Leaking Seam or Rivet on Aluminum Boat
As aluminum boats age they show various signs of wear and tear. One of these signs may be a leaking seam or rivet. Over time, rivets can stretched and loosen, causing a gap in the hull integrity and this results in a leak. The solution to this problem is fairly simple and may be fixed at home using just a few tools and know-how. So, how should this problem be addressed?
Locate the Leaking Rivet or Seam
The first step is to find the exact seam or rivet that needs repair. To do this, put the boat in water and observe carefully. You could also put water inside the boat and see where it allows the water to escape from.
Assess the Damage
The second step is assessing the extent of damage to the rivet or seam. If the seam is too wide to be filled or caulked, it will need additional rivets in combination with a sealant product. If the damage is easily visible a sealant or caulk will be sufficient.
Choose a Sealant or Epoxy Product
There are hundreds of products out there that claim to fix leaks and seal cracks. How do you know which to choose? The Bottom Paint Store has done most of the hard work for you and can confidently recommend 2 products that really work.
If your hull is bare aluminum you can cover the entire surface with a high build epoxy primer to help seal and protect it such as Tuff Stuff. For application details see our link for application of a marine epoxy.
Hawk Epoxy is an excellent product to repair aluminum hulls. We recommend getting one of the Hawk Epoxy Kitsthat will contain everything you need for filling in the aluminum. Hawk Epoxy is a versatile product that can be used for many other application too. Everyone should own this kit! See video for mixingand selecting fillers.
Another option is G/Flex 650 Epoxymade by West System. This liquid epoxy is more flexible and versatile than regular epoxies and will adhere to almost any surface. The bond that it creates can absorb shock, vibration, expansions and contractions. It will fully cure in 24 hours. Also, West System has created a detailed and comprehensive set of instructions for a wide variety of applications. They can be found atthis linkand below:
Now that your leaky rivets and seams have been repaired, you are ready to paint! Check out this How To Articlefor more information on how to paint your aluminum vessel. Aluma Hawk is a great option or any of our antifouling copper free paintfor aluminum.
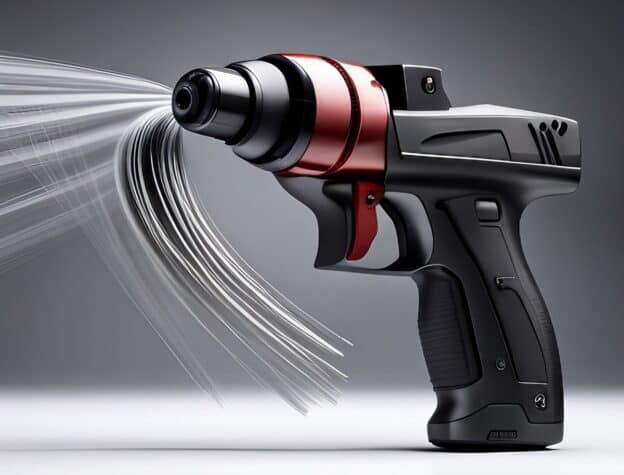
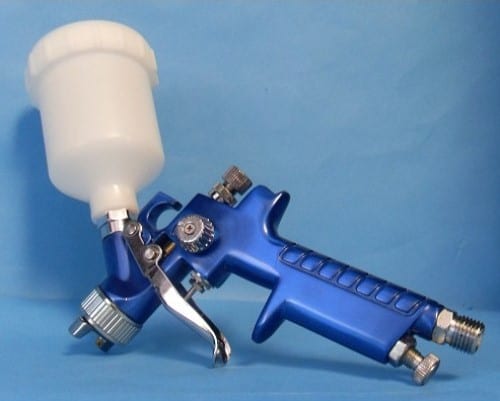
What Size Spray Tip Should I Use with my Spray Gun?
It’s crucial to get the right spray gun nozzle tip size for your project for the ultimate professional results. But how do you know which one to choose? Our team of experienced painters has identified the five key factors that need to be taken into consideration when selecting the right nozzle tip size for each job. We’ll make sure you have all the advice and guidance needed to make an informed decision, so your project can look amazing with great coverage and finish!
KEY TAKEAWAY
1. Get the perfect size of spray gun nozzle tip to suit each job requirement.
2. Benefit from our comprehensive step-by-step guide that simplifies the selection process.
3. Access our expertise and knowledge to make the right choice without hassle and confusion.
4. Avoid costly mistakes by selecting a nozzle tip of appropriate size according to your needs.
5. Take advantage of our tailored advice and insights to enhance the efficiency of your work.
There are three main factors to consider when determining the size tip that will produce the best results.
First, examine the coating that will be sprayed. Put simply, heavier coatings will require a larger orifice size than lighter ones. For example, primers are usually thicker than the accompanying paint so you should use a 1.7 or 1.8 mm tip to prime most surfaces. Most painters will stay in the range of 1.2 to 2.0 mm unless the paint being applied is specialized. (See chart below.)
The next thing to consider is your project surface area. This determines the appropriate fan width that your sprayer will produce, that is, the shape in which the product will leave the gun nozzle. Airless spray guns have more control over the fan width than conventional spray guns because the coating is forced through the tip without being atomized by air. This causes the tip to have a large impact on the fan width and shape. Most boat projects consist of large surfaces and so a wide fan will increase the spray coverage and also provide the ability to spray close to the surface without too much build up. Smaller surfaces will require a small fan width to reduce overspray. This also makes it possible to spray further away from the surface without too much falloff because the fan is more focused.
Lastly, consider the spray gun that is being used. Make sure that the spray tip you plan on using will be supported by the gun. Most spray gun manufacturers will provide this information in their product overview. The Bottom Paint Store distributes ES Manufacturing Gelcoat Spray Guns. The ES G830 gun will support a range of 0.8 – 2.0 mm. The ES G100and G200gelcoat spray guns support a range of 0.8 – 7.1 mm tips. If you aren’t sure about your gun’s supported sizes, check with the gun manufacturer.
Common Spray Tip Sizes and Their Uses
Tip size (mm)
Commonly Used for
0.8
Parting Films – PVA – very fine mist
1.2
Clear Coats – super fine finishes
1.4
All Around Tip – clears, base coat, single stage paints
1.6
General Purpose – light to heavy viscosity materials
1.8
Primers – will apply primer quickly
2.2 -2.5
Gel Coats and Resins – for thick resins and not paints
By considering these five factors, you can ensure you select the appropriate spray gun nozzle tip size for each job. If you have any questions or need additional guidance on selecting the right size, the experts at the Bottom Paint Store are here to help.
Typically the clear coat on a bass boat is meant to protect the metalflake. You can choose a clear paint or clear gelcoat.
Clear gelcoat is typically what bass boats use at the factory for UV protection over metalflake but gelcoat isn’t as easy to use as paint. Gelcoat typically covers 48 sq feet applied at 18 mils thick per gallon.
We are often asked if you can you gelcoat over gelcoat? If the surface is already covered with gelcoat, or if the surface is a fiberglass, or polyester resin, then you can. It is relatively easy to to apply gelcoat on top of gelcoat if you follow the instructions. If the surface is paint, then the paint would have to be removed before applying the gelcoat. It is important to remember not to completely rely on gelcoat as it you may still need to make repairs to your bass boat after applying gelcoat.
Has your boat developed a blister or two? Don’t worry too much! A blister is not a serious issue. Blisters very rarely get so bad that they cannot be repaired. You can even repair them yourself!
Make sure the blisters are thoroughly drained and grind them deep enough to remove any damaged material beneath the gelcoat. Increase size of ground area as needed until all the laminate around the blister is sound. Clean the entire area and allow it time to dry.
The filler recommended for blister repair is F6 MicroSphere Fairing Filler. F6 MicroSphere Fairing Filler thickens to a white lightweight fairing compound for small to large areas.This creates an easy to sand putty that will help fill in transitions and hull imperfections. Apply using a putty knife, spatula or trowel. Spread smoothly on the surface in a 1/8″ – 1/4″ layer using heavy hand pressure to displace air bubbles/voids. Try to force the material into holes or joints and smooth to the thickness needed.
Before applying the Hawk Epoxy, the hull must be very dry. Make sure the hull moisture is under 15% by using a moisture meter. Wipe down the entire area with clean rags and acetone. This will remove any remaining contaminants on the hull.
Hawk Epoxy is a low viscosity epoxy system that makes fiberglass repair easy for everyone! Equipped with a wide variety of Catalysts and fillers, you can mix up the exact epoxy batch needed for almost any job. For more information on how to mix Hawk Epoxy,click this link. Mix only enough Hawk Epoxy to use in 5-10 minutes. Apply the Hawk Epoxy to the hull using the Roll and Tip method. Use a roller to apply the epoxy and then use the tip of a high quality brush to smooth the epoxy evenly. The roller should be lint free and non-wicking. Any fibers that get in to the epoxy could compromise the integrity of the seal.
Apply the second coat when the first coat is tacky to the touch. Your finger should leave an imprint but not lift any of the epoxy coating. Allow the second coat to dry fully. Once it is completely cured, wash the repaired area with soap and water. The repair is now ready to be sanded and painted with Sea Hawk bottom paint. If redoing the hull apply Tuff Stuffprimer, followed by bottom paint.
If the blister has damaged the fiberglass, that will need to be repaired with fiberglass clothcut to match damaged area.
The video below is from Sea Hawk Paints and demonstrates how to seal a fiberglass hull using the Hawk Epoxy System.
Captain Jacks Premium Varnishhas been designed for the highest quality work, with outstanding results and durability. A combination of high quality pure phenolic modified tung oil provides excellent weathering performance and will enhance the richness and beauty of the wood with classic bright work appearance. BEST VALUE!
Awl-Spar Classic Spar Varnish (with reducer) is the highest quality classic spar varnish with state of the art ultraviolet inhibitors and absorbers used for brightwork protection against water and weather. It has excellent durability, and is fast dry, fast recoat for quick build up. For above waterline use only.
Cetol® Marine Gloss with Next Wave™ UV-absorbing technology is a durable clear gloss protective wood finish, developed as a topcoat for Cetol Marine, Cetol Marine Light and Cetol Marine Natural Teak. Next Wave technology is the next generation of Cetol Marine from Sikkens with a unique UV-absorbing package, which is specialty resins and advanced UV absorbers that provide greater protection, durability and longevity. Cetol Marine Gloss provides a high gloss, hard wearing, UV protection and an easy to clean finish. It can be used where a gloss appearance is preferred on top of Cetol Marine, Cetol Marine Light and Cetol Marine Natural Teak. Do not use on decks.
Marine Spar Varnish is a super clear, high gloss varnish for exterior and interior use on new or previously varnished surfaces subject to abuse from parching sun, fresh or salt water, severe weather conditions or abrasion. Formulated with an ultra violet screening agent, Marine Spar Varnish will hold its gloss on exterior surfaces far better than conventional varnishes. Excellent for use on boats doors, furniture, porches, bar tops, or any other surface where a durable clear gloss finish is desired.
Here’s an overview of the key differences between Awlgripand Awlcraft 2000, (each one has its own advantages and disadvantages), so you can make an informed decision about which is right for you.
KEY TAKEAWAY
1. Awlgrip provides superior gloss, color consistency, and durability due to its two-component urethane formula.
2. Awlcraft 2000 offers a single component water-based formula that’s easier to apply and can be buffed and polished for improved shine retention.
3. Awlgrip is more expensive than Awlcraft 2000 but provides better protection against UV rays, chemicals and abrasion over time.
4. Awlcraft 2000 requires less prep work compared to traditional, solvent based topcoats like Awlgrip, making it easier and faster to apply with minimal odor or cleanup needed afterwards.
5. Both products provide excellent resistance to fading, chalking, weathering, and corrosion when applied properly in the right environment.
Awlgripis based on a polyester urethane resin and Awlcraft 2000 is based on an Acrylic Urethane resin. At the surface they seem very similar, but at the molecular level they are vastly different. Polyester molecules are much smaller than acrylic molecules. This means that at any given volume, there can be more polyester molecules than acrylic and this allows polyester films to be more dense and tough. Awlgrip has more abrasion and chemical resistance than Awlcraft and is usually more rigid.
Awlcraft, on the other hand is not without its own advantages. It is generally easier to apply. The larger molecules and less dense film of the acrylic allows for faster drying and therefore less dust entrapment in the finish. Both urethane topcoats will resist staining and provide a long lasting gloss. It is best to consider cure times, reparability, application methods, chemical resistance, as well as abrasion resistance when deciding which topcoat to choose.
Which is more suited for buffing?
Both Awlgripand Awlcraft 2000 urethane topcoats have a protective resin layer. This layer is the first line of defense against UV light and abrasive damage. Underneath this resin is a layer of rich pigment particles that give the paint its bright shine and color. Awlgriphas a thicker protective resin layer and when the polyester is scratched, it is necessary to cut deeply into the resin to repair it. Buffing the surface leaves the pigment exposed and compromises the performance of the paint in the long run.
Awlcraft has a softer finish, due to the less dense molecular structure, and thus has a lower melting point. When this acrylic urethane is buffed, the resin is able to flow together and does not require cutting the surface as deeply. So, Awlcraft 2000is more suited for buffing and Awlgrip will require a Fairing Compound.
Over time contaminants can build up and cause the finish of yourAwlgrip/Awlcraft 2000paint to appear dull. You can restore the gloss of a freshly painted boat and prevent the premature aging caused by contaminates by following these steps:
Wash your Awlgrip or Awlcraftsurface with Awlwash mixed with water (1-2 capfuls in a bucket of water for washing) using soft, non-abrasive cloths and rinse well. Doing so on a regular basis (once per month) will help control dulling buildup.
Solvent cleaning of Awlgriponly: Awlprep and Awlprep Pluscan be used to aid in removal of stains or markers and to soften or remove heavy build ups of grease and grime, or spray paint on the topcoat and toluene, lacquer thinner, M.E.K., acetone can be used as well.
Solvent cleaning of Awlcraft 2000 and Awlgrip HDT only: Awlprep or mild solvents (mineral spirits, xylene, kerosene and diesel fuel) should be used.
In both cases apply solvents with soft cloths and do not allow the chemicals to dry on surface, puddle or soak. Wash with Awlwashto prevent remaining solvent to attack paint. As always when working with solvents, test in an inconspicuous area first.
Distilled white vinegar and hot water will aid in removing salt stains, always follow with Awlwash.
Protecting the Surface
Awlcarecan be applied to the surface like a wax to remove pollutants (such as diesel soot), protects the finish and leaves a glossy shine. Awlcare should be applied regularly to protect against pollutants. It can be removed with Awl-Prep Plus (Awlgrip only) when it’s time to repaint. What to avoid with Awlgrip and Awlcraft 2000:
Abrasives
Polishing compounds
Traditional waxes as they tend to break down rapidly, yellow and attract dirt
Trapped moisture from supplies as paint can blister or delaminate
AVOID:
Avoid Traditional Waxes
Awlgrip topcoat only: Regular applications of Awlcare will help temporarily seal and restore shine to painted surfaces that have become porous due to age or mistreatment, helping to maintain a satisfactory appearance until there is time to repaint.
Awlcraft 2000 and Awlgrip HDT: Awlcare Protective Polymer Sealer will help maintain the gloss on these finishes with regular applications, especially those which have been buffed or polished. Remember, Awlcare is only applied and buffed by hand. Never apply or buff Awlcare with a machine.
Avoid abrasive and polishing compounds
Avoid strong solvents (eg. lacquer thinner, M.E.K., acetone) to clean Awlcraft 2000, Awlgrip HDT, Awlbrite Clear or Awlspar varnish.
Bilge pumps are devices used in boats to remove unwanted water from the bilge compartment of a boat. (The bilge is the lowest compartment of the inside hull of a ship.) Whether you have a sailboat or powerboat, they are as important as lifejackets in an emergency. If there happened to be a collision that caused a leak, having a bilge pump actively removing water from the boat’s compartments could buy you precious time. However, as many experience boaters know, you cannot rely on a pump to keep your boat afloat indefinitely.
Main Types of Bilge Pumps
Non Automatic:
Non Automatic pumps are controlled by means of a float switch and/or a manual panel switch. The panel switch allows you to control the pump remotely. Using the float switch is beneficial because the pump only runs when the water reaches a certain level. After the water is pumped out and the level goes back down, the pump can shut off. The most common type of non-automatic pump is the Electrical Submersible Bilge Pump. They are easy to install, very effective, and have low amp draw. Also, the motor cartridge can be easily removed to clean out debris and other obstructions.
Automatic:
Automatic Bilge Pumps function without the use of a float switch. It uses the principle of impeller resistance to sense if any water is present. Depending on the brand, the pump will automatically turn on every 2.5 minutes to check for water. If water is present, the pump will know about it from the slight pressure on the impeller as it spins. It will continue to run until all the water has been pumped out. The voltage needed for both automatic and non-automatic pumps will vary from 12V – 32V, depending on the size and capacity of each pump.
Manual:
If the boat’s electrical system goes out, a manual bilge pump would be invaluable. They are able to move lots of water effectively, but can be tiring to use. Water is heavy, and that weight is compounded when moving it some distance. When installing these sorts of pumps, take into consideration the ease of access, and imagine how it will be used. Putting a manual pump in a tight, cramped space may hinder your use of it when it is needed.
Which Pump is best for your boat?
The first thing to consider is the size of your boat. Smaller boats will need a good size pump because the bilge compartment is smaller and will fill up with water quicker than larger boats. Some boats have separate bilge compartments. If that is the case, it would be a good idea to have a pump for each section.
Most electric pumps are rated for the number of gallons that they can pump in an hour. (G.P.H.) It is recommended to select a pump the largest model that is still practical for your boat. Also consider the size of your existing output hose and the capacity of your boat’s wiring and battery. Don’t hesitate to ask an expert when making these decisions. You can talk to a pump manufacturer and get their informed opinion.
Suggested Pump Capacity:
Boat Size
Number of Pumps
Pump Output in GPH
16’ – 20’
2
2500
21’ – 26’
2
3000 – 3500
27’ – 35’
3
3500 – 4500
36’ – 42’
3
6000
43’ – 49’
3
8000
50’ – 59’
4
9000 – 10,000
Where to place Your Bilge Pump(s)?
It is always a good idea to have more than one bilge pump onboard. Many boaters have a backup pump installed in the same bilge compartment. The first pump may be smaller and positioned where the majority of water will pool inside. The secondary pump may be a bit higher inside the hull. This pump should be bigger than the first, because if the boat has collected that much water the main goal is to get it out as fast as possible.
When deciding where to place your pumps, observe where the water accumulates in the hull when the boat is at rest as well as in motion. For powerboats the water tends to flow toward the aft when the boat is moving. Sailboats tend to accumulate bilge water in the middle.
Bilge Pump Installation Reminders:
Follow the manufacturer’s specifications – especially on wires sizes
Use a vented loop – if the thru-hull discharge can be submerged, a siphoning effect can fill your hull instead of empty it.
Keep discharge hoses short – long hoses make the pump work harder than it has to.
Use waterproof connectors – any connections in the bilge area should be protected.
Use smooth bore hoses – corrugated hoses are cheaper but not effective for pumps.
There are many different boat paints and qualities, generally the more you spend the better the results. There are a variety of types including topside and bottom paints. Topside paints are meant to be used above the waterline and will not hold up under water. Bottom Paints (also called antifoulants or antifouling coatings) are pesticides that are only used below the waterline when you are trying to stop growth from occurring while your boat stays in the water over long periods of time. See Related Article>: Do I need Bottom Paint?
The type of paint you choose for your boat will depend on the type of boat you have and the environment in which it will be used.
There are two main types of boat paint: antifouling and topside. Antifouling paint is designed to prevent marine growth from attaching to the hull of the boat, while topside paint is designed for the superstructure of the boat, such as the deck and cabin.
If you plan on using your boat in saltwater, it is important to choose a paint that is specifically designed for saltwater use. Saltwater is much more corrosive than fresh water, so a saltwater-specific paint will be more durable and longer lasting.
Using your boat in freshwater, will require a different paint. There are a few different types of paint you can choose from. Freshwater-specific paints are available, but they are not necessary if you do not plan on using your boat in saltwater.
Duralux High Gloss Marine Enamel is affordable and easy to apply and only recommended for above the waterline or moderate use on the bottom (a day or so in the water, not extended periods). This topside paint works best in very thin coats; see the prep recommendations found on product page on “how to use” tab. Duralux marine enamels do have a color offering in a flat finish, those are limited to their camouflage paint colors. Marine Alkyd Enamels like Duralux are effective and low cost.
The best performing and hardest application is either Awlgrip or Awlcraft 2000. These require a more technical application and require the use of proper primers, catalyst and thinners with each application.
Typically when people discuss bottom paint on a boat they are referring to Antifouling paint. Bottom paint prevents growth of organisms that attach to the hull and can affect a vessels speed, performance, and durability when boat is kept in the water for extended periods of time. If you don’t have that problem, you may not need bottom paint. Antifouling bottom paint typically has a flat, dull finish that is used below the waterline.
Once you have selected the type of paint you need, you will need to select a color. The color of your boat should be based on personal preference, but it is important to keep in mind that darker colors will absorb more heat than lighter colors.
Your boat paint choice ultimately depends on your budget and which boat paint colors meet the needs of your boat and usage.
When it comes to boat repair, epoxy and polyester resins are both popular choices. But which one is the best option? Epoxy resin is known for its strong bonding properties, making it ideal for repairing cracks and holes. It also has excellent waterproofing qualities, making it ideal for boats that spend a lot of time in the water. Polyester resin, on the other hand, is a bit more flexible than epoxy, making it better suited for repairs that require some give. It’s also less likely to yellow over time, making it a good choice for boats that will be spending a lot of time in the sun. Ultimately, the best choice of epoxy or polyester resin for boat repair depends on the type of project you are tackling.
Every household should own a Hawk Epoxy Kitlike this. You can use it to repair anything around your home or own your boat. This kit comes with the resin, catalyst and your choice of filler. Just mix them together and you have an excellent bonding, filling, or adhesive paste.
FGCI General Purpose Resin is used for laminating with fiberglass, kevlar and carbon reinforments. It can be tinted with pigment up to 3% and best results are when used at 70-85 degrees F. Hardener varies depending on thickness of fiberglass, the more fiberglass the less hardener as you will generate more heat-never go below 1%. Complete cure needs sanding aid added to resin or PVA while still hot.
Polyester resins are unsaturated resins that are combined with hardeners, such as MEKP.
Polyester resin is used more for fiberglass lay-up or if you’re going to finish a repair with gelcoat, as the polyester resin will bond to the gelcoat better than epoxy. It is also cheaper than epoxy and a great choice when casting deep molds.
Various Types of Polyester Resin:
Boatyard Polyester Resin is a non-specified resin that contains different types of polyester resins and wax. Boatyard Polyester Resin is not recommended for use below the waterline. The material may cure hard and tack-free due to the included wax. If so, the product will need to be sanded prior to adding another layer in order to promote good bonding.
Clear Casting Polyester Resin is used to cast small objects into a mold. This method can be used to create sculptures, crafts, or industrial prototypes.
Surfboard Polyester Resin is Clear & wax free. It is ideal for building & repairing surfboards because it cures to an almost clear color when applied in a film. Also it highlights underlying graphics.
Iso Marine Resin is based on isophthalic acid. This resin is a step above the general purpose polyester resin and that is reflected in the price. Iso Resin is stronger, more durable, and is the best choice when applying in corrosion environments or elevated temperatures.
Vinyl ester resins are formulated with a base of polyester resin strengthened with epoxy molecules (a hybrid form of polyester and epoxy and aiding for gelcoat to bond with epoxy) and also use peroxides, such as MEKP, for hardening. These are cheaper than epoxy resins and more expensive than polyester. Ideal temp for use is 77 F, not applied over 1/8th thickness or it will generate too much heat.
Vinyl esters are more tolerant of stretching, less likely to show stress cracking and more resistant to water penetration. Vinyl ester is the choice when improved resistance to moisture is the goal (like repairing a blistered hull).
Long term water exposure (hull or water tank) or if impact resistance is important vinyl ester is usually chosen.
Epoxy resins are cured with the addition of a hardener. Unlike the polyester and vinyl ester resins, cured with a small amount of catalyst, epoxy resins usually require a lot more, often 1:1 or 2:1. A epoxy resin is the most expensive of these.
Epoxy resin has the best bonding strength as it will bond dissimilar or already cured materials for strong, reliable repair work. This is the most expensive resin but offers the most in its ability to flex, prevent delamination and ease of repair work.
If doing a repair and not overlaying with gelcoat then the epoxy will perform best as it tends to act as a stronger “glue” for the patch to the surrounding surface.
Laminating Epoxy Resin is the correct choice for repairing boats. It is super durable and has high resistance to water. Also, it has very good adhesion to a variety of surfaces including metals, plastics, fiberglass, wood, and glass. The ratio is well suited for use with high-solids marine, maintenance coating and bonding agents. The cure time is three days in the sun or a week if it is not. Set time changes with activator and film thickness. If there is an excessive amount of activator applied , the laminating epoxy will be soft and rubbery. In contrast, if there is not enough activator, the epoxy will not cure hard. Laminating Epoxy is available in 3 different ratios that provide different working and cure times.
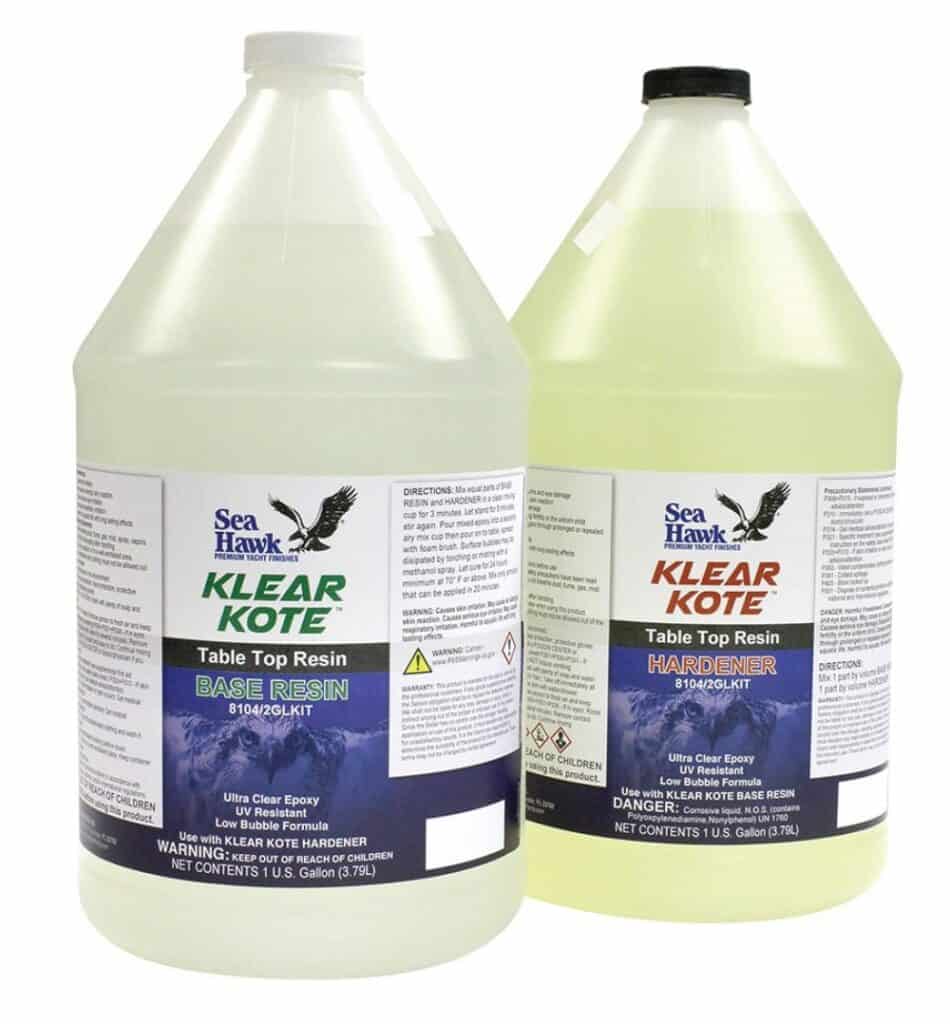
A Premium Commercial Grade Clear Epoxy Resin – Klear Kote Epoxy Resinis used extensively in coating surfaces and in table tops where a clear, hard and durable coating is required. Commonly seen on bar tops and restaurant tables. Easy to use 1:1 mixing ratio of resin and hardener. Items coated with it will become permanently preserved and protected for your enjoyment throughout a lifetime. The epoxy resin will not exhibit blushing or sweat out under high humidity conditions.
Epoxy resin kits are sold in two parts, A and B, which should be applied in two stages. The first stage is referred to as the seal coat. The seal coat is brushed on in a thin layer and is used to seal any pores on the surface and prevent air bubbles from forming in the following flood coats. This stage is followed by the flood coat, which will flow and self-level, clean brushes or squeegees can be used to help spread the epoxy. Flood coats are applied in 1/8″ layers at a time, as many as desired can be applied, however, one to three coats is average for most table or bar coatings. Resin kits are often applied on bar tops and tabletops in many bars and restaurants.
Superbond Standard Epoxy Glue
Superbond Standard Epoxy Glueis a two-part, 1:1 epoxy adhesive that has a Vaseline consistency. The product adheres to nearly everything and is a favorite among woodworkers. It’s offered in a fast curing agent, giving 8-15 minutes of working time; a medium, giving 20-30 minutes, and a standard, offering 30-45 minutes. SuperBond is offered in sizes from ½-pint tubs all the way to 5-gallon pails.
Rot Stop Epoxy
Rot stop epoxy is a 2-part epoxy that is 1:1 ratio and is very simple to mix. The coverage is similar to other epoxies, and like other epoxies, the product does vary in thickness based on temperature. The advantage of Rot Stop is it is NOT affected by moisture, making it excellent for deck or flooring and cracking repair, especially moisture damage.
See catalyst chart for mixing guidance:
The weight of MEKP is 1/125 grams per CC. 30 Drops is approximately equal to one CC (Cubic Cementer) NOTE: Using drops for catalyst is only an estimate. In Critical applications MEKP should be measure by using CC’s or Fluid Ounces which are volume measurements. The percentages in the chart: 1% thru 2% are percentages of gelcoat by weight.The CC’s and OZ’s values in the chart have been converted from weight of MEKP to volumes of MEKP.
Gelcoat and resin spray guns are ideal for large surface spraying, such as new mold construction, composite refinishing and large boat surfaces. Look for a resin gun with a blue die cast body which will ensure a long life. Most HVLP cup guns use nylon flat seal just behind the threads that the air cap attaches to.
If you have used a spray gun with a nylon flat seal just behind the threads that the air cap attaches to and cleaned it with acetone, the seals disintegrate so it is best to use one with a plastic seal.
According to Practical Sailor Magazine, March 2013 issue, this topic was discussed. It is generally regarded that after 72 hours of exposure to air that hard bottom paints will oxidize and lose antifouling properties but test are showing otherwise. Of course you should always check with the manufacturer of your paint choice below are the guidelines to reactivate hard paint:
Launching of newly painted boats may be delayed up to 60 days after painting without sacrificing antifouling performance.
Boats painted between two and 12 months prior to launch date must be scuff-sanded with 220-grit production paper or abrasive pad before launching.
Boats painted more than 12 months prior to launch date must be lightly sanded with 100-grit production paper and recoated before launching.
Boats in the water for less than 24 hours (e.g. for in-the-water water testing) should be pressure washed lightly to remove dirt, salt or other contaminants and allowed to dry. These boats should still be considered newly painted and may be launched up to 60 days after the date of painting.
Boats in the water for more than 24 hours, but less than 30 days, should be pressure washed when hauled, then lightly sanded with 220-grit production paper immediately before re-launching. If necessary, launching may be delayed up to 60 days after the bottom has been sanded. Note: Boats re-launched within 72 hours of haulout do not need to be sanded before launching.
Boats in water for more than 30 days should be pressure washed when hauled, lightly sanded with 100-grit production paper and recoated with antifouling paint, even when re-launching will take place within 72 hours.
If there isn’t enought hard bottom paint on the surface it could flake off with sanding due to the thin layer.
There are many different topside boat paints and qualities, generally, the more you spend the better the results. See the below the waterline paints for water exposure.
Blue Water Mega Glossis affordable and easy to apply and only recommended for above the waterline only. This topside paint works best in very thin coats; see the prep recommendations found on the product page on the “how to use” tab and if the Blue Water Mega Gloss Primeris needed.
Popular color options can also be found with the Interlux Brightside,commonly used for topside gloss surfaces with moderate water exposure. Also, Interdeck white paint with added non-skid is perfect for a white slip-resistant deck.
Duralux offers some camo paints as well as the high gloss marine enamel option. For use on aluminum and wood, a primer is recommended for the best adhesion.
In flat paint/primer in one option, you’ll find the Aluma Hawk. This is extremely popular for hunting and fishing boats and easy of use in white, blue, sand, aluminum gray, Jon boat green, and black.
The best available boat paint for the topside with the best finish is Awlgrip, most expensive but best results and loved by customers. Some of the Awlgrip paints can be brushed or rolled but others must be sprayed. Awlgrip marine paint also requires a little more “do it yourself savvy” to apply these paints, and require the correct activators and reducers when applying. The manufacturer of Awlgrip recommends it for use only above the waterline and by professionals.
Your topside boat paint choice depends on your budget, the durability needed and the amount of time you want to spend on your boat paint application.
Most of the paints above do exceptionally well with brush and roller application. Be sure to choose a solvent-resistant, high density closed cell size foam roller. This minimizes the formation of bubbles in the surface that can happen with mohair or large cell foam rollers. These paints typically do better with thinner application and more coats may be needed. Using this method is commonly referred to as the roll and tip method and works well when two painters work side by side.
When applying by brush use the largest brush that is practical for your job. Long flexible bristles are best for gloss paints and holding the brush at a 45-degree angle minimizes brush marks with an even spread. A disposable foam brush is favored for small touch-up jobs.
Paint application tips:
Clean or change brushes every 20 minutes
Stir the can during work
Paint on warm, dry mornings as cold weather retards drying and dampness will spoil the gloss.
Use a worn brush for the final coat for fewer brush marks.
A lot of factors contribute to what paint is best for your boat:
Are you painting the entire boat, or just the bottom? Is the boat in fresh water or salt water? Is your boat trailered?
What is on the bottom of the boat now: bottom paint, topside paint or gelcoat? Once an antifouling bottom paint has been applied only antifouling paint can go over it (unless you remove it). Gelcoat application is recommended over fiberglass, most resins and gelcoat. It can have difficulty adhering to other surfaces.
For topside only the Duralux Marine Enamel is an economical choice. It has several colors to choose from and features easy application.
Gelcoat is usually what is “original” to most boats; a bass boat will have metal flake mixed in. We sell metal flake that can be added to gelcoat or paint but we don’t sell any with it already mixed in.
Ablative bottom paint can help with the slime, will wear away slowly over time, and it is suitable for trailered boats. Bottom paint is applied below the waterline only.
If you need assistance selecting the right boat paint for your needs feel free to call our technical support team Monday-Friday 9am-5pm EST 888-505-2313.
Most of the time when bottom paint is considered on a boat it is Antifouling paint. Bottom paint blocks growth of organisms that attach to the hull and can impact a vessels speed, performance, and durability when the boat is stored in water for extended periods of time. Antifouling bottom paint usually has a flat, dull finish that is used below the waterline. If you don’t have this challenge, you may not need bottom paint.
If you don’t have a growth problem or would like a nice shine to your boat’s bottom look to our other items like gelcoator a topside paint for moderate water exposure or an aluminum paint with no antifouling agents. Gelcoat adheres to most gelcoats or fiberglass/resins, see how to apply gelcoat. A boat bottom with antifouling will need to have it removed via sanding, sandblasting or bottom paint removerbefore a different type of paint will adhere.
There are generally two types of bottom paint both of which have several variations that create a multitude of products in the market place. The two different types or categories of bottom paint include hard bottom paintand ablative bottom paint.
Hard bottom paint is bottom paint that is a hard modified epoxy. After you apply hard bottom paint it is very durable and does not wear off.Hard bottompaints typically have a higher ratio of pesticides (usually copper) in them that are exposed in the outer surface of the bottom paint coating. As time goes by, the coating oxidizes and becomes less effective in combating marine growth. Hard bottom paint is generally used on boats when the boat sits for long periods of time without moving at all, or there is little movement of water (current/ tide) around the boat. You should not use a hard paint if you boat comes out of the water such as on a trailer or a lift. After 72 hours, the hard bottom paint will oxidize on the outer surface from the air and becomes ineffective. If you are trailering your boat, or keep it on a lift you should always use ablative bottom paint.
Ablative bottom paint, also known as self- polishing bottom paint, is softer and allows the coating to wear off at a controlled rate. Much like a bar of soap, once the boat moves in the water or there is a current and or tide, the outer layer slowly wears away. The wearing away of the self-polishing bottom paint allows for new, unoxidized paint to be exposed. Therefore, if you are trailering your boat, or it comes in and out of the water for any reason, the paint will oxidize within 72 hours. However, once placed back in service, that oxidized ablative paint wears away and exposes a new fresh outer coating with active protection. Ablative bottom paint is a newer technology then hard paint. It is the preferred bottom paint of most users since it typically lasts longer and continuously exposes a new active outer coating that protects against marine growth.
How long does bottom paint last on a boat?
In general, you should apply boat bottom paint once a year, however; some bottom paints can last for two years. If your boat is kept in the water or you use it regularly, you you have it checked annually to determine if it requires a new bottom paint coating.
The cost to paint the bottom of your boat depends on a number of factors including the size of your boat, the paint you choose and whether you use a primer or not. Other factors include whether you will paint your boat or hire someone to paint it. For example, Biocop TF by Sea Hawk, is a popular bottom paint and currently costs $275.77 a gallon and provides theoretical coverage of 315 square feet per gallon. If the bottom surface of your boat is 700 square feet you would theoretically need to purchase three gallons (Biocop is not offered in quarts) at a total cost of $827. 31 for the three gallons.
That may seem expensive for paint, however boat bottom paint uses antifouling properties in order to protect the boat’s bottom from organisms found in saltwater and other elements.
For information on calculating how much paint you need to paint your boat bottom you can refer to our Bottom Paint Calculator.
If you do not have any coatings at all on the bottom of the boat, we suggest to sand the pontoons with 80 grit and then apply Tuff Stuff High Build Epoxy. It is a water tight barrier coat designed for use under the waterline and with aluminum hulls. Tuff Stuff will insure that you protect the aluminum from corrosion, and also aid in the adhesion of the antifouling paint. Use 2 coats. You can apply the 2nd coat within a couple of hours of the first coat. See detailed instructions at“How to Apply Marine Epoxy Primer”.
After you apply Tuff Stuff marine epoxy primeron hull, be sure to use an aluminum safe antifouling paint. The bottom paint needs to be applied the same day as the Tuff Stuff marine epoxy primer. Antifoulants in general are designed to repel hard growth. For soft growth you should have an additional biocide that help with the algae. Colorkoteis an excellent antifoul for aluminum pontoons used in salt water and/or fresh water. For a less expensive option, see Smart Solution Metal Free Antifouling paint.
WARNING:You should only use an aluminum safe antifouling like Smart Solution. Using any other type of copper based antifouling could severely damage your pontoons and will cause corrosion, pitting and eventually holes in your pontoon boat.
If you do not need antifouling paint and are in fresh water, we suggest using one of the products located in the “How to Paint an Aluminum Jon Boat“ article.
Non-skid paints can be used for various different applications and circumstances. The most common use of non-skid is on boats, or for marine use. Although that is the most common, it is used in many more conditions. Here are some other examples of how non skid paint can be used outside of the nautical setting.
The additive for gelcoat is extremely easy and adds just one extra step to the gelcoatapplication process. You simply mix the additive in with the gel coat before application and then apply. Alternative preferred application methods include using a flour sifter, powdered sugar shaker, or the punctured container itself, sprinkle the non skid into the gelcoat or paint. To use the container just punch holes in it with a nail or ice pick, overlappping the broadcasting stroke to provide a uniform pattern.
The amount you use is completely subjective and dependent on what your goal is; it is recommended to use no more than a quart of non-skid per gallon of paint. The available sizes of additive are a quart and a gallon.
When looking at a scratch in the gelcoat, you need to determine whether it is a surface scratch or a deep scratch. The reason being is that surface scratches can easily be buffed with a rubbing compoundas opposed to deep scratches which take a couple more steps. As long as the gelcoat around the deep scratch is in good condition, you will be able to use gelcoat putty , requires mixing MEKP catalyst-once mixed properly it can be worked with a putty knife for filling, or you can make one using gelcoatand an aerosil filler/thickener. Once the filler is applied, the service will be uneven so sanding and polishing will be necessary. Customers report wet sanding with 2000 grit worked well. Everything about the repair of the scratch is fairly easy to do.
For deeper gouges, you will need to purchase gelcoat in various colors. Tints are available as well if custom matching larger quantities of gelcoat or paste. The kit will contain everything you need to do the job including some tints for matching. Some find the gouge needs to be scraped deeper with a screwdriver or Dremel tool to open it into a wide V to make sure the gelcoat has a place to settle and more permanent. If you simply cover the cracks they may continue to spread. The gelcoat that exists on the boat is already bonded with the laminates that are underneath. That being said, you will have to rough the surface up a bit with sand paper in order to give the paste something to stick to. Please note that you need to clean the surface with acetone after sanding to clean any contaminates off that may interfere with the filling process.
When the damage is a larger (like a screw hole) you made need3M’s Preminum Marine Filleror3M Marine High Strength Repair Filler. These are for bonding and filling repairs above or below the waterline and can be sanded. Some customers prefer to mix some thickener (cabosil)and gelcoat to a thick consistency. Both of these products can be applied with a spreader. If coating over with gelcoat be sure to leave space (about 1/8 inch) for the gelcoat. Splash Zone epoxy is easy to use for large areas underwater for all substrates.
If the underlying problem for the hairline cracks is not handled, re-gelcoating over them will only be a temporary fix, such as a soggy core or broken support. The cracking has stemmed from a crack below the gelcoat and in the fiberglass. This is one option to repair those cracks:
Using a Dremel tool, remove the gelcoat on either edge of the crack, all the way down its length. Basically this widens the gap and reveals the fiberglass layer beneath.
Determine if there is a crack in the fiberglass. If there is, it needs to be filled with a putty containing fiberglass strands. Duraglas Fiberglass Filler is one option.
Apply Gelcoat to the area. Can be brushed, rolled, or spray applied.
Once you have the gelcoat mixed, saving the hardener for last, begin to spread over the gouge with a plastic spreader. Since the paste will shrink slightly as it dries, make sure you put a little extra paste on the “wound”. A slight bulge will be ideal after the paste is applied. As the paste will not cure completely in the air, you will need to put a plastic film over it. If your kit does not have one, shrink wrap or wax paper will work. Tape the plastic/wax paper on all sides over the paste and let dry for 24 hours.
After the 24 hours are up, remove the plastic/wax paper. Take a piece of 400 grit sandpaper accompanied with a 3M sanding block and begin to level any areas that are raised and uneven. It will help if you have a bucket of water or water hose handy to wash away the excess material as you sand. Once you have completed the sanding with the 400 grit, you will need to now use a 600 grit sandpaper to go over the repair. The reason this is being done is to eliminate any scratches the 400 grit may have put in the repair and smooth it even more. You will continue this process moving up to a 800 grit and then a 1200 grit. Occasionally you will want to dry the repair area just to get an idea of the work you have done so far. At this point you can wax and buff the repair.
A gelcoat surface is a very smooth, mirror-like finish when it is new. As gelcoat ages, it becomes porous which means the more easily it stains, the worse it looks and the harder it is to clean. Most all gelcoat can be restored, providing it is not completely worn through. Exhaust stains, like diesel, can develop on the surface of the Gel Coat. These stains can set in on the wax surface of the gel coat but the right cleaner can remove them. If the stain goes deeper, a bit of elbow grease will be needed.
Clean and inspect the surface with a wash with a mild cleaner like 3M’s boat soapor some alternative stronger cleaners if needed. After cleaning, dry and inspect surface for needs to be addressed: scratches, dings, cracking and crazing and to fix these flaws before rubbing out the gelcoat and restoring its shine. See the fiberglass/gelcoat repair section for options and the West System Videofor “how to” instruction.
Apply a fiberglass stain remover, like 3M Fiberglass Restorer and Wax, Mothers Marine Black Streak Remover, or 3M Marine Cleaner and Waxto the stained gelcoat area with a clean rag. The black/gray stains are the result of soot being deposited on your hull. It can happen when wet exhaust systems mix the exhaust gases with seawater and discharge those gases or dry exhaust systems discharging the soot directly into the atmosphere and it lands on your boat.
These liquid one-step products that combine a polish or compound with a wax remove oxidation, and protect the gelcoat in one step.
Wait 10-15 minutes. If the stain is simply laying on the surface of the Gel Coat, the stain will begin to loosen; rinse and inspect the results.
If the stain is lifting, repeat. If not, then something stronger like a more abrasive compound with a polisher may be needed; in that case a wax will be needed to restore the shine. Each time compound products are used, some of the gelcoat is removed. Use caution to use the least aggressive product that will get the job done. Frequently all that may be needed is to apply a protective coating of wax, such as 3M Ultra Performance Wax, Scotchgard Marine Wax, or Mothers Marine Synthetic Waxto help keep that shine.
After further review on the performance of Eco-Clad as a bottom paint, we are NOT offering this product to our customer base. Eco Clad is engineered to support a natural beneficial biofilm (slime) on the coated area. However, we have heard several complaints about the products’ poor performance when it comes to keeping growth off the boat. The company has done a great job of marketing Eco Clad everywhere, and claims better fuel economy and faster speeds. This might be true, but performs only for a few months at best. After that you will see substantial marine growth and even worse fuel ecomony and speed along with the added costs of a new bottom job.
Our opinion and recommendation is to stay away from Eco-Clad unless you plan on keeping your boat in fresh water. Your are much better off using a traditional high quality bottom paint.
Gel coat is a resin that is pigmented with color. The consistency of gel coat is very thick and is best applied with aspray gun.Metal flake is commonly used in clear gel coat for that “bass boat” look. Although it appears that the metal flakes are mixed into the base coat, they are usually mixed into the clear gel coat.
This can be applied over the colored gel coat and the metal flake is usually coated with clear gelcoat for added UV protection and to smooth the surface. The larger the metalflake, the more coats of clear gel coat it will often take to cover.
Usually it is recommended to use around 16 oz of metal flake per gallon of gel coat and personal preference plays a role as there us no magic ratio for adding flake. The typical bass boat will use 2-3 lbs of metal flake in the gel coat. Mix the gel coat inside a pail thoroughly with a paint stirrer to disperse the metal flakes. Stir it thoroughly and frequently during application to prevent the metal flakes from settling to the bottom.
Metal flake gelcoat is best applied using a gel coat spray gunto achieve an even coating and be sure to use an appropriate nozzle tip based on flake size.
You will need to disassemble the spray gun to clean it well as the flakes can lodge into small areas.

 II. Apply Awl-Wash Primer CF (
 If you desire a gloss finish, look to the
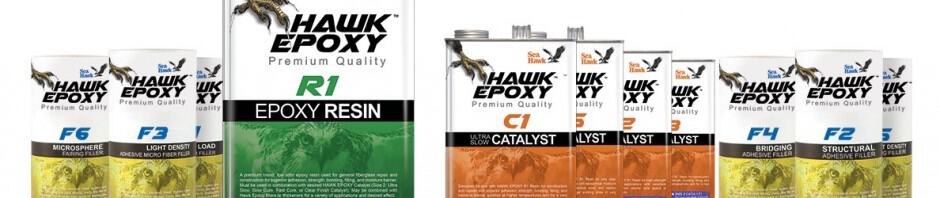
 How to Fix a Leaking Seam or Rivet on Aluminum Boat
 Make sure the blisters are thoroughly drained and grind them deep enough to remove any damaged material beneath the gelcoat. Increase size of ground area as needed until all the laminate around the blister is sound. Clean the entire area and allow it time to dry.
 The filler recommended for blister repair is F6 MicroSphere Fairing Filler.

 Awlcare

 gray, Jon boat green, and black.