

Gelcoat Not Curing? Causes, Fixes, and Prevention Tips
Applying gelcoat can feel intimidating, even for experienced do-it-yourselfers. Unlike paint, gelcoat involves a precise chemical reaction that requires careful measuring and preparation. When it stays tacky or won’t harden at all, it can be one of the most frustrating issues in fiberglass repair. Don’t worry—uncured gelcoat is a common problem with clear, fixable causes.
This guide explains the most common reasons why gelcoat fails to cure, how to fix it, and how to prevent it from happening again.
Common Reasons Gelcoat Does Not Cure
1. Incorrect Surface Preparation
Gelcoat adheres only to fiberglass, cured gelcoat, or polyester resin. It will not stick to paint, epoxy, or any protective coating. Always remove existing paint completely before applying new gelcoat.

- Sanding: Use 40–80 grit sandpaper for heavy removal or shaping and 220–330 grit for feathering edges of the repair. A rubber sanding block helps maintain flat surfaces.
- Cleaning: Wipe the surface with acetone to remove grease, wax, or dust. The surface must be completely clean and dry before applying gelcoat.
- Recommended Tools: 3M abrasives and clean lint-free cloths provide the best bond.
Skipping or rushing surface prep is one of the most common reasons gelcoat remains tacky or peels later.
2. Incorrect Catalyst Ratio (MEKP)
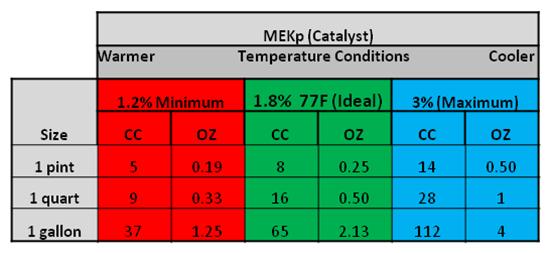
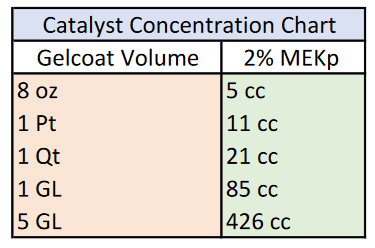
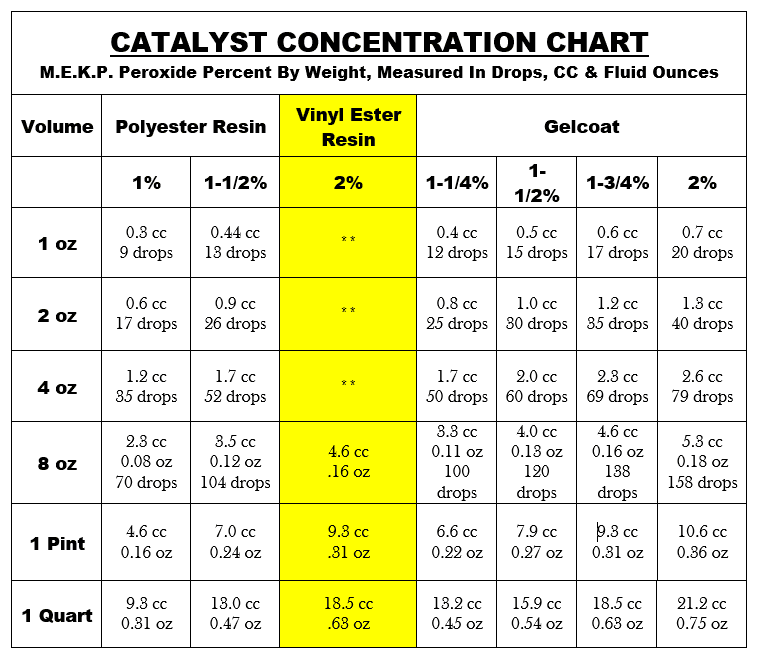
Gelcoat requires a precise mix of MEKP catalyst to harden correctly. Most products need 1.5%–2.0% by volume, with 1.8% @ 77°F being ideal (about 12 drops per ounce of gelcoat).
- Too little catalyst: The gelcoat won’t “kick,” leaving a sticky, soft surface.
- Too much catalyst: The mixture can overheat and harden in the can or while applying.
Always mix small batches—no more than one pint at a time—and stir thoroughly.
| Temperature (°F) | Recommended Catalyst % | Notes |
|---|---|---|
| 60–65°F | 2.0% | Cooler temps require more MEKP |
| 70–80°F | 1.8% | Ideal range for most applications |
| 85–90°F | 1.5% | Reduce catalyst in warm weather |
Pro Tip: Keep gelcoat at room temperature before use. For the most consistent cure, pour the mixed gelcoat into a clean second container before brushing or spraying. This ensures no uncatalyzed material remains on the sides of the pot.
3. Missing Wax Additive (Surfacing Agent)
Oxygen in the air prevents gelcoat from curing tack-free. The final coat must include a wax additive sanding aid to seal out oxygen and allow full cure. Use 1 oz wax per quart of gelcoat. The first coat usually doesn’t need wax, but the last coat does.
All gelcoats from the Bottom Paint Store include both MEKP catalyst and wax additive, but extra additives are available if needed.
4. Too Thin of a Coat
Gelcoat must be applied thick enough to generate heat for the curing reaction. The proper wet film thickness is about 25 mils, resulting in a cured thickness of 18–22 mils.
Use a wet film thickness gauge to confirm coverage. Press the edge of the gauge into the gelcoat until it contacts the surface below. The highest numbered tooth with gelcoat on it and the next higher tooth without gelcoat indicate the wet film thickness.
Example: If the 15-mil tooth is coated and the 20-mil tooth is clean, the film thickness is between 15 and 20 mils—too thin for proper curing.
What to Do If Your Gelcoat Didn’t Cure
Can I Apply More Gelcoat Over It?
No. Adding new gelcoat over an uncured layer will not make the first coat cure. The underlying gelcoat must be removed and reapplied.
Will It Cure With More Time?
Sometimes. If the mixture or temperature was slightly off, it may cure after a few days. However, if it’s still soft or tacky after 72 hours, it needs to be removed.
How to Remove Uncured Gelcoat
- Wipe the surface with acetone to soften the uncured gelcoat.
- Use a plastic putty knife to scrape off the material carefully.
- Re-sand the area and clean thoroughly before reapplying gelcoat with the correct catalyst ratio and wax additive.
How to Prevent Gelcoat Cure Problems
- Store and mix gelcoat at room temperature (70–80°F).
- Measure catalyst with graduated mixing cups for accuracy.
- Use wax additive in your final coat to achieve a hard, sandable surface.
- Apply multiple thin coats instead of one heavy coat.
- Verify wet film thickness (25 mils) with a gauge.
Shop Gelcoat Repair Kits • Buy Wax Additive Sanding Aid
Frequently Asked Questions
Can I Apply Gelcoat Over Epoxy?
No. Gelcoat will not adhere directly to epoxy. You must apply a compatible barrier coat or primer first.
Why Is My Gelcoat Sticky After 24 Hours?
It’s usually caused by too little catalyst or forgetting the wax additive in the final coat.
How Long Should Gelcoat Take to Cure?
At 77°F, most gelcoats will be tack-free in 2–4 hours and fully cured within 24 hours.
Pro Tip
1 mL = 1 cc If using wood mixing stick, place stick in resin before adding catalyst so the wood doesn’t absorb catalyst. Only catalyze slightly more than needed. Resin that cures still in the mixing pot is unusable.
Can I apply more gelcoat over uncured gelcoat? No. Applying more gelcoat will not help the first layer cure. Most likely it will need to be removed and reapplied.
What can I try to get the gelcoat to cure? Allow more time. If something wasn’t exactly right, the gelcoat may just take a few days to harden. If it’s not rock-solid in a few days, though, you may have to scrape it off and reapply it.
How can I remove the uncured gelcoat? Acetone on a rag can be used to break down the gelcoat. Use a plastic putty knife to scrape the uncured gelcoat away.
Read More:
Click this link to read How to Apply Gelcoat
Click this link to read Clear Coat My Bass Boat


 In terms of performance, both slick coatings are equally good. They do the job and do it well. It is too early to say which product will outlast the other in the minds of consumers. But for right now, we recommend PropGlide as opposed to PropOne. The savings alone makes PropGlide worth every penny.
 Painting a wooden boat on your own can be a daunting task. The amount of information about the correct way to paint a boat is staggering! First-time boat owners may be at a loss when trying to make a plan for their first project. The Bottom Paint Store’s aim is to make this process as stress-free as possible so you can enjoy working on your boat and ultimately, enjoy the fruits of your labor!
 What is the best way to achieve maximum adhesion when replacing your boat’s hardware? This How To article will give you the basic knowledge you need to get your repair done correctly.
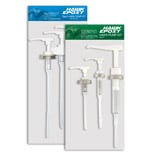 The Pump Kits come in two sizes, one kit accommodating the Size 1 and 2 Resin and Catalysts, and one kit accommodating the Size 3 Resin and Catalysts. Be sure to get the right size kit for the amount of resin and
 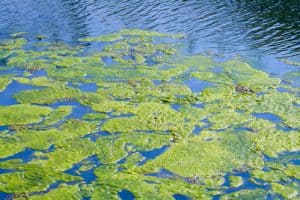 Most Antifouling Bottom Paint is marketed toward the harsh conditions of the Caribbean. But which Antifouling Bottom Paint will work best in Freshwater Lakes?
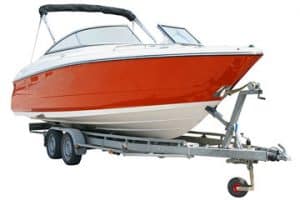 If the boat comes out of the water periodically, such as on a lift or trailer,