Trying to decide the right Awlgrip color to paint your boat this season? Well, consider yourself lucky because Awlgrip has a color selection tool to help you choose the right color for your boat. Not only is Awlgrip one of the best quality boat paints on the market, but it also comes in a wide range of colors to suit a wide range of boats. So, whether you’re looking for a classic white or something more eye-catching, you’re sure to find the perfect shade in the Awlgrip color chart. And once you’ve decided on a color, you can place your Awlgrip paint order with Bottom Paint Store.
Go here to find theAwlgrip Color Chart tool and explore all the colors available for your vessel.
Our customer service team often receives phone calls from customers asking how to identify the type of paint on my boat? The paint label should indicate the type of paint it is, as well as any other information about the paint. However, that may not be available.
In this case, you will need to know the surface of your vessel, for example is it aluminum, wood or fiberglass?
Once you have identified the surface, the type of boat paint can be narrowed down.
If you are looking at the topside area of a boat, and the surface has a gloss/shiny finish, the options are mainly Gelcoat or marine paint.
To tell these apart, you can use a couple of methods:
One method is to use rubbing alcohol on a white cloth and rub it over an inconspicuous area of the hull. If the surface starts to shine, then it’s likely that you have Gelcoat. Another option is to take a piece of sandpaper and gently rub it over an area where the finish appears smooth. If the paper doesn’t snag and pull up any fibers from the surface, then it’s most likely Gelcoat as well.
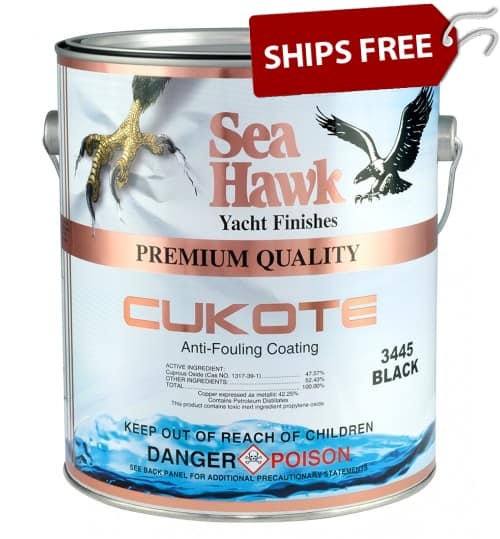
If you are looking at the bottom of the boat, and the surface has a dull, flat sheen finish you most likely have some type of antifouling bottom paint. The two most popular bottom paints are self-polishing ablative and hard bottom paint.
The self-polishing ablative bottom paints work like a bar of soap, once the boat moves in the water or there is a current and or tide, the outer layer slowly wears away. It is easy to tell when a boat is painted with ablative bottom paint, simply rub it with a dry rag in an inconspicuous area of the hull. If the paint easily rubs off, you most likely have a self-polishing ablative bottom paint.
Note: compatibility within bottom paints can be tricky, we recommend checking the compatibility chart of the new bottom paint you are interested in applying, to ensure you prepare the surface correctly.
Here are the bottom paint compatibility and cross-references charts by bottom paint manufacturer:
It is important to determine the age of the paint. Again, you can look at the label on the can of paint for a date or call the source you ordered from to see if they have a record of your order. Bottom Paint Store has order records that span several years.
The final step is to evaluate the condition of the paint. If the paint is peeling, flaking, or otherwise showing signs of wear, it will need to be replaced. However, if the paint is in good condition and there are no visible signs of wear, you may be able to simply touch up any areas that are damaged.
If you’re a boat enthusiast, you know that there’s nothing quite like the feeling of cruising out on the open water. But what do you do when your beloved vessel starts to show signs of wear and tear? If you have a fiberglass boat, you’re in luck. In this blog post, we’ll walk you through everything you need to know about repairing your fiberglass boat, from small cracks to large holes. So, whether you’re a seasoned pro or a complete novice, read on for our step-by-step guide on how to repair a fiberglass boat.
KEY TAKEWAYS
Clean the Area The first step in boat fiberglass repair is to clean the area that needs to be repaired. This step is important because it will allow the repair materials to bond properly with the existing fiberglass. Use a mild soap and water solution to clean the area, and then dry it thoroughly with a clean cloth.
Cut Out the Damaged Area Once the area is clean, use a sharp knife or razor blade to cut out the damaged area. Be sure to cut away any loose or damaged fiberglass so that you have a clean, smooth surface to work with.
Apply the Repair Material There are a variety of repair materials that can be used for boat fiberglass repair. The type of material you use will depend on the size and severity of the damage. For small repairs, you can use a fiberglass repair kit; for larger repairs, you may need to use a sheet of fiberglass cloth and some resin. Follow the instructions that come with your chosen repair material to apply it to the damaged area.
Repairing Small Cracks and Scratches
One of the most common problems that boat owners face is small cracks and scratches in the hull. While these may not seem like a big deal at first, they can quickly turn into larger problems if left unaddressed. The good news is that small cracks and scratches are relatively easy to fix with some basic supplies.
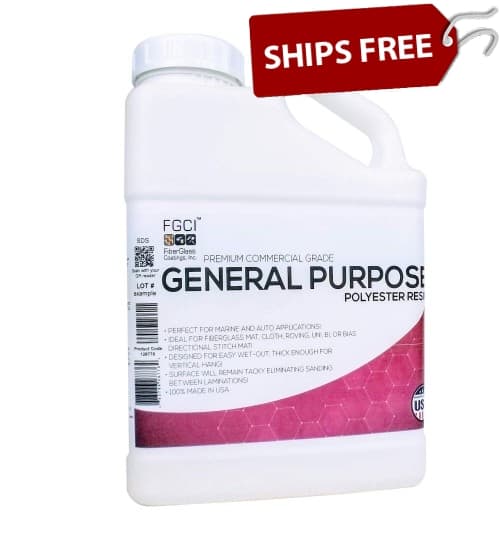
Polyester Resin is a great choice for fiberglass repairs
Here’s what you’ll need:
-Fiberglass cloth -Resin -Hardener -Sandpaper -Putty knife or spreader -Measuring cup -Gloves -Eye protection
Once you have all of your supplies, follow these steps to repair small cracks and scratches in your fiberglass boat:
Clean the area around the crack or scratch with sandpaper to rough up the surface and allow the resin to adhere better.
Cut a piece of fiberglass cloth to size and lay it over the crack or scratch.
Mix together the resin and hardener in a measuring cup, according to the application guidelines.
Use a putty knife or spreader to apply the resin mixture over the fiberglass cloth, making sure to work it into any crevices.
Allow the resin to cure for 24 hours before sanding down any excess material.
Your fiberglass boat is as good as new!
Fixing Large Holes in Fiberglass Boats
While small cracks and scratches are relatively easy to fix, large holes can be much more challenging—but not impossible! With some patience and elbow grease, you can patch up even the biggest holes in your fiberglass boat hull. Here’s what you’ll need:
-Fiberglass cloth -Resin mixture (resin and hardener) -Putty knife or spreader -Sandpaper -Measuring cup -Gloves -Eye protection -Plywood (optional)
Follow these steps to repair large holes in your fiberglass boat hull:
If necessary, use plywood to create a temporary patch for the hole until the resin has cured. This will help keep water out of the hole while you’re working on it.
Cut a piece of fiberglass cloth to size and lay it over the hole.
Use a putty knife or spreader to apply the resin mixture over the fiberglass cloth, making sure to work it into any crevices.
Allow the resin to cure for 24 hours before sanding down any excess material and removing any plywood patches.
Your fiberglass boat is as good as new!
Conclusion:
No matter how experienced you are as a boat owner, sooner or later you’re going to need to make some repairs—and if you have a fiberglass boat, that means getting familiar with some basic repair techniques. In this blog post, we’ve walked you through everything you need to know about repairing small cracks and scratches, as well as large holes in your hull. So, whether you’re dealing with cosmetic damage or something more serious, now you know how to fix it!
Interlux, a division of AkzoNobel, is one of the world’s largest manufacturers of high-performance boat paint, yacht coatings and marine protection. high performance boat paint, yacht coatings and marine protection.
For over a hundred years, the Interlux brand has been creating the most innovative coating solutions to protect, beautify and improve the performance of all types of boats.
The following are reviews we have received from our customers who have purchased Interlux. The reviews have been collected through Verified Reviews, an independent rating company.
I have used this primer many times, it is great for ALL epoxy primer applications. It goes on smoother than PrimeKoat, sands easier, comes in 2 tints, mixes easier, better in all respects except does not have quite the coverage of PrimeKoat. Interlux Interprotect 2000E Epoxy Primer – John B.
The paint was great! Interlux Ultra Kote- Jon Z.
Good stuff. Interlux Pacifica Plus – Thomas P.
We have use this product in the past and it is excellent. – Interlux Interprotect 2000E Epoxy Primer.- Captain Steve G.
I’ve had very good luck with this product on my charter boat. – Interlux Act – David M.
Good. – Interlux Primocon – Gary W.
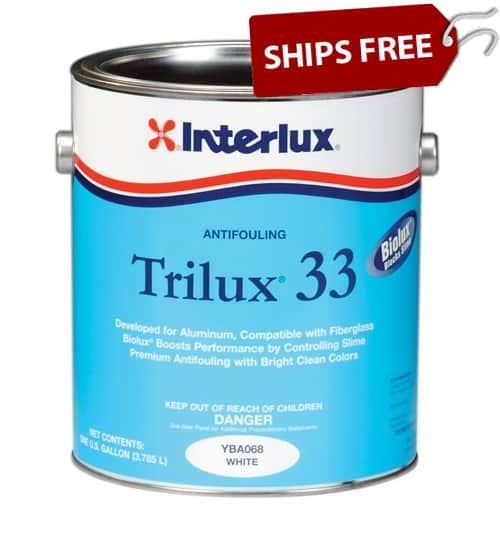
I am new to Trilux 33 but I have had good experience with Interlux. – David M.
Best paint for my outdrive. –
Top of the line quality for a great price. Great product. – Micron 66 by Interlux – Scott H.
Excellent product. – Interlux Interprotect 2000E Epoxy Primer – Charles P.
Product is very good and cost effective. – Interlux Act – anonymous.
Have used multiple times and always exceeds expectations. A good inexpensive product for a boat that is trailer sailed as this one is. – Interlux Ultra Kote- Ken C.
This is the 5 (th) time using Pacific Plus and it is a good product. – Interlux Pacifica Plus
We have received a lot of good feedback on Blue Water Marine Paints, which is a high quality bottom coating at very attractive price. The reviews below are from actual customers received through Verified Reviews, an independent review collection company. Many of the reviews can be found on the corresponding Blue Water Bottom Paints product pages.
Unfortunately, it is not available in: Arizona, Arkansas, Colorado, Idaho, Indiana, Iowa, Montana, Nebraska, Nevada, New Mexico, North Dakota, Oklahoma, South Dakota, Utah, Vermont, West Virginia, and Wyoming.
Blue water marine paints are excellent performing paints. – Peter M.
This paint worked very well for the past 2 years. – Michael B.
My go to bottom paint. Blows away the competition. – Jay W.
Very happy customer. – Teresa B.
I use this paint every year. – Thomas G.
We restore boats and always buy blue water paint. It is great! – Nancy S.
Great Product. Larry G.
Excellent wear for the Jersey Shore. Richard C.
Great product. Smooth application. – Melissa G.
When on well and seems to be what I wanted for boot stripe. – Douglas S.
Great price and a great product! Charles P.
Great product went on smooth and easy! – Thomas H.
Great paint. – Richard Y.
I’ve used this paint exclusively since I sandblasted the hull several years ago. I sand and repaint every 2 years. – Eddy W.
Very good product. – Angelo R.
Used it last year and it did what it supposed to do. – Richard L.
Good mid-priced paint for the money. Doesn’t harden over the winter. Doesn’t need to be thinned. – Joseph D.
Been using for 8 years and quite pleased with the results. – Brian L.
It works. – G. M.
Not sure how it will hold up as this is the first time I have used it so I am giving it 4 stars as so far it seems like a solid product. – Anthony C.
Great bottom paint! – Henry D.
I have been using Copper Shield 45 and have been very happy with it, does last a solid two seasons. – Donald S.
It’s as good as any other I’ve tried for east coast waters to the Bahamas. Cheaper than some too. – John M.
I have not used your product yet. I was referred to you by my son who uses your paint. So far your shipping was fast. – James R.
Low odor and worked great. Covered well and easy to sand. Dried quickly. – David H.
I’ve been using this product on my Islander 41 for 10 years. – Frank R.
Really pleased with this bottom paint. – Clive A.
Excellent product. – Jeffrey T.
Excellent. – Larry L.
This is the best coal tar product (Bluewater Coal tar Epoxy)I have purchased. I apply this product over my pontoons on my 60ft.houseboat.The product goes on pretty good considering rough surface with a roller and brush application. It drys quick and is very shiney. – Wade H.
Great stuff! – Derek F.
Went on easy and looked good. – Albert K. April 28, 2023
Blue Water Marine Copper Shield 45 Ablative, Excellent… – Lisa R., April 15, 2023
Blue Water Marine Copper Shield 25 excellent bottom paint. – Angelo R., April 14, 2023
Blue Water Marine Shelter Island Plus Copper Free Ablative- I have used his antifouling paint for 5 years on the bottom of my boat and have never gotten any barnacles. The boat is kept in brackish water 5 months of the year. Donald H., March 23, 2023
The following are customer reviews of AQUAGARD® BOTTOM PAINT, an anti-fouling bottom paint that is formulated to prevent barnacles, algae, slime, and other fouling organisms on vessels immersed in saltwater, brackish and freshwater. The reviews were submitted to Verified Reviews, an independent rating service.
I have used this paint for years. – Jim D.
Product was good. Painted a 14 foot boston whaler with two coats and paint left over. – Rickey R.
Great Service ! – Maria V.
Spreads just fine and on fiberglass 3 coats was perfect. Cleanup was a breeze as it is water based. What was dripped on the floor was a quick clean up. – Hans D.
Aquaguard waterbase anti-fouling paint can be applied over existing bottom paints that are clean, free of any debris, and dry.
Very easy to work with. – Daniel D.
Wonderful product. – Leonard E.
It does meet all my requirements and needs. – Peter F.
Polyurethane is a versatile material that can be used for a variety of applications. It is commonly used in the construction and automotive industries, but it also has many uses in the marine industry. Polyurethane is used to make boat hulls, decks, and upholstery. It is also used to make boat parts that are resistant to salt water and sun damage.
KEY TAKEAWAY
What is polyurethane used for?
Polyurethane is a polymer that has many uses. It was first synthesized in 1937 by German chemist Otto Bayer. Today, it is used in a variety of industries, including boatmaking. When used as a boat coating, polyurethane helps to repel water and protect the hull from UV damage.
Boat Hulls
Polyurethane is often used to make boat hulls. Hulls made from polyurethane are strong and durable. They are also resistant to salt water and sun damage. Hulls are less likely to crack or break than hulls made from other materials.
Boat Decks
It is also commonly used to make boat decks. Decks made from polyurethane are strong and durable. They are also resistant to salt water and sun damage. Polyurethane decks are less likely to crack or break than decks made from other materials.
Boat Upholstery
Boat upholstery is often made from polyurethane. Upholstery made from polyurethane is usually strong and durable. It is also resistant to salt water and sun damage and is less likely to crack or break than upholstery made from other materials.
Polyurethane Advantages and Disadvantages
Polyurethane has a number of advantages over other types of plastics, including its durability, flexibility, and resistance to chemicals and heat. Excellent abrasion, corrosion, and impact resistance. However, polyurethane also has a number of disadvantages, such as its tendency to yellow and crack over time. Polyurethane is also flammable, making it a potential safety hazard. Despite its drawbacks, polyurethane remains a popular choice for many applications due to its unique properties.
Due to being a versatile plastic, polyurethane can be used to make a wide variety of products, from cushions and Insulation to car parts and medical implants. While it is most commonly used in the manufacturing of flexible foam products, it can also be used to create rigid plastics, elastomers, and coatings. Some common examples of polyurethane products include spray foam insulation, upholstery foam, shoe soles, and hard plastic objects like skateboard wheels. Polyurethane is an extremely versatile material with a wide range of properties, making it an ideal choice for a variety of applications. Thanks to its flexibility and durability, it is one of the most commonly used plastics in the world.
How do you calculate the density of polyurethane foam
Polyurethane foam is a type of polymer that has a wide range of applications, from insulation to padding. It is made by combining two chemicals, polyol and diisocyanate. The ratio of these two chemicals determines the density of the foam. To calculate the density of polyurethane foam, divide the weight of the foam by its volume. The resulting number is the density of the foam in pounds per cubic foot. Keep in mind that the density of polyurethane foam can vary depending on its intended use. For example, softer foams are often used in mattresses and upholstery, while denser foams are used in insulation and packaging.
Final thoughts
Polyurethane is a versatile material that can be used for a variety of applications in the marine industry. It is commonly used to make boat hulls, decks, and upholstery. Polyurethane is also used to make boat parts that are resistant to salt water and sun damage. If you are looking for a durable material for your next boating project, consider using polyurethane. And if you have any questions contact the Bottom Paint Store customer service team Monday through Friday 9-5p.m. 888.555.2313.
If you keep your boat in salt water, then you know that a good coat of bottom paint is key to keeping your boat looking great and performing well. Not only does it protect your boat from the elements, but it also keeps it looking good. But what is the best bottom paint for trailered boats? There are a lot of different types and brands on the market so it can be tough to decide. In this article post, we’ll discuss the different types of bottom paint and help provide an overview so you can decide which one is right for you.
What paint should I use for the bottom of my boat?
For those who are new to the world of boat ownership, the task of bottom painting can seem a bit daunting. After all, there are a lot of different products on the market, and it can be difficult to know which one is right for your boat. Bottom paint is designed to protect the bottom of your boat from barnacles, algae, and other marine growth. It also helps to prevent corrosion and make it easier to clean the bottom of your boat. When choosing a bottom paint, it is important to consider the type of boat you have, the water conditions in your area, and the level of maintenance you are willing to perform. With so many different products on the market, it can be difficult to know which one is right for you. However, by taking the time to do your research, you can find the perfect bottom paint for your boat.
There are three main types of bottom paint: ablative, hard, and semi-hard. Ablative bottom paint is the most popular type; it wears away over time, which allows it to continually renew itself. This makes ablative bottom paint ideal for boats that are used frequently. Hard bottom paint, on the other hand, is designed to last longer; it doesn’t wear away as quickly as ablative bottom paint, but it also doesn’t provide as much protection. Semi-hard bottom paint is a blend of the two; it’s more durable than ablative bottom paint but not as long-lasting as hard bottom paint.
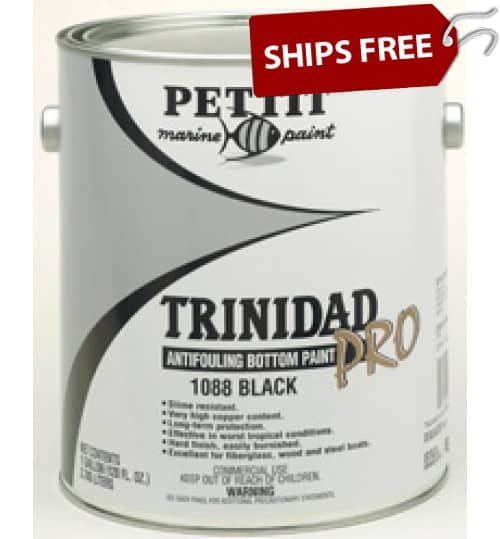
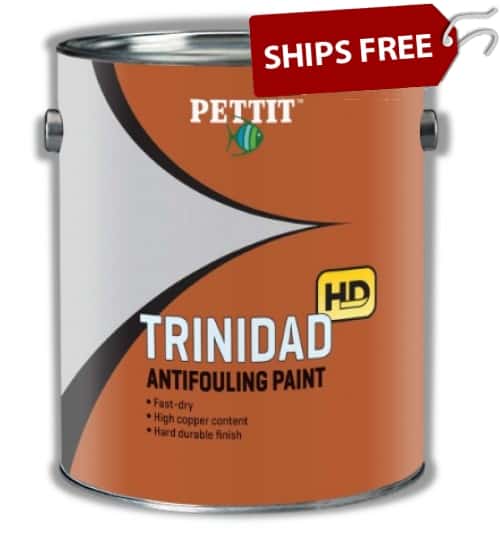
As for brands, there are dozens of different companies that make bottom paint. New Nautical Coatings, Interlux, Pettit, and Aquaguard are just a few of the most popular brands. Interlux offers a wide variety of ablative and semi-hard bottom paints, including their well-known Micron CSC formula. Pettit makes both ablative and hard bottom paints, including their Trinidad Pro, featuring a high copper load and slime resistance to provide unprecedented resistance to all fouling.
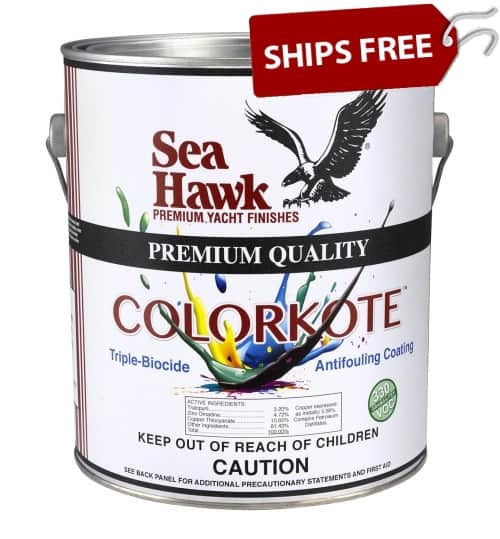
New Nautical Coatings, Sea Hawk Paints, includes a wide range of economical and premium ablative and hard bottom paints for various conditions and price points.
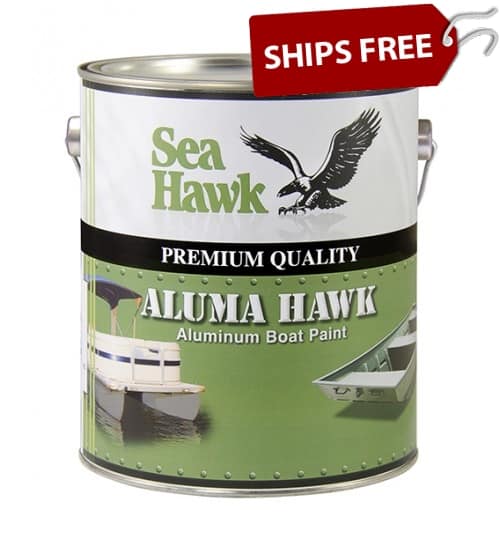
If you’re looking for the best bottom paint for aluminum boats, Colorkote is a good way to go. This high-quality paint provides a durable barrier against corrosion, while also being able to withstand the rigors of saltwater conditions. Colorkote is also easy to apply and dries quickly, so you can get back on the water in no time. So, if you’re looking for a bottom paint for your aluminum boat, Colorkote is a great choice.
For those who want an eco-friendly option, Smart Solutions Metal Free Bottom Paint is the best eco-friendly bottom paint on the market. It is made with a specially formulated resin that is designed to bind to metal surfaces, making it an ideal choice for boats and other watercraft. The binding agent in the resin helps to prevent metals from leaching into the water, making Smart Solution Metal Free Bottom Paint an environmentally friendly option. In addition, the binding agent also helps to prevent barnacles and other marine growth from attaching to the hull, making it easier to clean and extending the life of the boat. Smart Solution Metal Free Bottom Paint is available in a variety of colors, making it easy to find a color that matches your boat. It is also exceptionally durable, lasting up to three years with proper maintenance. Smart Solution Metal Free Bottom Paint is the best choice for those looking for an eco-friendly bottom paint that is also effective and long-lasting.
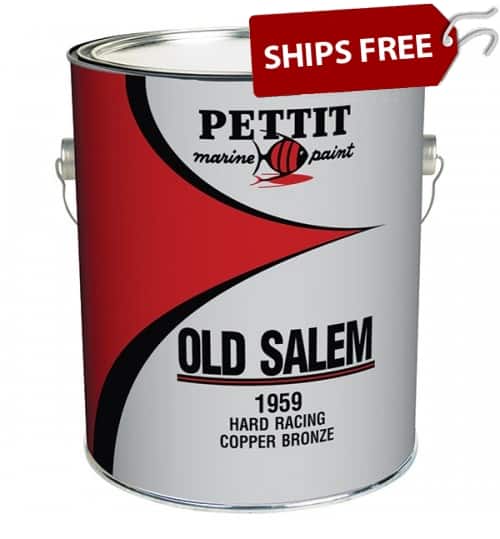
Finally, if you’re looking for a high-performance racing bottom paint, Pettit Hard Racing Copper Bronze is a high-performance bottom paint that is specifically designed for racing boats. It is made with a copper-infused epoxy resin, which provides exceptional protection against fouling organisms. The Pettit Hard Racing Copper Bronze also has a high load-carrying capacity and resistance to abrasion, making it an ideal choice for high-speed racing boats. In addition, the Pettit Hard Racing Copper Bronze is available in a wide range of colors, so you can choose the perfect color to match your boat. Hard Racing Copper Bronze is recommended for use in fresh water on racing hulls, sailboats, runabouts, or cruisers. You can use it in saltwater for small, dry sailed boats which are not left in the water. When used above the waterline in saltwater, Hard Racing Copper Bronze will oxidize to a green color if not overcoated with a clear sealing coat.
How long does bottom paint last on a boat?
Bottom paint is designed to last for several years, however, longevity depends on the paint. It will eventually break down and need to be replaced. The specific lifespan will depend on a number of factors, including the type of paint used, the boat’s exposure to sunlight and water, and the amount of wear and tear the bottom of the boat experiences. In general, bottom paint can be expected to last for several years before it needs to be replaced. This makes it a wise investment for any boat owner who wants to protect their investment and keep their boat looking its best.
Final thoughts
Choosing the best bottom paint for your trailered boat comes down to personal preference. If you’re looking for something that will last longer, go with a hard or semi-hard bottom paint; if you’re looking for something that’s easier to apply and renew, go with an ablative bottom paint. Just pick one that’s reputable and has a good track record.
When it comes to choosing the best bottom paint for your trailered boat, there are a lot of factors to consider. If you have any questions or would like assistance, the Bottom Paint Store technical support team can help you find the perfect paint for your boat—whether you’re looking for something eco-friendly, high-performance, or long-lasting.
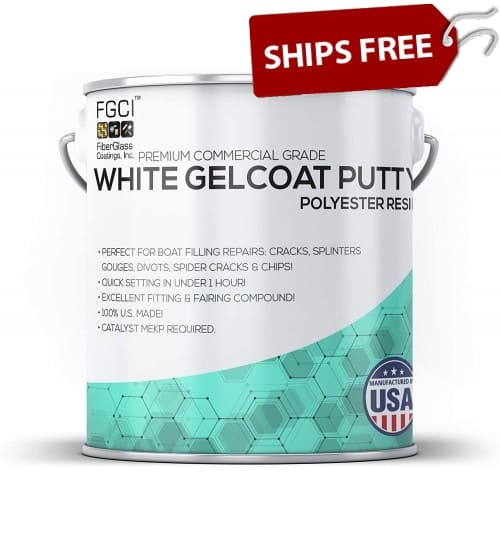
Professional Grade Exterior Gelcoat can be applied either by Spraying, Brushing or Rolling. This article will discuss how to apply the gelcoat with the brush and roller method. For a more comprehensive guide on How to Apply Gelcoat, please read this article. We will assume you have already read the article to learn about prepping the surface, sanding, and finishing the gelcoat.
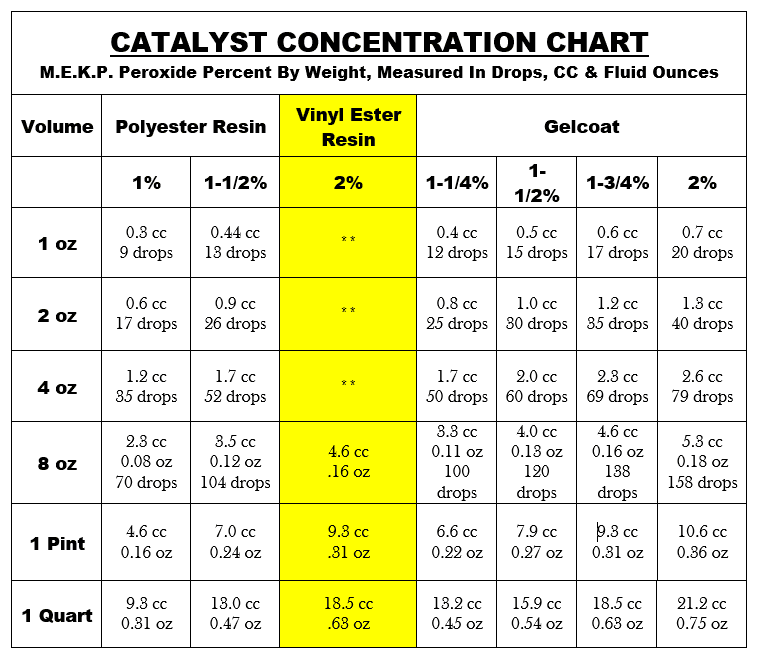
Catalyzing Gelcoat with MEKP
All gelcoats MUST be catalyzed with MEKP to cure. This should be added after all other additives just prior to application. We suggest 1-1/4% to 1-1/2% by volume, i.e. 13-15 cc per quart. We do NOT recommend mixing more than 1 quart at a time. Darker colors need a little more catalyst for the same reaction, so you can catalyze those up to 2%. All Gelcoats purchased from the Bottom Paint Store come with MEKP. Refer to the catalyst chart located on the product page, the product label, or the one below.
One gallon of polyester resin weighs approximately 9.2 lbs. One gallon of gelcoat weighs approximately 10.5 lbs. The weight of MEKP 925 is 1.125 grams per cc. 30 drops is approximately equal to one cc.
cc = cubic centimeter. Oz = fluid ounce Note: Using drops for catalyst measurement is only an estimate. In critical applications MEKP should be measured using cc’s or fluid oz’s which are volume measurements. The percentages in the chart: 1% thru 2%, are percentages of resin or gelcoat by weight. The cc and oz values in the chart have been converted from weights of MEKP to volumes of MEKP.
NOTE: The catalyst level (MEKP) should not exceed 3.0% or fall below 1.2 for proper cure. Ideal range is 1.8% @ 77°F. Gel time at 1.8% MEKP is 10-17 minutes. This time element is dependent on material temperature, room temperature, humidity, air movement, and catalyst concentration. Gelcoat should not be used when temperature conditions are below 60°F, as curing may be adversely affected.
Be sure to have a good strategy when applying your gelcoat. Once you mix and catalyze, you have about 15 minutes to apply the gelcoat before it starts getting hard or starts to “gel.” The actual working time depends on the amount of catalyst and how hot the working conditions are. Anything below 60 degrees, and your gelcoat will not cure, but as you get warmer and warmer, your working time will decrease rapidly. At 70 degrees, you get 15 minutes, but at 90 degrees, you only get 5 minutes.
TIP: If you need more time to work, sit the can in some cold ice water to cool it down to 60 degrees to allow a little more working time.
Application
Brushing: Use a solvent resistant brush. The chemicals in the gelcoat can be harsh on materials not designed to withstand them. Using a solvent resistant brush should stop any brush materials from getting in the finished product.
TIP: Choose a natural bristle brush with tapered bristles that are not too stiff.
Apply gelcoat quickly using long brush strokes to help achieve an even thickness and to help remove trapped air pockets. Load the brush fully with gelcoat each time. Applying the gelcoat quickly will help you apply it to the correct thickness. Gelcoat applied too thin will not cure properly. Remember, this gelcoat has been catalyzed and the clock is ticking. Also, large amounts of gelcoat left in the container allows a buildup of exotherm and causes the gelcoat to cure too quickly. Once all the gelcoat is out of container and on the surface then you can spend time tidying up with the brush strokes.
TIP: Try to finish vertical areas with an upward brush stroke. This will help reduce sag.
Rolling: Use a solvent resistant 1/8 or 1/4 inch nap roller. Be sure not to use foam rollers; they tend to leave bubbles. Wrap the roller in painters’ tape and rip the tape off to remove loose fibers from the roller. Apply the gelcoat to the surface quickly. Remember, this gelcoat has been catalyzed and the clock is ticking. After wetting out a small area with the roller, use the tip of a brush to smooth out the stipple left by the roller. Move the brush in smooth strokes perpendicular to the direction that the roller moved. Be careful to not apply too much pressure during this step. Ask a friend to assist with the tipping to speed things along. When rolling or brushing on the second coat be sure to apply in the opposite direction from the previous coat. This allows for a uniform finish.
Overview
The 1st coat will consist of gelcoat and hardener only. Wait a half hour for the gelcoat to set. It should be tacky. It will not be fully cured yet.
The 2nd coat will consist of gelcoat, hardener, and wax additive sanding aid. 1 oz of sanding aid per quart or 4 oz per gallon. Sanding aid seals the surface from oxygen, causing the surface to dry tack free.
A wax additive is NOT used with HI UV Clear. You should only use a wax additive in the final application coat or if you are planning on applying only one coat.
If you followed all the steps correctly you should have a beautiful application of gelcoat! If you’re using our Professional Grade Exterior Gelcoat, you’ll be ready to sand and buff your freshly gelcoated surface after about 1- 3 hours.
If you’re looking to show off your sailboat in its best light, give it a burnish finish. This quick and easy process will make your boat shine like new and impress your friends and neighbors. However, if you don’t burnish a sailboat correctly, you’ll end up with a finish that’s dull, chipped, and scratched. In this blog post, we’ll show you how to burnish a sailboat the right way.
Burnishing refers to the process of caring for and maintaining a sailboat’s hull. The hull is the protective outer layer that covers the sailboat’s inner workings, and it is susceptible to damage from sun, salt, and wear. Burnishing helps to keep the hull in good condition by removing dirt, barnacles, and other marine growth. It also helps to protect the hull from further damage and aging.
The process of burnishing can be done by hand or with a machine, and it typically involves polishing the hull with a soft cloth or brush. Some sailboats also have special coating that helps to protect the hull and make it easier to clean. Burnishing is an important part of sailboat maintenance, and it can help to prolong the life of a sailboat. With just a few simple steps, you’ll have a sailboat that looks like it came straight from the showroom!
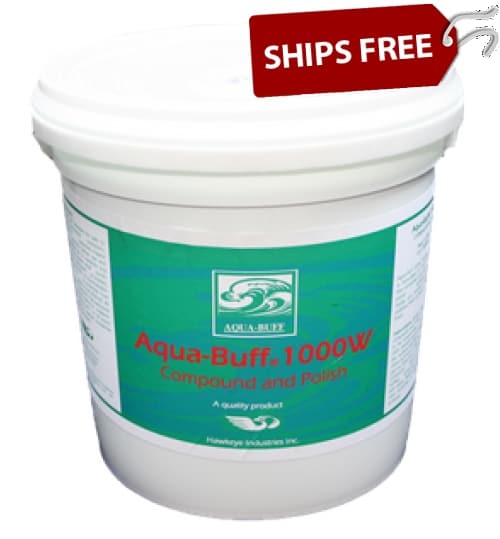
Aqua Buff 1000-W is a polishing compound designed to remove heavy oxidation or sanding scratches from gelcoat. It also cleans variety of surfaces including boat hulls with gelcoat.
Step One: Gather Your Materials
To Burnish a sailboat properly, you’ll need the following materials: • Burnishing Compound • Burnishing Pads • High-Speed Polisher
Step Two: Apply the Compound
Once you have all your materials, it’s time to start burnishing! Begin by applying a generous amount of burnishing compound to the entire surface of the boat. Be sure to work in small sections so that the compound doesn’t dry out before you have a chance to work it in. Once the entire surface is covered, let the compound sit for about 15 minutes.
Step Three: Polish the Surface
After the compound has had a chance to set, it’s time to start polishing! Begin by attaching a burnishing pad to your polisher and turning it on to high speed. Slowly move the polisher back and forth across the surface of the boat until the entire area is evenly polished. You should see a noticeable difference in the finish after just a few minutes! Let the area dry for about an hour before moving on to step four.
Step Four: Wax the Surface
The last step in Burnishing your sailboat is to apply a layer of wax. This will help protect the newly polished surface from dirt, grime, and UV rays. Simply apply a generous amount of wax to another clean Burnishing pad and polish it into the surface of the boat. Let the wax dry for about 15 minutes before buffing it off with a soft cloth. And that’s it! You’re now ready to enjoy your showroom-quality finish.
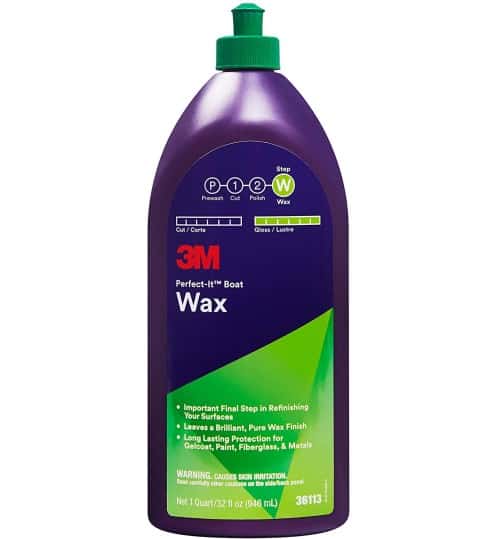
3M™ Perfect-It™ Boat Wax is the final, brilliant step in achieving a truly professional marine finish. Safe for gelcoat, paint, fiberglass and metal.
So there you have it – the basics of burnishing a sailboat for a showroom finish. It’s not as hard as it may seem, but it does take some time and effort to get that perfect shine. By following these simple steps, you’ll be able to buff your boat until she gleams like new. Have fun out there on the open water!
When most people hear the term “Liquid Urethane,” they think of a thick, black substance used for coating surfaces. While this is correct, Liquid Urethane comes in many varieties with different purposes. For example, some Liquid Urethanes are designed to be applied very thin while others are much thicker. Additionally, there are variations in terms of density – some liquids are denser than others – which affects how they should be used. In this blog post, we will look at what Liquid Urethane is, what its various uses are, and how density affects its application.
What is liquid urethane and what are its uses
Urethane is a liquid polymer that has a wide variety of uses. It is used in the production of plastics, coatings, adhesives, and sealants. Liquid urethane is also used as an insulation material and as a filler for composite materials. In addition, liquid urethane can be used to create dental implants and prosthetic devices.
How is liquid urethane density measured?
To measure the density of liquid urethane, you’ll need a graduated cylinder and a weight scale. First, weigh the graduated cylinder on the scale to get an empty weight. Then, fill the cylinder with liquid urethane and weigh it again. Subtracting the empty weight from the full weight will give you the total weight of liquid urethane in the cylinder. To calculate the density, simply divide this weight by the volume of liquid urethane in the cylinder. This will give you a density measurement in grams per cubic centimeters (g/cc).
The density of liquid urethane is measured in a variety of ways, depending on the intended use of the urethane. For example, the weight per gallon is often used to calculate the costs of shipping and handling. The pound per cubic foot is also used to calculate the volume of urethane needed for a given job. In both cases, the density of liquid urethane is calculated by dividing the weight of the urethane by its volume.
What factors affect the density of liquid urethane
The density of liquid urethane can be affected by a variety of factors, including its composition, temperature, and pressure. Urethane is a polymer that can be made from a variety of monomers, or small molecules. The type of monomer used will affect the urethane’s density. For example, using a heavier monomer will result in a denser urethane. Temperature can also affect the density of liquid urethane; as temperature increases, the urethane will expand and become less dense. Finally, liquid urethane is usually stored under pressure to keep it from expanding. If the pressure is too high, the liquid urethane can become dense and difficult to work with. By understanding these factors, it is possible to control the density of liquid urethane and choose the right product for your needs.
There are many factors that can affect the density of liquid urethane. The first is the temperature of the liquid urethane. The colder the liquid urethane, the denser it will be. The second factor is the pressure of the liquid urethane. The higher the pressure, the denser the liquid urethane will be. The third factor is the type of liquid urethane. Some types of liquid urethane are denser than others. The fourth factor is the amount of liquid urethane. The more liquid urethane there is, the denser it will be. Finally, the fifth factor is the presence of impurities in the liquid urethane. If there are impurities present, they can make the liquid urethane denser.
Examples of where to use liquid urethane with different densities
There are many different uses for liquid urethane. The material can be used as a sealant, adhesive, or even a casting material. When choosing a liquid urethane, it is important to consider the density of the material. A high-density urethane may be better suited for a heavy-duty application, while a low-density urethane may be more suitable for a lightweight application.
Here are some examples of where to use liquid urethane with different densities:
Use a high-density urethane as an adhesive for bonding metal to concrete.
Use a low-density urethane as a sealant for gaps and cracks around doors and windows.
Use a medium-density urethane as a casting material for creating prototypes or models. No matter what the application, liquid urethane can be a versatile and durable solution. By carefully selecting the right density for the job, it is possible to achieve excellent results.
How to select the right liquid urethane for your needs
How do you know which one is right for your project? Here are a few things to keep in mind: The first thing you need to consider is what you’ll be using the liquid urethane for. There are different formulas for different applications, so you need to make sure you get the right one.
Next, think about the properties you need your liquid urethane to have. For example, do you need it to be clear or opaque? UV resistant? Heat resistant? Each type of liquid urethane has different properties, so it’s important to select the one that best meets your needs.
Once you’ve narrowed down your choices, it’s time to start testing. The best way to do this is to buy small quantities of each type of liquid urethane and try them out. This will help you see how they perform in real-world conditions and narrow down your options even further.
Finally, once you’ve selected the liquid urethane that’s right for you, make sure to follow the manufacturer’s instructions carefully. This will help ensure that you get the best results and avoid any problems down the road.
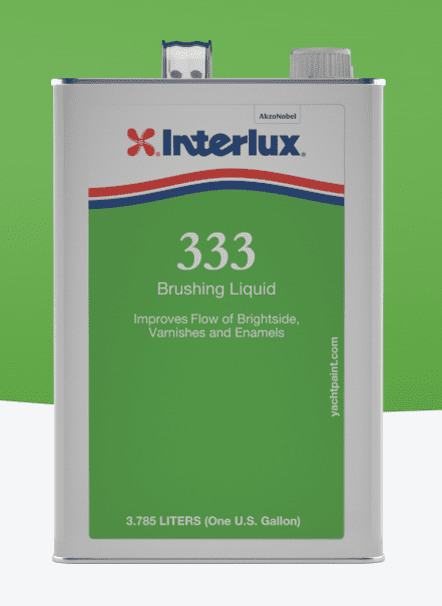
It is important to select the right liquid urethane for your needs to get the best results out of this versatile product. By understanding how density factors into its uses, you can be sure to select the correct liquid urethane for your specific project. Bottom Paint Store carries several different liquid urethane products including liquid urethane foam kits, which are a two-component, Isocyanate/Polyol based, pour-in-place, urethane foam system and Interlux Brushing Liquid 333, a slow drying solvent to ease brushing and facilitate the flow of specified paint coatings.
If you need additional information or ordering assistance on these liquid urethane products call our customer service team Monday through Friday 9:00 a.m.-5:00 p.m.
If you’re a boat owner, there’s a good chance you’re familiar with Hawk Epoxy by SeaHawk Paints; however, did you know there are several diverse ways to use it? In this post, we’ll take a look at some of the different ways Seahawk Hawk Epoxy can be used to keep your boat in top condition. So, whether you’re a beginner or an experienced boater, read on for some helpful tips!
What is epoxy?
Epoxy is a type of adhesive that is commonly used to bond two surfaces together. It is made up of a resin and a hardener, which are mixed together to form a tough, durable bond.
Unlike other sealants, epoxy is able to form a strong bond with the surface it is applied to, making it an ideal choice for sealing concrete, metal, and glass. Epoxy is also resistant to temperature changes and UV light, making it ideal for use in outdoor applications. In addition to its practical benefits, epoxy can also be used to create interesting visual effects. When applied to a surface in thin layers, epoxy can create a marbled or even tie-dye effect. As a result, epoxy is a versatile material that can be used for both functional and decorative purposes.Epoxy is typically used for repairing metal, plastic, and glass.
It can also be used for bonding wood, concrete, and ceramic. Epoxy is available in both liquid and powder form. The liquids are typically used for small repairs, while the powders are better suited for larger projects. Epoxy is typically applied with a brush or roller. Once it has been applied, it needs to be allowed to cure for 24 hours before it can be used.
Hawk Epoxy can be used as a sealant to protect surfaces from water and other elements.
Fairing Hull Imperfections with Hawk Epoxy
Let’s face it, our boats take a beating. They’re exposed to the sun, the salt, the waves, and the wind on a daily basis. So, it’s no wonder that even the best-kept boats can start to show their age after a few years. One of the most common problems is fairing hull imperfections. These are small cracks or indents in the gelcoat that can make your boat look old and worn. But don’t despair, there is a simple way to fix this problem with hawk epoxy. Hawk epoxy is a two-part epoxy resin that you mix together to create a putty-like substance. Once it’s mixed, you can use it to fill in any cracks or indentations in your hull. It dries hard and sets fast, so you can sand and paint over it once it’s dry. And best of all, it’s very affordable. So, if your boat is starting to look a little worse for wear, don’t worry, just grab some hawk epoxy, and give your boat a facelift.
Patching Holes in a Boat with Hawk Epoxy
There’s nothing worse than getting your boat out on the water only to find that it’s taking on water. Fortunately, patching holes in a boat is relatively easy to do, as long as you have the right materials.
Hardware Replacement Adhesion with Hawk Epoxy
Hawk epoxy’s two-part epoxy provides a strong, permanent bond and can be used on a variety of materials, including metal, glass, ceramic, and plastic. And it sets in just minutes, so you won’t have to wait around for hours for it to dry. Plus, it’s easy to use – just mix the two parts together and apply it to the surfaces you want to bond.
Hawk Epoxy Proper Measuring and Mixing
Anyone who has ever worked with epoxy knows that it is crucial to get the measuring and mixing process exactly right. Too much or too little of either ingredient can ruin the entire batch, and that can be a costly mistake. Hawk Epoxy strives to make the measuring and mixing process as simple and foolproof as possible. Our epoxy products come with clear instructions and easy-to-use tools that make it easy to get the perfect mix every time. If you follow the provided instructions, you can be confident that your epoxy project will turn out just the way you want it to.
Applying Hawk Epoxy
Hawk epoxy is specifically designed for use on boats, and it’s perfect for patching small holes. The epoxy comes in two parts that you mix together, and then it can be applied directly to the hole. Sometimes, you need something more than just epoxy resin. That’s where Hawk epoxy fiberglass cloth and mat come in. The cloth and mat help to reinforcing the epoxy, making it stronger and more durable. They can be used to repair cracks, leaks, or holes in a variety of surfaces, including concrete, metal, glass, and wood. Best of all, the cloth and mat are easy to apply and can be cut to fit any size or shape. So, whether you’re patching up a small crack or fixing a large hole, Hawk epoxy fiberglass cloth and mat can help you get the job done right. First, clean the area around the hole with sandpaper to make sure that the epoxy will adhere properly. Then, mix the epoxy according to the instructions and apply it to the hole. Once it dries, the epoxy forms a strong bond that will keep the hole sealed. It is important to note that the curing time may vary depending on your temperature and humidity levels. Once properly applied and cured your boat will be good as new – no leaks guaranteed!
Sealing a Fiberglass Hull with Hawk Epoxy
Sealing a fiberglass hull with epoxy is a great way to extend the life of your boat. Epoxy is a strong, durable material that will create a waterproof barrier between the hull and the water. It is important to properly prepare the surface before applying the epoxy, and to follow the manufacturer’s directions closely. Once the epoxy has been applied, it is important to allow it to cure properly before using the boat. With proper preparation and care, sealing a hull with epoxy will help to keep your boat in good condition for many years to come.
How to apply Hawk Epoxy
Epoxy is a type of synthetic resin that is often used as an adhesive or coating. It is typically made up of two parts that are mixed together and then cured to form a hard, durable finish. Hawk Epoxy by SeaHawk paints is a two-part epoxy that can be used for a variety of applications, including bonding, coating, and laminating. Before using Hawk Epoxy, it is important to read the instructions carefully and to follow all safety precautions. Once you have mixed the two parts of the epoxy together, you will have a limited time to apply it before it begins to set. For best results, apply the epoxy to a clean, dry surface and use a brush or roller to spread it evenly. Once it has been applied, the epoxy will need to cure for 24 hours before it is fully cured. However,
Hawk Epoxy is a versatile product that can be used in many different ways. We’ve highlighted just a few of the potential applications for this amazing adhesive. If you have questions for how to use Hawk Epoxy or need help bringing your boat painting project to life, contact the Bottom Paint Store customer service team Monday through Friday 9-5 EST 888-505-2313.
If your jet ski or waverunner hull is made of fiberglass then gelcoat can be an excellent restoration option. Gel coating a jet ski is a great way to keep it looking new and protect the surface from scratches and dings. It’s also a relatively easy process that most people can do in a few hours. In this blog post, we’ll walk you through the steps of how to gelcoat a jet ski. We’ll also provide some tips on how to make the process go as smoothly as possible.
What is gelcoat and what does it do
Gelcoat is a type of resin that is used as a protective coating on many boats, jet skis, and wave runners. It is applied to the hull of the vessel in order to provide a shiny, smooth finish. In addition to its aesthetic benefits, gelcoat also helps to protect the hull from UV damage, scratches, and other types of wear and tear. In some cases, gelcoat can even help to repair minor damage to the hull. As a result, gelcoat is an essential part of any boat or jet ski owner’s arsenal. While gelcoat can help extend the life of your jet ski or wave runner, it is not indestructible. Over time, it can become dulled or scratched, and it may eventually need to be replaced.
How to clean and prep the jet ski surface before you start
To clean the jet ski, you’ll need a mild soap, a soft cloth, and a jet ski brush. Start by mixing the soap and warm water in a bucket. Then Wet the jet ski with the soapy water and use the brush to scrub away any dirt or grime. Rinse the jet ski off with clean water and dry it with a soft cloth. For tough grease and dirt spots you can use a degreaser. This will remove any dirt, grime or grease that could prevent the paint from adhering properly.
Finally, inspect the jet ski for any cracks, chips or other damage. If you notice any of these, make sure to get them repaired before applying gelcoat. Use a fine-grit sandpaper to smooth out any rough spots. Gel coat repair kits, scratch patch kits, gel coat paste, fiberglass repair kits come with everything you need for small repairs.
Applying the gelcoat to your jet ski, wave runner
Applying gelcoat to a jet ski is a great way to protect your investment. Gelcoat is a clear or colored coating that is applied to the surface of a jet ski to protect it from the elements. It is also used to give the jet ski a high gloss finish. Gelcoat is available in both spray and brush-on versions. The brush-on version is generally easier to apply, but the spray version will give you a more even coverage. When applying gelcoat, be sure to follow the manufacturer’s instructions carefully. In general, you will want to apply several thin coats rather than one thick coat. Be sure to allow each coat to dry completely before applying the next one. Once the gelcoat has been applied, you will need to buff it out to achieve a high gloss finish. Once the final coat of gelcoat has been applied, the jet ski should be allowed to cure for 24 hours before being launched.
It’s important to choose the right gelcoat. There are dozens of different formulations on the market, so it’s important to do your homework and consult your owner’s manual. Once you’ve selected the right gelcoat, the next step is to apply it correctly. One common mistake is to apply too much gelcoat, which can lead to runs and sagging. It’s important to apply a thin, even coat and then allow it to cure properly before sanding or buffing.
With these tips in mind, your gelcoat project should be easier. Just remember to take your time and follow all instructions carefully, and you’ll soon be enjoying your jet ski on the open water. If you have any questions about selecting the right gel coat for your watercraft, please call the Bottom Paint Store customer support team 888.505.2313.
We strive to provide outstanding customer service. The following reviews were collected by Verified Reviews, an independent third party that specializes in the collection, moderation and display of ratings and reviews from actual customers. Below are some of the 5 star reviews from our customers.
Amazing fast quick customer service! Wry friendly and they had all my previous orders pulled up and on hand when I called which made the entire process seamless and fast! Love these guys! Chandler F.
Very friendly and helpful. They came through for me, and I really appreciated it. Mike T.
Dustin was extremely helpful, knowledgeable and personable when helping me with my order. Daniel W.
Outstanding service and response, excellent pricing too. Robert T
Great to deal with, super fast shipping Sven J.
Great customer service. We had a shipping error on the original order, and they corrected if promptly and hassle-free. Highly recommend! Chris J
Prompt and attentive service…. Well Done ! Gene I.
Received my order in a timely manner Michael L.
Talked to Hey personnel answered all my questions what is very patient couldn’t ask for anything better Jerry Y.
Fast shipping. Exactly what I wanted. I would recommend Tim R.
The bottom paint store is first rate. Product arrived in a few days and was well packed, and I can’t argue with the price along with free shipping. Donald R.
Appreciate the quick delivery. Greg R.
Quick and outstanding packaging it was shipped in. William S.
Easy, ordered by phone. Talked with assistant and made order. Two Fisted Great service,fast shipping very pleased Tom R.
Site was easy to order. Especially liked the chat when I had a question, was promptly answered. Cheryl D.
I’ve not used it yet, but the purchasing experience was fast and effortless and the delivery was on time and reasonable. I’m happy with my decision to use this store to get my paint quickly with no issues. Thank you ! Cindi C.
Everything went according to plan. The only issue I had was I did receive a tracking number but I believe it has to do with permissions in my e-mail client. I called for help and the gent was right on it. The product was shipped and arrived in a timely manner. BPS is now in my contacts folder for paint…..Greg M.
Competitvely priced, quick delivery, have used them many times and always good service. Ken C
Great business, and prompt customer service. Victor M.
Finding the product I wanted was simple and fast. Checkout was a breeze. I will definitely purchase again from bottom paint store.com Greg T.
Great service and quick shipping Kurt J.
I’ll definitely br ordering from you again! Ginger T.
Informative, easy ordering, on time delivery. Richard K.
Quick fast delivery. Mark L.
Mark Lanzotti Lennie S.
Site is easy to navigate and find the bottom paint I wanted. Checkout was easy also. Lennie S.
Excellent customer service Theodore S.
Good products at the right price Richard S.
Always professional, great prices and service.
The order was processed and shipped promptly and received the 3 gallons of paint in 2 days. The can lids were secured with small clamps, as required, and protected with specially designed one- and two-gallon styrofoam packs that fit the cardboard boxes perfectly and did not allow for movement of the cans. The prices were $40 lower per gallon than the pricing I could get with a 40% discount from West Marine. The Sea Hawk Colorkote mixed easily and went on smoothly and time will tell its anti-fouling properties and longevity. Coverage was a bit less than anticipated as 4 gallons would have been best for a 44-foot sailboat, 2 coats. Two people just over 2.5 hours to apply with rollers. Great service and excellent product. – Don P.
Quick and dependable service. Franklin H.
Great company to deal with, even sent me a letter on how to install the bottom paint. – Albert W.
Very user friendly web site. For some reason I wasn’t able to use PayPal to complete the sale. I somehow managed to input the wrong address for delivery. A quick email and the problem was corrected, even as my order was enroute. My first order. Won’t be my last. – Ronald O.
Great customer service. – George N.
Placing the order for the paint on the website was easy. I am working on a 50 year old aluminum flat Jon boat as a project. Bringing back to life. At the point where it needed a paint job. After much research, Bottom Paint Store came on top and Sea Hawk Aluma Hawk. The paint came quick, from Florida to Arizona. Well packaged. Now, as for the paint – it was very thick. Perhaps I should’ve thinned it down. I used a roller and a brush to finish off around and under the ribs. Paint dried quick. By the time I finished one end of the boat, it was ready for the second coat. But the finished product was awesome. The 14’ Jon boat looked new. I used the entire gallon. If I had to do it again, I would thin it down and perhaps use a spray gun. I was satisfied with the quick service and the paint. I do recommend this paint store and “thick” paint. – Raul M.
Website was easy to navigate and my shipment arrived promptly and in good condition. – David L. 5/26/2023
I have had nothing but a good experience with the Bottom Paint Store. Customer Service was very helpful and the number of options more than satisfactory. The only reason I withheld an excellent rating is the CS rep told me you do not carry any coatings for metal swing Kiel’s. – Dennis G. 5/26/2023
Exceptionally fast shipping, very fast email support and they had my hard to find item at a fair price. The Bottom Paint Store is definitely on my list of “go to” vendors. – John N. 5/25/2023
Very fast shipping and everything arrived in great condition. James T. 5/22/2023
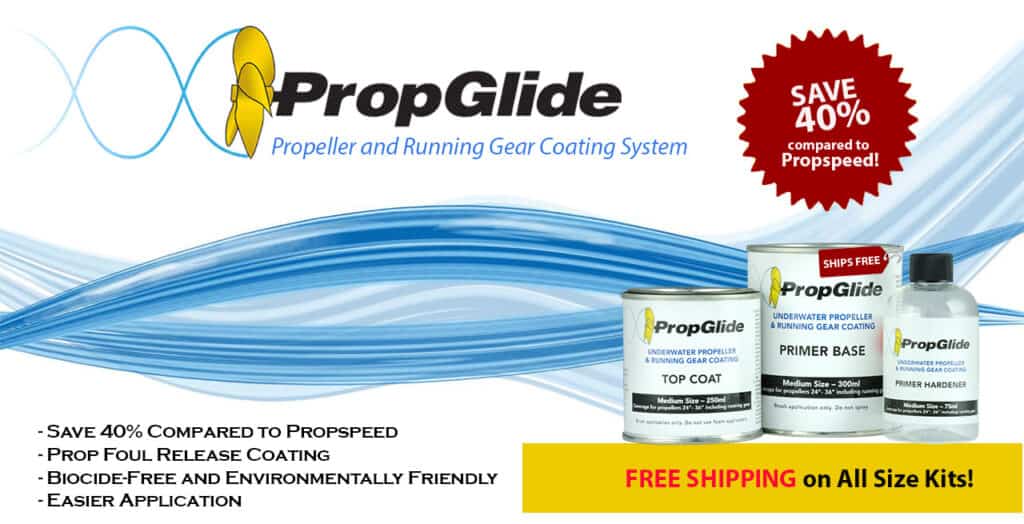
PropGlide USA Corp began its innovative approach to solving the issue of fouling on the props and running gear of vessels back in 2006. Since then PropGlide has perfected the formulation, achieved remarkable results, and has become the best affordable solution for boaters worldwide.
“Great tried something last year and came back to PropGlide this year.- Carl R.
PropGlide is an excellent protective coating for my propellers.- Louis S.
Easy to use. Too soon to comment on how it works. My boat is not yet in the water.- Goes on as described, the prep is the hard part. We will see how it works when I drop it in the water in the new few weeks. Expect it to work as advertised. I ended up with the medium kit and it was way too much for me. 2 – 3 bladed props about 12 inch blades plus the shafts. Better to have too much than too little I guess but next time I will order the small instead of medium.”
“I have used it before and (it) works great.”
“Easier to apply than Propspeed. Almost twice as long between the primer and the top coat.”
“It’s always nice to be able to order and receive in a timely fashion what you need for your boat running gear.”- Curtis S.
“Easy to apply, looks good.”- Greg D.
“Just applied it. We will see how it works during the coming season”.- Shawn H.
“Product works great and is a reasonable price.”
“Excellent. Love this product. Strongly recommend.”
“I have not had time to apply the Prop glide yet. I just received it this evening.” – Mike Z
“Good product. Less expensive than PropSpeed. Great price”!
“Product works well on running gear when applied properly. Follow instructions on application”.- Charles O.
“Works as advertised”.- Raymond R.
The following testimonial was provided outside of Verified Reviews.
“We applied PropGlide to the propellers and rudders on our 42′ power catamaran in March 2016. We have found excellent results so far with very little growth appearing on the running gear. We have been able to maintain great boat speed, excellent economy and no vibrations unlike previous years with using other products. Our Applicator has even commentated how much easier PropGlide is to apply compared to its competitors.” – Mick M.
If you have any questions about foul-release coating systems for your underwater propellers and running gear please see our numerous how to articles on PropGlide or you can call our technical support team 888-505-2313.
There are many common fillers used with gelcoat and resin and here we’ll help you pick the one that is right for you.
When using putty, a good rule is not to go higher than 1/8″ thick without adding a layer of glass to prevent any issues. With the various fillers, for the right working consistency, you’ll want about 60-70% mix to resin ratio.
Milled Fibers: Finer than chopped glass, makes a harder putty that is strong and coarse.
Walnut Shells: Brown in color and preferred for wood putty or nonskid since it has large particles. Good Strength and darker pigment.
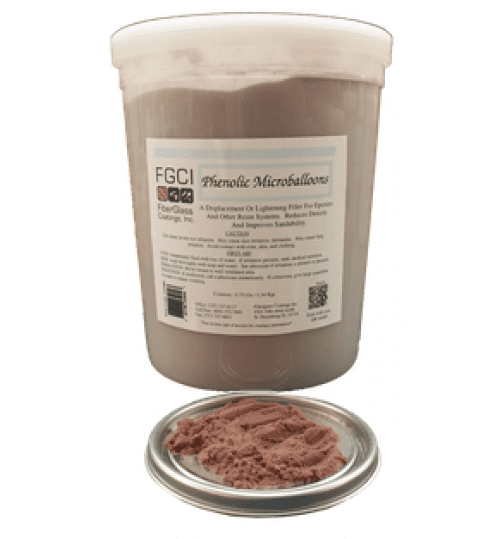
Phenolic Microballons
Microballoons or Microspheres: Phenolic spheres are generally plastic or glass and hollow, intact spheres that are lightweight. This is ideal for making fairing compounds. The Microballoons are a more expensive option for filler.
Fumed Silica: Also known as Cabosil FIller or Aerosil Filler. This is a hydrophilic fumed silica. Fumed Silica provides little change to weight, color, or physical properties after cure, used in resins and gelcoats to make them hang on vertical surfaces, (too much can cause porosity.)
Cotton Flock: Made from pieces of cotton and thickens to an off-white color. Great for bonding many substrates, especially wood. The mixture also creates a multipurpose adhesive for many other substrates in addition to providing excellent substrate wetting and penetrating characteristics. Increases impact and abrasion resistance.
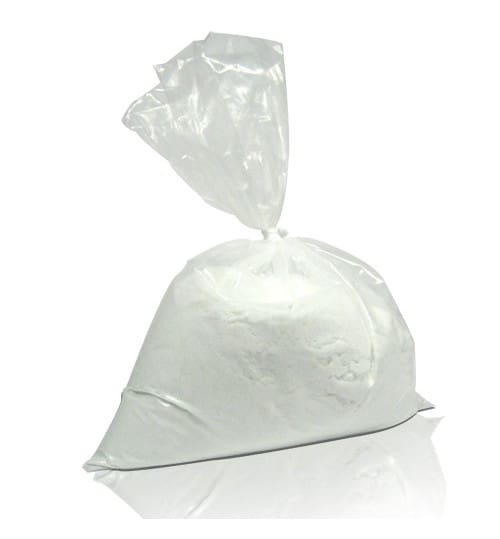
Chopped Glass Fibers
Chopped Glass: These are the biggest pieces of fillers and are most popular for use with resin putty. Perfect for corners, crack resistant, and doesn’t affect pigmented gelcoat. 1/4″ glass fibers make the strongest glass reinforced putty.
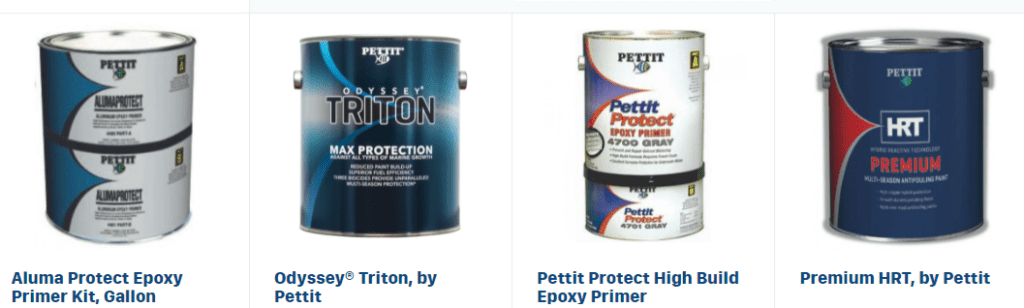
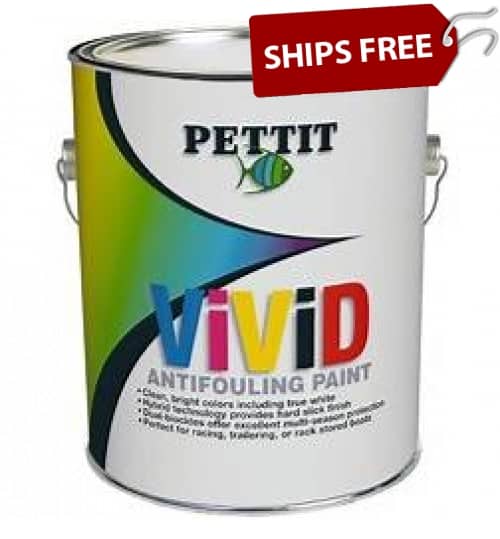
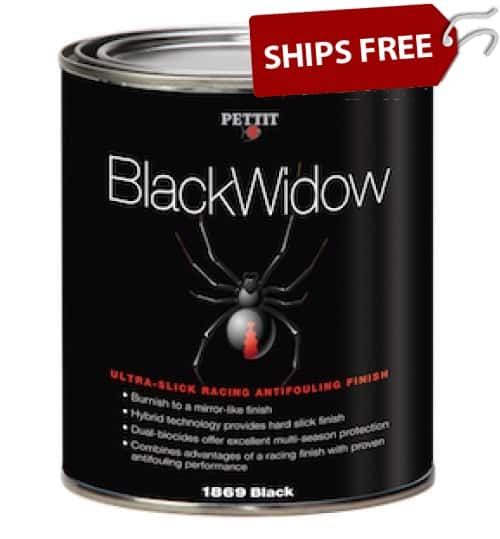
Pettit Marine Paints offers a number of high-performance products, from topside paints to antifoulant bottom paints and everything in-between, some brand names include Trinidad, Easypoxy, Odyssey, Triton, and Black Widow covered. Pettit Paints plant is located in Rockaway, New Jersey, and its products are available throughout the world.
Below are some of the Pettit Reviews we have received from customers through Verified Reviews, an independent rating service.
We first used Pettit Trinidad Pro on my sail boat in 2014. Now in 2021 a full 7 years later we have to repaint. Probably should have repainted last year but regardless of 7 years or only 6 years of effective coverage its amazing. Virtually no bottom growth for 6 years – WOW. This would be my permanent choice for bottom paint if Pettit were not finally giving up the fight. – Michael H
The delivery was fast but the gallon can was badly damaged due to the weight of the product inside. Nothing wrong with the contents and the package did have a red warning label Do Not Drop. Can’t blame the store, just the shipper. – Robert K
Went on thin but easily. Definitely needs two coats as the sanding/buffing to bring out the best in the product was worn through on edges/thin spots. Seems very slick….first time trying this one.
I will know more later in the summer and beyond. I am hopeful that it is as good it sounds. I tried a roll and tip method for applying the two coats of paint, and it sets up too quickly for that, so I think it would be applied better by either roller or brush alone.
Product worked as expected I will rate the results when I haul the boat in the fall. salvatore s. published on 03-06-2023
Went on somewhat easily, but make sure you mechanically stir the solids in. No amount of mechanical shaking will break up the mass in the bottom of the can. Hopefully it holds up OK. Not expecting long term, but 9-12 months would be nice. Aaron G. published on 07-26-2022
It works, it really does. Gregory C. published on 04-24-2022
I am very happy with Pettit Prop Coat and especially happy with the brush on quart can availability now. Spray can version is never as good with half or more going into the air and is much thinner. I’ve tried many products and PPC is the best so far. Curtis W. published on 03-10-2022
Product works great.
So far so good, extremely easy to apply, hopefully it will work well. published on 05-24-2021
Polyurethane paint, also referred to as PU paint or PU coating, is a durable, highly-resistant coating used in industrial and architectural coating systems. It is popular in the marine industry and is used for numerous applications including coatings, rigid and flexible foams, and varnishes. It is also used in steelwork, concrete, wood, and other substrates.
Polyurethane is a reaction polymer, a combination of a polyol resin and an isocyanate hardener or curing agent. Essentially, a polyurethane coating is a liquid plastic which dries to form a paint-like film on an underlying substance or layer. Polyurethane paint provides durability, resistance to chemicals, water, abrasion, and temperature, as well as an attractive glossy finish. The most common application of polyurethane is as a solid foam, accounting for approximately 60% of all polyurethane produced.
What is polyurethane used for?
Polyurethane is a versatile material that can be used for a wide variety of applications. It is commonly used in the manufacture of plastics, insulation, and coatings. Polyurethane is also used in the production of adhesives, sealants, and elastomers. In addition, polyurethane is often used as a food additive and as a component in medical devices. Polyurethane is an ideal material for many applications due to its durability, flexibility, and resistance to chemicals and abrasion.
Marine Polyurethane Clear Coat
Polyurethane can be used to protect a boats paint and to keep the finish on wooden marine vessels visually appealing and more durable. You can apply polyurethane over any type of paint if it is clean and prepared properly. Polyurethane coatings can be applied to exposed wooden surfaces to create a glossy finish that serves to repel water, resist corrosion, and protect from scratches, stains, and UV damage.
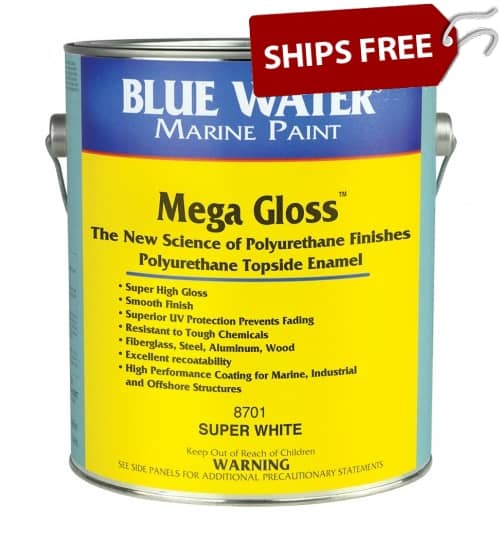
Blue Water Marine Mega Gloss Polyurethane
Mega Gloss by Blue Water Marine is a single component topside polyurethane enamel that can be used on fiberglass, wood, aluminum, and steel. It provides a hard protective coating for super high gloss, color retention, and long durability. Mega Gloss is fast drying which when brushed or rolled, it can also be sprayed, and offers a smooth finish, is resistant to tough chemicals, cleaning solutions and ultraviolet light.
Polyurethane Foam Uses
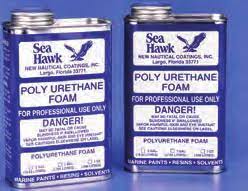
Sea Hawk Polyurethane Foam
Sea Hawk polyurethane foam is urethane foam that provides excellent flotation, soundproofing or insulation. Mixed 1:1 and easy to install in hard-to-reach places. Poly-U-Foam bonds to wood, metal, and fiberglass. It foams wherever it is poured and is impervious to solvents and gasoline. A 2-quart kit will yield 2.5 cubic feet of space. Available in 2lb density. It is advised not to use below 70°F.
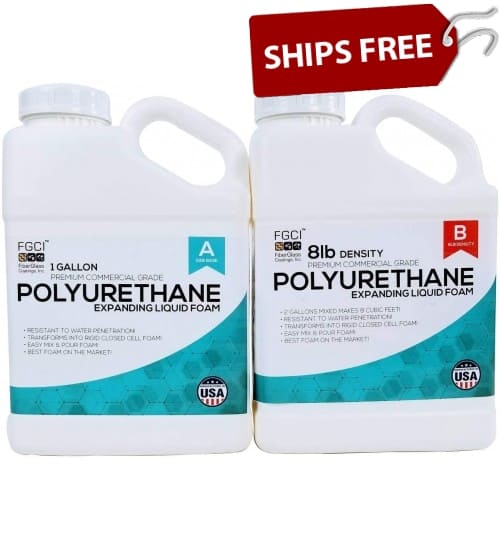
Liquid Urethane Foam Kit
Liquid urethane foam is a closed cell foam that comes in varied sizes, most commonly 2LB, 4LB, 8LB and 16LB densities. This two-part liquid, expanding rigid urethane foam is a closed cell, pourable foam, which will resist the absorption of water. It is the ideal boat foam for structural applications as it is resistant to water penetration and can be used for flotation, insulation, casting, carving, sculpting, sign making and areas where an extremely durable (you can penetrate with a fingernail) while it cannot be dented by hand, making it ideal for support.
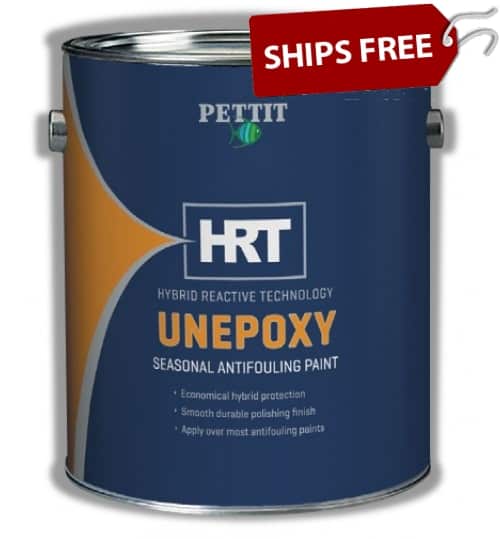
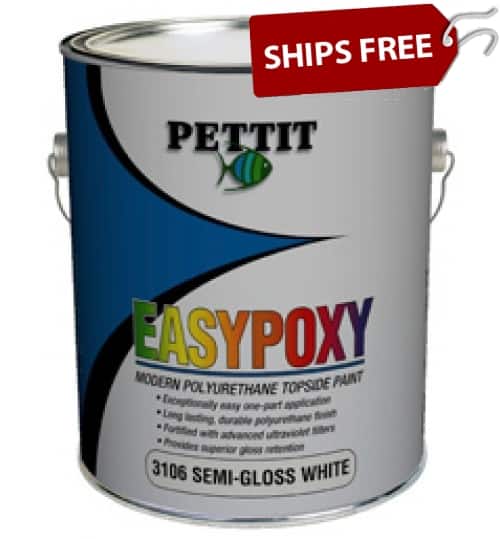
Pettit Easypoxy/ EZ-Poxy
Pettit EZ-Poxy is an advanced one-part polyurethane topside and deck enamel. It’s a high gloss finish flows well when applied with a brush. It is a modern one-part polyurethane topside and deck enamel. It It’s use of silicone provides a brilliant shine and easy brush-ability. Its advanced ultraviolet filters enhance the superior gloss retention and durability of polyurethane. The result is a topside finish that is exceptionally easy to apply, producing a lasting gelcoat-like brilliance with a minimum of effort. It is more economical, requires less effort, and is more forgiving than the competition.
Easypoxy’s innovative ultraviolet filters improve gloss retention and enhance the polyurethane’s durability. This results in an end product that is simple to apply and easily creates an enduring shine and superior gloss retention, similar to that of polished gelcoat. Pettit Easypoxy is available in numerous colors.
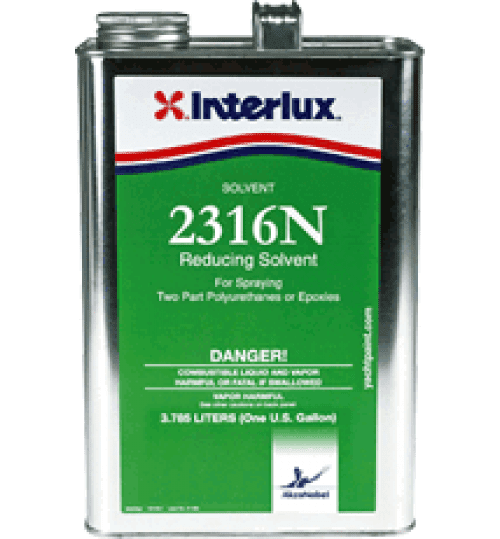
Interlux Spray Reducing Solvent
Interlux’s Reducing Solvent 2316N is for use in specific two-part polyurethane and epoxy products. It is an amazingly effective, fast evaporating solvent. Safe for aluminum outdrives. Refer to the specific product directions for the amount to be used.
Interlux Pre-Kote
Pre-Kote® is a unique V.O.C. compliant, single package, undercoater or primer for use with Brightside® Polyurethane, Yacht Enamels, or anyone-part topside finish. Microspheres give Pre-Kote® superior build and hide while improving flow and sandability. Use anywhere above the true waterline where a coating is needed to provide a smooth, fair surface for overcoating with a topside enamel.
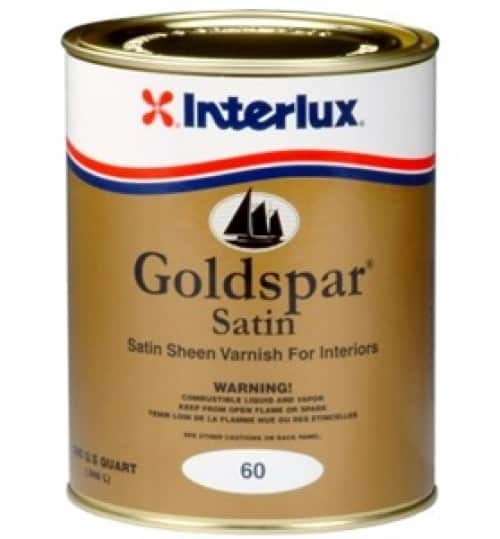
Interlux Goldspar Satin Varnish
Designed for interior wood surfaces, Interlux Goldspar Satin Varnish is a modified polyurethane low luster varnish. It produces a rich satin sheen finish that resists scratches and stains and applies easily enough to yield truly professional results by either brush or spray. It’s low luster finish makes it ideal for cabin soles, cabinets, counters, tables, as well as home interior finishes.
Urethane Paint
Urethane paint was created in the mid-1960s, utilizing newly developed plastics technology, and designed to be superior to enamel paint in terms of durability by mixing pigment with polyurethanes, which act as the binder to hold the pigment molecules together. Semi-gloss urethane paints have been developed, but all urethane paint will have some degree of glossiness, because the same properties that make it resilient also make it reflect light. It has become a staple in the marine and automotive industry because of its durability.
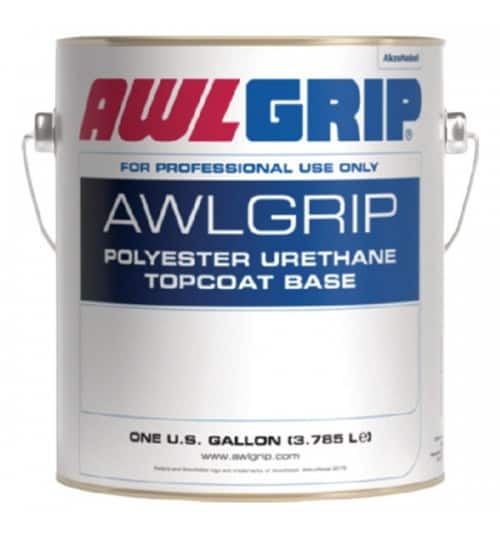
AwlGrip Topcoat
AwlGrip Topcoat is a polyester based high gloss polyurethane topcoat giving long lasting gloss and color retention. It can only be applied above the waterline of your boat by either a brush, roller, or spray. You should apply Awlgrip Topcoat in two coats of 1.5 to 2.5 mils WFT each and allow 16 hours between each coat. Sanding between coats with 280 to 400 grit paper will provide a smoother finish.
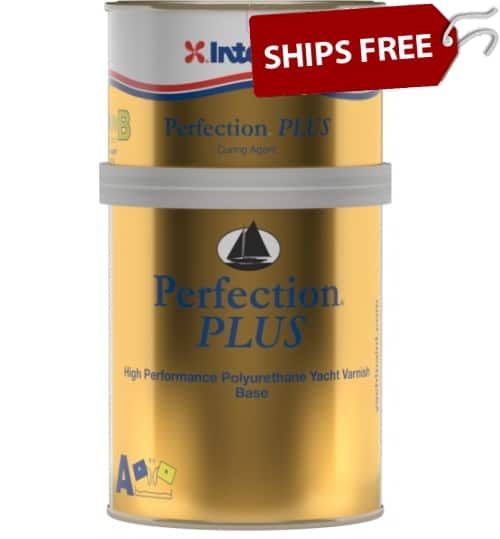
Interlux Perfection Plus
Considered by many as the ultimate clear wood varnish, Interlux Perfection Plus is a high-performance clear polyurethane, offering multiple solutions from one product delivering the ultimate in clear wood coating performance. The chemical cure urethane formulation combines with a best-in-class UV and HALS package to offer outstanding chemical and abrasion resistance, and superb gloss and gloss retention. It typically lasts four times longer than conventional one-part varnishes and can is suitable for all woods, including teak.
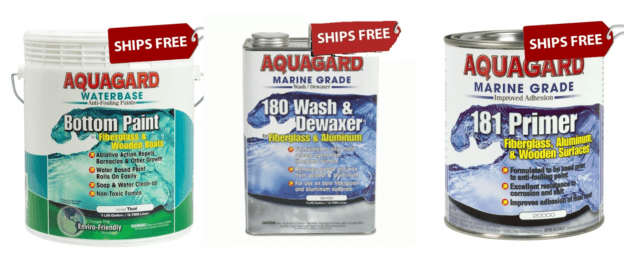
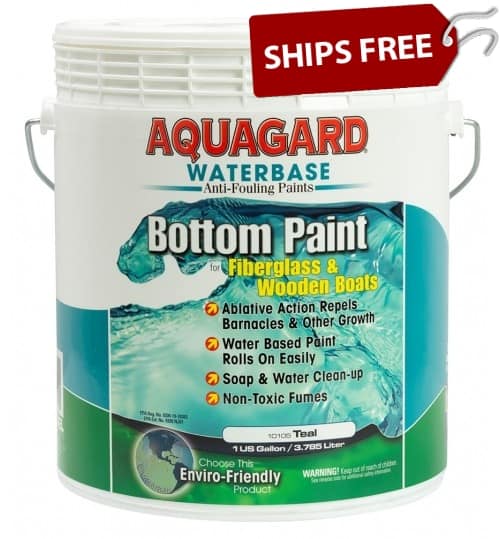
Antifouling paint can be applied to many different substrates including wooden boats. What is the recommended procedure for preparing the surface? Is a primer needed? What paint should I use? This article should answer all those questions. The Bottom Paint Store has 3 water-based antifouling products: Aquagard, Sea Hawk Monterey, and Interlux Fiberglass Bottomkote Aqua.
Aquagard Water-based Antifouling Bottom Paint
When applying antifouling paint to wooden boats, primer is optional. Antifouling paint can seep into the wood grain and create a strong bond. Usually, the first coat is thinned 10% to assist in penetrating the wood grain. Then the subsequent coats can be applied normally.
If adhesion is a major concern, then primer will promote adhesion. There are 2 Aquagard primers to choose from: 181 Solvent based primer and 190 Water based primer. They both accomplish the same task, but the water-based version has less VOC’s (volatile organic compounds). If you choose to use a solvent based primer and then a water based paint, make sure the primer is completely cured before proceeding. You can read the full application instructions on the Aquagard product page.
Monterey Self Polishing Solvent Free Bottom Paint
When applying Sea Hawk Monterey to a wood hull, no primer is needed. You can use the same method of thinning the product to allow it to seep into the wood grain. If the wood can accept more paint after the first coat, you can repeat the process a second time. Here is the step by step process for Monterey:
Step 1 – CLEAN SURFACE
Surface must be clean, dry and free of contaminants.
Step 2 – SAND & CLEAN
Sand to a uniformly frosty, dull looking surface with 80-100 grit (no finer) sandpaper; remove any residue.
Step 3 – APPLY ANTIFOULANT
Apply two coats of Sea Hawk antifouling by brush, roller or spray. Apply first coat thinned 10% and let dry overnight. Apply two more coats of bottom paint allowing 3 to 6 hours between coats and a minimum overnight dry.
Interlux Fiberglass Bottomkote Aqua
BARE WOOD: It is essential to remove all contaminants from the surface prior to sanding and overcoating.
DO: 1. Wash the surface regularly with Awlwash (73234) or Awlwash 2.0 (73235) and water. 2. Use only mild solvents to remove stubborn stains. Awlprep T0008, mineral spirits and xylene are acceptable for use on Awlgrip HDT. Do not allow solvent to dry on the surface or puddle and soak into the surface. Wash these areas with Awlwash and water to remove solvent residue. 3. Always thoroughly rinse surfaces with fresh water after cleaning with Awlwash or solvents. 4. Use distilled white vinegar and hot water to remove stubborn salt stains. Washing with Awlwash after use of vinegar is recommended. 5. Use Awlcare (73240) by hand only to remove mild diesel soot stains. Protecting the surface with Awlcare will help maintain the gloss of Awlgrip HDT. Awlcare is a hand applied, non-abrasive, synthetic polymer. It will remove mild stains, water spots and diesel soot while increasing resistance to attack from acid rain and other pollutants, when applied regularly.
DO NOT: 1. Do not use traditional waxes. Awlgrip has developed Awlcare Protective Polymer Sealer for those who want to enhance their finish and need the additional cleaning power of a hand applied, dry wash product. 2. Do not use abrasives, scratch pads or polishing compounds. Scratching the surface gives dirt a place to cling while wearing out the resin layer. Using abrasives of any kind will reduce the overall life of the finish and voids the Awlgrip Limited Warranty. 3. Do not allow contact between the Awlgrip HDT and teak cleaners. 4. Do not allow metal polishes to dry on the surface of Awlgrip HDT. Metal polishes may discolor and stain the painted surface. 5. Do not use strong solvents (eg. lacquer thinner, M.E.K., acetone) to clean Awlgrip HDT. 6. Do not allow wet equipment (e.g. seat cushions, coils of line, sails, sail covers, coolers) to trap and hold moisture against Awlgrip HDT. 7. Do not ‘shrink wrap’ or tightly bind Awlgrip HDT surfaces with plastic wrappings. The cover system, whether synthetic or natural fiber, should be ventilated to allow the coating system to ‘breathe’.
The surface preparation advice provided, and equipment suggestions, can be used as a guide. Preparation techniques and results will vary according to individual conditions, equipment choice/condition and other factors. Testing on a non-critical area should be carried out prior to full-scale preparation. Awlgrip HDT should be applied over Awlgrip 545 Epoxy Primer or previous Awlgrip Topcoat/Awlgrip HDT/Awlcraft 2000. Over Awlgrip Topcoat/Awlgrip HDT/Awlcraft 2000 topcoat sand topcoat with P400 to remove the gloss and clean with surface cleaner T0170 (US) or T0340 (EU) using the two cloth wipe down method. Avoid painting in direct sunlight. Do not apply paint materials to surfaces less than 5°F (3°C) above dew point, or to surfaces warmer than 105°F (41°C). Ambient temperature should be minimum 55°F (13°C) and maximum 105°F (41°C). At standard conditions (77˚F (25˚C), 50% R.H.), avoid applying topcoats when the temperature could drop below the dew point within 6–8 hours after the application.
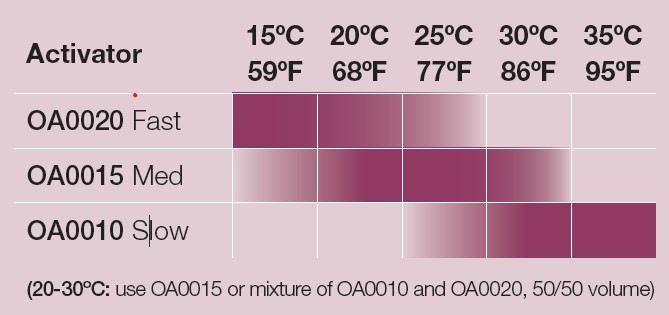
Mixing & Reductionof Awlgrip HDT Mixing and reduction requirements will vary according to individual conditions, climate, equipment choice/condition and other factors. Mixing and application of a small sample before full-scale application is recommended. Mix Ratio (by volume) – 1:1:0.25 (Base : Curing Solution : Activator) (eg 1 Gallon:1 Gallon:1 Quart or 100:100:25ml). Induction time = 15 minutes. Mix to a smooth, homogenous mixture Awlgrip HDT is designed for spray application only. Correct choice of activator must be made according to the application conditions and project size. General guideline: 15-23ºC OA0020 20-30 ºC OA0015 (US only) >30ºC OA0010
1. Mix all 3 components of Awlgrip HDT thoroughly, especially the base. Mix by volume to a homogeneous mixture:
For example, mix 100ml OC series, 100ml OC0010 & 25ml OA0020 (or 32 ounces OC series, 32 ounces OC0010 & 8 ounces OA0020). Keeo in mind that adding more activator into the mix may compromise pot life and could affect the flow of the product. 2. Once the product is mixed, ensure at least 15 minutes induction time. If the induction time is not followed, the product may down gloss / haze once cured. 3. Initial spray viscosity should be 14-20 seconds (DIN4 or equivalent) and varies with the application conditions. The best choice of activator will depend on application conditions and boat size.
As a general guideline (see below):
Application & Conditionsfor Awlgrip HDT
4. Application equipment: Gravity or pressure feed, air atomized spray or electrostatic spray 5. The primed surface must be clean and dry. 6. Apply 2 coats of Awlgrip HDT, this should be sufficient to achieve the correct DFT of 50-75 microns (3mils) DFT. However, some colours may require additional coats to achieve full hide / opacity and colour development. Application of the first coat should be approximately 75 microns (3 mils) WFT and application of the second coat should be approximately 100 microns (3.9mils) WFT. The surface may not become completely ‘tack free’ in between coats, however it is recommended to wait at least 30 minutes between coats (this time will vary depending on activator selection, temperature and humidity and air flow) 7. Awlgrip HDT has a relatively short pot life compared to Awlgrip topcoat, so for optimal performance prepare a fresh mix for each application. Don’t mix the new & old paint together as this may compromise the final finish. 8. The Awlgrip HDT activators can be blended together to suit not only environmental conditions but also project complexity. For a good starting point use a 50/50 OA0010/ OA0020 blend (or OA0015) then adjust to your preference. 8.1 To achieve a longer pot life or longer wet edge, the blend of A0010 and A0020 should be adjusted to include more A0010. 8.2 Similarly, for small areas or where drying time needs to be reduced, the proportion of A0020 should be increased.
9. Even if temperature has a greater effect on the cure and the potlife, humidity to some extend can also have an influence on the flow and performance of the product. 9.1 In cooler humid conditions it is suggested to either use only OA0020 or a blend of OA0020 and OA0010 with a higher proportion of OA0020 to OA0010. Example 75/25 OA0020/OA0010. 9.2 In hot humid conditions it may be necessary to increase the proportion of OA0010 and decrease the proportion of OA0020. Example, 75/25 OA0010/OA0020. Even in hot humid conditions, it is not recommended to solely use OA0010 due to the risk of moisture causing down glossing. 10. When first using Awlgrip HDT, it can apply differently to other topcoats currently in use. To help with this, up to 12.5% of T0002, T0001, T0003, T0005 or T0031 can be added to help with wetting out of the surface. Using extra reducer may require an additional coat to be applied and will mean the product is no longer ‘VOC compliant’. Once applicators are used to the behaviour of HDT on application, a similar quality of finish can be achieved without the addition of extra reducer. It is recommended to mix separately the Activator (OA0010, OA0015, OA0020) in equal amounts to the chosen reducer. This mix can then be added to the 1:1 base & curing solution at 25%. This mix will contain 12.5% Activator (as recommended) with 12.5% reducer; from a painters perspective this gives a 1:1:0.5 overall mix ratio. 11. Thanks to the activator/ reducer choice based on temperature, Awlgrip HDT has been proven to be a very adaptable product. The chart on page 1 is to be used as a guide only. In low temperatures, the standard paint mix with fast activator works very well. On larger surfaces, the addition of standard solvents helps to carry a wet edge if the applicator is struggling. For hot weather, OA0015 activator works well. If the applicator is struggling with wet edge, the addition of solvents helps. It is recommended when blending the activators to use the two extremes OA0010 Slow) and OA0020 (Fast) this allows more control. In low temperatures, we recommend T0001 or T0002; in medium temperatures T0003 and in hot temperatures T0005. In hot to very hot weather T0031. Start with the addition of 5% solvent. It is recommended for larger applications that a pre-shoot on panels is to be carried out, “to enable applicator to choose” the best optimization for the size project and conditions. DRYING TIMES & REPAIRS for Awlgrip HDT 12. If environmental conditions require that the product dries faster (cooler more humid conditions), add slightly more OA0020 into the mix. Keep in mind this may compromise pot life and could affect the flow of the product. Also, in that case the product is no longer VOC compliant. 13. Awlgrip HDT has a new repair process compared to the standard Awlgrip repair. See the Repair & maintenance brochure for further info. 14. Awlgrip HDT can be harder to polish therefore we only recommend this for repairs and to remove localised defects. If working in an environment where you know you’re going to polish the whole boat, Awlcraft 2000 is the best choice. 15. Polishing Awlgrip HDT : Always test a small, low visibility area (or a sample panel) first before proceeding. Certain color shades may not be suitable for polishing. The tone of the color may be affected during sanding or aggressive polishing. Multi-stage sanding & polishing systems can also be used. You should contact your local supplier for further information.
Awlgrip HDT Application continued
Application equipment and parameters are given as a guide. Actual equipment choices will vary according to application conditions, equipment condition and other factors. Testing on a non-critical area should be carried out prior to full-scale application. Contact your local technical service representative for further advice if necessary. To ensure optimal adhesion between coats Awlgrip HDT should be applied according to the overcoating intervals as described in the Recoatability & Drying Times section. Apply a full coat of Awlgrip HDT to the surface. Allow tack coat to “flash off” 30-45 minutes depending on application conditions. Apply a slightly heavy second coat. A third coat can be applied to reach DFT if needed.
Application Methods
Fluid Tip
Fluid Pressure
Air Pressure
Conventional Spray Gravity, Electrostatic
1.20 – 1.40 mm 47 – 55 thou
–
180 – 280 cc/min
3 – 5 bar 29 – 44 psi
Recoatability & Drying Times The data given for recoatability is not exhaustive. Actual recoatability can vary according to individual conditions, climate and surroundings. If unsure, consult your local technical service representative before proceeding.
Awlgrip HDT has a shorter pot life than a standard polyurethane topcoat.
Overcoated by
15ºC (59ºF)
15ºC (59ºF)
25ºC (77ºF)
25ºC (77ºF)
35ºC (95ºF)
35ºC (95ºF)
Min
Max
Min
Max
Min
Max
Awlgrip HDT
2 hours
24 hours
2 hours
24 hours
2 hours
24 hours
Recoatability: Spray application consists of 2 to 3 coats applied over 2-4 hours. Exact time will vary with temperature, project size and film thickness applied. Awlgrip HDT cannot be overcoated with itself after 24h. Please contact your local representative for more information Some Important Points Awlgrip HDT is compatible with Awlgrip repair product. Please refer to the Awlgrip website or to the Awlgrip Application Guide for further information.
Sea Hawk Paints is an American manufacturer of premium performance antifouling paints and coatings, dedicated to bringing the highest quality products to boat enthusiasts.
Bottom Paint Store is a proud Sea Hawk paints distributor, and we have received a lot of Verified Reviews from actual customers using Sea Hawk marine paints. Although the reviews are listed on each of our product pages, we thought it would be helpful to share a collection of some of the reviews on one page.
Sea Hawk Aluma Hawk Paint Reviews
Seahawk aluminum boat paint is perfect. No primer required. I’ve used this paint for two years with excellent results. – William E.
Great product. – Kody L.
Very impress with the paint covering, 1 1/2 half gallon for my 20 feet pontoon.- Cristian V.
Adhesion seems better than most paints even when not fully cured. Liking what I see so far. – Mark L.
Great paint and easy to use. Took a little bit longer to dry than expected, but that was mostly a humidity issue on my end. Looks great and it will buy it again if I need some more for anything.- Eddie C.
Haven’t used it yet but I ordered it because of its good reviews on YouTube.- Jesse H. Great product. Bruce D.
Excellent product for my Jon Boat- Dennis E.
Looks great! Sam B.
I learned several things about this paint; 1. Make sure you apply it soon after you receive it. If it’s going to sit for a couple of weeks, you will need to stir it very well to break up chunks in the bottom of the can. 2. Two quarts are not enough to paint the bottom hull of a 14-foot aluminum Jon boat. It will take at least 3 quarts for 1 coat. 3. Wear gloves. If you get this on your hands, it will take longer to get off than regular paints. 4. It takes a week to cure. It says so on the can and I can see that. Even though the paint appears dry after a few hours, it’s still tacky. So, you will need to have some patience. Seriously, this is not like painting other objects like wood. Read all the directions and act accordingly. Keep in mind that this is for boats that will routinely be out of the water. It has no anti-fouling properties, and that’s OK if you’re not going to leave it in the water. Personally, I live in a desert area of Arizona, so not an issue for me. – Kevin P.
The best product for aluminum boats.- Robert D.
Purchased an older small used pontoon for our no motor lake. The bottom crud was like cement and I eventually used a sand blaster wand attachment to my power washer to clean of this crud (unreal). Chose Aluma Hawk paint for the sand blasted pontoons and it worked great. This paint needs to be used in a WELL ventilated area!!! I was outdoors painting with a roller on a calm morning and decided to wait till the wind picked up to finish. Tough durable and easy to use. The green makes it look like its from the military surplus! Love it. Certainly the fish will be confused. LOL.- Keith B.
Smooth application.- Brad H.
Very good paint. – Chris T.
I used a roller went on smooth. – Roger C.
The paint match was pretty close to what the previous owner said he put it on the boat… I only did the transom and some touch up on the sides. Good quality paint for an aluminum boat.- Rich H.
I purchased the Aluma Hawk 7031 lite gray – 1 gallon, which gave me 2 coats on the bottom & 1 coat inside. The factory didn’t recommend spraying the paint, so i rolled it & brushed it on. The paint dries quickly, so you have to work fast to maintain a wet edge. I did small sections at a time to make sure I got even coverage. – Russell S.
Haven’t used it yet. – Joe S.
Love this paint. I painted my jon boat years ago with this stuff. It holds up, doesn’t fall off or fade. Added pods to my boat and had to get another quart. The color matched really well.- Steve K.
Great paint, just needs to be shaken before shipping.- Greg M.
This paint if fantastic! It adhered to my boat very well and it only needed one coat to cover evenly. – Arnold B.
Met all my expectations for painting exterior of houseboat. I strongly recommend!- Marsha M.
Best I ever used on alum!!!!!!!!!!!!!!!!!!!! – Herman B.
The Value is in the Lasting Performance so I shall see. Putting it on, one NEEDS to KNOW what they are dealing with BEFOREHAND as far as Application, in knowing this project should come out perfect. Price of this product should be determined by it’s worthiness over time. Clean Up be SURE to use right Measures and Tools.- Jerry H. Works good, dries well, one quart did a first and second coat on our jonboat.- Lindsey M.
Anticipating the paint will be great- Paul M.
Great products. – D. Mendez
Great product. Best bottom paint I have used yet. Good ventilation required. -Jon B. Awesome- Todd Z.
Paint was as advertised. Very pleased with product. Would highly recommend.- Jerry R. Easy to apply and dried quick, didn’t even really need a second coat but put one on anyway. -Sarah L.
Applying the product now and appears to be coating and covering as described. The painting (job) isn’t complete yet so I can’t comment on life longevity or wearing but satisfied so far. – Jason K.
This appears to be a good quality product but is not real user friendly for DIY due to the fumes and the fact that MEK is needed for clean up. – Douglas L.
So far pretty good, it’s been about six months now since application. I recommend reading the directions very well, it tells you exactly how to thin and apply with the exception of what type of roller to use, I used a 1/4 nap roller but seemed to go on pretty thick. I had to thin it a bit more than what it said in order make it a bit easier, it recommends rolling as best method but I believe spraying would be better. A 16 foot long 5 foot wide vhull took about a gallon and a half to paint but I believe it is because it was going on pretty thick, to spray it says can be thinned 50% but for roller or brush only 10% which seemed to thick and not much coverage, either way you have to move pretty quick because it will flash pretty fast. It dried to touch pretty quick but due to the thickness from rolling it seemed to take forever to fully dry and or cure during which time it was still pretty soft and easily scratched off. After being left to sit and fully cure/harden I will say the stuff seems pretty hard and tough as nails. I used the sand color and if an when the time comes to paint the boat again I would use it again only spray it . I initially bought a gallon and a quart but soon realized it was going to be enough so I bought another gallon and still have about half of it left, I applied two coats to the entire boat both inside and out.- David P.
Great- Todd Z.
The paint went on as expected will have to wait and see how it holds up.- Howard B.
Great product. – Rober P. May 10, 2023
(I) put the first coat on and it’s awesome. Kurt S., May 9, 2023
Paint is as good as it appeared…FOLLOW PREPARATION DIRECTIONS, and the process of painting will go smoothly. We got two coats onto a 16′ boat, did it in a 65 degree garage, used a 6″ foam roller (with some cut-in with a brush), and it looks great! Stephen K. May 8, 2023
Follow the application directions and you will be satisfied. – Brian F. April 23, 2023
Aluma Hawk Boat Paint is the best paint you can buy for DIY. And you can’t go wrong buying it from Bottom Paint Store. 2 great companies come together. James H. April 14, 2023
I used this brand on the outside of my goes on thick dries fast and holds up well. Dan M. March 31, 2023
Good product would buy it again. Martin B. March 26, 2023
Great paint for aluminum boat. This the second order for a second boat. First boat painted 3 years ago still looks great. Put it on as directed and it will work. Clayton D. March 13, 2023
I thought the value was great even though I haven’t used it yet due to my marina being backed up with haul outs so Ill probably get hauled out after hurricane season is over, plus it will be cooler then as well.- Michael W.
The quart I bought was surprisingly heavy but instructions were clear and it was easy to apply. Certainly recommend gloves and a disposable brush. – Peter S.
Boat had never been painted and I prepped and applied 2 coats below the waterline and 3 coats on the waterline . Held up for 2 years in coastal NC waters . Very little growth to remove . Pressure washer blew most of it off . I would call Sea Hawk Cukote a very good product. – D. Bordeaux
After more than 40 years experimenting with different bottom paints on many boats, I’d have to say Sea Hawk paints are the best (least fouling, longest-lasting) ablative paints I have found. – Stephen P.
Quick delivery good pricing. – Robert S.
I kept my sailboat on the Chesapeake in an area with warm brackish water very conducive to barnacle growth. Cukote worked better. – Robert P.
Excellent product. Alfred L.
IMO, this is the best bottom paint. Only requires one coat. – Gerald D.
It is on our boat now and we needed some touch up. – Carol S.
Great product to use on boat bottoms. – Jeffrey R.
Great product and worth every penny!! Joe F., March 3, 2023
Cleaned the surface, highly recommend a fan or 2 when using. Does have strong odor like any reducer or thinner. – Peter P.
A high quality epoxy paint. I will order it again. – Edward O.
Applied well, pretty happy so far! – Sam B.
Love it. Easy to work with and tough when cured ! Easy to wet sand also in prep for color coats ! – James W.
Very easy to use, just follow the directions. I have not put the boat in the water yet, but I don’t forsee any problems. – Sharon T.
The Sea Hawk Tuff Stuff was very easy to work with and the 1:1 ratio made mixing easy and error free. It went on easily and dried quickly so that I could apply 2 coats plus bottom paint In one day on a 46ft. Motor Yacht. The Sea Hawk Tropicoat was also easy to go on ( I recommend thinning as the paint is extremely heavy with copper). It dries quickly and have a hard service in 15 minutes. I am very happy with both products. – George M.
It’s no secret that fiberglass surfaces can be extremely fragile and susceptible to damage. Even the smallest nick or crack can quickly become a larger problem, leading to an unsightly and potentially hazardous mess. Fortunately, there is a fix for most common fiberglass issues – gelcoat! This article will explain what gelcoat is, how it can be used to repair fiberglass surfaces, and some of its benefits. Keep reading to learn more!
What is gel coat?
Gelcoat is a specialized resin and is popular as a surface coating in the fabrication and repair of fiberglass-based products and can also be used to patch existing gel coat, fiberglass repairs, and new construction and repair projects. Gelcoat is extremely durable and provides a high-quality finish to visible surfaces making it a popular solution for damages to fiberglass surfaces such as covering up blemishes, patching small holes, filling cracks, and renewing surface shine. Gelcoat is often referred to as a one-stop solution for almost all types of damages on fiberglass surfaces such as, boats, jet skis, wave runners, swimming pools, hot tubs, showers and more.
Gelcoat for Swimming Pools
If you have a fiberglass pool then its surface is made of gelcoat, a liquid-colored resin that is applied to the pool shell. Gelcoat is the considered one of the most durable pool surfaces, typically lasting several decades, depending on maintenance, wear and tear, and the quality of the surface. Concrete pools need to be refinished about every ten years or so.
One of the more common areas of a fiberglass pool that needs to be refinished over time are the pool steps which can fade after exposure to pool chemicals, weather and UV rays. For more information please refer to our How to Gelcoat your Fiberglass Pool Steps article.
Gelcoat for Shower Stalls, Bathtubs, and Hot tubs
Cracks, holes, chips, and stains in showers and tubs made from fiberglass can be repaired with gelcoat. A common rule of thumb is if the hole is smaller than 1/2 inch, you should be able to make the repairs yourself; if it is a larger hole, then it may require the replacement of the surface or unit.
Fixing the damaged area requires applying two-part epoxy that hardens to the strength of the surrounding surface.
Gelcoat for a Fiberglass Deck
Applying gelcoat to a fiberglass deck is a great way to protect the surface from UV damage and environmental elements. Gelcoat is a clear or tinted resin that is applied to the surface of the deck, creating a protective barrier. The gelcoat will need to be reapplied every few years in order to maintain its effectiveness. When applying gelcoat, it is important to use a natural bristle brush in order to avoid damaging the fibers of the deck. In addition, gelcoat should be applied in thin coats in order to avoid runs and sags. With proper application, gelcoat can provide many years of protection for your fiberglass deck.
One of the most common ways to refinish a fiberglass deck is with a two-part polyurethane, as the results will provide a finish that will look as good as and should last at as long as the original gelcoat.
Re-gelcoating a Boat Fiberglass Hull
Regularly waxed gelcoat can last up to 15 years, depending on how well you take care of your boats hull and exposure to UV rays. If your hull is showing signs of damage such as cracking or is no longer retaining its gloss, and has chalky white powder on the surface, then it is time to re-gelcoat your hull. Dewaxer is perfect for dewaxing the hull and effectively cleaning up paint supplies.
Repairing a Fiberglass Boat
Repairing a fiberglass boat is not as difficult as it may seem. In fact, with the right materials and some basic knowledge, you can easily repair gelcoat cracks and holes. The first step is to clean the area around the crack or hole. This will help to ensure that the repair area is free of debris and dirt. Next, use a gelcoat patch kit to apply a thin layer of gelcoat to the damaged area. Once the gelcoat has cured, sand it down until it is flush with the surrounding area. Finally, apply a fresh coat of paint to protect the gelcoat from UV rays and weathering. With some patience and attention to detail, you can easily repair gelcoat cracks and holes yourself.
Be Prepared for your Gelcoat Project
Using gelcoat can be an excellent solution for repairing and renewing fiberglass-based surfaces. Gelcoat is sometimes referred to as marine paint for fiberglass, however it is not a paint, so if you are unfamiliar with applying gelcoat, please see our numerous how to articles as it can be difficult to apply and achieve optimal results for first time users. You can also contact Bottom Paint Store’s technical team from 8:30-5:00pm EST Monday through Friday.
Pettit Marine Paint was established back in 1923 and is a manufacturer of a variety of boat paint including marine coatings, antifouling boat bottom paint, varnish, and epoxies. Pettit is a subsidiary of RPM International Inc. and Pettit Marine Products are just one of the many leading brands represented by RPM, including household names su Read.
Pettit Marine Paint offers a wide variety of products in both solvent-based and water-based formulas to meet the needs of boaters around the world. They also offer a variety of specialized coatings for boat hulls, topsides, decks, and interiors. Pettit Marine Paint is committed to providing their customers with the highest quality products and services possible.
Hard Modified Epoxies – The active ingredient leaches out while the paint film stays mostly intact. Leaching Coppers lose performance as time goes by and must be repainted after dry storage.
Pettit Easypoxy is an advanced single-stage topside polyurethane and deck enamel. It has a superior high gloss finish and flows well when brush applied. Easypoxy’s innovative ultraviolet filters improve gloss retention and enhance polyurethane’s durability.
Captain’s Satin Sheen Varnish V-975 is widely esteemed for its reliability, multi-purpose application, fast-drying capability, and superior durability.
Ablatives – (Ultima and Hydrocoat Technology) Ablative polymers paints wear away with use exposing new biocides, both the biocides and the paint film disappear over time. Ablative Polymers can be used multi‐season and maintain a more steady performance throughout their useful life.
Pettit Black Widow Racing Antifouling is the slickest, fastest, ultra-smooth, burnishable racing finish available. Its powerful dual biocides provide multi-season protection in all waters. Black Widow is easily applied by roller, brush, or spray and is easily burnishable to a metallic “gun-metal” shine.
Hybrid – (Vivid Technology) Hybrid antifoulings offering hard paint that does not build up. Hybrid’s work by leaching out the biocides just as a Traditional Leaching Copper does, but once the biocides are gone, the paint film will break down exposing a new layer of biocide.
Trinidad HD, Multi-Season Hard Antifouling Paint provides excellent, long-lasting protection, even under the toughest antifouling conditions. Trinidad HD provides dependable in-water antifouling protection while meeting the 330 gram per liter VOC regulations.
Copper Free – Econea is a non-metal biocide that is extremely effective against hard-shelled fouling organisms including barnacles, hydroids, mussels, oysters, and tube worms.
Odyssey HD multi-season antifouling combines controlled polishing ablative technology with a high copper content to provide a paint film strong enough to handle the tough marine environment from coast to coast. Odyssey HD is compatible over most finishes, is 50 state V.O.C. compliant, and it will not build up over time, leaving running surfaces smooth and clean.
Pettit Odyssey HD multi-season antifouling combines controlled polishing ablative technology with a high copper content to provide a paint film strong enough to handle tough marine environments.
White Copper -(Cuprous Thiocyanate)- requires 50% less copper content than the heavy, dark copper used in conventional antifouling paints. They are the only copper-based paints that are compatible with aluminum.
Low-Density Copper – replaces the core of traditional Cuprous Oxide with environmentally friendly materials found naturally in the ocean.
Irgarol – is used in many dual biocide products, Irgarol is an algicide designed for use in antifouling paints to prevent soft growth such as algae and grasses.
Water-Based (Hydrocoat Technology)- This formula uses water to replace the harsh solvents found in conventional antifouling paints. The product has an extremely low VOC content.
Clean Core Technology – An enhanced paint film that can reduce the amount of heavy metals released into our waters by up to 90%. These new additives have been specially formulated to provide a more “finetuned” and consistent release of the biocides from the paint film. This results in a more effective bottom paint that requires lower biocide levels to deliver full antifouling protection.
Odyssey is available in the following colors: 1299G Blue, 1899G Black, 1399G Green, 1699G Red, 1199G White.
Pettit Marine Paint has been manufacturing and marketing a complete line of high-performance marine paints for over 50 years. Their products are highly regarded and are formulated to provide superior protection against the sun, salt water, and other harsh marine environments. If you have questions about Pettit Paint or need help selecting the right paint for your boat, feel free to contact Bottom Paint Store and out free tech support.
Pettit Ultima® SR-40 features an enhanced formula that utilizes an increased biocide load combined with PTFE to offer an outstanding multi-season control in all types of fouling. SR-40 employs a unique controlled erosion technology to minimize coating build-up and keep underwater surfaces smooth. Its ablative surface wears away with use providing a continuous supply of fresh biocides while eliminating the need for sanding. Ultima® SR- 40 employs a Slime Release technology combining super slick PTFE with a higher copper load for added performance and reduced friction. It can be hauled and re-launched without repainting. Ultima SR-40 is available in red and blue colors and is an excellent choice for powerboats or sailboats with fiberglass, wood, or steel hulls. Formerly sold as Ultima® SR and Horizons® Pro, this formula has a proven track record as one of America’s premium ablative bottom paints. Ultima® SR-40 is an excellent choice for power or sailboats with fiberglass, wood, or steel hulls.
Pettit Trinidad Pro is packaged exclusively for professional applicators through the Pro Coatings line. Due to its dual biocides, with a high 60% copper load, Trinidad Pro offers unprecedented protection. It is a long-lasting, strong antifouling and features a high copper load and slime resistance that provides unprecedented resistance to all fouling. It is a hard protective coating that has excellent adhesion and withstands the toughest abuse. Trinidad Pro is available in black and blue colors and can provide years of dependable service, even if left in the water, and is backed up by the HD (Hull Defense 18 Month Limited Warranty).
If you need assistance selecting the best boat paint for your paint project, contact the technical experts at Bottom Paint Store Monday through Friday 8:30-5:00 pm EST 888.505.2313.