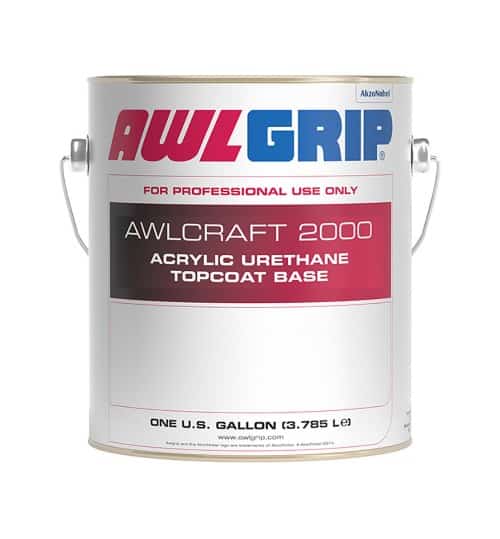
Awlgrip vs. Awlcraft SE – What are the differences?

Awlgrip and Awlcraft SE – Which is better?

Here’s an overview of the key differences between Awlgrip and Awlcraft SE (each one has its own advantages and disadvantages), so you can make an informed decision about which is right for you.

KEY TAKEAWAY

1. Awlgrip provides superior gloss, color consistency, and durability due to its two-component urethane formula.
2. Awlcraft SE is mainly used for 5. Both products provide excellent resistance to fading, chalking, weathering, and corrosion when applied properly in the right environment.

Awlgip Marine PaintsAwlgrip is based on a polyester urethane resin, and Awlcraft SE is based on an Acrylic Urethane resin. At the surface, they seem very similar, but at the molecular level, they are vastly different. Polyester molecules are much smaller than acrylic molecules. This means that at any given volume, there can be more polyester molecules than acrylic, and this allows polyester films to be denser and tougher. Awlgrip has more abrasion and chemical resistance than Awlcraft SE and is usually more rigid.

Awlcraft, on the other hand, is not without its own advantages.  It is generally easier to apply. The larger molecules and less dense film of the acrylic allows for faster drying and therefore less dust entrapment in the finish.  Both urethane topcoats will resist staining and provide a long-lasting gloss. When deciding which topcoat to choose, it is best to consider factors such as cure times, reparability, application methods, chemical resistance, and abrasion resistance.

Which is more suited for buffing?

Both Awlgrip and Awlcraft 2000 urethane topcoats have a protective resin layer. This layer is the first line of defense against UV light and abrasive damage. Underneath this resin is a layer of rich pigment particles that give the paint its bright shine and color. Awlgrip has a thicker protective resin layer, and when the polyester is scratched, it is necessary to cut deeply into the resin to repair it. Buffing the surface leaves the pigment exposed and compromises the performance of the paint in the long run.

Awlcraft has a softer finish, due to the less dense molecular structure, and thus has a lower melting point. When this acrylic urethane is buffed, the resin is able to flow together and does not require cutting the surface as deeply. So, Awlcraft SE is more suited for buffing, whereas Awlgrip will require a Fairing Compound, as it cannot be buffed.

Awlgrip vs Awlcraft SE – Fast Facts

Awlgrip Polyester Urethane Topcoat

  • Can be applied by spray, brush/roll.
  • Excellent color retention and chemical resistance.
  • More dense molecular structure.
  • Cannot be wet-sanded or buffed

Awlcraft SE – Acrylic Urethane Topcoat

  • For spray application only.
  • Superior flow-out and high gloss.
  • Fast drying to reduce dust entrapment and repairable to reduce downtime
  • Awlcraft SE must be clear-coated.

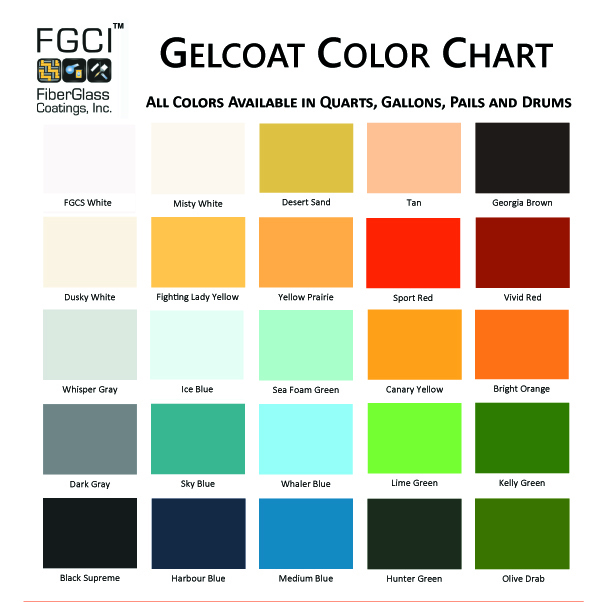
Awlgrip Color Chart


Restoring and Maintaining Awlgrip and Awlcraft 2000 Paint

Last Updated: February 10, 2026

Quick Recommendation

Restoring & Maintaining Awlgrip vs Awlcraft 2000

  • Awlgrip: Best for maximum durability and long-term gloss—clean gently and do not compound aggressively; restore shine with approved cleaners and sealants.
  • Awlcraft 2000: Easier to polish and repair; light compounding and polishing can restore gloss when oxidation appears.
  • Routine care: Wash with mild soap, avoid abrasives, and protect with a paint-safe sealant to slow UV damage.
  • Bottom line: Choose maintenance methods based on the coating—Awlgrip favors gentle care, while Awlcraft 2000 allows corrective polishing.

Tip: Always confirm the coating type before polishing—using compound on Awlgrip can permanently dull the finish.

Over time contaminants can build up and cause the finish of your Awlgrip/Awlcraft 2000 paint to appear dull.  You can restore the gloss of a freshly painted boat and prevent the premature aging caused by contaminates by following these steps:

  • Wash your Awlgrip or Awlcraft surface with Awlwash mixed with water (1-2 capfuls in a bucket of water for washing) using soft, non-abrasive cloths and rinse well. Doing so on a regular basis (once per month) will help control dulling buildup.
  • Solvent cleaning of Awlgrip only: Awlprep and Awlprep Plus can be used to aid in removal of stains or markers and to soften or remove heavy build ups of grease and grime, or spray paint on the topcoat and toluene, lacquer thinner, M.E.K., acetone can be used as well.
  • Solvent cleaning of Awlcraft 2000 and Awlgrip HDT only: Awlprep or mild solvents (mineral spirits, xylene, kerosene and diesel fuel) should be used.

Awlgrip AWLwashIn both cases apply solvents with soft cloths and do not allow the chemicals to dry on surface, puddle or soak. Wash with Awlwash to prevent remaining solvent to attack paint. As always when working with solvents, test in an inconspicuous area first.

 Distilled white vinegar and hot water will aid in removing salt stains, always follow with Awlwash.

Protecting the Surface

awlgrip awlcareAwlcare can be applied to the surface like a wax to remove pollutants (such as diesel soot), protects the finish and leaves a glossy shine. Awlcare should be applied regularly to protect against pollutants. It can be removed with Awl-Prep Plus (Awlgrip only) when it’s time to repaint. What to avoid with Awlgrip and Awlcraft 2000:

  • Abrasives
  • Polishing compounds
  • Traditional waxes as they tend to break down rapidly, yellow and attract dirt
  • Acid based products such as teak or metal cleaners and strong solvents on Awlcraft 2000, Awlbrite Clear or Awlspar Varnish.
  • Trapped moisture from supplies as paint can blister or delaminate

AVOID:

  • Avoid Traditional Waxes
  • Awlgrip topcoat only: Regular applications of Awlcare will help temporarily seal and restore shine to painted surfaces that have become porous due to age or mistreatment, helping to maintain a satisfactory appearance until there is time to repaint.
  • Awlcraft 2000 and Awlgrip HDT: Awlcare Protective Polymer Sealer will help maintain the gloss on these finishes with regular applications, especially those which have been buffed or polished. Remember, Awlcare is only applied and buffed by hand. Never apply or buff Awlcare with a machine.
  • Avoid abrasive and polishing compounds
  • Avoid strong solvents (eg. lacquer thinner, M.E.K., acetone) to clean Awlcraft 2000, Awlgrip HDT, Awlbrite Clear or Awlspar varnish.

Choosing a Bilge Pump

What are Bilge Pumps?

Bilge pumps are devices used in boats to remove unwanted water from the bilge compartment of a boat. (The bilge is the lowest compartment of the inside hull of a ship.) Whether you have a sailboat or powerboat, they are as important as lifejackets in an emergency. If there happened to be a collision that caused a leak, having a bilge pump actively removing water from the boat’s compartments could buy you precious time. However, as many experience boaters know, you cannot rely on a pump to keep your boat afloat indefinitely.

Main Types of Bilge Pumps

Non Automatic:

Non Automatic pumps are controlled by means of a float switch and/or a manual panel switch. The panel switch allows you to control the pump remotely. Using the float switch is beneficial because the pump only runs when the water reaches a certain level. After the water is pumped out and the level goes back down, the pump can shut off. The most common type of non-automatic pump is the Electrical Submersible Bilge Pump. They are easy to install, very effective, and have low amp draw. Also, the motor cartridge can be easily removed to clean out debris and other obstructions.

Automatic:

Automatic Bilge Pumps function without the use of a float switch. It uses the principle of impeller resistance to sense if any water is present. Depending on the brand, the pump will automatically turn on every 2.5 minutes to check for water. If water is present, the pump will know about it from the slight pressure on the impeller as it spins. It will continue to run until all the water has been pumped out. The voltage needed for both automatic and non-automatic pumps will vary from 12V – 32V, depending on the size and capacity of each pump.

Manual:

If the boat’s electrical system goes out, a manual bilge pump would be invaluable. They are able to move lots of water effectively, but can be tiring to use. Water is heavy, and that weight is compounded when moving it some distance. When installing these sorts of pumps, take into consideration the ease of access, and imagine how it will be used. Putting a manual pump in a tight, cramped space may hinder your use of it when it is needed.

Which Pump is best for your boat?

The first thing to consider is the size of your boat. Smaller boats will need a good size pump because the bilge compartment is smaller and will fill up with water quicker than larger boats. Some boats have separate bilge compartments. If that is the case, it would be a good idea to have a pump for each section.

Most electric pumps are rated for the number of gallons that they can pump in an hour. (G.P.H.) It is recommended to select a pump the largest model that is still practical for your boat.  Also consider the size of your existing output hose and the capacity of your boat’s wiring and battery. Don’t hesitate to ask an expert when making these decisions. You can talk to a pump manufacturer and get their informed opinion.

Suggested Pump Capacity:

Boat Size

Number of Pumps

Pump Output in GPH

16’ – 20’

2

2500

21’ – 26’

2

3000 – 3500

27’ – 35’

3

3500 – 4500

36’ – 42’

3

6000

43’ – 49’

3

8000

50’ – 59’

4

9000 – 10,000

Where to place Your Bilge Pump(s)?

It is always a good idea to have more than one bilge pump onboard. Many boaters have a backup pump installed in the same bilge compartment. The first pump may be smaller and positioned where the majority of water will pool inside. The secondary pump may be a bit higher inside the hull. This pump should be bigger than the first, because if the boat has collected that much water the main goal is to get it out as fast as possible.

When deciding where to place your pumps, observe where the water accumulates in the hull when the boat is at rest as well as in motion. For powerboats the water tends to flow toward the aft when the boat is moving. Sailboats tend to accumulate bilge water in the middle.

Bilge Pump Installation Reminders:

  • Follow the manufacturer’s specifications – especially on wires sizes
  • Use a vented loop – if the thru-hull discharge can be submerged, a siphoning effect can fill your hull instead of empty it.
  • Keep discharge hoses short – long hoses make the pump work harder than it has to.
  • Use waterproof connectors – any connections in the bilge area should be protected.
  • Use smooth bore hoses – corrugated hoses are cheaper but not effective for pumps.

Choosing the Right Boat Paint

Last Updated: February 9, 2026

Quick Recommendation

Choosing the Right Boat Paint

  • Below the waterline: Use bottom paint (antifouling) to prevent algae, slime, and marine growth.
  • Above the waterline: Choose topside paint or polyurethane for durability, gloss, and UV resistance.
  • Match paint to hull material: Fiberglass, aluminum, and wood each require compatible primers and coatings.
  • Bottom line: The right boat paint depends on where it’s applied, how the boat is used, and the hull material.

Tip: Always check compatibility with any existing coatings before switching paint types to avoid adhesion problems.

There are many different boat paints and qualities, generally the more you spend the better the results. There are a variety of types including topside and bottom paints. Topside paints are meant to be used above the waterline and will not hold up under water. Bottom Paints (also called antifoulants or antifouling coatings) are pesticides that are only used below the waterline when you are trying to stop growth from occurring while your boat stays in the water over long periods of time.  See Related Article>: Do I need Bottom Paint?

The type of paint you choose for your boat will depend on the type of boat you have and the environment in which it will be used.

There are two main types of boat paint: antifouling and topside. Antifouling paint is designed to prevent marine growth from attaching to the hull of the boat, while topside paint is designed for the superstructure of the boat, such as the deck and cabin.

If you plan on using your boat in saltwater, it is important to choose a paint that is specifically designed for saltwater use. Saltwater is much more corrosive than fresh water, so a saltwater-specific paint will be more durable and longer lasting.

Using your boat in freshwater, will require a different paint. There are a few different types of paint you can choose from. Freshwater-specific paints are available, but they are not necessary if you do not plan on using your boat in saltwater.

Boat Paints

Duralux High Gloss Marine Enamel is affordable and easy to apply and only recommended for above the waterline or moderate use on the bottom (a day or so in the water, not extended periods). This topside paint works best in very thin coats; see the prep recommendations found on product page on “how to use” tab. Duralux marine enamels do have a color offering in a flat finish, those are limited to their camouflage paint colors. Marine Alkyd Enamels like Duralux are effective and low cost.

A step up from the marine enamels are polyurethane enamels. These products such as Blue Water Marine Mega Gloss Polyurethane,  Interlux Brightside,  and Pettit Easypoxy have a better flow and gloss.

The best performing and hardest application is either Awlgrip or Awlcraft 2000. These require a more technical application and require the use of proper primers, catalyst and thinners with each application.

Typically when people discuss bottom paint on a boat they are referring to Antifouling paint. Bottom paint prevents growth of organisms that attach to the hull and can affect a vessels speed, performance, and durability when boat is kept in the water for extended periods of time.  If you don’t have that problem, you may not need bottom paint. Antifouling bottom paint typically has a flat, dull finish that is used below the waterline.

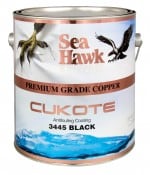
CUKOTE 2013There are generally two types of bottom paint both of which have several variations that create a multitude of products in the market place. The two different types or categories of bottom paint include hard bottom paint and ablative bottom paint. Related Article> What is the Difference Between Hard and Ablative Bottom Paint.

Once you have selected the type of paint you need, you will need to select a color. The color of your boat should be based on personal preference, but it is important to keep in mind that darker colors will absorb more heat than lighter colors.

Your boat paint choice ultimately depends on your budget and which boat paint colors meet the needs of your boat and usage.

Which Resin Should I Choose?

Last Updated: January 26, 2026

Quick Recommendation

How to Choose the Right Marine Epoxy Resin

  • Match the epoxy to the job: Use low-viscosity epoxy for wet-out and bonding, and thickened epoxy for filling gaps or fairing.
  • Select the correct hardener speed: Choose fast, medium, or slow hardeners based on temperature, working time, and project size.
  • Confirm compatibility: Ensure the epoxy system is compatible with fiberglass, wood, aluminum, or existing coatings.
  • Bottom line: The right marine epoxy depends on application type, cure time needs, and substrate compatibility—not a one-size-fits-all choice.

Tip: Always measure epoxy and hardener precisely; incorrect ratios are a common cause of weak bonds or curing problems.

When it comes to boat repair, epoxy and polyester resins are both popular choices. But which one is the best option? Epoxy resin is known for its strong bonding properties, making it ideal for repairing cracks and holes. It also has excellent waterproofing qualities, making it ideal for boats that spend a lot of time in the water. Polyester resin, on the other hand, is a bit more flexible than epoxy, making it better suited for repairs that require some give. It’s also less likely to yellow over time, making it a good choice for boats that will be spending a lot of time in the sun. Ultimately, the best choice of epoxy or polyester resin for boat repair depends on the type of project you are tackling. 


General Purpose Repair Epoxy Resin Kit

Hawk Epoxy KitEvery household should own a Hawk Epoxy Kit like this. You can use it to repair anything around your home or own your boat. This kit comes with the resin, catalyst and your choice of filler. Just mix them together and you have an excellent bonding, filling, or adhesive paste.

FGCI General Purpose Resin is used for laminating with fiberglass, kevlar and carbon reinforments. It can be tinted with pigment up to 3% and best results are when used at 70-85 degrees F. Hardener varies depending on thickness of fiberglass, the more fiberglass the less hardener as you will generate more heat-never go below 1%. Complete cure needs sanding aid added to resin or PVA while still hot.

Polyester Resin:

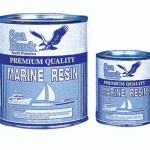
MARINE ResinPolyester resins are unsaturated resins that are combined with hardeners, such as MEKP.

Polyester resin is used more for fiberglass lay-up or if you’re going to finish a repair with gelcoat, as the polyester resin will bond to the gelcoat better than epoxy. It is also cheaper than epoxy and a great choice when casting deep molds.

Various Types of Polyester Resin:

Boatyard Polyester Resin is a non-specified resin that contains different types of polyester resins and wax. Boatyard Polyester Resin is not recommended for use below the waterline. The material may cure hard and tack-free due to the included wax. If so, the product will need to be sanded prior to adding another layer in order to promote good bonding.

Clear Casting Polyester Resin is used to cast small objects into a mold. This method can be used to create sculptures, crafts, or industrial prototypes.

Surfboard Polyester Resin is Clear & wax free. It is ideal for building & repairing surfboards because it cures to an almost clear color when applied in a film. Also it highlights underlying graphics.

Iso Marine Resin is based on isophthalic acid. This resin is a step above the general purpose polyester resin and that is reflected in the price. Iso Resin is stronger, more durable, and is the best choice when applying in corrosion environments or elevated temperatures.

Vinyl Ester Resin:

Vinyl ester resins are formulated with a base of polyester resin strengthened with epoxy molecules (a hybrid form of polyester and epoxy and aiding for gelcoat to bond with epoxy) and also use peroxides, such as MEKP, for hardening. These are cheaper than epoxy resins and more expensive than polyester. Ideal temp for use is 77 F, not applied over 1/8th thickness or it will generate too much heat.

Vinyl esters are more tolerant of stretching, less likely to show stress cracking and more resistant to water penetration. Vinyl ester is the choice when improved resistance to moisture is the goal (like repairing a blistered hull).

Long term water exposure (hull or water tank) or if impact resistance is important vinyl ester is usually chosen.

Epoxy Resin:

Epoxy resins are cured with the addition of a hardener. Unlike the polyester and vinyl ester resins, cured with a small amount of catalyst, epoxy resins usually require a lot more, often 1:1 or 2:1. A epoxy resin is the most expensive of these.

Epoxy resin has the best bonding strength as it will bond dissimilar or already cured materials for strong, reliable repair work. This is the most expensive resin but offers the most in its ability to flex, prevent delamination and ease of repair work.

If doing a repair and not overlaying with gelcoat then the epoxy will perform best as it tends to act as a stronger “glue” for the patch to the surrounding surface.

Laminating Epoxy Resin is the correct choice for repairing boats. It is super durable and has high resistance to water. Also, it has very good adhesion to a variety of surfaces including metals, plastics, fiberglass, wood, and glass.  The ratio is well suited for use with high-solids marine, maintenance coating and bonding agents.  The cure time is three days in the sun or a week if it is not. Set time changes with activator and film thickness.  If there is an excessive amount of activator applied , the laminating epoxy will be soft and rubbery. In contrast, if there is not enough activator, the epoxy will not cure hard. Laminating Epoxy is available in 3 different ratios that provide different working and cure times.


Epoxy Resin (Bar Top Epoxy Resin):

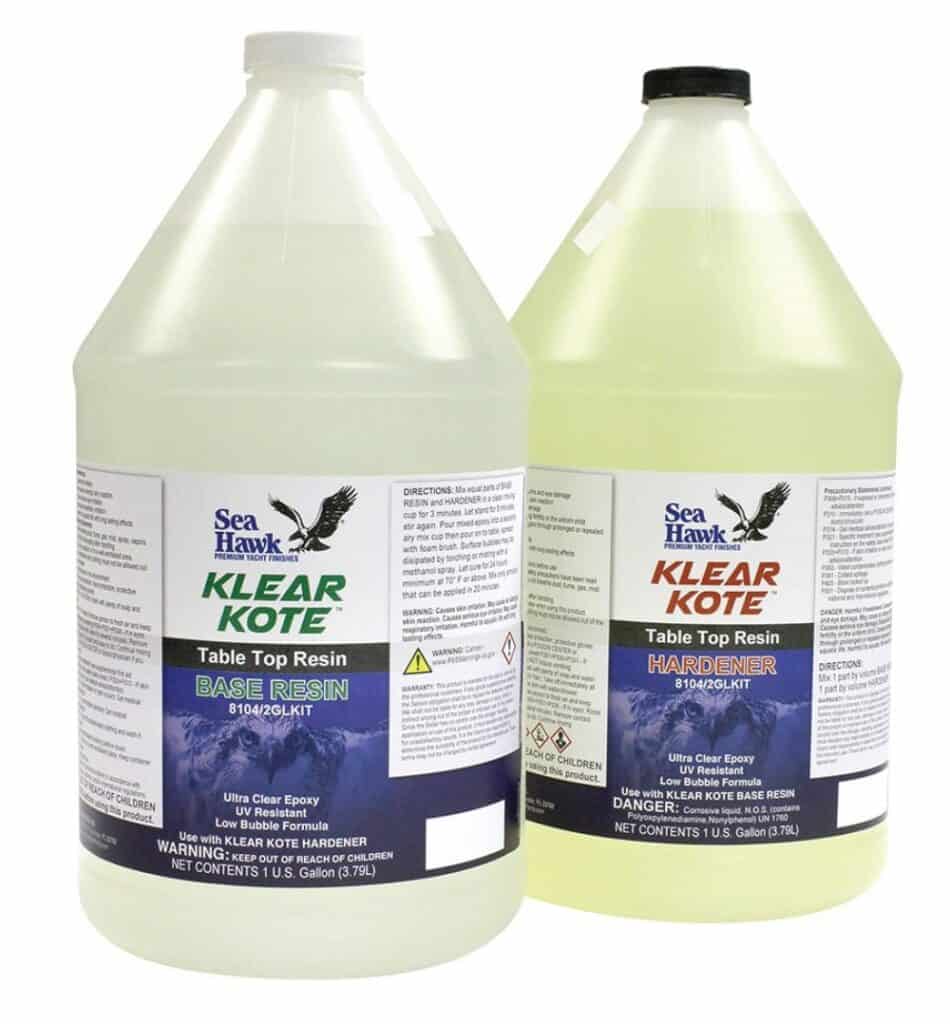
A Premium Commercial Grade Clear Epoxy Resin – Klear Kote Epoxy Resin is used extensively in coating surfaces and in table tops where a clear, hard and durable coating is required. Commonly seen on bar tops and restaurant tables. Easy to use 1:1 mixing ratio of resin and hardener.  Items coated with it will become permanently preserved and protected for your enjoyment throughout a lifetime. The epoxy resin will not exhibit blushing or sweat out under high humidity conditions.

Epoxy Resin Kits

epoxy resin kit

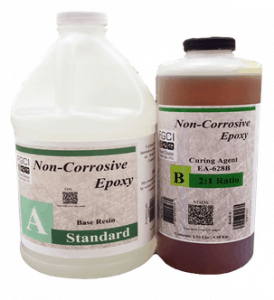
Epoxy resin kits are sold in two parts, A and B, which should be applied in two stages. The first stage is referred to as the seal coat. The seal coat is brushed on in a thin layer and is used to seal any pores on the surface and prevent air bubbles from forming in the following flood coats. This stage is followed by the flood coat, which will flow and self-level, clean brushes or squeegees can be used to help spread the epoxy. Flood coats are applied in 1/8″ layers at a time, as many as desired can be applied, however, one to three coats is average for most table or bar coatings. Resin kits are often applied on bar tops and tabletops in many bars and restaurants.

Superbond Standard Epoxy Glue

Superbond Standard Epoxy Glue is a two-part, 1:1 epoxy adhesive that has a Vaseline consistency. The product adheres to nearly everything and is a favorite among woodworkers. It’s offered in a fast curing agent, giving 8-15 minutes of working time; a medium, giving 20-30 minutes, and a standard, offering 30-45 minutes. SuperBond is offered in sizes from ½-pint tubs all the way to 5-gallon pails.

Rot Stop Epoxy

Rot stop epoxy is a 2-part epoxy that is 1:1 ratio and is very simple to mix. The coverage is similar to other epoxies, and like other epoxies, the product does vary in thickness based on temperature. The advantage of Rot Stop is it is NOT affected by moisture, making it excellent for deck or flooring and cracking repair, especially moisture damage.

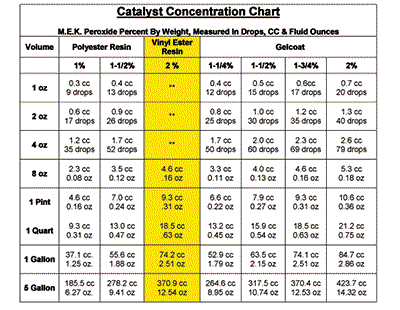
See catalyst chart for mixing guidance:

MEKP Chart
The weight of MEKP is 1/125 grams per CC. 30 Drops is approximately equal to one CC (Cubic Cementer)
NOTE: Using drops for catalyst is only an estimate. In Critical applications MEKP should be measure by using CC’s or Fluid Ounces which are volume measurements. The percentages in the chart: 1% thru 2% are percentages of gelcoat by weight.The CC’s and OZ’s values in the chart have been converted from weight of MEKP to volumes of MEKP.

Resin guns

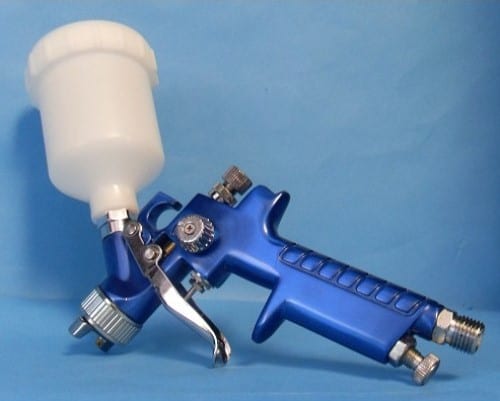
Gelcoat and resin spray guns are ideal for large surface spraying, such as new mold construction, composite refinishing and large boat surfaces.  Look for a resin gun with a blue die cast body which will ensure a long life. Most HVLP cup guns use nylon flat seal just behind the threads that the air cap attaches to.

resin gun

If you have used a spray gun with a nylon flat seal just behind the threads that the air cap attaches to and cleaned it with acetone, the seals disintegrate so it is best to use one with a plastic seal.

Can I Reactivate Hard Bottom Paint?

sharkskin300x300

Hard Bottom Paint

According to Practical Sailor Magazine, March 2013 issue, this topic was discussed. It is generally regarded that after 72 hours of exposure to air that hard bottom paints will oxidize and lose antifouling  properties but test are showing otherwise. Of course you should always check with the manufacturer of your paint choice below are the guidelines to reactivate hard paint:


  • Launching of newly painted boats may be delayed up to 60 days after painting without sacrificing antifouling performance.
  • Boats painted between two and 12 months prior to launch date must be scuff-sanded with 220-grit production paper or abrasive pad before launching.
  • Boats painted more than 12 months prior to launch date must be lightly sanded with 100-grit production paper and recoated before launching.
  • Boats in the water for less than 24 hours (e.g. for in-the-water water testing) should be pressure washed lightly to remove dirt, salt or other contaminants and allowed to dry. These boats should still be considered newly painted and may be launched up to 60 days after the date of painting.
  • Boats in the water for more than 24 hours, but less than 30 days, should be pressure washed when hauled, then lightly sanded with 220-grit production paper immediately before re-launching. If necessary, launching may be delayed up to 60 days after the bottom has been sanded. Note: Boats re-launched within 72 hours of haulout do not need to be sanded before launching.
  • Boats in water for more than 30 days should be pressure washed when hauled, lightly sanded with 100-grit production paper and recoated with antifouling paint, even when re-launching will take place within 72 hours.

If there isn’t enought hard bottom paint on the surface it could flake off with sanding due to the thin layer.


Topside Boat Paint Options: What are your choices?

Last Updated: February 9, 2026

Quick Recommendation

Topside Boat Paint Options: What Should You Choose?

  • Single-part polyurethane: Best for DIY projects and easier application with good durability and gloss.
  • Two-part polyurethane: Ideal for maximum durability, color retention, and gloss on high-visibility areas.
  • Marine enamel: A budget-friendly option for light-duty or temporary refinishing.
  • Bottom line: Choose topside paint based on application difficulty, durability needs, and desired finish quality.

Tip: Topside paints are not antifouling—boats kept in the water still need bottom paint below the waterline.

There are many different topside boat paints and qualities, generally, the more you spend the better the results. See the below the waterline paints for water exposure.

Blue Water Mega Gloss is affordable and easy to apply and only recommended for above the waterline only. This topside paint works best in very thin coats; see the prep recommendations found on the product page on the “how to use” tab and if the Blue Water Mega Gloss Primer is needed.

Popular color options can also be found with the Interlux Brightside, commonly used for topside gloss surfaces with moderate water exposure. Also, Interdeck white paint with added non-skid is perfect for a white slip-resistant deck.

Duralux offers some camo paints as well as the high gloss marine enamel option. For use on aluminum and wood, a primer is recommended for the best adhesion.

In flat paint/primer in one option, you’ll find the Aluma Hawk. This is extremely popular for hunting and fishing boats and easy of use in white, blue, sand, aluminum gray, Jon boat green, and black.

The best available boat paint for the topside with the best finish is Awlgrip, most expensive but best results and loved by customers. Some of the Awlgrip paints can be brushed or rolled but others must be sprayed.  Awlgrip marine paint also requires a little more “do it yourself savvy” to apply these paints, and require the correct activators and reducers when applying. The manufacturer of Awlgrip recommends it for use only above the waterline and by professionals.

Your topside boat paint choice depends on your budget, the durability needed and the amount of time you want to spend on your boat paint application.

Most of the paints above do exceptionally well with brush and roller application. Be sure to choose a solvent-resistant, high density closed cell size foam roller. This minimizes the formation of bubbles in the surface that can happen with mohair or large cell foam rollers. These paints typically do better with thinner application and more coats may be needed. Using this method is commonly referred to as the roll and tip method and works well when two painters work side by side.

When applying by brush use the largest brush that is practical for your job. Long flexible bristles are best for gloss paints and holding the brush at a 45-degree angle minimizes brush marks with an even spread. A disposable foam brush is favored for small touch-up jobs.

Paint application tips:

  • Clean or change brushes every 20 minutes
  • Stir the can during work
  • Paint on warm, dry mornings as cold weather retards drying and dampness will spoil the gloss.
  • Use a worn brush for the final coat for fewer brush marks.

What is the best paint for my boat?

A lot of factors contribute to what paint is best for your boat:

Are you painting the entire boat, or just the bottom? Is the boat in fresh water or salt water? Is your boat trailered?

What is on the bottom of the boat now: bottom paint, topside paint or gelcoat? Once an antifouling bottom paint has been applied only antifouling paint can go over it (unless you remove it). Gelcoat application is recommended over fiberglass, most resins and gelcoat. It can have difficulty adhering to other surfaces.

For topside only the Duralux Marine Enamel is an economical choice. It has several colors to choose from and features easy application.

Gelcoat is usually what is “original” to most boats; a bass boat will have metal flake mixed in. We sell metal flake that can be added to gelcoat or paint but we don’t sell any with it already mixed in.

Ablative bottom paint can help with the slime, will wear away slowly over time,  and it is suitable for trailered boats. Bottom paint is applied below the waterline only.

If you need assistance selecting the right boat paint for your needs feel free to call our technical support team Monday-Friday 9am-5pm EST 888-505-2313.

Do I Need Bottom Paint on My Boat?

Last Updated: Feb 10, 2026

Quick Recommendation

Do You Need Bottom Paint on Your Boat?

  • Yes—if your boat stays in the water: Boats kept in the water for weeks or months need bottom paint to prevent algae, slime, and marine growth.
  • Usually no—if you trailer your boat: Boats that are trailered and stored dry typically don’t need antifouling paint.
  • Water type matters: Saltwater and warm climates cause faster fouling than freshwater or colder regions.
  • Bottom line: Whether you need bottom paint depends on how long the boat stays in the water, where it’s kept, and how it’s used.

Tip: Applying bottom paint when it’s not needed adds cost and maintenance—choose antifouling only if your boating habits require it.

Sea Hawk Cukote Bottom PaintMost of the time when bottom paint is considered on a boat it is Antifouling paint. Bottom paint blocks growth of organisms that attach to the hull and can impact a vessels speed, performance, and durability when the boat is stored in water for extended periods of time. Antifouling bottom paint usually has a flat, dull finish that is used below the waterline. If you don’t have this challenge, you may not need bottom paint. 

If you don’t have a growth problem or would like a nice shine to your boat’s bottom look to our other items like gelcoat or a topside paint for moderate water exposure or an aluminum paint with no antifouling agents. Gelcoat adheres to most gelcoats or fiberglass/resins, see how to apply gelcoat.  A boat bottom with antifouling will need to have it removed via sanding, sandblasting or bottom paint remover before a different type of paint will adhere.

There are generally two types of bottom paint both of which have several variations that create a multitude of products in the market place. The two different types or categories of bottom paint include hard bottom paint and ablative bottom paint.

Hard Bottom Paint vs. Ablative Bottom Paint

Hard bottom paint is bottom paint that is a hard modified epoxy. After you apply hard bottom paint it is very durable and does not wear off. Hard bottom paints typically have a higher ratio of pesticides (usually copper) in them that are exposed in the outer surface of the bottom paint coating. As time goes by, the coating oxidizes and becomes less effective in combating marine growth. Hard bottom paint is generally used on boats when the boat sits for long periods of time without moving at all, or there is little movement of water (current/ tide) around the boat. You should not use a hard paint if you boat comes out of the water such as on a trailer or a lift. After 72 hours, the hard bottom paint will oxidize on the outer surface from the air and becomes ineffective. If you are trailering your boat, or keep it on a lift you should always use ablative bottom paint.

Ablative bottom paint, also known as self- polishing bottom paint, is softer and allows the coating to wear off at a controlled rate. Much like a bar of soap, once the boat moves in the water or there is a current and or tide, the outer layer slowly wears away. The wearing away of the self-polishing bottom paint allows for new, unoxidized paint to be exposed. Therefore, if you are trailering your boat, or it comes in and out of the water for any reason, the paint will oxidize within 72 hours. However, once placed back in service, that oxidized ablative paint wears away and exposes a new fresh outer coating with active protection. Ablative bottom paint is a newer technology then hard paint. It is the preferred bottom paint of most users since it typically lasts longer and continuously exposes a new active outer coating that protects against marine growth.

How long does bottom paint last on a boat?

In general, you should apply boat bottom paint once a year, however; some bottom paints can last for two years. If your boat is kept in the water or you use it regularly, you you have it checked annually to determine if it requires a new bottom paint coating.

For more how to use details see How to apply bottom paint to bare fiberglass or How to apply bottom paint over existing bottom paint.


How much does it cost to bottom paint a boat?

How much does it cost to bottom paint a boat?

The cost to paint the bottom of your boat depends on a number of factors including the size of your boat, the paint you choose and whether you use a primer or not. Other factors include whether you will paint your boat or hire someone to paint it. For example, Biocop TF by Sea Hawk, is a popular bottom paint and currently costs $275.77 a gallon and provides theoretical coverage of 315 square feet per gallon. If the bottom surface of your boat is 700 square feet you would theoretically need to purchase three gallons (Biocop is not offered in quarts) at a total cost of $827. 31 for the three gallons.

That may seem expensive for paint, however boat bottom paint uses antifouling properties in order to protect the boat’s bottom from organisms found in saltwater and other elements.

For information on calculating how much paint you need to paint your boat bottom you can refer to our Bottom Paint Calculator.

Applying Antifouling Paint to a Pontoon Boat

Last Updated: February 9, 2026

Quick Recommendation

Applying Antifouling Paint to a Pontoon Boat

  • Use aluminum-safe antifouling only: Choose copper-free or aluminum-compatible bottom paint for pontoon tubes.
  • Prep thoroughly: Degrease, remove oxidation, and lightly abrade the aluminum to ensure proper adhesion.
  • Prime correctly: Apply an etching or epoxy primer designed for aluminum before antifouling paint.
  • Bottom line: Long-lasting pontoon protection depends on aluminum-safe paint systems and proper surface preparation.

Tip: Never apply traditional copper-based antifouling directly to aluminum pontoons—it can cause rapid galvanic corrosion.

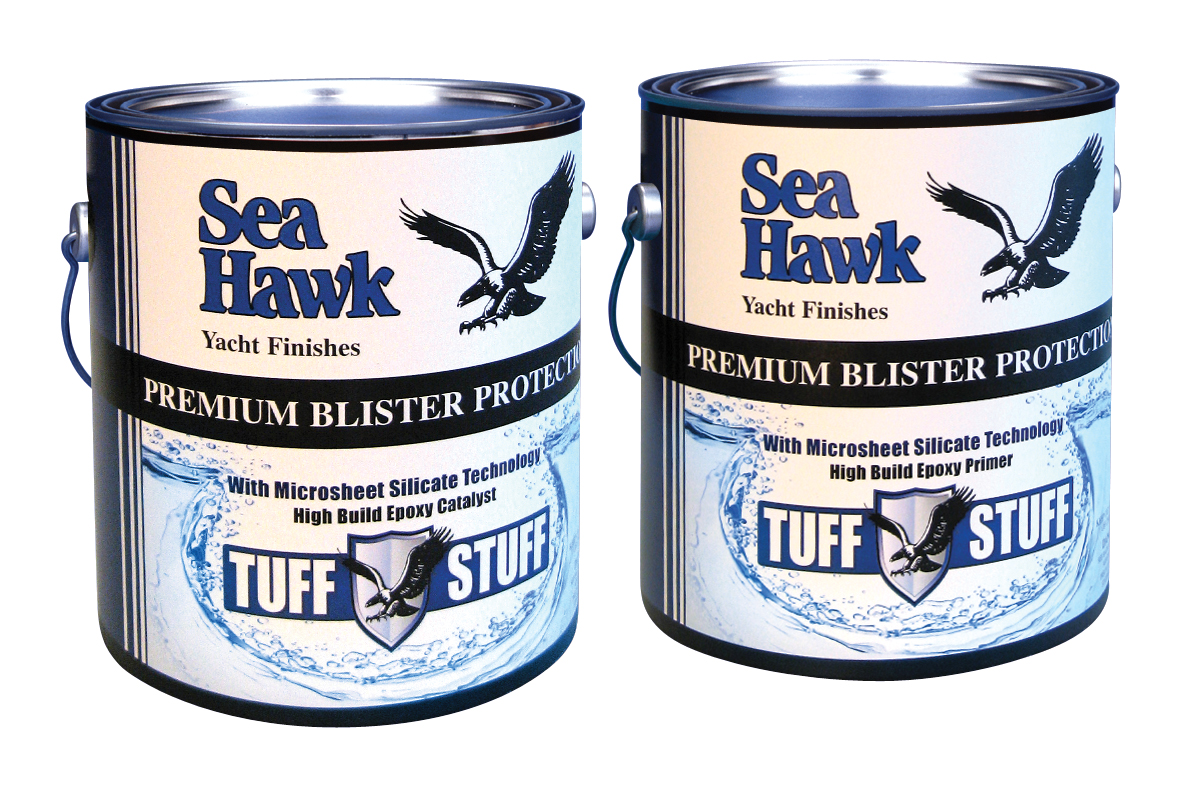
If you do not have any coatings at all on the bottom of the boat, we suggest to sand the pontoons with 80 grit and then apply Tuff Stuff High Build Epoxy. It is a water tight barrier coat designed for use under the waterline and with aluminum hulls. Tuff Stuff will insure that you protect the aluminum from corrosion, and also aid in the adhesion of the antifouling paint. Use 2 coats. You can apply the 2nd coat within a couple of hours of the first coat. See detailed instructions at How to Apply Marine Epoxy Primer”.

TUFFSTUFFnewAfter you apply Tuff Stuff marine epoxy primer on hull, be sure to use an aluminum safe antifouling paint. The bottom paint needs to be applied the same day as the Tuff Stuff marine epoxy primer. Antifoulants in general are designed to repel hard growth. For soft growth you should have an additional biocide that help with the algae. Colorkote is an excellent antifoul for aluminum pontoons used in salt water and/or fresh water. For a less expensive option, see Smart Solution Metal Free Antifouling paint.

WARNING: You should only use an aluminum safe antifouling like Smart Solution. Using any other type of copper based antifouling could severely damage your pontoons and will cause corrosion, pitting and eventually holes in your pontoon boat.

If you do not need antifouling paint and are in fresh water, we suggest using one of the products located in the “How to Paint an Aluminum Jon Boat article.

Links:

How to Video:

How to Apply Non-Skid Paints

Last Updated: January 27, 2026

Quick Recommendation

How to Apply Non-Skid Paints for Best Grip

  • Choose the right texture: Use pre-mixed non-skid paint for consistency, or add non-skid additive to control aggressiveness.
  • Prep thoroughly: Clean, de-wax, and sand the surface so the non-skid coating bonds properly.
  • Apply evenly: Roll or broadcast the non-skid material evenly to avoid slick spots or overly abrasive areas.
  • Bottom line: Proper prep and controlled texture application are key to achieving a durable, safe, non-slip surface.

Tip: Mask carefully before applying non-skid paint—clean edges make a big difference in the final appearance.

Non-skid paints can be used for various different applications and circumstances. The most common use of non-skid is on boats, or for marine use. Although that is the most common, it is used in many more conditions. Here are some other examples of how non skid paint can be used outside of the nautical setting.

  • Industrial Buildings
  • Amusement Parks
  • Utility Vehicles
  • Ramps
  • Mechanic Shop
  • Walk-in Freezers
  • Ski Areas
  • Handicap Utilities
  • Residential Decks
  • Stairs
  • Restaurant kitchens
  • Stadiums
  • Restrooms
  • Warehouse floors
  • Wooden Decks
  • Food prep areas
  • Hospitals
  • Schools

One option is to add non-skid to paint or gelcoat. This process is when you take paint/gelcoat and add a non-skid additive such as Duralux non-skid additive non-skid additive for gelcoat, and Griptex for Awlgrip.  Another options is adding non-skid pumice to Blue Water Mega Gloss or Sea Hawk Aluma Hawk Camo paints.

The additive for gelcoat is extremely easy and adds just one extra step to the gelcoat application process. You simply mix the additive in with the gel coat before application and then apply. Alternative preferred application methods include using a flour sifter, powdered sugar shaker, or the punctured container itself, sprinkle the non skid into the gelcoat or paint. To use the container just punch holes in it with a nail or ice pick, overlappping the broadcasting stroke to provide a uniform pattern.

The Interlux Interdeck is available with non skid already premixed for ease of use.

The amount you use is completely subjective and dependent on what your goal is; it is recommended to use no more than a quart of non-skid per gallon of paint.  The available sizes of additive are a quart and a gallon.

How to Repair a Gelcoat Scratch, Cracks or Hole

When looking at a scratch in the gelcoat, you need to determine whether it is a surface scratch or a deep scratch. The reason being is that surface scratches can easily be buffed with a rubbing compound as opposed to deep scratches which take a couple more steps. As long as the gelcoat around the deep scratch is in good condition, you will be able to use gelcoat putty , requires mixing MEKP catalyst-once mixed properly it can be worked with a putty knife for filling, or you can make one using gelcoat and an aerosil filler/thickener. Once the filler is applied, the service will be uneven so sanding and polishing will be necessary. Customers report wet sanding with 2000 grit worked well. Everything about the repair of the scratch is fairly easy to do.

For deeper gouges, you will need to purchase gelcoat in various colors. Tints are available as well if custom matching larger quantities of gelcoat or paste. The kit will contain everything you need to do the job including some tints for matching. Some find the gouge needs to be scraped deeper with a screwdriver or Dremel tool to open it into a wide V to make sure the gelcoat has a place to settle and more permanent.  If you simply cover the cracks they may continue to spread. The  gelcoat that exists on the boat is already bonded with the laminates that are underneath. That being said, you will have to rough the surface up a bit with sand paper in order to give the paste something to stick to. Please note that you need to clean the surface with acetone after sanding to clean any contaminates off that may interfere with the filling process.

When the damage is a larger (like a screw hole) you made need 3M’s Preminum Marine Filler or 3M Marine High Strength Repair Filler. These are for bonding and filling repairs above or below the waterline and can be sanded. Some customers prefer to mix some thickener (cabosil) and gelcoat to a thick consistency. Both of these products can be applied with a spreader. If coating over with gelcoat be sure to leave space (about 1/8 inch) for the gelcoat. Splash Zone epoxy is easy to use for large areas underwater for all substrates.

For puncture holes through the gelcoat or several holes have been drilled through and need filling you can also consider using the Hawk Epoxy System. See information on how to choose the Hawk Epoxy kit.  

If the underlying problem for the hairline cracks is not handled, re-gelcoating over them will only be a temporary fix, such as a soggy core or broken support. The cracking has stemmed from a crack below the gelcoat and in the fiberglass. This is one option to repair those cracks:

  1. Using a Dremel tool, remove the gelcoat on either edge of the crack, all the way down its length. Basically this widens the gap and reveals the fiberglass layer beneath.
  2. Determine if there is a crack in the fiberglass. If there is, it needs to be filled with a putty containing fiberglass strands. Duraglas Fiberglass Filler is one option.
  3. Apply Gelcoat to the area. Can be brushed, rolled, or spray applied.

Once you have the gelcoat mixed, saving the hardener for last, begin to spread over the gouge with a plastic spreader. Since the paste will shrink slightly as it dries, make sure you put a little extra paste on the “wound”. A slight bulge will be ideal after the paste is applied. As the paste will not cure completely in the air, you will need to put a plastic film over it. If your kit does not have one, shrink wrap or wax paper will work. Tape the plastic/wax paper on all sides over the paste and let dry for 24 hours.

After the 24 hours are up, remove the plastic/wax paper. Take a piece of 400 grit sandpaper accompanied with a 3M sanding block and begin to level any areas that are raised and uneven. It will help if you have a bucket of water or water hose handy to wash away the excess material as you sand. Once you have completed the sanding with the 400 grit, you will need to now use a 600 grit sandpaper to go over the repair. The reason this is being done is to eliminate any scratches the 400 grit may have put in the repair and smooth it even more. You will continue this process moving up to a 800 grit and then a 1200 grit. Occasionally you will want to dry the repair area just to get an idea of the work you have done so far.  At this point you can wax and buff the repair.

Removing Stains from Gelcoat

Last Updated: February 9, 2026

Quick Recommendation

Removing Stains from Gelcoat: What Works Best

  • Identify the stain type first: Rust, tannin, fuel, mildew, and waterline stains each require different cleaners.
  • Start with the least aggressive method: Use a gelcoat-safe cleaner before moving to stain removers or light compounding.
  • Escalate carefully: For stubborn stains, use a dedicated marine stain remover or mild compound—avoid harsh abrasives.
  • Bottom line: Most gelcoat stains can be removed without sanding by matching the product to the stain.

Tip: After stain removal, apply a marine wax or sealant to protect gelcoat and reduce future staining.

A gelcoat surface is a very smooth, mirror-like finish when it is new. As gelcoat ages, it becomes porous which means the more easily it stains, the worse it looks and the harder it is to clean. Most all gelcoat can be restored, providing it is not completely worn through. Exhaust stains, like diesel, can develop on the surface of the Gel Coat. These stains can set in on the wax surface of the gel coat but the right cleaner can remove them. If the stain goes deeper, a bit of elbow grease will be needed.

Clean and inspect the surface with a wash with a mild cleaner like 3M’s boat soap or some alternative stronger cleaners if needed. After cleaning, dry and inspect surface for needs to be addressed: scratches, dings, cracking and crazing and to fix these flaws before rubbing out the gelcoat and restoring its shine. See the fiberglass/gelcoat repair section for options and the West System Video for “how to” instruction.

Apply a fiberglass stain remover, like 3M Fiberglass Restorer and Wax , Mothers Marine Black Streak Remover, or 3M Marine Cleaner and Wax to the stained gelcoat area with a clean rag. The black/gray stains are the result of soot being deposited on your hull. It can happen when wet exhaust systems mix the exhaust gases with seawater and discharge those gases or dry exhaust systems discharging the soot directly into the atmosphere and it lands on your boat.

These liquid one-step products that combine a polish or compound with a wax remove oxidation, and protect the gelcoat in one step.

Wait 10-15 minutes. If the stain is simply laying on the surface of the Gel Coat, the stain will begin to loosen; rinse and inspect the results.

If the stain is lifting, repeat. If not, then something stronger like a more abrasive compound with a polisher may be needed; in that case a wax will be needed to restore the shine. Each time compound products are used, some of the gelcoat is removed. Use caution to use the least aggressive product that will get the job done. Frequently all that may be needed is to apply a protective coating of wax, such as 3M Ultra Performance WaxScotchgard Marine Wax, or Mothers Marine Synthetic Wax to help keep that shine.

For more gelcoat restoration tips see our how to Maintain and Restore Gelcoat link and Aqua Buff information.


Eco-Clad Bottom Paint Review

eco cladAfter further review on the performance of Eco-Clad as a bottom paint, we are NOT offering this product to our customer base. Eco Clad is engineered to support a natural beneficial biofilm (slime) on the coated area. However, we have heard several complaints about the products’ poor performance when it comes to keeping growth off the boat. The company has done a great job of marketing Eco Clad everywhere, and claims better fuel economy and faster speeds.    This might be true, but performs only for a few months at best. After that you will see substantial marine growth and even worse fuel ecomony and speed along with the added costs of a new bottom job.

Our opinion and recommendation is to stay away from Eco-Clad unless you plan on keeping your boat in fresh water. Your are much better off using a traditional high quality bottom paint.

How to Use Metal Flake in Gel Coat

Gel coat is a resin that is pigmented with color. The consistency of gel coat is very thick and is best applied with a spray gun. Metal flake is commonly used in clear gel coat for that “bass boat” look.  Although it appears that the metal flakes are mixed into the base coat, they are usually mixed into the clear gel coat.

This can be applied over the colored gel coat and the metal flake is usually coated with clear gelcoat for added UV protection and to smooth the surface. The larger the metalflake, the more coats of clear gel coat it will often take to cover.

Usually it is recommended to use around 16 oz of metal flake per gallon of gel coat and personal preference plays a role as there us no magic ratio for adding flake. The typical bass boat will use 2-3 lbs of metal flake in the gel coat. Mix the gel coat inside a pail thoroughly with a paint stirrer to disperse the metal flakes. Stir it thoroughly and frequently during application to prevent the metal flakes from settling to the bottom.

Metal flake gelcoat is best applied using a gel coat spray gun to achieve an even coating and be sure to use an appropriate nozzle tip based on flake size.

You will need to disassemble the spray gun to clean it well as the flakes can lodge into small areas.

Related Articles: How to Apply Gel Coat

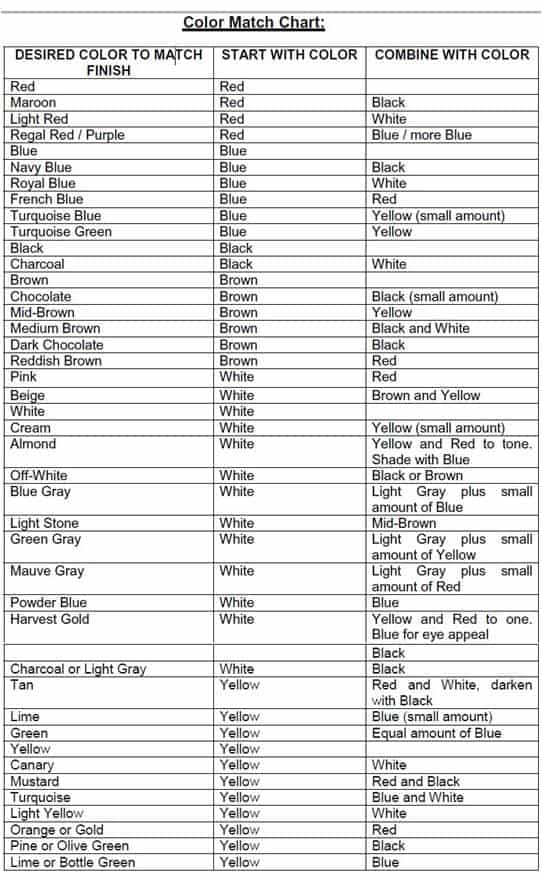
Gelcoat Color Match Chart

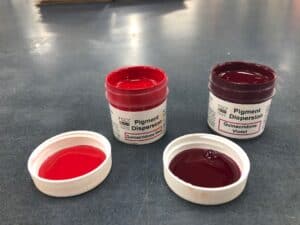
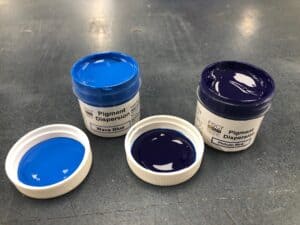
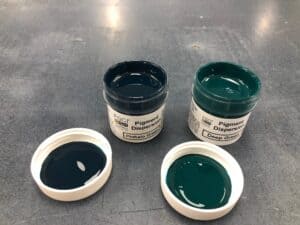
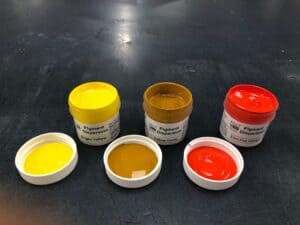
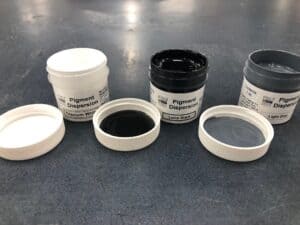
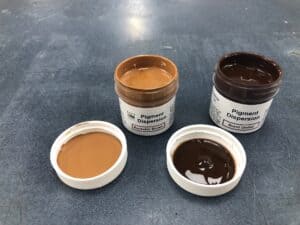
Our Gelcoat Color Match Chart is the perfect solution for any boat repair project. With a wide range of pre-mixed colors, our chart will help you find the right color tint to flawlessly make your gelcoat repairs. For smaller repairs, we offer convenient and easy-to-use repair kits with everything you need to match colors. For larger projects, we have gallons and quarts in 12 different colors ready for you to use. Plus, our neutral gelcoat lets you make any custom color you need when using the gel coat coloring agentGet the perfect match for all your boat repair needs with Gelcoat Color Match Charts today. See the different colors of the pigments at the bottom of this article.

How Do You Match Gelcoat Color?

To match gelcoat color, start by identifying your boat manufacturer, model, year, and original gelcoat color if available. Then compare that information to a gelcoat color match chart or manufacturer color reference. Because gelcoat fades and oxidizes over time, the original factory color may not perfectly match the current color of an older boat.

For the best match, clean and compound a small area near the repair before comparing colors. This helps reveal the true gelcoat color underneath oxidation, chalking, stains, and surface fading. If the boat is older or heavily weathered, tinting or blending may be needed for the closest repair match.

Gelcoat Color Matching Methods

Matching Method Best For What to Consider
Boat manufacturer color code Finding the original factory gelcoat color Useful when the boat information is available, but older gelcoat may have faded from the original color.
Gelcoat color match chart Comparing common gelcoat colors by brand, year, or shade A chart is a helpful starting point, but screen colors and printed colors may not be exact.
Physical color chip or sample More accurate visual comparison Best viewed in natural light against a cleaned and polished area near the repair.
Custom tinting Older boats, faded gelcoat, and visible repairs May be needed when the original color no longer matches the boat’s current surface color.
Professional color matching Large repairs or highly visible areas Often the best choice when the repair must blend closely with surrounding gelcoat.

Best Gelcoat Match Approach by Repair Type

Repair Type Recommended Approach Why
Small chip or scratch Use the closest matching gelcoat repair paste or kit Small repairs are less noticeable and may not require a perfect custom match.
Visible topside repair Clean, polish, compare colors, and tint if needed Repairs above the waterline are easier to see, so color accuracy matters more.
Older oxidized gelcoat Compound first, then match to the restored surface Oxidation can make the boat look lighter, chalkier, or duller than the true color.
Large repair area Use custom matching or professional help Larger repairs are harder to hide if the gelcoat color is slightly off.
Below-waterline repair Match if needed, then finish with the correct underwater coating system Color may be less critical if the area will be covered by barrier coat or bottom paint.
White or off-white gelcoat Compare carefully under natural light Small differences in white, cream, ivory, and off-white shades can be very noticeable.

How to Use a Gelcoat Color Match Chart

Step What to Do Why It Matters
1. Identify the boat Find the boat make, model, year, and any available factory color information. Many gelcoat colors are tied to specific manufacturers and model years.
2. Clean the repair area Remove wax, oxidation, stains, dirt, and surface contamination. A dirty or oxidized surface can make the gelcoat look like the wrong color.
3. Polish a small area Compound or polish near the repair before comparing colors. This helps reveal the true color of the existing gelcoat.
4. Compare the chart or sample Use the closest chart match, color chip, or physical sample. Physical samples are usually more reliable than screen images.
5. Test before applying Apply a small test patch or compare cured material before completing the repair. Gelcoat can look different before and after curing, sanding, and polishing.
6. Blend and finish Sand, compound, and polish the repaired area after curing. Finishing helps the repaired area blend with the surrounding surface.

What to Consider Before Choosing a Gelcoat Color

Gelcoat color matching is not always as simple as choosing the original factory color. Sun exposure, oxidation, age, repairs, cleaning products, and previous polishing can all change how the boat’s surface looks. A color that matches the original chart may look too clean, too bright, or too dark next to older gelcoat.

White gelcoat can be especially difficult to match because there are many slight variations, including bright white, off-white, cream, ivory, oyster, and gray-white tones. For the closest match, compare the gelcoat color in natural daylight and test the repair material before applying it to a highly visible area.

Common Questions About Gelcoat Color Matching

How do I find my boat’s gelcoat color?

Start with the boat manufacturer, model, year, and any available hull or color information. Then compare that information to a gelcoat color match chart or manufacturer color reference. If the boat is older, clean and polish the surface before comparing colors.

Will the original gelcoat color match my boat exactly?

Not always. The original gelcoat color may be close, but older boats can fade, oxidize, stain, or weather over time. A factory color may need slight tinting or blending to match the boat’s current appearance.

Why is white gelcoat hard to match?

White gelcoat is difficult to match because small differences in tone are easy to see. Bright white, off-white, cream, ivory, and gray-white can look similar on a chart but noticeably different on a boat, especially in direct sunlight.

Can I tint gelcoat to match my boat?

Yes, gelcoat can often be tinted to improve the match. Tinting should be done carefully and in small amounts because a little pigment can change the color quickly. Always test the tinted gelcoat before applying it to the repair area.

Does gelcoat dry the same color it looks in the container?

Gelcoat may look different after it cures, sands, compounds, and polishes. For that reason, it is best to test a small amount and evaluate the cured, finished color before completing a visible repair.

Should I match gelcoat before or after polishing the boat?

Match gelcoat after cleaning and polishing a small area near the repair. Oxidized gelcoat can look chalky, faded, or lighter than the true color, which can lead to choosing the wrong shade.

Can I use a gelcoat color chart from my computer screen?

A screen chart can help narrow your options, but it should not be treated as an exact match. Screen brightness, monitor settings, lighting, and photo quality can all change how the color appears.

What if I cannot find my exact gelcoat color?

If you cannot find an exact gelcoat color, choose the closest match and consider tinting or blending. For large or highly visible repairs, professional color matching may be the best option.

Is gelcoat color matching important below the waterline?

Color matching may be less important below the waterline if the repair will be covered by barrier coat or bottom paint. The priority below the waterline is usually proper repair, sealing, and coating compatibility.

How can I make a gelcoat repair blend better?

Use the closest color match, prepare the surface properly, apply the repair carefully, and finish by wet sanding, compounding, and polishing. Feathering and polishing the repair area can help it blend with the surrounding gelcoat.

Recommended Gelcoat Color Matching Products and Supplies

Bottom Paint Store carries gelcoat repair kits, neutral gelcoat, white gelcoat, colored gelcoat, tinting pigments, MEKP catalyst, wax additive, PVA, sandpaper, polishing compound, cleaners, and application supplies. The right product depends on the boat color, size of the repair, surface condition, and whether the gelcoat needs to be tinted or finished after curing.

For smaller repairs, we offer a convenient and easy-to-use gelcoat repair kit  with everything you need to match colors. For larger projects, we have have over 12 premixed colors of gel coat to choose from, in either gallons or quarts. Plus, our neutral gelcoat lets you make any custom color you need.

Other Product Links:

We are often asked how long does gel coat take to cure?

It really depends on several factors, for example, the type of gel coat used, the temperature and humidity of your environment, and the thickness of the application. Generally speaking, gel coat can take anywhere from a few hours to several days to fully cure.

Here are some general guidelines:

Initial Cure time: Gel coat typically reaches an initial cure within a few hours, usually around 2 to 4 hours. During this time, the gel coat becomes tack-free and can be touched without leaving fingerprints.

Gel Time: this refers to the time it takes for the gel coat to reach a semi-solid state where it can hold its shape and is no longer tacky to the touch. Gel time can vary based on the specific gel coat formulation but is usually within 6 to 12 hours.

Full Cure: this usually takes longer. It can take anywhere from 24 to 72 hours for the gel coat to completely cure and harden to its maximum strength and durability. However, some high-performance gel coats may require longer curing times to achieve their optimal properties.

Factors that can influence curing time include:

Temperature: Higher temperatures generally accelerate the curing process, while cooler temperatures can slow it down. Follow the manufacturer’s recommendations for curing temperature ranges.

Humidity: Higher humidity levels can also affect curing time. High humidity can extend the curing process, while low humidity may speed it up.

Thickness: Thicker applications of gel coat may take longer to cure due to the heat generated during the curing process. Thicker layers can also trap solvents that need to evaporate.

Catalyst/Hardener: Gel coat is usually catalyzed with a hardener to initiate the curing process. The amount and type of hardener used can impact the curing time.

Ventilation: Proper ventilation is essential during curing to ensure that any volatile solvents evaporate and don’t get trapped in the cured gel coat.

We recommend referring to the manufacturer’s instructions and guidelines, as curing times can vary based on the product’s formulation. It’s also important to consider the intended use of the gel-coated surface, as some applications may require longer curing times to ensure the best performance and durability.

How to match your gelcoat color?

We understand matching your gelcoat color can be a daunting task, however with the right tools and techniques, it can be done. The key is to start with a precise color match and then to carefully apply the gelcoat, ensuring that the new color blends seamlessly with the surrounding area. With patience and attention to detail, you can restore your boat’s gelcoat to its original luster or create a customized look that truly represents your personal style on the water.

Where to buy gel coat?

If you need assistance on where to buy gelcoat, Bottom Paint Store is available to answer your questions and help you select the right gelcoat for your needs. We have 100’s of colors and products to choose from.

Pigments for Gelcoats and Resins

Red, Violet

Red, Violet

Blue Wave, Phthalo Blue

Blue Wave, Phthalo Blue

Phthalo Green, Deep Green

Phthalo Green, Deep Green

Bright Yellow, Yellow Oxide, Lead Free Orange

Bright Yellow, Yellow Oxide, Lead Free Orange

Titanium White, Black Lamp, Light Gray

Titanium White, Black Lamp, Light Gray

Buckskin Brown, Burnt Umber

Buckskin Brown, Burnt Umber

What is the difference in Hard Bottom Paint and Ablative Bottom Paint?

Last Updated: January 6, 2026

Hard Bottom Paint Vs. Ablative Bottom Paint

Quick Recommendation

Hard vs Ablative Bottom Paint: Which Should You Choose?

  • Choose Ablative (self-polishing) if you trailer, your boat sits at the dock for long periods, or you want a coating that wears away gradually to reduce paint buildup.
  • Choose Hard Bottom Paint if you want a tough, scrub-friendly finish, you race or want a smoother surface, or your boat stays in the water and you don’t mind periodic sanding to manage buildup.
  • Not sure? For most recreational boats, an ablative is the safer all-around choice; hard paint is best when you need maximum durability and frequent cleaning.

Tip: Always confirm compatibility with your previous bottom paint type and your boat’s typical water conditions (freshwater vs saltwater) before switching.

Hard Bottom Paint vs Ablative Bottom Paint

Hard bottom paint dries to a tough, durable coating that holds its biocide in a hard paint film. It is often a good choice for faster boats, trailered boats, racing boats, and boats that are cleaned regularly. Ablative bottom paint slowly wears away as the boat moves through the water, exposing fresh biocide over time and reducing paint buildup.

Quick Answer: Hard Bottom Paint vs Ablative Bottom Paint

Hard bottom paint dries to a tough, durable coating that holds its antifouling protection in a hard paint film. It is often a good choice for faster boats, racing boats, trailered boats, and boats that are cleaned or scrubbed regularly. Ablative bottom paint slowly wears away as the boat moves through the water, exposing fresh antifouling protection over time and reducing paint buildup.

For many recreational boats that stay in the water, ablative bottom paint is often the easier long-term maintenance choice because it gradually wears away instead of building up layer after layer. Hard bottom paint may be better when a smooth, durable, scrub-resistant finish is more important.

Hard Bottom Paint vs Ablative Bottom Paint Comparison

Feature Hard Bottom Paint Ablative Bottom Paint
How It Works Forms a hard coating that releases antifouling protection from the paint film. Gradually wears away to expose fresh antifouling protection.
Best For Fast boats, racing boats, trailered boats, and boats that are scrubbed often. Cruising boats, sailboats, powerboats, and boats kept in the water for extended periods.
Paint Buildup Can build up over time if old layers are not removed. Helps reduce buildup because the paint film gradually wears away.
Durability Very durable and more resistant to scrubbing and abrasion. Designed to wear away, so it is usually less scrub-resistant than hard paint.
Maintenance May require sanding or removal after repeated applications. Usually easier to recoat because old paint is gradually depleted.
Trailered Boats Often a good option because the coating is harder and more durable. Some ablative paints can be used on trailered boats, but product directions should be checked.
Hauling and Relaunching Some hard paints have launch-window limits after application. Many ablative paints are more flexible for seasonal haul-outs, depending on the product.
Performance Finish Can often be sanded smooth for racing or speed-focused applications. Good for general boating, but not usually chosen when the smoothest racing finish is the priority.
Long-Term Use Can require more surface prep over time due to paint buildup. Often preferred for easier seasonal maintenance and reduced coating buildup.

Best Bottom Paint Choice by Boat Use

Boat Use Better Choice Why
Boat stays in the water all season Ablative bottom paint Provides ongoing protection as the paint wears away and exposes fresh antifouling ingredients.
Boat is used frequently Ablative bottom paint Water movement helps the paint polish away and maintain antifouling performance.
Boat sits idle for long periods Hard bottom paint or premium ablative bottom paint Some paints perform better than others when a boat is not moving often, so product selection matters.
Fast powerboat Hard bottom paint Hard paint is more durable at higher speeds and can better tolerate cleaning.
Racing sailboat Hard bottom paint Can often be sanded or burnished smooth for a faster racing finish.
Cruising sailboat Ablative bottom paint Usually easier to maintain and reduces heavy paint buildup over time.
Trailered boat Hard bottom paint or trailerable ablative paint Hard paint handles abrasion well, but some ablatives are also designed for haul-out and relaunch use.
Boat owner wants less annual sanding Ablative bottom paint Ablative paint helps reduce buildup, which can mean less sanding and stripping over time.
Bottom is scrubbed by a diver Hard bottom paint Hard coatings usually tolerate cleaning and scrubbing better than softer ablative paints.

What to Consider Before Choosing Hard or Ablative Bottom Paint

Before choosing between hard and ablative bottom paint, consider how often the boat is used, how fast it runs, whether it is kept in the water or trailered, how often the bottom is cleaned, and how much paint buildup is already on the hull. The best paint depends on the boat, water conditions, existing paint, and maintenance routine.

If your boat stays in the water and you want easier seasonal maintenance, ablative bottom paint is often the better choice. If your boat is fast, frequently scrubbed, raced, or trailered, hard bottom paint may be the better fit. Always check the product instructions for compatibility, launch time, surface preparation, and whether the paint can be applied over your existing bottom paint.

Common Questions About Hard and Ablative Bottom Paint

What is hard bottom paint?

Hard bottom paint is an antifouling paint that dries to a firm, durable coating. It releases antifouling protection from the paint film while maintaining a hard surface. It is often used on faster boats, racing boats, trailered boats, and hulls that are cleaned regularly.

What is ablative bottom paint?

Ablative bottom paint is an antifouling paint that slowly wears away as the boat moves through the water. As the surface wears, fresh antifouling protection is exposed. This helps maintain performance and reduces heavy paint buildup over time.

Is hard bottom paint better than ablative bottom paint?

Hard bottom paint is not always better; it depends on the boat and how it is used. Hard paint is better for durability, speed, and scrubbing. Ablative paint is often better for easier maintenance, long-term buildup reduction, and boats kept in the water for extended periods.

Is ablative bottom paint better for recreational boats?

For many recreational boats, ablative bottom paint is a practical choice because it wears away gradually and reduces the need to remove heavy paint buildup later. It is especially useful for boats that remain in the water during the season.

Can you put ablative paint over hard bottom paint?

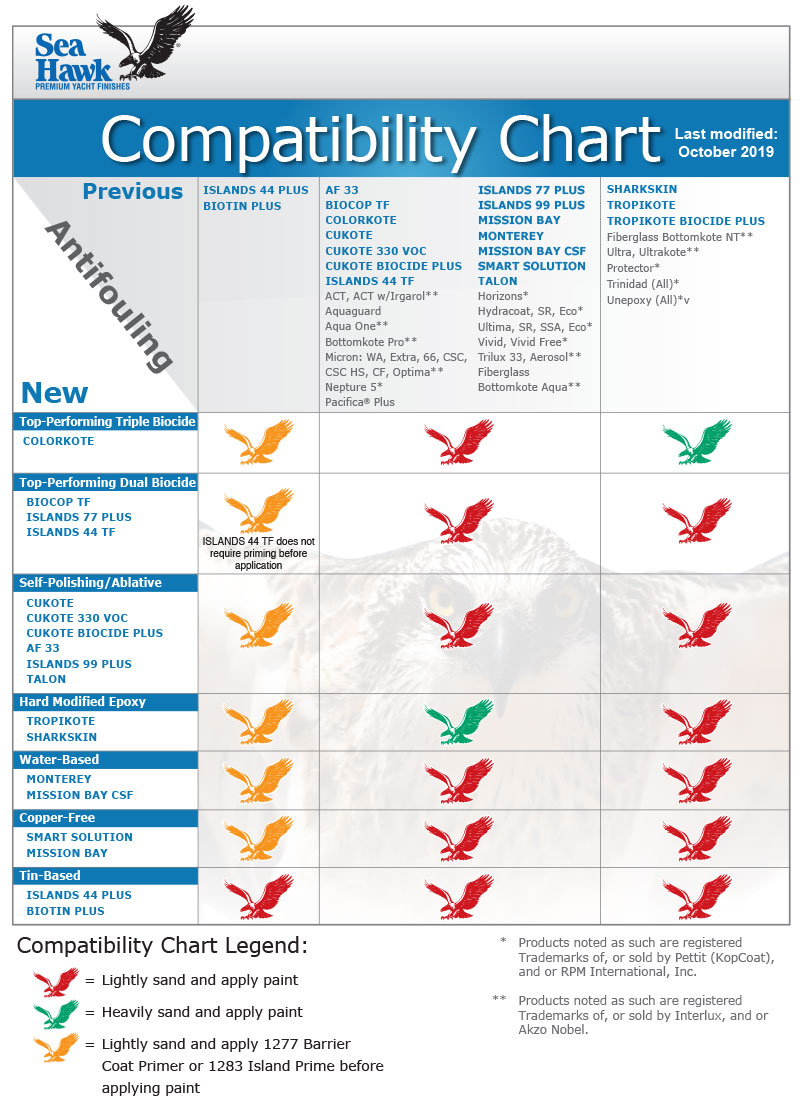
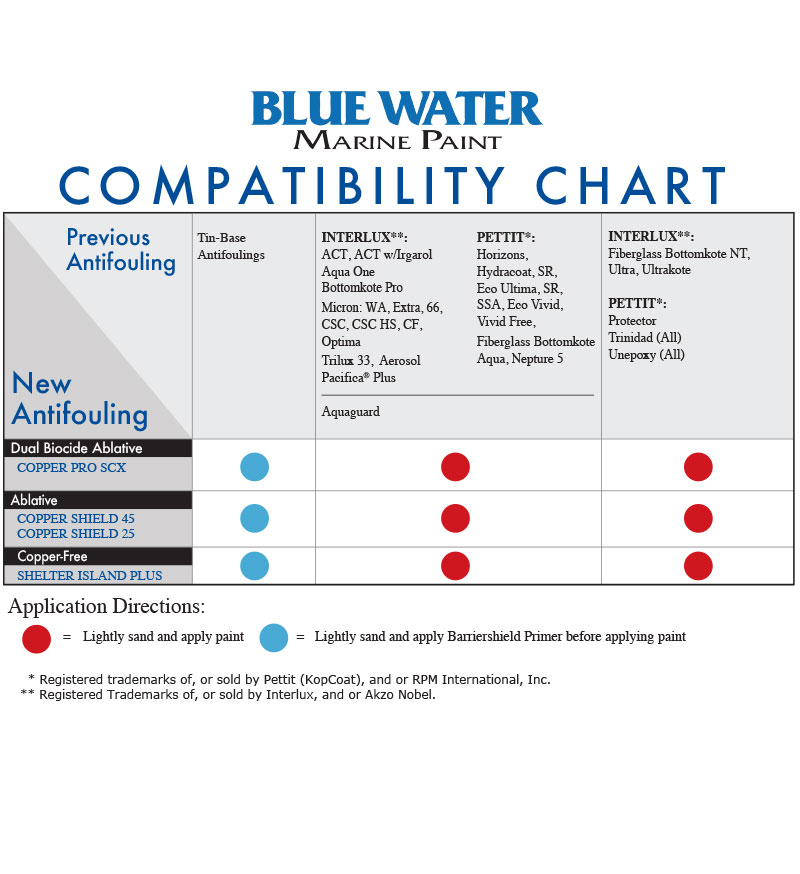
In many cases, ablative bottom paint can be applied over old hard bottom paint if the existing coating is sound, properly sanded, and compatible with the new paint. Always check the manufacturer’s compatibility chart before applying one bottom paint over another.

Can you put hard bottom paint over ablative paint?

Hard bottom paint should generally not be applied over soft or heavily worn ablative paint unless the old coating is removed or properly prepared according to the manufacturer’s instructions. A soft or unstable coating underneath can cause adhesion problems.

Does ablative bottom paint need to be sanded every year?

Ablative bottom paint may not require heavy sanding every year if the existing paint is still sound and compatible with the next coat. Light sanding, cleaning, or touch-up may be needed depending on the product, condition of the paint, and manufacturer’s recoat instructions.

Does hard bottom paint build up over time?

Yes, hard bottom paint can build up after repeated applications because the coating does not wear away the same way ablative paint does. Over time, too many layers may require sanding or stripping before repainting.

Which bottom paint is better for a trailered boat?

Hard bottom paint is often a good choice for trailered boats because it is more durable and abrasion resistant. However, some ablative paints are designed to tolerate haul-out and relaunching, so it is important to check the specific product instructions.

Which bottom paint is better for a fast boat?

Hard bottom paint is often preferred for fast boats because it creates a durable surface and can be sanded smooth. Some ablative paints can work on moderately fast boats, but high-speed use should always be checked against the paint manufacturer’s recommendations.

Which bottom paint requires less maintenance?

Ablative bottom paint often requires less long-term maintenance because it gradually wears away and reduces paint buildup. Hard bottom paint can be durable and scrub-resistant, but it may require more sanding or removal after multiple seasons of recoating.

Recommended Bottom Paint Products and Supplies

Bottom Paint Store carries hard bottom paints, ablative bottom paints, multi-season antifouling paints, primers, barrier coats, paint removers, sandpaper, rollers, trays, solvents, and related application supplies. The right product depends on your boat speed, hull material, water conditions, maintenance routine, and whether your existing bottom paint is compatible with the new coating.


For most recreational boats that stay in the water, ablative bottom paint is often the easier long-term maintenance choice because it gradually wears away instead of building up layer after layer. Hard bottom paint may be better when a smooth, durable, scrub-resistant finish is more important.

Hard Bottom Paint vs Ablative Bottom Paint Comparison

Feature Hard Bottom Paint Ablative Bottom Paint
How It Works Forms a hard coating that releases biocide from the paint film. Slowly wears away to expose fresh antifouling protection.
Best For Fast boats, racing boats, trailered boats, and boats that are scrubbed often. Cruising boats, sailboats, powerboats, and boats kept in the water for extended periods.
Paint Buildup Can build up over time if old layers are not removed. Reduces buildup because the paint film gradually wears away.
Durability Very durable and more resistant to scrubbing and abrasion. Designed to wear away, so it is less scrub-resistant than hard paint.
Maintenance May require sanding or removal after repeated applications. Usually easier to recoat because old paint is gradually depleted.
Trailered Boats Often a good option because the coating is harder and more durable. Some ablative paints can be used on trailered boats, but product directions should be checked.
Hauling and Relaunching Some hard paints have launch-window limits after application. Many ablative paints are more flexible for seasonal haul-outs, depending on the product.
Performance Finish Can be sanded smooth for racing or speed-focused applications. Good for general boating, but not usually chosen when the smoothest racing finish is the priority.
Long-Term Use Can require more surface prep over time due to paint buildup. Often preferred for easier seasonal maintenance and reduced coating buildup.

Best Bottom Paint Choice by Boat Use

Boat Use Better Choice Why
Boat stays in the water all season Ablative bottom paint Provides ongoing protection as the paint wears away and exposes fresh biocide.
Boat is used frequently Ablative bottom paint Water movement helps the paint polish away and maintain antifouling performance.
Boat sits idle for long periods Hard or premium ablative bottom paint Some paints perform better than others when a boat is not moving often, so product selection matters.
Fast powerboat Hard bottom paint Hard paint is more durable at higher speeds and can be cleaned or sanded smooth.
Racing sailboat Hard bottom paint Can be burnished or sanded smooth for a faster racing finish.
Cruising sailboat Ablative bottom paint Usually easier to maintain and reduces heavy paint buildup over time.
Trailered boat Hard bottom paint or trailerable ablative paint Hard paint handles abrasion well, but some ablatives are also designed for haul-out and relaunch use.
Boat owner wants less annual sanding Ablative bottom paint Ablative paint helps reduce buildup, which can mean less sanding and stripping over time.
Bottom is scrubbed by a diver Hard bottom paint Hard coatings usually tolerate cleaning and scrubbing better than softer ablative paints.

What to Consider Before Choosing Hard or Ablative Bottom Paint

Before choosing between hard and ablative bottom paint, consider how often the boat is used, how fast it runs, whether it is kept in the water or trailered, how often the bottom is cleaned, and how much paint buildup is already on the hull. The best paint depends on the boat, the water conditions, and the maintenance routine.

If your boat stays in the water and you want easier seasonal maintenance, ablative bottom paint is often the better choice. If your boat is fast, frequently scrubbed, raced, or trailered, hard bottom paint may be the better fit. Always check the product instructions for compatibility, launch time, surface preparation, and whether the paint can be applied over your existing bottom paint.

Common Questions About Hard and Ablative Bottom Paint

What is hard bottom paint?

Hard bottom paint is an antifouling paint that dries to a firm, durable coating. It releases biocide from the paint film while maintaining a hard surface. It is often used on faster boats, racing boats, trailered boats, and hulls that are cleaned regularly.

What is ablative bottom paint?

Ablative bottom paint is an antifouling paint that slowly wears away as the boat moves through the water. As the surface wears, fresh biocide is exposed. This helps maintain antifouling protection and reduces heavy paint buildup over time.

Is hard bottom paint better than ablative bottom paint?

Hard bottom paint is not always better; it depends on the boat and how it is used. Hard paint is better for durability, speed, and scrubbing. Ablative paint is often better for easier maintenance, long-term buildup reduction, and boats kept in the water for extended periods.

Is ablative bottom paint better for recreational boats?

For many recreational boats, ablative bottom paint is a practical choice because it wears away gradually and reduces the need to remove heavy paint buildup later. It is especially useful for boats that remain in the water during the season.

Can you put ablative paint over hard bottom paint?

In many cases, ablative bottom paint can be applied over old hard bottom paint if the existing coating is sound, properly sanded, and compatible with the new paint. Always check the manufacturer’s compatibility chart before applying one bottom paint over another.

Can you put hard bottom paint over ablative paint?

Hard bottom paint should generally not be applied over soft or heavily worn ablative paint unless the old coating is removed or properly prepared according to the manufacturer’s instructions. A soft or unstable coating underneath can cause adhesion problems.

Does ablative bottom paint need to be sanded every year?

Ablative bottom paint may not require heavy sanding every year if the existing paint is still sound and compatible with the next coat. Light sanding, cleaning, or touch-up may be needed depending on the product, condition of the paint, and manufacturer’s recoat instructions.

Does hard bottom paint build up over time?

Yes, hard bottom paint can build up after repeated applications because the coating does not wear away the same way ablative paint does. Over time, too many layers may require sanding or stripping before repainting.

Which bottom paint is better for a trailered boat?

Hard bottom paint is often a good choice for trailered boats because it is more durable and abrasion resistant. However, some ablative paints are designed to tolerate haul-out and relaunching, so it is important to check the specific product instructions.

Which bottom paint is better for a fast boat?

Hard bottom paint is often preferred for fast boats because it creates a durable surface and can be sanded smooth. Some ablative paints can work on moderately fast boats, but high-speed use should always be checked against the paint manufacturer’s recommendations.

Which bottom paint requires less maintenance?

Ablative bottom paint often requires less long-term maintenance because it gradually wears away and reduces paint buildup. Hard bottom paint can be durable and scrub-resistant, but it may require more sanding or removal after multiple seasons of recoating.

Recommended Bottom Paint Products and Supplies

Bottom Paint Store carries hard bottom paints, ablative bottom paints, multi-season antifouling paints, primers, barrier coats, paint removers, sandpaper, rollers, trays, solvents, and related application supplies. The right product depends on your boat speed, hull material, water conditions, maintenance routine, and whether your existing bottom paint is compatible with the new coating.

Bottom paint is generally used to keep the growth off of the bottom of your boat. There are generally two types of bottom paint both of which have several variations that create a multitude of products in the market place. The two different types or categories of bottom paint include a hard bottom paint, and an ablative bottom paint.

Sharskin Hard Bottom PaintHard Bottom Paint is bottom paint that is a hard modified epoxy. After you apply a hard bottom paint it is very durable and does not wear off. Hard Bottom Paints ypically have a higher ratio of pesticides (usually copper)  in them that are exposed in the outer surface of the bottom paint coating. As time goes buy, the coating oxidizes and becomes less effective in combating marine growth. Hard bottom paint is generally used on boats when the boat sits for long periods of time without moving at all, or there is little movement of water (current/ tide) around the boat. You should not use a hard paint if you boat comes out of the water such as on a trailer, or a lift. After 72 hours, the hard bottom paint will oxidize on the outer surface from the air and becomes ineffective. If you are trailering your boat, or keep it on a lift you should always use an ablative bottom paint.

AF-33 Ablative Bottom PaintAblative bottom paint, also known as self- polishing bottom paint, is softer and allows the coating to wear off at a controlled rate. Much like a bar of soap, once the boat moves in the water or there is a current and or tide, the outer layer slowly wears away. The wearing away of the self-polishing bottom paint allows for new, un-oxidized paint to be exposed. Therefore, if you are trailering your boat, or it comes in and out of the water for any reason, the paint will oxidize within 72 hours. However, once placed back in service, that oxidized ablative paint wears away and exposes a new fresh outer coating with active protection. Ablative bottom paint is a newer technology then hard paint. It is the preferred bottom paint of most users since it typically lasts longer and continuously exposes a new active outer coating that protects against marine growth.

Related Articles and links:

Hard Bottom Paint

Ablative Bottom Paint

Applying Bottom Paint

Bottom Paint Cross Reference Guide

See the table below for a listing of most bottom paints and how they compare by the top manufacturers.
Bottom Paint Cross Reference Guide.

Top Performing Bottom Paints

sea hawk paints
interlux_paints Pettit Paints Blue Water Marine Paints
Biocop TF Micron 66 Odyssey HD
Islands 77 Plus Micron 77
Colorkote Micron Extra with Biolux* Odyssey Triton

Self Polishing / Ablative Bottom Paints

Sea Hawk  Interlux Pettit Blue Water
Biocop TF Micron 66 Odyssey HD
Islands 77 Plus Micron 77
Micron Extra with Biolux* Ultima SR40*
Cukote Micron CSC Ultima SSA Copper Shield 45 Ablative
Monterey Fiberglass Bottomkote Aqua Hydrocoat SR*
Hydrocoat
Hydrocoat Eco
AF-33 Micron CSC Horizons Copper Shield 25
ACT Ultima SR40*
Mission Bay Micron CF Vivid Shelter Island Plus
Mission Bay CSF Fiberglass Bottomkote Aqua
Fiberglass Bottomkote NT Seamate Copper Shield 25

Hard Modified Epoxy Bottom Paints

Sea Hawk  Interlux Pettit Blue Water
Tropikote Ultra-Kote Trinidad 75
Trindad HD
Ultra with Biolux* Trinidad SR*
Trindad Pro*
Sharkskin Trinidad HD
Talon Unepoxy HRT

Aluminum Safe Bottom Paints

Sea Hawk  Interlux Pettit Blue Water
Smart Solution Pacifica Plus Ultima Eco
Micron CF* Odyssey Triton
Mission Bay Trilux 33 Vivid Shelter Islands Plus
Colorkote

Water Based Bottom Paints

Sea Hawk  Interlux Pettit Blue Water
Monterey Fiberglass Bottomkote Aqua Hydrocoat SR*
Hydrocoat
Hydrocoat Eco
Mission Bay CSF

Outdrive Bottom Paints

Sea Hawk  Interlux Pettit Blue Water
Smart Solution Trilux 33 Aerosol Alumaspray Plus Aerosol

Bottom Paint Primers

Sea Hawk  Interlux Pettit Blue Water
Bottom Paint Primer Primocon Tie Coat Primer 6627 BarrierShield Primer
Islands Prime
Shawkocon
1266 Non-Sanding Primer YPA200 No-Sand Primer Skip Sand Primer 6998
Barnacle Blocker Aerosol Primocon Aerosol
High Build Epoxy Primers
Sea Hawk  Interlux Pettit Blue Water
Tuff Stuff Interprotect 2000E Pettit Protect Bottom Protect 70, Bottom Protect

Bottom Paint Cleaners

Sea Hawk  Interlux Pettit Blue Water
S-80  Wax ‘N Grease Killer 202  Fiberglass Solvent Wash Bottom Prep D-95 973 Dewaxer
S-90  De-Waxing Etch & Cleaner 202V  Low VOC Fiberglass Solvent Wash Bio-Blue 92

Bottom Paint Removers / Strippers

Sea Hawk  Interlux Pettit Blue Water
Marine Paint Stripper Interstrip 299E

Speciality

Sea Hawk  Interlux Pettit Blue Water
N/A VC-17M Extra* Black Widow Racing
1959 Hard Racing Copper Bronze
Biocop TF Pint Booster

These bottom paint comparisons are the best match-ups of antifoulant brands and types by manufacturers. This information is the sole opinion of www.BottomPaintStore.com. Please consult each manufacturer for more specific product information and comparisons. 

*These items are currently out of stock from the manufacturer and are considered to be on phase-out.   Availability is very limited. 

Can you use a Marine Descaler on an aluminum outboard engine?

We recommend a Hammerhead Marine Descaler Flush every 100 hours, or twice a year for any engine running in warm, calcium rich waters.  This is a revolutionary change to outboard marine engine maintenance which has come about through Bright Bay’s next generation chemistry.  Only Hammerhead Marine Descaler  is made with aluminum safe cleaning agents designed for today’s high performance marine engines. Now you can even descale your aluminum outboard engine safely!
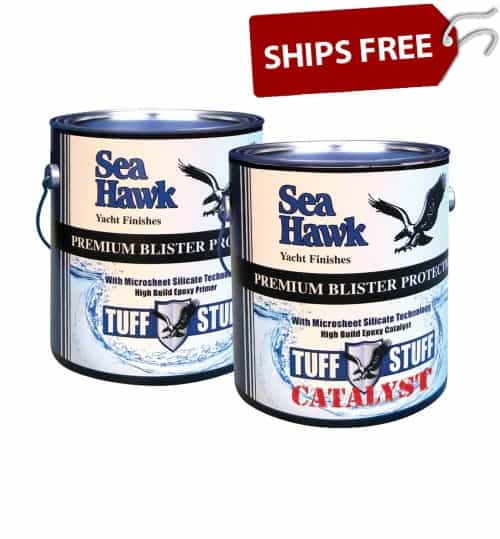
The attached pictures were taken of a 4 stroke outboard engine in Key West.  The block cracked with less than 200 hours because marine scale had restricted water flow for engine cooling.  Because water flow and scale buildup are a maintenance item, damage was not covered under the manufacturer’s warranty on the $20,000 motor. A marine descaler would have prevented this damage.

When compared to other brands such as Rydlyme Descaler and Barnacle Buster, we found Hammerhead Marine Descaler to be as effective, less expensive  and safe for use on aluminum outboards.

Owners have historically only used “salt away” to flush outboard engines because acid descalers are not safe for the aluminum heads.  Salt away does not remove marine biogrowth which ultimately causes engines to overheat.  The traditional repair method for an overheating engine is to tear down and rebuild.  We are going to recommend that an outboard Hammerhead Flush be done with each oil change as a preventative maintenance procedure for avoiding marine scale buildup, overheating, and engine rebuilds.

Watch this video of Hammer Hear Marine Descaler in action!

Can you use water-based bottom paint over a marine epoxy primer?

Epoxy paint is a latex acrylic substance that may have a small amount of epoxy in the mix and provide a tough, durable protective coating that’s effortless to maintain. Putting a water-based bottom paint  (WBP) over a solvent based primer can be done with some modified application procedures. You do NOT want to make the window, or hot coat the water based paint over the solvent based primer such as Tuff Stuff high build marine epoxy primer. If you do, it will mud crack. So instead of putting on the WBP over the Solvent Primer in the same day, you need to wait for the primer to totally cure. Then you have to sand it with 80 grit sandpaper before apply WBP. This is a lot of extra work and very difficult to sand = extremely hard surface. So the best thing to do when using a high build solvent based epoxy is to coat it with a solvent based paint. That way you skip the extra time and labor with sanding.

Tuff Stuff Marine Epoxy Primer

Awlgrip Paint, the Best Topside Boat Paint

Awlgip Marine PaintsAwlgrip Topcoat, also referred to as awlgrip paint,  is a polyester based high gloss polyurethane topcoat giving long lasting gloss and color retention. It is considered the among the best Topside Paints in the marine industry. AwlGrip Topcoat  may be applied by brush/roller or spray. For application above the waterline only. See Awlgrip Application Guidelines

Awlcraft 2000 is an Awlgrip paint that is a 3 component, premium polyurethane finish that must be applied by spray only, and delivers a high gloss finish in a wide range of colors with enhanced color and gloss retention.  Awlcraft 2000 comes in a number of unique color options.  You will need to choose the appropriate Converter and a Reducer. 

awlgrip 545 primerThe most common practice for the do it yourselfer is priming the boat with Awlgrip 545 epoxy primer. This is a 2 part primer, so you will need the base (either white or grey) and the converter. Awlgrip also recommends a reducer. The links to the converter and reducer can be found on the base primer product page.

Mixing and Reduction:
This is a two part system. You must order the base primer in either gray or white along with the D3001 Converter in the appropriate size. The mix ratio is 1:1 so if you purchase 1 quart of primer you also need 1 quart of converter for a total of 2 quarts. Additionally you need to purchase the appropriate reducer (spray or brush) for spraying reduce up to 25% with T0006 and for brushing reduce up to 10% with T0031.

Theoretical Coverage: 497 Sq feet/gallon at one mil dry (25 microns) 165-248 Sq. Feet at recommended dry film thickness. Calculated based on a theoretical transfer efficiency of 100%.

Then you will choose your base color of Awlgrip Topside paint, the converter and reducer. The reducer and converter change depending if you are spraying or brush/rolling.

Mixing and Reduction

Spray: Mix by volume one part AWLGRIP Topcoat Base Component (Color) with one part AWL-CAT #2 G3010 spray converter to a a smooth homogenous mixture. Reduce up to 25% with the spray reducer(s) appropriate for conditions. Overall mixture is 1:1:1/2 volume. Example: 8oz Base, 8oz G3010, 4oz Reducer. 25% reduction is a standard mix. Clear coats. metallic colors, and painting in high temperature conditions may require additional reduction. 40% reduction is the maximum recommendation.

Brush/Roller: Mix by volume two parts AWLGRIP Topcoat Base Component with one part AWL-CAT #3/H3002 Brushing Converter until one smooth, homogenous mixture is obtained. Reduce 25% to 33% with T0031. Overall mix is 2:1:3/4-1 by volume. Example: 8 oz. color base component, 4 oz. H3002, 3-4 oz. T0031. 

Theoretical Coverage:
Brush/Roller Application: 700-725 Sq. Feet at 1 mil (25 Microns) dry: 285 Sq. Feet at recommended dry film thickness.
Recommended Wet Film Thickness: 4.5-6 mils (112.5-150 Microns), Total of 2 Coats.
Recommended Dry Film Thickness: 2-3 mils (50-75 Microns), Total of 2 Coats.

Spray Application: 530 Sq. Feet at 1 mil (25 microns) dry film thickness; 210 SQ. Feet at recommended dry film thickness.
Recommended Wet Film Thickness: 6-9 mils (150-225 Microns), Total of 2-3 Coats.
Recommended Dry Film Thickness: 2-3 mils (50-75 Microns), Total of 2-3 Coats.

You can view the links provided above to see more information about the products, mix ratios, surface prep and auxiliary products.

Awlgrip Color Chart

How do I know if my boat has gelcoat on it or paint?

Last Updated: February 3, 2026

Quick Recommendation

Boat Gelcoat Paint: When to Use It

  • Use gelcoat when repairing or restoring fiberglass surfaces and you want a thick, durable, original-style finish that can be sanded and polished.
  • Use marine paint instead for large cosmetic refinishing jobs where ease of application and faster turnaround matter more than thickness.
  • Below the waterline: Gelcoat is not antifouling—boats kept in the water still require proper bottom paint.
  • Bottom line: Gelcoat excels at repairs and long-term durability; marine paint excels at simplicity and full-boat color changes.

Tip: Gelcoat requires correct catalyst ratios and air-inhibition control (wax additive or PVA) to cure properly.


How Can You Tell if a Boat Has Gelcoat or Paint?

You can usually tell whether a boat has gelcoat or paint by inspecting the surface, checking for peeling, looking at scratches, testing a small hidden area, and reviewing the boat’s history. Gelcoat is the original molded finish on most fiberglass boats and is usually thicker, harder, and more polishable. Paint is a coating applied over the surface and may show peeling, brush marks, roller texture, or a visible edge where it was applied.

If the boat is fiberglass and has never been refinished, the surface is most likely gelcoat. If the finish has been changed, repainted, or repaired, it may have marine paint over the original gelcoat. Knowing the difference matters because gelcoat can often be compounded, polished, or repaired, while painted surfaces usually require a different repair and recoating process.

Gelcoat vs Paint Identification Guide

What to Check Likely Gelcoat Likely Paint
Boat material Common on fiberglass boats as the original outer finish May be applied over fiberglass, wood, aluminum, steel, or old gelcoat
Surface thickness Usually thicker than paint and can often be sanded and polished Usually a thinner coating layer over the original surface
Peeling or flaking Gelcoat may crack or oxidize but does not usually peel like paint Paint may peel, chip, lift, or flake when adhesion fails
Scratches Scratches may show the same color underneath if the gelcoat is thick Scratches may reveal a different color or original gelcoat underneath
Oxidation Often turns chalky, dull, or faded and may improve with compounding May fade, chalk, or lose gloss, but aggressive compounding can damage thin paint
Edges and seams No obvious coating edge if it is original molded gelcoat May show paint edges around hardware, tape lines, repairs, or masked areas
Brush or roller marks Usually not visible on original molded gelcoat May show brush marks, roller stipple, spray texture, or uneven coating thickness
Repair method Often repaired with gelcoat paste, matching gelcoat, sanding, and polishing Usually repaired by sanding, priming, and repainting with a compatible marine paint

Simple Ways to Check if Your Boat Has Gelcoat or Paint

Test What to Do What It May Tell You
Look for peeling Inspect corners, chips, scratches, hardware edges, and damaged areas. Peeling or lifting usually points to paint rather than original gelcoat.
Check a scratch Look closely at a scratch or chip to see whether another color appears underneath. A different color below the surface may mean the boat was painted.
Inspect around hardware Look near cleats, rails, fittings, rub rails, hinges, and masked edges. Paint may leave visible edges, tape lines, or build-up around hardware.
Try light compounding in a small area Compound a small hidden or low-visibility spot carefully. Oxidized gelcoat often improves noticeably, while thin paint may not tolerate aggressive compounding.
Look for brush or roller texture View the surface from an angle in good light. Brush marks, roller stipple, or uneven texture may indicate a painted surface.
Review the boat’s history Check records, previous owner information, repair invoices, or manufacturer details. A repaint, restoration, or color change usually means paint was applied over gelcoat.

Best Next Step Based on What You Find

What You Find Likely Surface Recommended Next Step
Dull, chalky fiberglass surface that improves with compounding Oxidized gelcoat Clean, compound, polish, and protect before deciding to repaint.
Peeling or flaking coating Paint over gelcoat or another coating Sand or remove loose paint, then repaint with a compatible marine coating system.
Small chips or gouges in fiberglass Damaged gelcoat Use gelcoat repair material, then sand, compound, and polish.
Scratches reveal a different color underneath Painted surface Identify the existing coating before sanding, priming, or repainting.
Old finish is faded but not peeling Could be gelcoat or paint Test a small area before using aggressive compounds, sandpaper, or solvents.
Below-waterline coating is wearing away Likely bottom paint Identify whether it is hard or ablative bottom paint before recoating.

What to Consider Before Repairing or Recoating

Before repairing, polishing, or repainting your boat, confirm whether you are working with gelcoat, topside paint, bottom paint, or another marine coating. The wrong repair method can create adhesion problems, color mismatch, sanding damage, or coating failure.

If the surface is gelcoat, you may be able to restore shine with cleaning, compounding, and polishing before repainting is necessary. If the surface is painted, be more cautious with aggressive sanding or buffing because paint is usually thinner than gelcoat and can be damaged more easily.

Common Questions About Identifying Gelcoat or Paint

Do all fiberglass boats have gelcoat?

Most fiberglass boats are originally built with gelcoat as the outer molded finish. However, a fiberglass boat may later be painted during repair, restoration, refinishing, or color changes.

Can a boat have paint over gelcoat?

Yes, many fiberglass boats have paint applied over the original gelcoat. This is common when the boat has been refinished, repaired, restored, or had its color changed.

How can I tell if my boat was repainted?

Look for peeling, tape lines, brush marks, roller texture, overspray, color differences in scratches, or coating edges around hardware. These signs often indicate that paint was applied over the original surface.

Does gelcoat peel like paint?

Gelcoat usually does not peel like paint. It may oxidize, fade, crack, chip, or become chalky, but peeling or flaking is more commonly associated with paint or another coating applied over the surface.

Can you polish gelcoat?

Yes, oxidized gelcoat can often be restored by cleaning, compounding, polishing, and waxing or sealing. This is one reason it is important to identify gelcoat before deciding to repaint.

Can you polish boat paint?

Some marine paints can be polished lightly, but painted surfaces are usually thinner than gelcoat and can be damaged by aggressive compounding or sanding. Always test a small area and follow the coating manufacturer’s recommendations.

Can you apply gelcoat over paint?

Gelcoat should generally not be applied over standard boat paint unless the manufacturer specifically allows it. Gelcoat is usually applied over fiberglass, existing gelcoat, or compatible repair materials, so paint may need to be removed first.

Can you paint over gelcoat?

Yes, you can paint over gelcoat if the surface is clean, dry, sound, dewaxed, sanded, and properly prepared. Some paint systems may also require primer for best adhesion and durability.

What if I cannot tell whether it is gelcoat or paint?

If you are unsure, test a small hidden area, inspect scratches and edges, review the boat’s history, or ask a marine repair professional. It is better to identify the surface before choosing cleaners, compounds, sandpaper, primer, gelcoat, or paint.

Is bottom paint the same as gelcoat?

No. Bottom paint is an antifouling coating used below the waterline to help reduce marine growth. Gelcoat is the original outer finish on many fiberglass boats. A boat can have gelcoat on the hull with bottom paint applied over the underwater portion.

Recommended Gelcoat and Boat Paint Supplies

Bottom Paint Store carries gelcoat repair products, marine topside paints, bottom paints, primers, barrier coats, polishing compounds, sandpaper, cleaners, solvents, waxes, and application supplies. The right product depends on whether your boat has original gelcoat, marine paint, bottom paint, or a coating system applied over the original surface.

Fiberglass is what is used as the base of the boat. These are the strands underneath the gelcoat that you typically do not see. (unless there is a gouge!) Over the fiberglass usually gelcoat is applied at the factory. If the surface is scratched gelcoat is the same color throughout; if the surface has been painted when scratched it will show what is underneath.

Need a repair?

If it is just a gouge and not penetrated all the way through the boat, then you would need to fill in the gouge with 3M premium marine filler (just one product that will work but our most popular for this use). After you have filled in the gouge and sanded it down, you would then apply the topcoat of gelcoat. (gelcoat is the top finish that you see on your entire boat.) Gelcoat is typically much thicker than a paint and is designed to protect the underlying fiberglass as well as provide a smooth shiny appearance. Be sure to leave the marine filler about 1/8″ lower than the surrounding gelcoat. This will allow you to apply enough gelcoat and be able to feather the surrounding area once your done. If you leave the marine filler flush, then once you apply the gelcoat you will have a lump on the area you are repairing (gelcoat should be thick enough or it could release from repair).

Here are the products that you would need.

3M Premium Marine Filler

Gelcoat or Gelcoat repair putty

The amount that you will need is dependent on the size and number of gouges. If you have many gouges, you may consider buying a quart of gelcoat. However, the nice thing about the gelcoat repair kits is that they come with tints so that you can try to match your existing gelcoat color.

If you need to tint a quart our gallon to match see our available gelcoat tints, please note it isn’t recommended to use more than 1 oz of tint per quart or the curing of gelcoat could be effected.

What is gelcoat?

Gelcoat is a type of polymer that is used as a protective coating on boats and other watercraft. It is typically applied to the hull of the vessel, and it acts as a barrier against UV rays, salt water, and other elements. Gelcoat is available in a variety of colors and can be polished to a high shine. It is also one of the most durable materials used in boat construction, making it an ideal choice for those who want their vessel to look good for years to come.


Gelcoat is a liquid resin that is used to create a smooth, shiny surface on boats and other products.


What is difference between gel coat and paint?

Gelcoat is usually much thicker than paint and is engineered to protect the underlying fiberglass as well as provide a smooth shiny appearance.   However, the nice thing about the gelcoat repair kits is that they come with tints so that you can try to match your existing gelcoat color. Paint is thinner and typically much easier to apply. Unlike paint, gelcoat will not adhere to existing paint, wood, metal or concrete. Gelcoat also has a limited shelf life of around 3-4 months at around 70 degrees whereas paints that are solvent-based can last up to 15 years while latex and water-based ones may last for up to 10 years.

Final thoughts

So, how do you know if your boat has gelcoat or paint? One method is to use rubbing alcohol on a white cloth and rub it over an inconspicuous area of the hull. If the surface starts to shine, then it’s likely that you have gelcoat. Another option is to take a piece of sandpaper and gently rub it over an area where the finish appears smooth. If the paper doesn’t snag and pull up any fibers from the surface, then it’s most likely gelcoat as well. With this information in hand, now you can properly care for your boat and keep its beautiful finish looking good for years to come! If you need assistance selecting the right gelcoat for your needs, contact technical support at Bottom Paint Store.

What is the Best Bottom Paint Money Can Buy?

Best Bottom Paint

Best Performing Bottom Paint

The best bottom paint for boats that money can buy may NOT be the most expensive. You should buy the bottom paint that works best in your area. That will depend on the temperature of the water, tide changes, the nutrients in the water that feed unwanted growth, and many other factors.

The best bottom paint for you will be the bottom paint that stops the growth and does not break your wallet. If you buy the best performing bottom for the harshest fouling conditions and the warmest waters you would need Sea Hawk Paints Biocop TF  or another Top Performing Bottom Paint. This provides you the absolute maximum protection against hard and soft growth on the bottom of your boat. This solution is recommended for high growth areas, or if you are trying to goes as long as you possibly can between bottom jobs. If you are in cooler climates or lower fouling conditions you would NOT need to spend the extra money on Sea Hawk Biocop TF. A better choice that is less expensive and will work in these conditions is Sea Hawk AF-33 or the equivalent.

ALUMINUM BOATS: The best bottom paint for an aluminum boat or pontoons is a copper free bottom paint. You cannot put the paints mentioned above (Copper-Based) on aluminum because they contain copper and will react like a battery causing pitting (holes) on aluminum. Therefore, we recommend an Aluminum Safe Bottom Paint. A good choice for aluminum is  Sea Hawk Colorkote, it is copper free triple biocide paint  safe for aluminum. If the aluminum has never been painted the best practice is to prime with high build epoxy primer like Sea Hawk Tuff Stuff to insure good adhesion and protect against corrosion. If you are painting a pontoon boat for the first time – try our Pontoon Bottom Paint Kit.

Premium Outdrive bottom paint kitThe best bottom paint for the outdrives is to brush on Smart Solution. (pint size).  If your outdrive has never been painted before, you can use Barnacle Blocker Primer for priming the area application of bottom paint. A great value for this is the Premium Outdrive Bottom Paint Kit. If there is already a bottom paint on your running gear, just scuff sand and paint! Another option is to try an aerosol spray bottom paint. These are easy to apply.

For outdrives a foul release agent may be the choice for you, see here.

Do You Need Bottom Paint Thinner?

Last Updated: February 3, 2026

Quick Recommendation

Should You Thin Bottom Paint?

  • Only thin if the manufacturer allows it: Check the technical data sheet—some bottom paints should not be thinned at all.
  • Most common reason: Thinning is typically used for spray application to improve atomization and flow.
  • Use the correct thinner: Always use the brand-recommended reducer and stay within the specified percentage.
  • Bottom line: Thinning can help application, but over-thinning reduces film build and antifouling performance.

Tip: If rolling or brushing, most bottom paints need little to no thinning—stir thoroughly and test before adding reducer.

Bottom Paint is formulated to apply via brush or rolller. Under these normal application methods, there is no need to thin bottom paint (reduce bottom paint).

Bottom Paint Reducer

Bottom Paint Thinner

There are reducers for bottom paint, but these are used for spray applications, extremely hot climates (90F+) or if you applying to wood. (bottom paint should always be reduced by 20% for the first coat of bottom paint on wood.)

When used for these applications, please follow the manufacturers’ guidelines. (typically thin bottom paint no more than 10% unless barewood (20%) per application)). Be sure to use the correct thinner for the bottom paint that you are using. Do not mix competitive brands.

Don’t waste your money on bottom paint reducer unless your application meets these conditions. Otherwise, you are just spending more money thinning your bottom paint and waiting for it to dry! Remember that bottom is not like house paint, thinning bottom paint means that you are actually spreading less bottom paint over the surface. Bottom paint needs to be thick enough to repel growth as the paint film wears away over time.

How to Paint an Aluminum Jon Boat

Last Updated: January 19, 2026


Quick Recommendation

How to Paint a Jon Boat (Aluminum)

  • Use aluminum-safe coatings only: Choose copper-free, aluminum-compatible paint to prevent corrosion.
  • Prep is everything: Thoroughly degrease, lightly sand or scuff, and avoid touching bare aluminum before priming.
  • Prime correctly: Apply an etching or epoxy primer designed for aluminum immediately after prep for proper adhesion.
  • Bottom line: A Jon boat paint job lasts when you use the right primer and aluminum-safe paint—shortcuts lead to peeling and corrosion.

Tip: Never apply traditional copper-based bottom paint directly to aluminum; it can quickly damage the hull.

Paint a Jon Boat

Aluminum Jon Boat

Jon Boats are flat bottom boats manufactured for easy maneuverability in shallow water. The most used material for construction is aluminum, making them lightweight and durable for fishing and hunting.

What kind of paint do you use on an aluminum boat?

Choose a water-resistant aluminum boat paint that adheres to aluminum. Using a sprayer or brush, paint the inside of the boat first. Paint in horizontal strokes for an even coat. The inside coat should dry for 12 hours or so before you paint the exterior.

A camouflage paint job is a good idea for hunters using a Jon boat to help blend into the surrounding land and water; choose your favorite color of Blue Water Mega Gloss for a higher gloss than camouflage paint. The easiest and most popular paint for your boat is the aluminum boat paint green or Aluma Hawk  (white, blue, Jon boat green, black, aluminum grey, sand).  These are both a paint/primer in one that can be applied to most surfaces with little preparation needed.

Make sure you have a location for painting your Jon boat that is free from blowing dust and debris (a garage is ideal).

Surface Prep: The surface must be dry and free of grease, wax, dirt, or other foreign matter. Scrape off all loose paint and dull any gloss area with a light sanding or power brushing. Remove all dust with a cloth dampened with paint thinner and allow to dry, you can use wax and grease remover or acetone. Sand the existing Jon boat paint surface or bare aluminum with 80-100 grit sandpaper.

Use a paint scraper or sander to remove any peeling paint or areas that are likely to cause peeling on your new paint. Don’t worry about scratches because these will make it easier for the new paint to adhere by etching the surface. Use a soft-bristled brush to make sure you remove all debris left from sanding.

Painting a Jon Boat:

A primer coat is used to help the paint adhere to the Jon boat aluminum surface and provides an extra layer of protection from corrosion. When using the Duralux Camouflage Paint on bare aluminum apply two coats of primer after sanding. If using  Aluma Hawk, these can be your primer and paint.

Aluma Hawk PaintIf you choose to use a simple one-step system on your bare aluminum Jon boat, Aluma Hawk (available in Black, Jon Boat Green, Sand/Tan, Blue, White or Aluminum Grey) is an excellent choice since it can be used as a primer/paint in one over bare aluminum. You should prep the surface as stated above, and then wipe down the bare aluminum Jon boat with white vinegar prior to coating. This acts as an acid and will “etch” the surface for better adhesion.  You will need to apply two coats of this flat-finish paint.

To make the inside have a non-skid surface use the Non-Skid Additive with the Aluma Hawk. See the ‘how to apply non-skid paints’ for more details.

If you need the ideal barrier coat to put over roughed bare aluminum then consider Pettit Marine’s Aluma Protect Epoxy Primer. This aluminum primer kit contains strontium chromate and is designed to form the ideal barrier coat over roughed bare aluminum. 

aluminum primer


How to Paint an Aluminum Boat

If you’re the owner of an aluminum boat, you may be wondering how to go about painting it. While the aluminum hull itself doesn’t need to be painted, the aluminum deck does need to be protected from the elements. Here are a few tips on how to paint an aluminum boat:

  1. First, clean the aluminum deck with soap and water. If there are any areas of corrosion, sand them down until they’re smooth.
  2. Next, apply a primer designed for aluminum boats. This will help the paint adhesion and prevent future corrosion. If you use Aluma Hawk, a quick-drying, high-solids, corrosion-inhibiting coating designed for use on aluminum, there is no need for a primer. Same goes for Duralux marine enamels, which is a vinyl-type coating for aluminum and galvanized surfaces and has excellent adhesion that eliminates the need for a primer.
  3. Once the primer is dry, begin applying the boat paint of your choice. Use a brush or roller designed for use with oil-based paints and try and paint in thin coats. Applying thin coats of paint will help prevent runs and ensure a smooth, even finish. Work in small sections and follow the manufacturer’s instructions carefully.
  4. Once the paint is dry, enjoy your newly-painted aluminum boat!

Painting an aluminum Jon boat correctly requires thorough preparation, the right primer and paint, and patience between coats. Following these steps will help ensure a long-lasting, durable finish that stands up to frequent use on the water.

How to paint an aluminum jon boat chart


Painting an aluminum boat such as a jon boat, pontoon or fishing boat, is a process that takes preparation and the right supplies. If you’re looking to tackle this project on your own, be sure to read our how to articles and follow the paint manufacturers steps carefully. If you have any questions or need assistance, don’t hesitate to call the Bottom Paint Store customer service team – we’re happy to help!