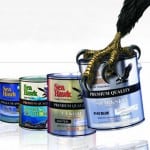
Use Ablative Bottom Paint if your boat is trailered, hauled seasonally, or you want a coating that self-polishes to reduce paint buildup.
Use Hard Bottom Paint if your boat stays in the water year-round, is frequently cleaned, or you want a tougher surface that can be burnished.
Match paint to water type: Freshwater and saltwater environments require different antifouling strength.
Bottom line: The best bottom paint depends on how the boat is used, where it’s kept, and the hull material.
Tip: Always confirm compatibility with your existing bottom paint and hull material before switching products.
What is Bottom Paint?
If you don’t know what bottom paint is, you are not alone. A boater that keeps his/her boat in the water for an extended period of time, must have bottom paint on the bottom of the hull to prevent growth (fouling) from occurring.
Bottom Paint also called antifouling paint, boat bottom paint, and anti-foul paint, is a special marine paint that is formulated with pesticides to keep those marine critters from growing on the bottom of the hull. Copper is most common pesticide used in bottom paints, and will prevent hard growth. Hard growth is considered mussels, barnacles, or any other crustacean that can attach to the bottom of the boat. Hard growth mostly occurs in warmer water and salt water. However, depending on your geographical location, hard growth will occur in fresh water and nutrient rich cool waters as well.
Some boat bottom paint also combine other pesticides (biocides) with copper to prevent soft growth. Soft growth refers to algae and grass.
What are some of the top performing bottom paints and what is the difference between them?
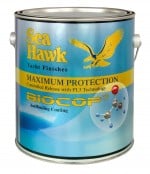
Biocop TF Self-Polishing Bottom Paint was developed as an alternative to tin-based antifouling paints to protect against the harshest marine environments.
Islands 44 TF™ By Sea Hawk Paints is an advanced tin-free self-polishing antifoulant that will keep your hull bottom smooth and free of organic growth over multiple cruising seasons.
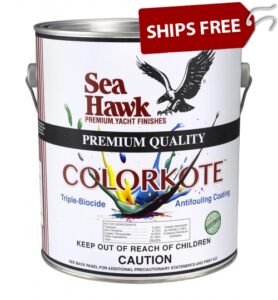
Sea Hawk ColorKote Triple Biocide Antifouling is the next generation hull coating built with Sea Hawk DNA. Incorporating self-polishing, triple biocide, low-leaching chemistry, vibrant colors, and multi-season performance, this is more than an antifouling paint.
Islands 77 Plus Antifouling Paint is an alternative to tin-based antifouling paints to protect against the harshest marine environments. Using the newest biocide technology.
Pettit Odyssey is a multi-season antifouling combines controlled polishing ablative technology with a high copper content to provide a paint film strong enough to handle the tough marine environment from coast to coast.
Interlux Micron Extra provides excellent, long lasting antifouling protection against all types of fouling. Micron Extra includes Biolux, to control slime.
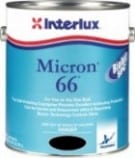
Micron 66 is a long lasting Self Polishing Copolymer with Biolux® formulated to provide a level of antifouling protection not previously available in any paint.
Blue Water Marine Copper Shield is a multi-season antifouling protection against barnacles, algae, and hydroids in salt and fresh water on boat bottoms only.
Aquagard® Waterbased Anti-Fouling Bottom Paint is formulated especially to prevent barnacles, algae, slime and other fouling organisms on vessels immersed in salt, brackish and fresh water. Nontoxic fumes, soap and water clean‐up.
Why do you need bottom paint? If you are going to keep your boat in the water for more than a couple of days, you will need some bottom paint!
Use reducer only if specified: Always follow the manufacturer’s technical data sheet—not all bottom paints should be reduced.
Most common use: Reducers are typically added for spray application to improve flow and atomization.
Do not over-reduce: Excess reducer can weaken antifouling performance and reduce film thickness.
Bottom line: Reducer can help with application, but using the wrong type or amount can compromise paint performance.
Tip: If rolling or brushing, most bottom paints require little to no reducer—stir thoroughly and test first.
Reducers help the paint to dry faster or slower, depending upon the reducer you use. There is a warm weather reducer that makes it dry slower, and a cool weather reducer that make it dry faster.
Generally speaking, reducers should only be used in extreme weather conditions, or to thin the paint for a spray application.
Can You Apply Bottom Paint Over Existing Bottom Paint?
Yes—if it’s compatible: Apply the same type of bottom paint (ablative over ablative, hard over hard) unless a barrier primer is used.
Prep is essential: Pressure wash, remove loose or flaking paint, and scuff-sand to ensure proper adhesion.
Switching paint types? Use a tie-coat or epoxy primer before changing from hard to ablative (or vice versa).
Bottom line: Repainting over existing bottom paint is fine when the surface is sound, clean, and properly prepped.
Tip: If the old paint is heavily built up or failing, stripping back to a stable layer—or to bare hull—will produce the best long-term results.
Bottom Painting is not very technical, but you must have a clean surface to insure good adhesion.
Refer to the Sea Hawk Compatibility Chart to determine if your existing coating is compatible with Sea Hawk antifoulant paint choice. To insure that your bottom paint adheres to your existing coating, it is important to have a clean prepared surface and an existing coating that is in good condition.
Known Compatibility of Existing Bottom Paint:
Power wash (pressure wash) to remove any loose paint, dirt, grease, or any other surface contaminants.
Scuff sand with 80 grit sandpaper, or scuff with a 3M Scotch-Brite® 7447 pad scrubbing thoroughly. Remove all residue and let dry.
Apply minimum of two coats of antifoulant. Allow 3 to 6 hours between coats and a minimum overnight dry. See the specific Technical Data Sheet for antifoulant being used. Some antifoulants may require more than 2 coats.
Unknown Compatibility* of Existing Antifoulant: Power wash (pressure wash) to remove any loose paint, dirt, grease, or any other surface contaminants.
Scuff sand with 80 grit sandpaper, or scuff with a 3M Scotch-Brite® 7447 padscrubbing thoroughly. Remove all residue and let dry.
Apply 1 coat of Bottom Paint Primer, sHAWKocon or 1283 Island Primer (see respective technical data sheet)
Apply minimum of two coats of antifoulant. Allow 3 to 6 hours between coats and a minimum overnight dry. See the specific Technical Data Sheet for antifoulant being used. Some antifoulants may require more than 2 coats.
Poor Condition of Existing Antifoulant:
If previous coating is cracking, flaking or peeling then strip antifoulant with Marine PaintStripper, or by sanding or commercial blast. Refer to Bare Fiberglass ApplicationGuidelines for new antifoulant application.
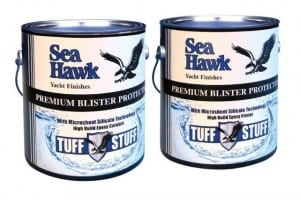
Apply Primer: Seal the surface with 2-3 coats of Tuff Stuff, or other high build epoxy primer. For Tuff Stuff, apply the first coat of primer and allow the surface to dry to become tacky. Temperature and humidity affect the dry time, but you will know when to apply your next coat of primer once the paint film becomes “tacky”. You should be able to firmly press your thumb into the paint film and leave a thumbprint without any primer coming off the surface. You should use this method in between coats of primer and your first coat of antifouling paint. When applying over multiple days, it is always best to go overnight between coats of primer instead going overnight between the final coat of primer and the first coat of bottom paint. Additional information can be found on the Tuff StuffTechnical Data Sheets.
Apply Bottom Paint: Apply minimum of two coats of Sea Hawk bottom paint. Allow 3 to 6 hours between coats and a minimum overnight dry. See the specific Technical Data Sheet for antifoulant being used. Some antifoulants may require more than 2 coats.
Sanding System** Better Paint Option
Sand and Clean: Sand to a uniformly frosty, dull looking surface with 80-100 grit (no finer) sandpaper, remove any residue.
Apply Bottom Paint: Apply minimum of two coats ofbottom paint. Allow 3 to 6 hours between coats and a minimum overnight dry. See the specific Technical Data Sheet for antifoulant being used. Some antifoulants may require more than 2 coats.
Simple No Sand System ** Good Paint Option
Apply Primer: Apply one thin coating of 1266 Non-Sanding Primer. This coating is applied at a maximum of 1-2 mils WFT. Excessive buildup can cause a lack of adhesion. Minimum dry time is 20 minutes with a maximum of one hour.
Apply Antifoulant: Apply minimum of two coats ofSea Hawk antifouling paint. Apply first coat of antifouling within 2 hours of applying primer. Apply 2nd coat of antifouling allowing 3 to 6 hours between coats and a minimum overnight dry.
Note: Do NOT use a copper based paint on metal running gear and parts. You should use a metal free bottom paint such as Sea Hawk Outdrive Paint, priming it withTuff Stuff first.
To sign in to your customer account, click Sign In on the menu bar and enter your e-mail address and password. If you do not have an account, please click Register on the menu bar.« Back to top
How do I sign out of this site?
To sign out of your customer account, click Sign Out on the menu bar and you will return to the home page. If Sign Out does not appear on the menu bar, then you are not currently signed in to the site.« Back to top
What if I forgot my password?
If you have forgotten your password, click Sign In on the menu bar to access the Sign In screen. At the bottom of the page, click on the Forgot your password? link. On the password retrieval page, you may enter your e-mail address, and then click Get Password. We will send your password to the e-mail address we have on file for your account.« Back to top
How do I become a registered user for this site?
To become a registered member of this site, click Register on the menu bar and enter your Profile and Account information. Then click Register. There is no cost to become a registered member. Please note: For security purposes, your password must consist of 7-32 characters and must include at least one letter and one number. Passwords are case sensitive.« Back to top
How do I add an item to my shopping cart?
To add an item to your shopping cart, on the Product page enter the quantity you wish to purchase in the quantity field and then click Add to Cart.« Back to top
How do I remove an item from my shopping cart?
To remove a single item from your shopping cart, click the x box next to the item you wish to remove.« Back to top
How do I remove all of the products in my shopping cart?
To remove all of the items currently in your shopping cart, click the Clear Cart button.« Back to top
Who can I contact if I have questions?
Please click Contact Us on the menu bar to learn how to reach us regarding any questions or issues you may have. Feel free to contact us, or fill out the Contact Request form and we will contact you.« Back to top
Is my credit card information secure through this site?
YES! Your credit card information is protected with a secure SSL Certificate that encrypts all of your transactions through our site with industry-standard secure sockets layer (SSL) technology. If the online store accepts credit cards; rest assured that both your credit card information and personal information are protected.« Back to top
Can I update my account contact information?
To update your contact information you must first Sign In. Click My Account on the menu bar to access your account information. Select the Profile for which you wish to update the contact information. Make your changes and then click Save.« Back to top
Can I change my e-mail address and password?
To update your e-mail address and password you must first Sign In. Click My Account on the menu bar to access your account information and then select Change E-mail Address and Password from the My Account menu. You may update your e-mail address, first and last name, and change your password, then click Save. Please note: For security purposes, your password must consist of 7-32 characters and must include at least one letter and one number. Passwords are case sensitive.« Back to top
Can I view my previous orders placed on this site?
To view your order history you must first Sign In. Click My Account on the menu bar to access your account information. Select View Order History from the My Account menu and then select the order number for the order you wish to view.« Back to top
Can I provide special instructions with my order?
You can include special instructions for orders during checkout. In your shopping cart, click Checkout On the Payment page, type your special instructions or comments in the Special Instructions text box. The store owner will receive these instructions along with the order. Click Place Order to continue with the checkout process.« Back to top
How do I get more information or technical advice about the products you sell on your website? First check our Blog Articles by choosing from a category on the right side of this page. Our team of experts have spent countless hours writing HOW TO articles for many of the products we offer. You will find comprehensive answers to your technical questions along with the product links needed.
If the answer to your question is not there, our staff is available to answer technical questions. The fastest and easiest way to do this is through email by submitting your question to info@BottomPaintStore.com . Or for more advanced technical questions, please contact the manufacturer directly by going to their website via the about ustab.
Do you sell current, new products? Yes. The products we sell are always brand new and fresh from the factory. We offer no used, or preowned products.
Do you have a physical store location? Unfortunately, we don’t have a store front, but we did ship out of 12 warehouses to anywhere in the Continental U.S via our web store. Depending on the product(s) you order, you could have it the next day!
Do you have a printed catalog you can send me? We don’t offer a printed catalog. We are constantly adding new products and a printed catalog would be out-of-date as soon as it was printed! However, you can find over 30,000 items online that are updated daily. Many of the items ship for free anywhere in the Continental U.S. Happy Shopping!
How do I locate an MSDS sheet or technical data sheet? We provide a link to this information on each product page.
What if I need warranty service? Our suppliers hold to the strictest standards of quality control, and all of our products are fully warranted by the manufacturer. If by chance you receive a product which is defective, the manufacturer’s warranty information and service address will be clearly marked on or in the package you receive. If your product is damaged in shipping, the issue can quickly be resolved by notifying UPS. If you ever have questions not answered by the manufacturer or by UPS, please contact us.
My Order: How can I place an order? We only accept online orders via American Express, Discover, Mastercard, Visa and Paypal. You may also call us to place your order at 888-505-2313.
How do I know that you received my order? Upon completion of your order you will receive an email confirmation of your order. If for any reason any of the information is incorrect please contact us immediately so we can make the necessary changes.
When will my order ship? Most orders placed before 2:00 EST. Monday-Friday are shipped the same day. There are some exceptions, including gel coat, boat covers, and pwc covers which ship 2-4 days after you place your order.
How do I know when my order ships? As soon as your order ships we will send you an email confirmation with the tracking number(s) next to the items that you have purchased.
How do I track my Order? As soon as your order ships we will send you an email confirmation with the tracking numbers. Login to your account and click on the tracking number. That will take you to the UPS website where you can track your order.
How do I Cancel an order? We are committed to shipping your order as quickly as possible. In the event that you wish to cancel this order, the cancellation must take place within 2 hours from the time the order was placed. We are unable to cancel your order after this time period because your order is already in the fulfillment process. Please email us at Info@BottomPaintStore.com to find out if your order shipped and to request cancellation of your order. Most orders are shipped within a few hours after being placed. If your order has already been shipped, simply refuse the order upon delivery and we will refund any charges to your credit card less the shipping cost.
How do I return an order or item(s) from my order? Your Satisfaction is our top priority! You can return any item for any reason for a refund within 30 days of receipt (10 days for Gelcoats) . Returns must be in salable condition, with ALL original materials and packaging and require a Return Authorization Number. You are responsible for return shipping and any shipping charges are not refundable except in the case of defective merchandise. Please email or call us to request a Return Authorization Number.
Shipping and Tax: How do I calculate shipping costs? Shipping costs are based on UPS rates plus packaging if any. Most products are shipped via UPS Ground. Larger orders may be shipped with a freight company. Once you have placed items in your shopping cart, you can proceed to “Checkout” and then enter your zip code to calculate shipping charges, if any.
Do you ship International? No. We currently only ship to US addresses.
Will I be charged sales tax? We are not required to collect sales and use tax on deliveries throughout the US except in Florida. Any order shipped to Florida will be charged sales tax of 7.5%. You may be responsible for payment of tax in your state if otherwise required.
Delivery, and Returns: How long will it take to receive my order via UPS Ground shipping? Most orders placed before 2:00 EST. Monday-Friday are shipped the same day. After the product leaves the warehouse, standard UPS shipping times apply.
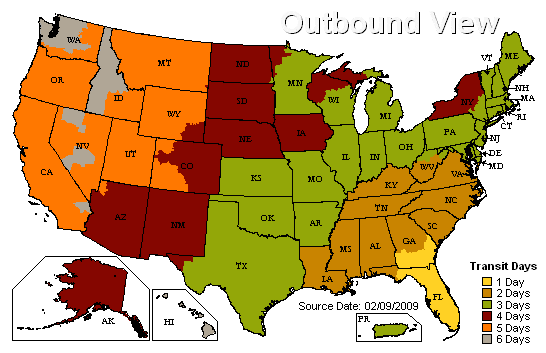
The map below shows estimated shipping times for items shipped via UPS Ground from our main warehouse In Florida, to destinations in the US. Please note that your order may ship from a manufacturer, or another warehouse resulting in less or more time stated below.
Can I return an order or item(s) from my order? Absolutely! You can return most items for any reason for a refund within 30 days of receipt (10 days for Gelcoats). Returns must be in salable condition, with ALL original materials and packaging and require a Return Authorization Number. You are responsible for return shipping and initial shipping charges are not refundable except in the case of defective merchandise. Click here to request a return authorization number.
Do you charge re-stocking fees for returned merchandise? No. As long as the item is returned in salable condition, within 30 days of receipt (10 days for Gelcoats), you will NOT be charged a restocking fee. Original shipping costs will not be credited whether paid by you, or by Bottom Paint Store via a free shipping promotion at the time of purchase.
Security: Is my credit card information secure through this site? YES! Your credit card information is protected with a secure SSL Certificate that encrypts all of your transactions through our site with industry-standard secure sockets layer (SSL) technology. If our online store accepts your credit card, rest assured that both your credit card information and personal information are protected. We do not retain any credit card information on file.
How to Clean, Restore, and Seal Teak Wood on a Boat
For routine cleaning: Use a mild teak cleaner and a soft brush to remove dirt and mildew without stripping natural oils.
For weathered or gray teak: Clean first, then apply a teak brightener to restore color before sealing.
For long-term protection: Finish with a teak sealer or oil to slow UV damage and moisture absorption.
Bottom line: Teak lasts longest when it’s cleaned gently, brightened only when needed, and sealed regularly.
Tip: Avoid aggressive sanding and harsh two-part cleaners—they can shorten the life of your teak by removing too much material.
Teak wood is an excellent material for boat decks, furniture, and trim. However, to keep it in good condition and enhance its beauty, it needs regular maintenance. Applying teak oil is one of the best ways to protect teak wood from drying out, fading, and
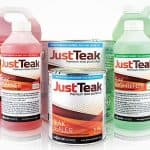
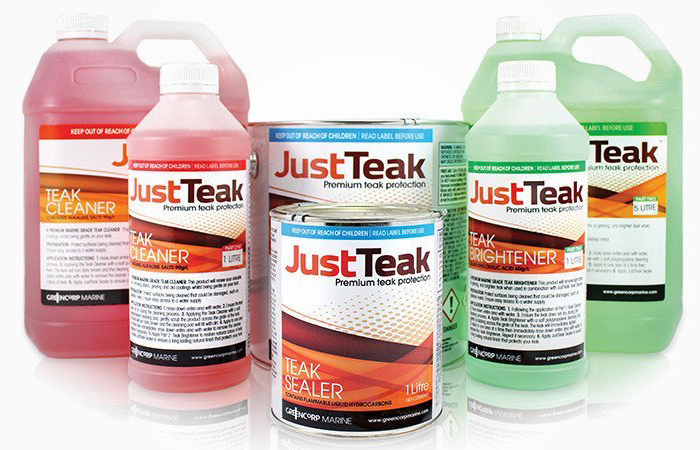
Restoring your weathered teak wood is an easy 3 step process using the JustTeak™ Teak Restoration Kits. Learn how to clean, brighten, and seal your teak or other wood. This simple teak restoration process can be used on an teak wood including teak furniture and teak decking.
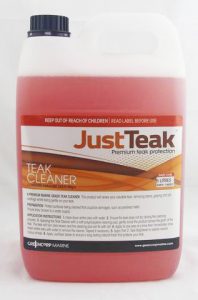
Step 1 (Part 1). Cleaning Teak Wood with the JustTeak™ Teak Cleaner Getting the teak clean is the first step in the process. You need a really effective cleaner that will not harm the wood. You should not use any bleach. All weathered teak should be first be cleaned with JustTeak™ Teak Cleaner.
1. Hose down entire areas thoroughly with fresh water. Ensure the teak does not dry during the cleaning process. 2. Applying the JustTeak™ Teak Cleaner with a soft polypropylene cleaning pad, gently scrub the product across the grain of the teak. The teak will tum dark brown and the cleaning pad will fill with dirt. 4. Apply to one area at a time then immediately rinse down entire area with water to remove the cleaner. Repeat if necessary.
Step 2. (Part 2) Using JustTeak™ Teak Brightener on Your Teak Deck
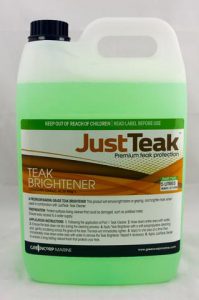
JustTeak™ Teak Brighteneris the answer to dull, gray teak. Specifically designed to restore light beautiful look of new teaks. – Brightens Teak Dulled by Weather and Wear – Won’t Raise the Grain – Contains No Bleach – Cleans Away Discoloration in the Deck
1. Following the application of Part 1: JustTeak™ Teak Cleaner. 2. Hose down entire area with water. 3. Ensure the teak does not dry during the cleaning process. 4. Apply JustTeak™ Teak Brightener with a soft polypropylene cleaning pad, gently scrubbing across the grain of the teak. The teak will immediate lighten. 5. Apply to one area at a time then immediately rinse down entire area with water to remove the Teak Brightener. Repeat if necessary.
JustTeak™ Teak Oil Sealer is designed to seal and protect teak. Restores and protects teak and other woods. Easy to use and extra long lasting formula. – Easy to Use – Extra Long Lasting – Restores and Protects Teaks and Other Woods – Adds Luster and Beauty to Your Deck
1. For best results apply in temperatures above 10°C (50°F) on a sunny, low humidity day, ensuring the teak is dry. Shake vigorously prior to use. This product must be shaken periodically whilst using to ensure even colouring. Make sure the surface is completely dry prior to application. 2. Apply the JustTeak™ Teak Oil Sealer by either brush, pad applicator or rag. Take note to apply sealer along the length of the board to ensure even coating and avoid line marks. 3. Apply generously. Allow to dry, soak up any areas that may have not absorbed the sealer. When touch dry, apply 1-2 subsequent coats until the teak stops absorbing the sealer. LOOKING AFTER YOUR SEALED TEAK Over time the sealer will start to lose its lustre and water beading capability. A fresh coat of JustTeak: Teak Sealer should be applied to restore the finish. For best results remove the Teak Sealer with JustTeak Cleaner and Brightener and re-apply.
Applying teak oil is a simple and effective way to maintain the beauty and longevity of your boat’s teak wood. Just follow these simple steps and you can ensure that your teak wood surfaces remain protected, shiny, and smooth. Regular maintenance will prevent the wood from drying out, fading, or cracking, and keep your boat looking its best for years to come. So, go ahead and try it out – your teak wood will thank you!
The the best value, choose from our Teak Restorations Kits that include the Teak Cleaner, Teak Brightener, and Teak Sealer for the best Savings!
Primer for bottom paint is not necessary. However, if you use Tuff Stuffmarine epoxy primer on the bare fiberglass, it will provide protection against blisters and any moisture. It will also improve adhesion to the hull. Tuff Stuff marine epoxy primer will last for many years. It cannot be applied over paint, it must be applied on gel coat (bare fiberglass). It only needs to be applied once, while bottom paint should be applied every season or two depending on your conditions.
If you decide to useTuff Stuff, here is the link. You should apply at least two coats.
Use epoxy primer when: You need maximum adhesion and corrosion protection on fiberglass, aluminum, or steel—especially before bottom paint or topcoats.
Prep to bare, clean substrate: Degrease, sand to the recommended profile, and remove all contaminants before priming.
Mix and apply correctly: Follow the exact mix ratio, observe induction time if required, and apply within the recoat window.
Bottom line: Epoxy primer performance depends on surface prep, precise mixing, and timing—shortcuts lead to adhesion failure.
Tip: If you miss the recoat window, lightly sand before topcoating to ensure proper mechanical adhesion.
Marine Epoxy systems on the bottom of bare fiberglass is the best way to protect your boat against blisters. It also provides added adhesion of the bottom paint to the hull. Here are the steps that you need to take for proper application of a marine epoxy primer (barrier coat system) to the bottom of a boat.
Preparation
Clean When painting a bare fiberglass / gel coat hull for the first time, it is extremely important that all contaminants such as grease, oil, wax, salt, or other foreign material are completed removed prior to sanding or application of a Sea Hawk System. Scrub the surface with a detergent soap and stiff bristle brush.
A. Clean and de-wax fiberglass hull with S-80 Wax N’ Grease Killersolvent based dewax. Saturate cheesecloth rag and wipe thoroughly to remove any cleaner and contaminants. Be sure to remove any residue before it dries and change rags frequently to insure contaminants are completely removed.
OR
B. Apply S-90 De-Wax Etch & Cleanerwith a maroon 3M Scotch-Brite® padscrubbing thoroughly. Do not allow cleaner to dry on the surface and remove by flushing with water.Rinse entire surface with water and check for any beading on the surface which will indicate that wax is still present. If necessary repeat step 2 again until the surface is contaminant-free. Choose your system below.
Apply Marine Epoxy Primer Seal the surface with 2-3 coats of Tuff Stuff Epoxy Primer. Apply the first coat of marine epoxy primer and allow the surface to dry to become tacky. Temperature and humidity affect the dry time, but you will know when to apply your next coat of marine epoxy primer once the paint film becomes “tacky”. You should be able to firmly press your thumb into the paint film and leave a thumbprint without any high build marine epoxy primer coming off the surface. You should use this method in between coats of marine epoxy primer and your first coat of bottom paint.
Tip: When applying marine epoxy primer over multiple days, it is always best to go overnight between coats of marine epoxy primer instead going overnight between the final coat of marine epoxy primer and the first coat of bottom paint. When over coating Tuff Stuff Epoxy Primer it is important to meet the required over coating times in order to achieve the best adhesion because temperature and humidity control dry times. It is hard to give exact times of cure. An easier rule in epoxies is when the coating is dry to the touch, yet still has some tack, it is ready to be over coated. However, if the coating is completely cured (after 24 hours) it needs to be thoroughly sanded with 80 grit sand paper to remove shine. If the marine epoxy primer is not sanded after full cure, bottom paint will not adhere.
Apply Bottom Paint to Marine Epoxy Primer Apply minimum of two coats of bottom paint. Allow 3 to 6 hours between coats and a minimum overnight dry. See the specific Technical Data Sheet for bottom paint being used. Some bottom paint may require more than 2 coats.
Prep is critical: Clean thoroughly, remove wax, and sand the surface so the gelcoat can properly bond.
Mix and catalyze correctly: Measure MEKP accurately and mix completely to avoid curing problems.
Apply in thin, controlled layers: Build thickness gradually rather than applying heavy coats.
Bottom line: Successful gelcoat application depends on proper surface prep, correct catalyst ratio, and controlled application.
Tip: Gelcoat exposed to air will remain tacky—use a wax additive or PVA on the final coat to ensure a full cure.
This is one of the questions Bottom Paint Store is asked the most. Let’s start with explaining that gelcoat is not a paint but a type of resin that is used to provide a protective layer over fiberglass.
Key takeaways on how to apply gelcoat:
Clean the repair area and all tools with acetone prior to application.
Do not work in direct sunlight. Choose a shady location or an overcast day.
Catalyze your material so that it has a longer pot life.
Apply the gelcoat using a brush or spray gun.
Apply gelcoat in 4-5 layers at approximately 5 mils each, allowing 15-20 minutes between layers for a total thickness of 20-25 mils.
Use a gelcoat thickness gauge to ensure proper thickness is achieved.
Once gel coat has tacked up, about 20 minutes after final layer has been applied, lay-up of the part can begin.
Here are the steps to apply gelcoat using a brush.
Below you will find a detailed gel coat preparation guide on how to apply gelcoat to your boat, RV, or other surfaces. The secret to a good finish is to apply the gelcoat properly. The application of gelcoat is pretty straightforward when you follow this guide.
Determine the Existing Surface: First thing you want to do is look at the surface on which you want gelcoat applied. If the surface is already coated with gelcoat, or if the surface is a fiberglass or polyester resin, then the application of gelcoat is a snap. If the surface is painted then the paint should be removed before the gelcoat is applied.
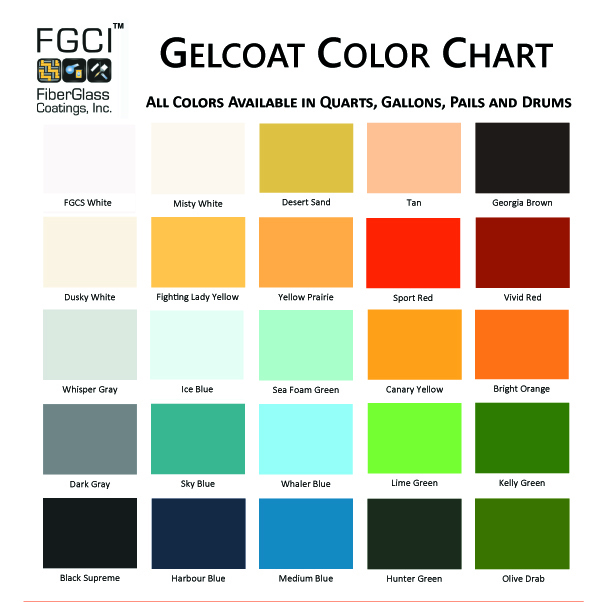
We offer pre-mixed colors of gelcoat, use this color chart as a guide for the available colors that we have.
Prepping the Surface: Remove rails, cleats, louvers, snaps, striping tape, etc. Duct tape off adjacent gunwale molding, and deck fittings you are unable to remove. **NOTE** Duct tape is recommended over masking tape because it provides better protection. Remove seals from the edges of parts or fittings when doing a repair around that part or fitting. Take steps to cover and protect the rest of the boat before starting. When working on the deck or cabin, tarp off the adjacent areas. 3M and UV tapes , and masking papers are recommended.
Sanding Existing Gel Coat: You want to sand the surface to make a mechanical bond to the gel coat. Our technicians suggest the use of Dyekum Steel Blue Dye to be really thorough. Steel Blue is a dye you’re going to wipe on or you can use the blue dye spray. If you don’t see the blue dye again, you know you’ve sanded it all properly. Start by sanding the surface with 150 grit or sandpaper. The heavier fast-cut grits (40/80/100) are used to feather sand and ground out a routed area prior to filling. Also, they are used for the first sanding of gouges, dock dings, scratches, and blisters. When sanding areas that have been filled with putty we suggest using 40 or 80 grit sandpaper, depending on how large the repair is. Once the fill area is level or contoured to the desired shape, sand with 100 grit paper to remove the course scratches from 40 or 80 grit. You should also feather the surrounding area of the gel coat repair with 220/330. At this point, the repair is ready to prep and spray/brush with gelcoat. Use 3M Abrasives for best results.
Preparing the Surface for Application: Next, you’re going to have to clean the surface. We encourage the use of Acetone, because it does not leave residue and evaporates easily. When the surface is clean, you want to get moving fairly quickly; if the surface is sitting for some amount of time, you want to re-clean the surface. Dust and dirt particles are your enemy here, so make sure you clean the surface thoroughly. Determine whether you need one or two gelcoat coats. If you change colors, it will require at least two gelcoat coats. If this is going over a patch, at least 2 coats are recommended to get a uniform surface. Otherwise, there will be only one coat.
Method of Application: Next, determine if you are going to brush, roll or spray your gelcoat so you can prepare the gelcoat for application. If you have Professional Grade Exterior Gelcoat you may either brush/roll or spray. When rolling on gelcoat be sure to use a 1/8 “or 1⁄4” solvent-resistant nap. Be sure not to use foam rollers because they tend to leave the bubbles. If you brush on the gel coat, make sure to use a solvent resistant brush.
Gel Coat Additives: You should also determine which additives you will use with your gelcoat application.
Wax Additive: Add up to 4 oz of Wax Additive per gallon 1 oz per quart for tack-free surface on the final coat, or if applying one coat a recommended film thickness. The Exterior Gelcoats that recommend a wax additive is included with purchase at Bottom Paint Store. (A wax additive is NOT used with Brushable Gel Coat or HI UV Clear.) You should only use a wax additive in the final application coat or if you are planning on only one coat.
Partall Film #10 PVA Surfacing Agent For Gel Coat: Use this product as a surfacing agent when using Gel Coat without wax additive and typically larger spray applications. Partall Film #10 is a polyvinyl alcohol (PVA) water/alcohol solution of water-soluble, film-forming materials. This parting film is particularly recommended as a parting agent for separation between polyester or epoxy resins and various mold surfaces. It is not recommended for use with resins containing water or giving off water during cure (i.e., phenolics) or with automotive finishes, as damage may occur. Partall Film #10 will not shrink and pull away from corners or curved surfaces. After the resin has dried, the film parts easily from the mold and is readily dissolved from the molded parts with water. An occasional coating of Partall Paste #2 is required on most mold surfaces before application of Partall Film #10. May be applied over gelcoat as a surface cure agent. (recommended for HI UV Clear since no wax should be added)
Patch Booster Gelcoat Additive is an additive that significantly improves the application, appearance, and longevity of gelcoat patches. Patch Booster eliminates the need to thin, side-promote, or add wax to gelcoat prior to patching. Formulation enhancements have lengthened the shelf life of a sealed can to (1) year while maintaining a sand-able cure in 1-3 hours. Do not use any other wax additive when using Patch Booster. Patch Booster should be used with Professional Grade Exterior Gel Coat. Another popular additive option is the Duratec Hi-Gloss Additive Clear, see the tech data sheet for mixing details for all items.
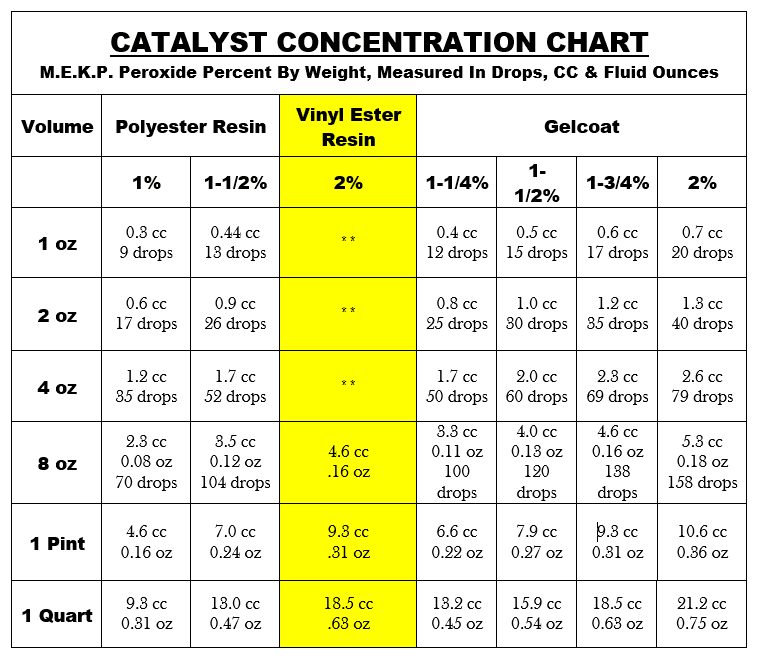
Catalyzing Gelcoat with MEKP: All gelcoat MUST be catalyzed with MEKP to cure. This should be added after all other additives just prior to application. Gelcoat requires Methyl Ethyl Ketone Peroxide or MEKP to enable the process of hardening. It’s a very small number. We suggest 1-1/4% to 1-1/2% by volume, i.e. 13-15 cc per quart. Darker colors need a little more catalyst for the same reaction, so you can catalyze up to 2%. All Gel Coats from Bottom Paint Store come with MEKP with each gelcoat purchase. Refer to the catalyst chart located on the product page for the gelcoat you are using or follow the label guidelines. As a general rule: The catalyst level (MEKP) should not exceed 3.0% or fall below 1.2 for proper cure. Ideal range is 1.8% @ 77°F. Gel time at 1.8% MEKP is 10-17 minutes. This time element is dependent on material temperature, room temperature, humidity, air movement, and catalyst concentration.
Gelcoat should not be used when temperature conditions are below 60°F, as curing may be adversely affected. Be sure to have a good strategy when applying your gelcoat. Once you mix and catalyze, you have about 15 minutes to apply the gelcoat before it starts getting hard or starts to “gel.” The actual working time depends on the amount of catalyst and how hot the working conditions are. Anything below 60 degrees, and your gelcoat will not cure, but as you get warmer and warmer, your working time will decrease rapidly. At 70 degrees, you get 15 minutes, but at 90 degrees, you only get 5 minutes. If you need more time to work, be sure to sit the can in some cold ice water to cool it down to 60 degrees to allow you a little more working time.
One gallon of polyester resin weighs approximately 9.2 lbs. One gallon of gelcoat weighs approximately 10.5 lbs. The weight of MEKP 925 is 1.125 grams per cc. 30 drops is approximately equal to one cc.
cc = cubic centimeter. Oz = fluid ounce Note: Using drops for catalyst measurement is only an estimate. In critical applications MEKP should be measured using cc’s or fluid oz’s which are volume measurements. The percentages in the chart: 1% thru 2%, are percentages of resin or gelcoat by weight. The cc and oz values in the chart have been converted from weights of MEKP to volumes of MEKP.
1 ML = 1 CC
If using a wood mixing stick, place the stick in resin before adding catalyst so the wood doesn’t absorb catalyst
Only catalyze slightly more than needed. Resin that cures still in the mixing pot is unusable. Mix small batches at a time since too much MEKP will result in the hardening of the gelcoat way too fast! Refer to the catalyst chart located on the product page for the gelcoat you are using or follow the label guidelines.
Gel Coat requires the addition of fiberglass resin hardener or catalyst (MEKP) at 1.8% by volume (77ºF) (approximately 12 drops per ounce)
Measure catalyst accurately. Under or over catalyzation retards curing and causes fading and chalking
All Gelcoats from the Bottom Paint Store comes with the MEKP catalyst but additional amounts can be purchased.
Applying Gelcoat by Brush or Roller: Choose a good pure (natural) resin-resistant bristle brush with tapered ends. Avoid brushes that are either too stiff or too soft. For most work, a 3″ or 4″ wide brush will suffice. If there is a trim color, you should have a narrow trim brush on hand. Our Gelcoat comes with MEKP hardener with every purchase, but you may need more which you can purchase as an option depending on the application, temperature, and other environmental factors. Please refer the to Catalyzation chart on the Gelcoat page or on the label. Gelcoat needs to be applied evenly. We suggest a thickness of 18-20 mils to properly cure. The thickness of the matchbook cover is approximately 18 mil. If you’re not sure how thick it is, pick up a mil gauge. This is a simple, easy way to see the thickness of your gelcoat. See this article for more information: How to Apply Gelcoat by Brush and Roller.
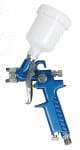
Spraying Gelcoat: For best results spraying gelcoat, it is recommended to use a spray gun designed specifically for applying gelcoat and resins, such as the professional grade spray guns offered by FGCI and ES Manufacturing. Next decide if you want to use an aluminum, plastic or paper cup to house the gelcoat. You can use either a heavy-duty, reusable plastic cup or disposable paper cup for spraying gelcoat. There are also disposable cup liners available that you can insert into the plastic Poly-Pro graduated cup or paper cup. You can mix your material right in the lined cup and then simply insert the cast aluminum lid onto the lined cup, attach the cup to the gun and you are ready to spray.
Can I spray gelcoat with an airless sprayer? Yes, you can spray gelcoat with an airless sprayer however it is it is recommended to use a pressure of 3000 psi. The pressure at which you spray gelcoat depends on the type of gun you are using. For example, if you are using a conventional spray gun, you should set the pressure between 30 and 50 psi.
Please follow the instructions located on the products page or the label. Spraying Gelcoat delivery rate of no more than 2.5 pounds per minute with conventional air atomized spray, and no more than 4 pounds per minute with airless equipment. Spray: Airless or Conventional: 2.0-2.5 orifice tip. Use a gelcoat spray gun such as ES Manufacturing Gelcoat Spray Gun G830, ES-G100 Spray Gun, or equivalent.
You will need to thin the gelcoat for it to run through the spray gun. There are 2 thinners that are recommended by the manufacturer when spraying gelcoat: Patch Booster, and Duratec. Patch booster is used with a 5:1 ratio or about 20% by volume. Do not use any other wax additive when using Patch Booster. Duratec is for a cosmetic high gloss finish. It has to be mixed at a 1:1 ratio with gelcoat. Since manufacturer specs change often due to formula updates be sure to follow the most recent recommendations from the technical data sheets. Some customers use Styrene for thinning but the manufacturer warns it can affect the gelcoat colors although this is the most cost-effective option and doesn’t have the added wax.
Initially spray a cover coat as smooth and evenly as you can to cover your repair. This coat should be mostly in the repair area and may be repeated. Sanding between coats is not necessary unless a surfacing agent has been added to your gel coat. Once your repair is covered, feather a ‘flow’ or sanding coat on the masked-off area making layered passes to avoid a buildup of gel coat in any one area. Each of these coats of gelcoat may involve several passes. Be even and consistent in your gun movement, overlapping each previous pass slightly and not hesitating on the ends. When spraying to a radius, flow the gelcoat to the tape. In open flat areas, layer passes. The final thickness should be 16-20 mils minimum or the gelcoat may not fully cure. Gelcoat needs to be applied evenly. We suggest a thickness of 18-20 mils to properly cure. The thickness of the matchbook cover is approximately 18 mils. If you’re not sure how thick it is, pick up a mil gauge. This is a simple, easy way to see the thickness of your gelcoat. As soon as you are done spraying, clean your sprayer fully with acetone. Most re-sprayed gelcoat will cure in 2-4 hours, although overnight cures are ideal.
Finishing your Gelcoat Application: If you’re using our Professional Grade Exterior Gelcoat, you’ll be ready to sand and buff your freshly gelcoated surface once it has cured to a hard surface. You should not be able to dent it with your fingernail. Begin wet sanding with the finest grit that will remove orange peel in the re-sprayed area. This will avoid unnecessary sanding scratches. Usually 320 or 400 grit wet paper is sufficient for the initial sanding. Going up to 400, then 600, and eventually 800 grit sandpaper. Compound and polish with Aquabuff 2000 then happy a wax such as Collinite 925 UV for protection.
Another option is you can use an 800 grit compound for the gelcoat at this stage. You want to use a buffer that turns 1600-3000 RPM. The car polishers won’t work if they’re spinning too slowly, so you want to check the speed of the spin. It’s best to do a 4-foot by 4-foot area at a time. Every 10 feet or so, you’re going to want to clean your pad with a spur or some air to make sure the contaminants don’t scratch your surface. If you want a perfect, glossy shine, use a machine glaze and then two wax coats, and you’ll have a stunning, glossy professional finish.
IMPORTANT GELCOAT APPLICATION TIPS:
DO NOT WORK IN DIRECT SUNLIGHT -Choose a shady location or an overcast day. You should catalyze your material so that it cures as quickly as possible within your working time. Generally, mix one-pint batches. A good practice is to pour the mixed gel coat from the mixing container into another container used for application. This further assures that no uncatalyzed material is clinging to the sides of the pot. “Lay on” the gel coat in a heavy thickness (about 10 mils) using horizontal strokes, and working from top to bottom. Avoid re-brushing as this could remove the waxy surface additive. Remember to always lap wet. Generally, one heavy coat is sufficient. However, if you have opacity problems two coats may be necessary with a light sanding between coats. Once the coating (gelcoat) has cured, it should be block sanded using 250 wet grit paper to remove all brush marks and high spots. Following this, it should be wet sanded with 320, 400, and 600 wet grit paper, buffed, polished and waxed.
Clean repair area and all tools with acetone prior to application
Pot life (amount of time for application of the product) shortens dramatically as you mix larger batch sizes. Keep in mind that you have a limited time to apply what you have mixed (usually between 5-15 minutes).
Measure catalyst accurately. Under- or over-catalyzed gel coat will cure slower and look faded or chalky.
Use the recommended thinners/additives only which are listed on the gelcoat’s product page.
Gel coat will not fully cure without adding a surfacing agent or over spraying with PVA
Check color thoroughly before applying. Gelcoat will not darken or change colors when it dries. The color wet is the color when dry.
Store gel coat in a cool, dry place
Gelcoat should be applied at temperatures of 60ºF to 80ºF
Always use eye and hand protection
Gelcoat should not be applied over paint, wood, metal, or concrete. It usually will not adhere to these surfaces.
Gelcoat will not fully cure without adding a surfacing agent or wax additive sanding aid. You can over-spray with PVA before gel coal reaches its gel stage (5-10 min.), or add 1oz per quart/ 4 oz per gallon of wax additive sanding aid.
Read all warnings on product labels and only use additives recommended as described per each product.
In order to have a form from which to develop your mold, you must either build the article from scratch using wood, plaster, polyester putty, formica, sheet metal, etc. or you must have on hand a completed article which you wish to duplicate. The latter is of course the fastest method. The plug is generally a male model exactly like the item you wish to fabricate in every detail. If the plug does not have draft (taper) then you will have difficulty getting parts off. If the plug has reverse bends, like many canoes, then you will need to make a split mold which can be spread or taken apart.
If the plug contains soft materials on its surface such as plaster, wood, or putty, then it will have to be sealed with lacquer orresinto fill the pores. If plaster is used, it must be oven dried and then sealed.
To prevent your mold from sticking to the plug, the plug must be coated with plastic film known as “PVA.” This is a plastic dissolved in alcohol and has a green color. It can be brushed or sprayed on, but the best system is to spray on three thin coats, the first being a “mist coat.” The appearance will then be green. Each coat must dry half an hour or so and there must be no pools or drips to blemish your mold surface. For the easiest possible parting, before applying the PVA, apply a soft wax (TR Mold Release) formulated for use with PVA.After the third coat ofPVAhas dried, a coating of this wax can be gently applied over it for easy parting.
The Mold
The first step is to apply a gelcoat which will be the mold surface. Thegelcoat must be “exterior gelcoat” (wax free). If many parts are to be taken off the mold, it is desirable to use a“tooling gelcoat” which is designed to give longer life in mold use. The gelcoat should be in contrasting color to the surface of the part you will make. Since most parts are light colored, black gelcoatis commonly used. This facilitates spraying up a uniform thickness of light colored gelcoat since the black will show through thin spots.
If the gelcoat is to be brushed on, two coats must be applied, and the first coat must cure several hours before the second coat is applied. The best means of gelcoat application is a simple gelcoat gundesigned for the purpose and easy to clean. Air pressure of 80 to 90 pounds is desirable. Gelcoat must be applied at least 15 mils thick, or a quart to every 25 square feet of surface. If the plug was rough so that considerable sanding of the gelcoat will be necessary, then double the application. Before applying the gelcoat, it must of course, be catalyzed with MEKp peroxide hardener, using from one to two percent. All gelcoats from the Bottom Paint Store include the MEKp.
When the gelcoat has cured so that it cannot be scratched off with the fingernail at the edge of the mold, which takes from 2 to 4 hours to overnight in cool or humid weather, you are ready for the “skin coat.” This is a layer of ¾ or 1oz. fiberglass mat, thin enough so you can see and remove all air bubbles entrapped by the resin when you “wet-out” the mat. The resinshould be applied with amohair roller or brush until no white fibers remain. Any air bubbles are then eliminated with a grooved plastic or metal laminating roller. The polyester resin used should be “lay-up resin,” which is wax-free. Be careful not to over-catalyze when laying up the glass. Above 75°F one 10-15 cc of hardener to the quart will generally suffice. Below 70°F, 20 cc per quart. Do not work below 65°F.
In laying up a fiberglass mold, warping can be avoided by allowing each layer to “kick” or gel before proceeding with the next layer. For a large mold, it is good to apply just one layer per day. After the “skin coat,” you can use 1½ oz. fiberglass mat for a faster build-up. Generally, woven roving is not used in molds because the pattern transfers through the mold to the gelcoat. If it is necessary to use woven roving fiberglass for strength in a large mold, it is applied after a thickness of 3 or 4 layers of mat has cured hard. The thickness required in a mold depends upon size and shape and the number of parts to be taken off. For a dinghy mold to be used only a few times, four layers of mat might be adequate.
Removing mold from the plug
Allow mold to cure several days if possible so it will hold its shape. The first step is to trim the excess laminate back to the molded edge. This is easily done with a saber saw and a metal-cutting blade. The edges are sanded carefully until the line between the mold and plug is exposed. Then a sharpened “tongue stick” is forced between mold and plug to separate the edges. The stick is then pulled clear around the plug until all edges are free and no bridges remain. Avoid using metal tools for this purpose as they will scratch the mold surface. Then the mold should pull free of the plug. If not, the parts can be flexed or pounded gently with a rubber mallet. If necessary, air or water can be forced under pressure between plug and mold. A hole can be drilled through the interface for this purpose. PVA is water soluble, which facilitates parting with water pressure.
Polishing the mold
Depending upon the condition of the mold surface, it may have to be sanded with 220 grit working up to 600 grit wet or dry. The surface is then compounded with regular and fine finish compound formulated for fiberglass work. Best results can be achieved by using special compounds such as 3M Finesse-It Marine Paste Compound to bring out a mirror finish.
Before using a mold, it should be allowed to cure a week or more if possible. Be sure to use PVA parting film and soft wax for the first 3 or 4 parts, after which a carnauba wax can be used.
Gelcoat problems
Alligatoring, or wrinkling, can result from:
1. Gelcoat too thin in some spots
2. Insufficient hardener, or hardener not mixed will enough.
3. Gelcoat not cured long enough before mat lay-up.
4. Acetone cleaner drips out of roller or brush during mat lay-up.
Original technical article provided by Fiberglass Coatings.
Use aluminum-safe antifouling only: Choose copper-free or aluminum-compatible bottom paint specifically approved for outdrives.
Prime correctly: Apply an etching or epoxy primer designed for aluminum to prevent corrosion and ensure adhesion.
Avoid traditional copper paints: Standard copper-based antifouling can cause galvanic corrosion and damage aluminum components.
Bottom line: The best paint for an aluminum outdrive is a manufacturer-approved, copper-free system applied over the proper primer.
Tip: Always check the outdrive manufacturer’s recommendations and maintain sacrificial anodes to further protect against corrosion.
Outdrives are difficult to keep free of growth. The main reason for this is that traditional copper-based bottom paints cannot be used on an aluminum outdrive. Doing so will result in serious corrosion from the aluminum reacting to the copper in the paint.
The Safe Solution: Use Copper-Free Paint
To protect your aluminum outdrive and keep it clean, you’ll need a copper-free antifouling paint specifically formulated for use on aluminum. Several brands offer effective options—Interlux, Blue Water Marine, and Sea Hawk among them—but for best results, we recommend pairing with Tuff Stuff Primer and Colorkote.
Why This Combo Works
Tuff Stuff Primer creates a protective barrier that shields the aluminum from moisture and corrosion while ensuring excellent paint adhesion.
Colorkote Outdrive Paint delivers strong antifouling performance without copper, making it safe for use on aluminum components below the waterline.
Application Tips
Surface Prep: Start by cleaning the outdrive thoroughly and removing any old paint or marine growth. Sand the surface lightly to create a rough texture for the primer to bond.
Prime: Apply Tuff Stuff Primer using a roller or brush. Follow the manufacturer’s recommended drying times.
Paint: Once the primer is cured, apply Colorkote with a brush or roller. Two coats are typically recommended for optimal protection.
The Outdrive Paint shows best results when paired with a primer such as Tuff Stuff. These products are usually applied by brush and roller.
Freshwater vs Saltwater Bottom Paint: What’s the Difference?
Choose Freshwater Bottom Paint if your boat stays exclusively in lakes or rivers and you need protection primarily against slime and algae, not heavy barnacle growth.
Choose Saltwater Bottom Paint if your boat is kept in coastal or tidal waters where barnacles, shell growth, and aggressive fouling are common.
Bottom line: Saltwater paints use stronger biocides for harsher conditions, while freshwater paints are formulated for lighter fouling environments.
Tip: Using freshwater paint in saltwater can lead to rapid fouling, while saltwater paint may be unnecessary—and sometimes restricted—in freshwater environments.
Typically there is less growth in fresh water than in salt water. For that reason, bottom paint used in fresh water usually have less active ingredients (copper, zinc, etc.) to prevent growth. Most bottom paint for salt water can be used in fresh water. However, there are some exception, such as, Interlux Micron 66. This paint is limited to salt water only. Using Micron 66 bottom paint in fresh water, or where there is a lot of fresh water run off, will result in failure of the coating.
Consider using a bottom paint that is good in both fresh water and salt water. All of Sea Hawk Paints, Blue Water, Pettit or Interlux bottom paints are good for either types of waters and are considered both fresh water bottom paint and salt water bottom paint. You never know where you might travel that will have significant fresh water run off!
Keep in mind that you probably don’t need the top performing paint like Sea Hawk Biocop TF bottom paint if you are in fresh water. You can go with a less expensive alternative like Copper Shield 25,AF-33 or Talon. Anything more is probably over kill!
Preparation is key when painting on any surface. Applying bottom paint is not the cleanest of jobs, but it is really simple to do. Below you will find the exact steps to insure a good bottom paint job, whether you have a new boat, or a boat that has existing bottom paint on it.
Preparation for Bare Fiberglass When painting a bare fiberglass gel coat hull for the first time, it is extremely important that all contaminants such as grease, oil, wax, salt, or other foreign material are completed removed prior to sanding or application of a Sea Hawk System. Scrub the surface with a detergent soap and stiff bristle brush.
Clean your boat following options A or B
A. Clean and de-wax fiberglass hull withS-80 Wax N’ Grease Killer solvent based dewax. Saturate cheeseclothrag and wipe thoroughly to remove any cleaner and contaminants. Be sure to remove any residue before it dries and change rags frequently to insure contaminants are completely removed.
B. Apply S-90 De-Wax Etch & Cleaner with a maroon 3M Scotch-Brite® pad scrubbing thoroughly. Do not allow cleaner to dry on the surface and remove by flushing with water.Rinse entire surface with water and check for any beadingon the surface which will indicate that wax is still present. If necessary repeat step 2 again until the surface is contaminant-free. Choose your system below.
Apply Bottom Paint Apply a minimum of two coats of Sea Hawk bottom paint. Allow 3 to 6 hours between coats and a minimum overnight dry before launching. See the specific Technical Data Sheet for the bottom paint you are using. Some bottom paint may require more than 2 coats.
Tip: Epoxy systems on the bottom of bare fiberglass is the best way to protect your boat against blisters. It also provides added adhesion of the bottom paint to the hull.
Preparation Over Existing Bottom Paint
Clean the boat Clean the existing boat bottom paint with a pressure washing. If you have excess build up of growth, you can remove this by scraping and/or using muratic acid. Try to get all growth residue off the existing old bottom paint so that you have good adhesion of the new bottom paint.
Scuff Sand the surface
Scuff sand to a dull looking surface with 80-100 grit (no finer) sandpaper, then rinse with water and allow to dry. If your old bottom paint is really chalky, consider giving it a more agressive sanding to insure proper adhesion of the new bottom paint.
Apply Bottom Paint Apply minimum of two coats of Sea Hawk bottom paint. Allow 3 to 6 hours between coats and a minimum overnight dry before launching. See the specific Technical Data Sheet for bottom paint being used. Some bottom paint may require more than 2 coats.
Best used in Fresh Water Only, or as a Smooth Racing Finish
Ranking: By Most Effective Antifouling Performance
* All rankings provided by Bottom Paint Store are based on customer feedback, product testing data, and current market prices.
Bottom paint is an essential part of protecting your aluminum boat from the elements. Be sure to choose a bottom paint that is specifically designed for aluminum boats. Some bottom paints can actually cause corrosion on aluminum, so it’s important to make sure you get the right type of paint. Apply the bottom paint according to the manufacturer’s instructions. In general, you’ll want to apply two coats for best results.
Here are a few tips on how to apply bottom paint to ensure optimal results.
Quick Recommendation
How to Apply Bottom Paint to an Aluminum Boat
Use aluminum-safe bottom paint only—choose copper-free or aluminum-compatible antifouling to prevent galvanic corrosion.
Prime correctly: Apply an etching or epoxy primer designed for aluminum immediately after surface prep to ensure adhesion.
Follow a strict prep process: Degrease, lightly sand, and avoid touching bare aluminum before priming.
Bottom line: Aluminum boats require specific primers and copper-free paints; skipping these steps can cause paint failure and corrosion.
Tip: Never apply traditional copper-based bottom paint directly to aluminum—doing so can rapidly damage the hull.
Tuff Stuff Marine Epoxy Primer
Tuff Stuff Marine Epoxy Primer
Begin by pressure washing your boat, and scrubbing any debris, dust, contaminants and marks off the boat surface so it is totally clean. Give your boat a final rinse and dry. If you do not have any coatings at all on the bottom of the boat, we suggest to sand the hull with 80 grit and then apply Tuff Stuff High Build Epoxy. It is a water tight barrier coat designed for use under the waterline and with aluminum hulls. Use 2 coats. You can apply the 2nd coat within a couple of hours of the first coat. (up to 6 days)
After you apply Tuff Stuff marine epoxy primeron hull, be sure to use an aluminum safe bottom paint. The bottom paint needs to be applied the same day as the Tuff Stuff marine epoxy primer. Bottom paints in general are designed to repel hard growth. Colorkote is an excellent triple biocide bottom paint for aluminum hulls when in salt water. We recommend Mission Bayfor fresh water. I have listed links below to the products described above. These can be brushed, sprayed, or rolled. If you already have coating(s) on the hull, pressure wash, sand with 80 grit, and then apply your paint choice.
For routine maintenance: Wash regularly with a non-abrasive boat soap and apply a UV-protective marine wax to prevent oxidation and fading.
For light oxidation or dullness: Use a gelcoat cleaner or mild polish to restore shine before sealing with wax.
For heavy oxidation or chalking: Start with a compound, follow with a polish, then protect with a marine-grade wax or sealant.
Bottom line: Regular cleaning and protection prevent major restoration work; neglected gelcoat requires compounding, polishing, and sealing to fully restore appearance.
Tip: Always test compounds and polishes on a small area first, and avoid aggressive abrasives that can permanently thin the gelcoat.
As you haul your boat out of storage you may want to get the gelcoat shining once again. Use the steps below as needed:
New Boats
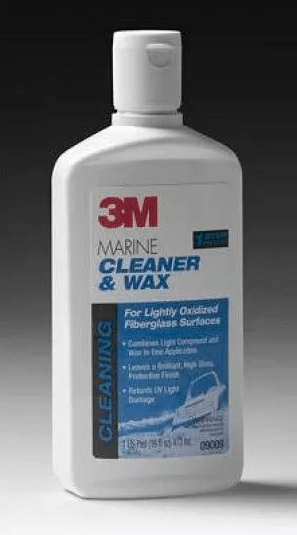
Which Products To Use: If your boat is new and the finish is still in good condition with little to no oxidation, you can use a one-step clean-and-wax product that combines washing and waxing in one step. We recommend using the 3M Marine Cleaner and Wax.
If your boat has light gelcoat oxidation use the least aggressive method, if possible, to prolong the life of gelcoat. We recommend cleaning with marine boat soap and buffing with the 3M Imperial Compound. Avoid direct sunlight and room temperature is best for application.
Note: An easy way to determine if gelcoat is oxidized is by wiping your hand across the surface. If any chalk wipes off on your hand, the gelcoat is oxidized and you will need to wash and buff the surface before polishing.
Follow these three simple steps to polish your gelcoat:
Step 1: Once you know which polish to use we recommend using a high-quality microfiber towel to apply the product. Avoid low-quality towels because they will shed fibers and leave streaks and residue on the boat.
Step 2: Wet the microfiber rag, remove any excess and apply a tablespoon of polish to the rag. This amount of polish will work for a few square feet. Remember, you want to work in small areas in order to cover the entire surface correctly.
Before buffing, spread the polish evenly across the boat’s gelcoat. You will get the best results when working the polish into the surface with circular motions.
Step 3: Once the polish dries into a haze you can remove it with a clean dry rag. Make sure you get in all the nooks and cracks for a smooth beautiful finish.
Older Boats
If your boat has been in contact with the elements over long periods of time (10-15 years), the process of restoring the appearance of the gelcoat will take some additional steps.
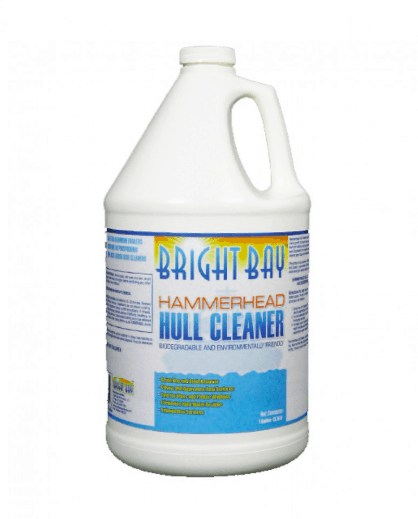
Step 1: Clean the surface. For boats that need a more aggressive cleaning just wash the surface and remove any loose contaminants. You can use a non-abrasive light detergent (marine boat soap) to remove all surface dirt and all previously applied coatings. If you need something stronger to remove surface rust, oil, tar, algae discoloration, black streaks caused from water runoff, exhaust and waterline scum, or other stains we recommend using an acid-based stain remover like Hammerhead Hull Cleaner. It is important to completely remove all stains before waxing, or you’ll seal in the stain.
Step 2: Select your compound. If your boat is a bit more oxidized a rubbing compound (liquid abrasive which “sands” your hull) is needed, but do so carefully as you can run through the gelcoat. The more faded your hull the more compounding you’ll need. The 3M Imperial Compound usually applied with a polisher if possible and compatible 3M pads, like the white 100% wool pad, recommended by 3M. Keep product off bottom paint, if applicable, by taping off as it can spatter. If the compound isn’t strong enough for your level of oxidation and scratches, then you may need to “pretreat” with a 1200 (or 800) grit as needed prior to the compound.
Note: When buffing, you should work on small sections of the hull (3-5ft sections is recommended). It is important to keep the wool pad damp. If you notice the pad is dry and the wool looks ‘matted’ after working the material into one area, just rake the wool back into form with a pad spur and re-wet the pad to continue with the application.
Step 3: Polish the surface. We offer the 3M Finesse-It II or Aqua buff 1000, to help provide a nice finish to the gelcoat after compounding and bring it to a gloss. Apply with the yellow pad by 3M.
Gelcoat is a type of resin that is applied to the hull of a boat in order to give it a smooth, glossy finish. In addition to its aesthetic appeal, gelcoat also helps to protect the hull from UV damage and tough weather conditions. While gelcoat is typically clear, it can also be tinted to a color to give the boat a unique look.
Topcoat is applied above the waterline only and is typically a polyester based high gloss polyurethane that provides long lasting gloss and color retention. Topcoat is available in both clear and colored varieties, and it can also be glossy or matte finish.
Gelcoat Restoration Process (Step-by-Step)
Restoring gelcoat properly requires addressing oxidation in stages, then sealing the surface to protect it from UV damage and water exposure.
Step
Purpose
When Needed
Wash & Decontaminate
Removes dirt, salt, and surface grime
Before any gelcoat work
Compound
Removes heavy oxidation and chalking
Gelcoat appears dull, rough, or faded
Polish
Refines surface and restores gloss
After compounding or for light oxidation
Wax or Seal
Protects against UV, water, and staining
Always after polishing
When to Repair vs Restore Gelcoat
Not all gelcoat issues can be fixed with compounding and polishing. Use the guide below to determine whether restoration or repair is required.
Restore gelcoat if the surface is faded, chalky, lightly scratched, or dull but still intact.
Repair gelcoat if there are deep cracks, chips, blisters, exposed fiberglass, or structural damage.
Re-gelcoating or repainting may be necessary if oxidation returns quickly or the gelcoat has been sanded too thin over time.
Rule of thumb: If the damage can’t be corrected with polishing alone, gelcoat repair products are the safer solution.
Gelcoat Maintenance & Restoration FAQs
How often should gelcoat be waxed?
Most boats benefit from waxing gelcoat every 3–6 months, depending on sun exposure and water conditions.
Can oxidized gelcoat be permanently fixed?
Oxidation can be removed, but regular waxing or sealing is required to prevent it from returning.
Is compounding bad for gelcoat?
Compounding is safe when done sparingly, but excessive compounding can thin the gelcoat over time.
Can gelcoat be restored without a buffer?
Light oxidation can be addressed by hand, but machine polishing is recommended for consistent results.
What causes gelcoat to fade or chalk?
UV exposure, saltwater, pollution, and lack of protective wax are the primary causes of gelcoat deterioration.
Micron CSC vs Cukote: Which Bottom Paint Is Right for You?
Choose Micron CSC (by :contentReference[oaicite:0]{index=0}) if you want a self-polishing, multi-season ablative with proven performance in moderate to heavy fouling and predictable wear that helps reduce paint buildup.
Choose Cukote (by :contentReference[oaicite:1]{index=1}) if you need a hard, scrub-resistant bottom paint that tolerates frequent cleanings and suits boats that stay in the water year-round.
Maintenance difference: Micron CSC wears away gradually; Cukote remains hard and requires periodic sanding to manage buildup.
Bottom line: Pick Micron CSC for multi-season ablative convenience; pick Cukote for durability and aggressive cleaning.
Tip: Match your choice to how often your hull is cleaned and how long the boat stays in the water—ablative for lower maintenance, hard paint for frequent scrubbing.
Cukote Bottom Paint Has Clear Advantages over Micron CSC Bottom Paint!
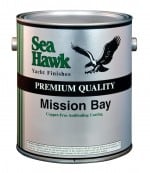
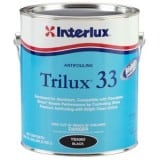
Trilux 33 vs Mission Bay: Which Bottom Paint Should You Choose?
Choose Trilux 33 if you need a copper-free antifouling that’s safe for aluminum outdrives, saildrives, and underwater metals with reliable protection in light to moderate fouling.
Choose Mission Bay by Sea Hawk if you want a water-based, copper-free ablative that’s easy to apply and clean up, especially for DIY use in freshwater or light saltwater.
Application difference: Trilux 33 is a harder, metal-safe coating; Mission Bay is a softer ablative that wears away gradually.
Bottom line: Pick Trilux 33 for metal compatibility and durability; pick Mission Bay for ease of use and lighter fouling conditions.
Tip: Always confirm compatibility with your substrate (especially aluminum) and your typical fouling severity before choosing a copper-free paint.
Mission Bay Bottom Paint Has Clear Advantages over Trilux 33!
30% Longer Lasting Performance than Interlux Trilux 33 !
US Made with Premium Raw Materials VS. European
Completely Safe for Aluminum Boats, Including Pontoon Boats!
No Copper (Trilux 33 has liquid copper)
Proven Premium Performance in All Waters!
Solvent Free Version Available (Mission Bay CSF -Easy application, Less Toxic Fumes and VOC’s)
Compatible with Trilux 33 (You can apply Sea Hawk Mission Bay over the top of Trilux 33 without any additional steps!)
This Sea Hawk Mission Bay and Interlux Trilux 33 bottom paint review / comparison was based on customer feedback and information received by the manufacturer(s) either directly or indirectly, and is solely the opinion of Bottom Paint Store.
Aquaguard vs Monterey by Sea Hawk: Which Bottom Paint Is Right for You?
Choose Aquaguard if you want a water-based, low-odor ablative that’s easy to apply and clean up—ideal for DIY projects and freshwater or light fouling conditions.
Choose Monterey by Sea Hawk if your boat is kept in moderate to heavy fouling saltwater and you need a stronger solvent-based ablative with more aggressive protection.
Application difference: Aquaguard emphasizes ease and convenience, while Monterey focuses on durability and fouling resistance.
Bottom line: Aquaguard is best for lighter conditions and DIY ease; Monterey is better when performance in tougher waters matters most.
Tip: Match the paint to your water type and haul-out schedule—lighter fouling favors Aquaguard, heavier fouling favors Monterey.
Monterey Bottom Paint Rated for 24+ Months over Aquagard Bottom Paint!
Longer Lasting Performance than Aquagard! Monterey is a Multi-Season Bottom Paint!
Made in the USA with USA Premium Grade Raw Materials
Lower VOC Means More Friendly Application!
More Copper (Monterey has over TWICE AS MUCH COPPER as Aquagard (55% Vs. 26% for Aquaguard)
Proven Premium Performance in All Waters!
Compatible with Aquaguard (You can apply Monterey over the top of Aquagard without any additional steps!)
Rated by Practical Sailor for 24+ Month Bottom Paint Protection
Sea Hawk Paints Monterey Has a One-Year Written Guarantee Against Barnacles!
Apply Directly over Aquaguard or any other Bottom Paint and Receive…
Pettit Hydrocoat vs Monterey by Sea Hawk: Which Should You Choose?
Choose Pettit Hydrocoat if you want a water-based, low-odor ablative that’s easy to apply and clean up, especially for DIY projects and freshwater or light saltwater use.
Choose Monterey by Sea Hawk if you need a stronger solvent-based ablative with better performance in moderate to heavier fouling conditions.
Application difference: Hydrocoat is more user-friendly and dries fast, while Monterey offers more aggressive antifouling protection.
Bottom line: Hydrocoat prioritizes ease and convenience; Monterey prioritizes durability and fouling resistance.
Tip: Match your choice to your water conditions and haul-out schedule—lighter fouling favors Hydrocoat, heavier fouling favors Monterey.
Monterey Bottom Paint Has Clear Advantages over Hydrocoat and Bottom Paint!
Longer Lasting Performance than Pettit Hydrocoat Monterey is a Multi-Season Bottom Paint!
Made in the USA with USA Premium Raw Materials VS. European Made and Owned Company
Lower VOC Means More Friendly Application!
More Copper (Monterey has over 55% Vs. 40% for Hydrocoat)
Proven Premium Performance in All Waters!
Compatible with Hydrocoat (You can apply Monterey over the top of Hydrocoat without any additional steps!)
Rated by Practical Sailor for 24+ Month Bottom Paint Protection
One-Year Written Guarantee Against Barnacles!
Apply Directly over Hydrocoat or any other Bottom Paint and Receive…
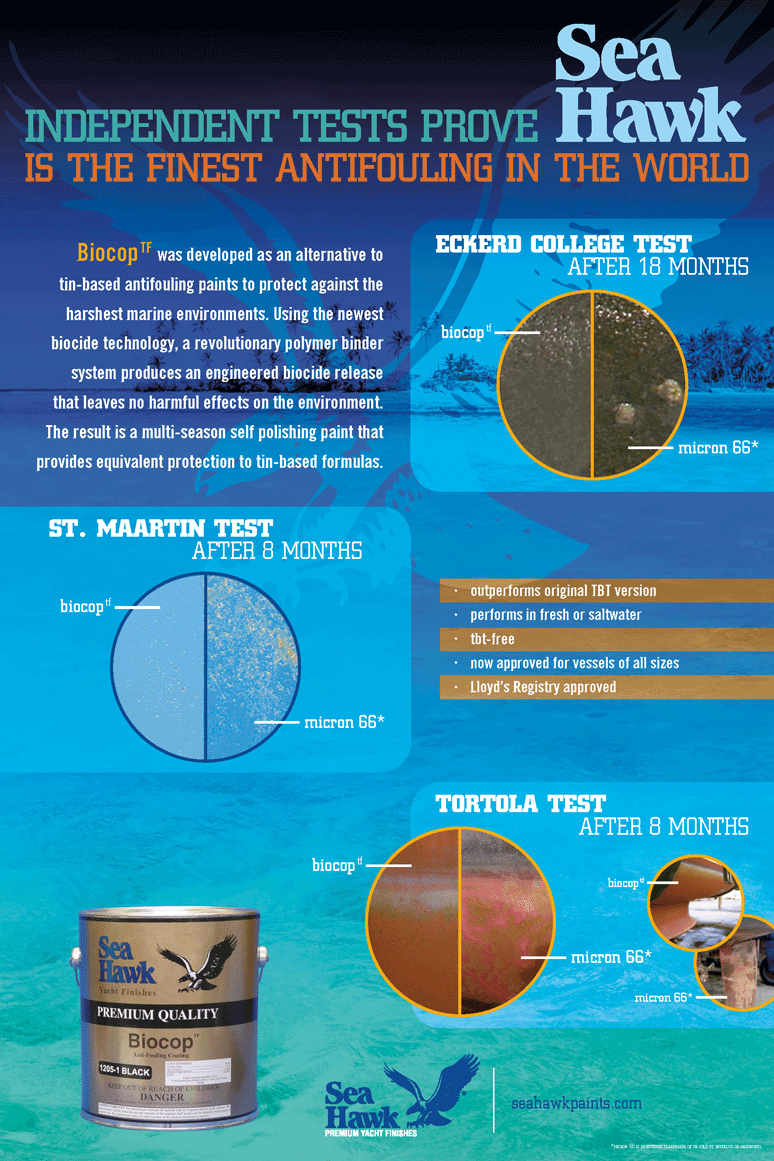
Biocop TF Bottom Paint Outperforms in Micron 66 Bottom Paint in Independent Testing!
Last Updated: January 12, 2026
Quick Recommendation
Micron 66 vs Biocop TF: Which Bottom Paint Is Right for You?
Choose Micron 66 if you want a long-lasting, multi-season ablative that performs especially well in heavy fouling saltwater and you don’t mind a higher upfront cost for extended durability.
Choose Biocop TF if you prefer a strong single-season or multi-season ablative with excellent slime resistance and a more budget-friendly option for warm coastal waters.
Bottom line: Micron 66 is ideal for boaters seeking maximum longevity and premium protection, while Biocop TF offers excellent antifouling performance at a lower price point.
Tip: Both paints are ablative—confirm compatibility with your existing bottom paint and consider your fouling severity and haul-out schedule before choosing.
30% Better Performance in Longevity and Reduced Growth!
US Made with Premium Copper, Solvents, and Rosins!
Bottom Paint That Works in Fresh Water!
Safer to Apply and Less Odor During Application!
More Color Choices!
Practical Sailor rates Biocop TF as a 24 Month paint and a “Top Choice”
2011 October Issues of Power & Motoryacht Magazine rates Biocop TF Excellent!
Apply Directly over Micron 66 or any other Bottom Paint and Receive…