Category Archives: Bottom Paint

what is zinc chromate used for

What Is Zinc Chromate Used For?

Last Updated: January 27, 2026

Quick Recommendation

What Is Zinc Chromate Used For?

  • Primary use: Zinc chromate is a corrosion-inhibiting primer commonly used on aluminum and other non-ferrous metals.
  • Best applications: Ideal as a base primer under marine or industrial coatings where corrosion protection is critical.
  • Compatibility matters: Must be applied to clean, properly prepped metal and topcoated with compatible paints.
  • Bottom line: Zinc chromate helps prevent corrosion and improve paint adhesion, but it must be used correctly and safely.

Tip: Zinc chromate contains hazardous compounds—always follow safety guidelines and local regulations when handling or applying it.

Zinc chromate is used for a wide range of applications. It is an odorless chemical compound primarily used as an industrial paint coating. The compound is a beneficial coating because it is an anti-corrosive and an anti-rust primer. It is primarily used to coat aluminum and iron materials. Developed by the Ford Motor Company during the 1920s, it was historically used on aircraft by the US military during the 1930s and 1940s. It is also widely used as a paint coating for the aerospace and automotive industries, as well as, a coating for boats, due to its ability to destroy organic growth on the surface and to protect aluminum from corrosion.

Zinc chromate is on the hazardous substance list and regulated by OSHA because studies have shown that not only is zinc chromate highly toxic, but it is also a carcinogen. It has been cited by ACGIH, NIOSH, DEP, IARC, HHAG, and EPA.

What is zinc chromate used for

Duralux ZinKromate is a high-quality synthetic primer for use in light to moderate marine exposures. It is lead and chromate free so it is safe to use; however, it offers all of the performance and quality characteristics of zinc chromate without the health and application hazards. It has good chemical and corrosion resistance, dries fast, and allows single finish coat coverage when using a like-colored topcoat. ZinKromate performance primer adheres very well to steel, iron, aluminum, or partially rusted galvanized surfaces.

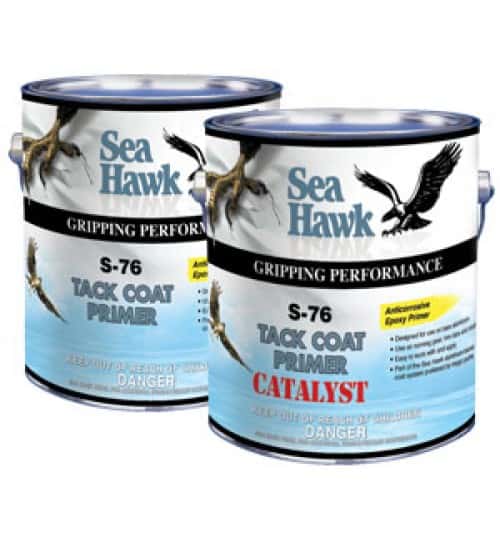
S-76 Strontium Chromate Tack Coat Primer is for use on properly prepared steel, aluminum, or galvanized steel. S-76 is an anti-corrosive strontium chromate-based primer that is specifically designed for underwater metal surfaces including hulls, running gear, and the lower units of outboards and I/O’s. It provides an excellent barrier to reduce the pitting of the metal from galvanic corrosion.

S-76 Strontium Chromate Tack Coat Primer

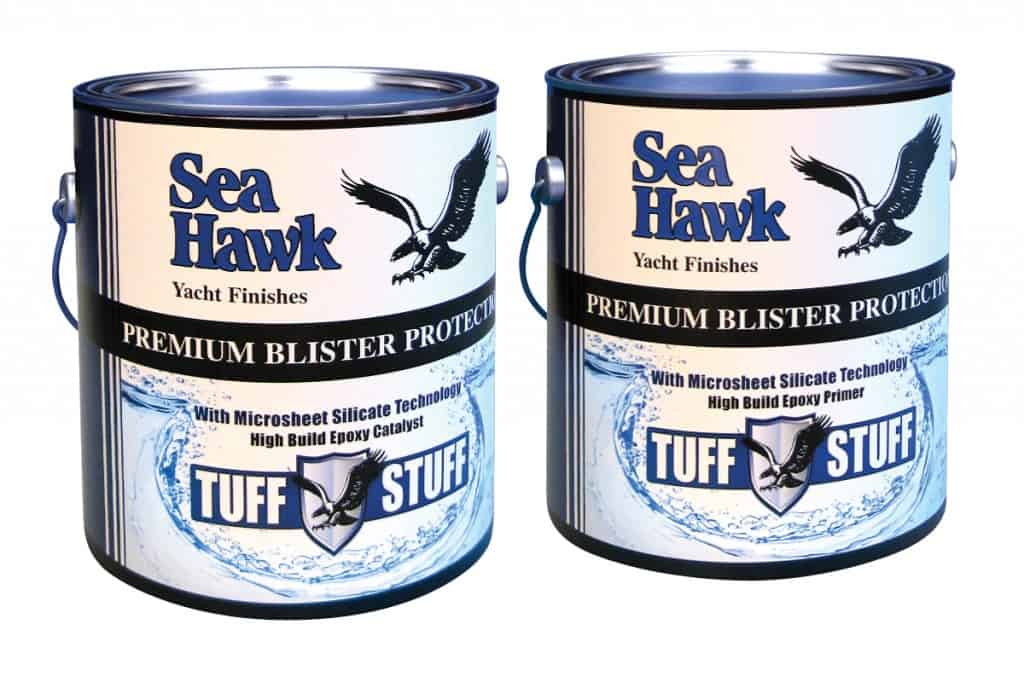
Stromate Chromate tack coat primer may be used on bare aluminum in conjunction with Tuff Stuff High Build Epoxy to form a barrier for the application of copper-based antifoulants.

If you have any questions about ZinKromate primer or Stromate Chromate tack coat primer, please call our technical expert team at 888-505-2313 Monday to Friday 8 am-5:00 pm EST.

Antifouling Paint or Prop Glide for Outdrives?

Which method of protective propeller coating is best for your boat? While there is no right or wrong solution, there are a few things to consider before making your decision.

Important questions to ask:

  1. Do you haul and repaint your boat every year?
  2. Does the prop see regular use?

Antifouling Paint – If you answered NO to the second question, you will likely be better off with traditional antifouling paint protecting your outdrive. Slick film coatings need to see regular use in order to repel fouling successfully. And if you answered YES to the first question, the additional cost of slick film coatings may not be worth it for you.

Which antifouling products are recommended for outdrives? Here are two good options.

Option 1 – Apply Tuff Stuff epoxy primer (or similar primer) direct to the metal. Paint over with a copper free bottom paint such as Colorkote. (It is very important to only use a copper-free bottom paint. Copper-based paints on underwater metals will experience galvanic corrosion.) This option guarantees the best protection and longest lasting coverage, but the paint will need to be recoated each season depending on prop usage.

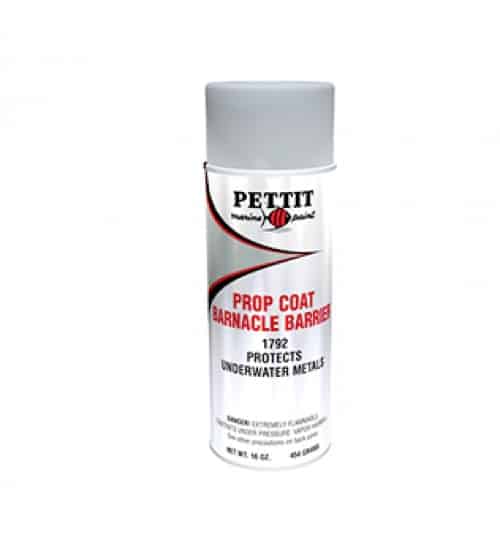
Option 2 – Apply an aerosol underwater metal coating such as Barnacle Blocker or Pettit Barnacle Barrier. These are relatively inexpensive coatings that could provide a large amount of pay off.

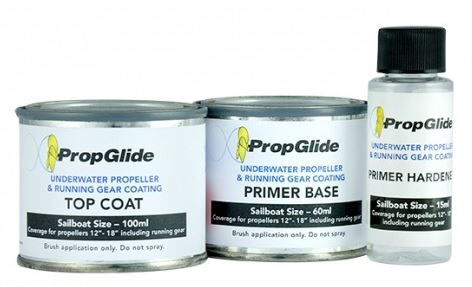
PropGlide™ Propeller and Running Gear Coatings – If you answered YES to the second question above then you may want to give foul-release systems a try. These are non-toxic, slick coatings that prevent growth from attaching itself to the prop and running gear, thus improving your boat speed and fuel efficiency. It is important to note that for PropGlide to keep its slick quality and repel fouling, the prop needs to see regular use. Without the pesticide coatings of traditional bottom paint, a stationary prop is an easy target for barnacles and other organisms. While slick film coatings may not be the solution for all boaters, many have tried it and had great success. Note what some PropGlide users have stated below.

“For over a year, we at the Big Boat Shed ship repair and storage yard for vessels up to 60ft have been trialing out PropGlide. We have found it very user friendly and has a better finish when compared to its competitors. With our tropical humid conditions we could not have asked for a better drying time then what PropGlide offers. This allows us to plan prepare and execute any prop coating task with PropGlide such a breeze. PropGlide is now our main recommended brand for propeller and running gear antifouling coatings.” 3/8/2017

“We applied PropGlide to the propellers and rudders on our 42′ power catamaran in March 2016. We have found excellent results so far with very little growth appearing on the running gear. We have been able to maintain great boat speed, excellent economy and no vibrations unlike previous years with using other products. Our Applicator has even commentated how much easier PropGlide is to apply compared to its competitors.” Mick Malone 9/28/2016

Click this link to compare the price of Propspeed kits and PropGlide™ Propeller Paint Kits.
Click this link to read about Painting an Aluminum Outdrive

How To Mark Your Waterline for Bottom Paint

Last Updated: February 10, 2026

Quick Recommendation

How to Mark Your Waterline for Bottom Paint

  • Mark the true waterline: Load the boat as it’s normally used and mark the natural waterline before hauling.
  • Raise the paint line slightly: Add 1–2 inches above the true waterline to account for load changes and wake action.
  • Use level reference points: Transfer marks using a laser level, water level, or tape line for accuracy.
  • Bottom line: A properly marked waterline prevents unsightly scum lines and exposed gelcoat once the boat is back in the water.

Tip: When in doubt, paint slightly higher—painting too low is far more noticeable than painting too high.


The waterline can also refer to anyline on a ship’s hull that is parallel to the water’s surface when the ship is afloat in a normal position. There are many reasons a waterline needs to be marked, it is a new vessel, the old paint has been blasted off for a new finish, or you’ve loaded it up with more stuff the original marking is off. Marking the waterline is often met with dread and getting the correct line for your bottom paint will provide stunning results. Getting it wrong, especially when paired with a boot stripe, will stand out like a sore thumb.

If your boat is new, the waterline should be marked on the designer’s drawing, if that is available. If not, you can take the measurements from a similar boat. If the boat has been in the water, even a few days, there may be some slight staining along the waterline (or just float the boat) that can be marked with a grease marker (best if it is full with fuel). Others have advised to throw sawdust in the water around the boat. Haul the boat and see where the sawdust has stuck to the wet hull.

Fine-line masking tape is ideal for this because it has some stretch and conforms very well to hull shape, especially if the hull has a lot of reverse turns. Don’t press the tape too firmly yet – you may need to peel it back for small adjustments. Once you’re happy with the whole line, press the tape firmly against the hull. Since the boat is already level, all you have to do for the second side is to set the level at the correct height and mark the stern with a piece of tape or transpose the wax crayon mark.

When the boat is aligned athwartships, set up the laser tripod, the exact spot is not critical providing the laser beam can see the whole side of the boat (if you can see it, so can the laser beam). Turn on the laser and adjust the height of the beam until it touches the marks you made at the bow and the stern. If it touches the mark on the bow but the stern is too high, lower the jack-stands at the stern or raise those at the bow—vice versa if the stern is low. Double-check the spirit level in the cockpit to make sure you’re not tilting the boat.


Can I change the color or tint my paint?

For most paints, in order to guarantee efficacy, the only way we recommend changing the color of  paints is to mix like paints, ie. Mixing Aluma Hawk with Aluma Hawk. We do not recommend addition of “universal” tints or pigments into our products. Many customers desire an antifouling paint in a deep, dark blue and this can be achieved by mixing blue and black.

Gel coats and resins can have a tint added, no more than 1 oz per quart, which can limit the effect. Another option is to mix two gelcoat colors, such as white and red for pink.

What Equipment is Needed to do a Proper Application of Antifouling Bottom Paint?

Antifouling bottom paint is needed if you store your boat in the water. If left in the water without protection, marine growth may attach to your boat’s exposed hull. Marine growth slows a boat down and increases fuel consumption. Here are the items that you will need in addition to the bottom paint for the proper anti-fouling bottom paint application.

60–100 grit – Suitable for the removal of paint or to sand gel coat prior to the application of antifouling paint.
• After sanding remove sanding residue by wiping with a cloth that has been dampened with the proper solvent.
Masking Tape – When it is necessary to mask off areas use a high quality clean edge masking tape, especially when the masking tape will be left on the surface for a long time.
• Brushes – For antifouling paints use a natural bristle brush but not necessarily one of as good quality as you would use to apply topside finishes.
• Rollers – Most solvent resistant rollers will have a phenolic core and will say that they are for use with oil based paints or epoxies. For antifouling paint and epoxy primers, use a 3/8”-1/2” nap roller.

Ideal Temperatures for Applying Paints and Gelcoats

Last Updated: February 10, 2026

Quick Recommendation

Ideal Temperatures for Applying Paints and Gelcoats

  • Best temperature range: Most marine paints and gelcoats apply best between 50°F and 85°F, with optimal results around 65–80°F.
  • Avoid cold conditions: Low temperatures slow curing and can cause poor adhesion or soft finishes.
  • Avoid excessive heat: High temperatures can cause rapid solvent flash-off, roller marks, and poor leveling.
  • Bottom line: Proper temperature—and stable conditions during curing—are critical for durability, appearance, and full cure.

Tip: Always consider surface temperature and overnight lows, not just daytime air temperature, before applying coatings.

When applying coatings in cooler temperatures it is important that you meet the minimum temperature requirements. This information can typically be found in the products technical data sheet, or on the can label.

As a general rule, coatings should be applied in good weather when air and surface temperatures are above 50°F (10°C) for most paints and 60°F (16°C) for epoxy, resin, and gelcoats . Surface temperature must be a least 50°F (10°C) above dew point. For optimum application properties, bring material to 70-80°F (21-27°C) temperature range prior to mixing and application.

Tips:

  • Make sure to store the coatings inside to keep the temperature in the optimal range prior to application.
  • Do not let coatings freeze, as this may alter the chemical integrity of the products.
  • In warm (hot) conditions be sure to keep the coatings out of direct sunlight exposure.

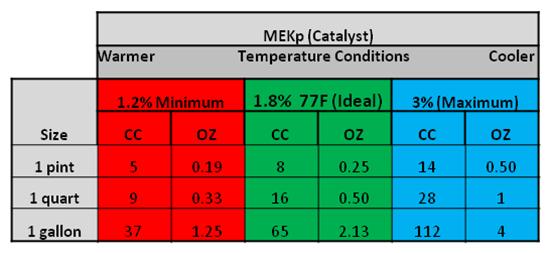
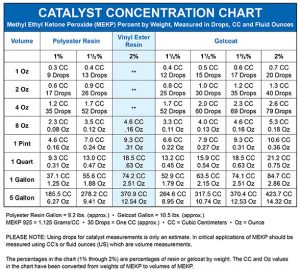
Coatings such as resins and gelcoats that require MEKp to be added for curing will require more MEKp in cooler conditions, and less MEKp in warmer conditions. See the guide below, but refer to the specific coating’s technical data sheet for detailed information:

MEPk Levels

MEkp Concentration Levels


Which Bottom Paint is Best for Freshwater Lakes?

Last Updated: February 10, 2026

Quick Recommendation

Which Bottom Paint Is Best for Freshwater Lakes?

  • Choose freshwater-specific bottom paint formulated to control slime and algae rather than heavy barnacle growth.
  • Ablative paints are ideal for most lake boats because they self-polish, reduce buildup, and handle seasonal haul-outs well.
  • Copper-free options may be required on certain lakes—always check local regulations.
  • Bottom line: For freshwater lakes, lighter-duty antifouling matched to algae control, trailering habits, and local rules delivers the best results.

Tip: Using heavy saltwater paint in freshwater is usually unnecessary and can increase cost, buildup, and maintenance.

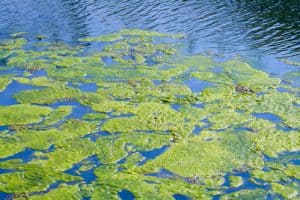
algaeMost Antifouling Bottom Paint is marketed toward the harsh conditions of the Caribbean. But which Antifouling Bottom Paint will work best in Freshwater Lakes?

The short answer is this: Antifouling Bottom Paint that works well in the harsh conditions of the Caribbean will be more than enough protection for boats in freshwater lakes. The real trick is choosing the paint that will fit your situation the best. Choosing a bottom paint with more biocide (usually cuprous oxide) will be more potent and fight off growth more successfully. Sometimes you don’t need to purchase the strongest and the greatest. A paint with just the right amount of biocide will do nicely and can also save a few bucks.

Here are some basic guidelines to help you decide which paint is best for your boat.

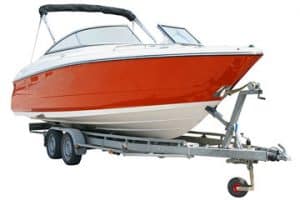
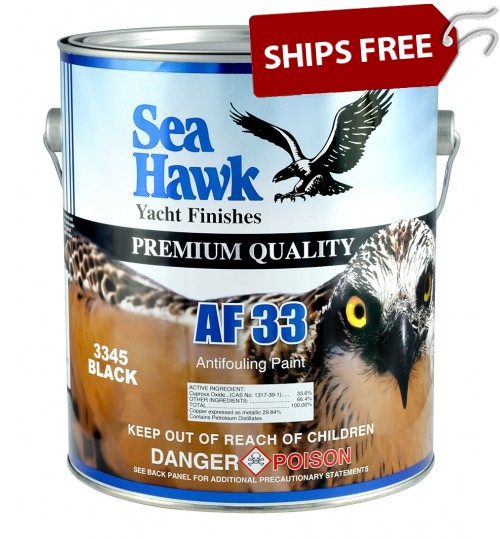
boat-trailer-360If the boat comes out of the water periodically, such as on a lift or trailer, Ablative Bottom Paint is the correct choice. When in fresh water, slime and algae tend to be the most concerning. Sea Hawk’s AF-33 or Talon and Blue Water Marine’s Copper Shield 25 perform really well with these conditions, especially with the manufacturers boosters added, see below.

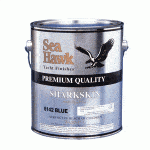
If the boat never comes out of the water except to be repainted, a Hard Epoxy Bottom Paint will keep away the algae. Sea Hawk Sharkskin is a mid strength Hard Bottom Paint that fits a tighter budget.

What about Bottom Paint Additives?

Sea Hawk bottom paint produces a paint additive called Bio Cop TF to help fight against algae and soft growth. This product will boost the effectiveness of your paint’s ability to keep the hull free of growth. **NOTE: Biocop TF Pint may only be used as a bottom paint additive in the following products: AF-33, Cukote, Sharkskin, Talon, and Tropikote. A booster has restrictions to paint added to and you should stick with the same manufacturer.

If you still aren’t sure what is needed for your boat, check out these other How To Articles:

Do I Need Bottom Paint on My Boat?

What is the Best Paint for My Boat?

Choosing the Right Boat Paint

How to Apply Bottom Paint Over Existing Bottom Paint

Apply Paint Over Polyethylene, Polypropylene, ABS, and PET/PBT Blends

Last Updated: January 26, 2026

Quick Recommendation

How to Apply Paint to Polyethylene, Polypropylene & Plastic Blends

  • Identify the plastic first: Polyethylene (PE) and polypropylene (PP) are low-surface-energy plastics and require special prep to hold paint.
  • Use adhesion promoters: Apply a plastic adhesion promoter or flame-treat the surface before priming.
  • Choose compatible coatings: Use paints specifically labeled for plastics or flexible substrates; standard marine paints may not bond.
  • Bottom line: These plastics can be painted successfully only with proper surface activation and compatible primers—skipping prep leads to peeling.

Tip: If paint scratches off easily with a fingernail after curing, the surface wasn’t properly activated or primed.

You can apply paint over Polyethylene, Polypropylene, ABS, and PET/PBT Blends with proper surface preparation and primer.

1. First wipes down the surface with a 50/50 Isopropyl Alcohol such as Denatured Alcohol to remove any contaminants prior to sanding.

2. Sand the surface with 60-80 grit sandpaper.

3. Wipe down the surface again with 50/50 Isopropyl Alcohol ( Denatured Alcohol ) to remove all sanding residue.

4. Apply 3M Tape Primer over a small section.M23929

5. Apply a small test section of the desired Topcoat paint. Since there are so many type of paints, it is recommended to perform an adhesion test on the small area painted. Once the paint has dried perform a hatch test. Use a razor blade to cut into the paint and the primer and draw a 2-3 inch line. You should follow this at least 3 more parallel lines about 1cm apart. Then cut 4 more perpendicular line again about 1cm apart. It should like a large tic-tac-toe game. Finally, apply duct tape firmly and then pull the tape off quickly. If you have any paint or primer on the tape the adhesion is poor. If there is no paint or primer on the tape then it is safe to apply the primer and paint over the entire surface.

Quick Answer: Can You Paint Polyethylene, Polypropylene, ABS, and PET/PBT Plastics?

Yes, some plastics can be painted, but the surface preparation and primer choice are critical. ABS is usually easier to paint than polyethylene or polypropylene. Polyethylene and polypropylene are low-surface-energy plastics, which means paint does not naturally stick well without special preparation, adhesion promoter, flame treatment, or a compatible plastic primer.

PET and PBT blends can often be painted when the surface is cleaned, sanded, and primed correctly, but compatibility depends on the exact plastic blend and coating system. Before painting any plastic part, test adhesion in a small area and follow the paint or primer manufacturer’s instructions.

Plastic Paintability Comparison

Plastic Type Paintability Recommended Prep
Polyethylene Difficult Clean thoroughly, abrade if appropriate, and use a compatible adhesion promoter or specialty primer designed for polyethylene.
Polypropylene Difficult Clean thoroughly and use a plastic adhesion promoter or primer made for low-surface-energy plastics.
ABS Moderate to good Clean, lightly sand, remove dust, and use a compatible plastic primer before applying paint.
PET/PBT Blends Moderate Clean, sand, test adhesion, and use a primer recommended for the specific plastic blend and coating system.
Unknown Plastic Varies Identify the plastic if possible, test in a hidden area, and perform an adhesion test before coating the full part.

Best Paint Prep Method by Plastic Type

Plastic Surface Best Approach Why It Matters
Polyethylene tanks, lids, panels, or molded parts Use specialty adhesion promoter or primer after cleaning and proper surface preparation Polyethylene is hard to bond to, so ordinary paint may peel without a compatible bonding system.
Polypropylene trim, covers, or flexible molded parts Use a primer or adhesion promoter designed for polypropylene Polypropylene has poor natural paint adhesion and often needs chemical or surface treatment.
ABS plastic parts Clean, scuff sand, prime, and paint ABS usually accepts coatings better than polyethylene or polypropylene when properly prepared.
PET/PBT blend parts Clean, abrade, prime, and test adhesion before full application Blend composition can affect how well primer and paint bond to the surface.
Glossy or slick plastic Degrease, dull the surface, and use plastic primer Paint needs a clean, dull, compatible surface to improve adhesion.
Flexible plastic Use flexible coating or additive if recommended A rigid coating may crack or peel if the plastic flexes during use.
Plastic exposed to water, sun, or abrasion Use a durable coating system and test carefully Outdoor and marine exposure increases the risk of coating failure if prep or primer is wrong.

Basic Steps for Painting Plastic

Step What to Do Why It Matters
1. Identify the plastic Look for a recycling code, manufacturer mark, product label, or material information. Different plastics require different primers and preparation methods.
2. Clean the surface Remove dirt, oil, wax, grease, mold release, silicone, salt, and other contaminants. Paint and primer will not bond well to a contaminated surface.
3. Sand or scuff when appropriate Lightly abrade the plastic if the product instructions allow it. A dull, abraded surface can improve mechanical adhesion.
4. Remove dust and residue Wipe the surface clean after sanding and allow it to dry completely. Dust and residue can interfere with primer and paint adhesion.
5. Apply adhesion promoter or plastic primer Use a primer specifically recommended for the plastic type. The primer is often the difference between a coating that bonds and one that peels.
6. Apply compatible paint Use thin, even coats and follow recoat times, dry times, and application instructions. Heavy coats can run, wrinkle, or fail to bond properly.
7. Allow full cure Let the coating cure fully before heavy handling, water exposure, or abrasion. Paint may feel dry before it has reached full hardness and adhesion.
8. Test adhesion Test a small coated area before committing to the full project. Some plastic blends reject coatings even after careful preparation.

What to Consider Before Painting Plastic

Before painting polyethylene, polypropylene, ABS, or PET/PBT blends, consider whether the part is flexible, exposed to sunlight, submerged, handled frequently, or subject to abrasion. A plastic part that bends, flexes, or gets wet may need a more specialized coating system than a rigid indoor part.

Compatibility is especially important with polyethylene and polypropylene. These plastics are often used because they resist chemicals and moisture, but that same resistance can make them difficult to paint. When long-term adhesion matters, surface preparation and primer selection are more important than the paint color or topcoat alone.

Common Questions About Painting Polyethylene, Polypropylene, ABS, and PET/PBT

Can you paint polyethylene?

Polyethylene can be painted only with the right preparation and compatible adhesion system. Standard paint usually does not stick well to polyethylene because it has low surface energy. A specialty adhesion promoter, plastic primer, or surface treatment is usually needed.

Can you paint polypropylene?

Polypropylene is difficult to paint because it naturally resists adhesion. For best results, clean the surface thoroughly and use an adhesion promoter or primer specifically designed for polypropylene or low-surface-energy plastics.

Can you paint ABS plastic?

Yes, ABS plastic is usually easier to paint than polyethylene or polypropylene. Clean the surface, lightly sand or scuff it, apply a compatible plastic primer, and then use a coating recommended for ABS or plastic surfaces.

Can you paint PET or PBT plastic blends?

PET and PBT blends can often be painted when properly cleaned, sanded, and primed, but the exact blend affects adhesion. Always test the coating system first and follow the primer and paint manufacturer’s compatibility recommendations.

Why does paint peel off plastic?

Paint often peels off plastic because the surface was contaminated, too glossy, too flexible, or incompatible with the coating. Low-surface-energy plastics like polyethylene and polypropylene are especially prone to peeling if painted without the correct adhesion promoter or primer.

Do you need primer before painting plastic?

In most cases, yes. A compatible plastic primer or adhesion promoter helps paint bond to the surface. This is especially important on polyethylene, polypropylene, PET/PBT blends, glossy plastics, flexible plastics, and parts exposed to outdoor or marine conditions.

Should plastic be sanded before painting?

Plastic is often lightly sanded or scuffed before painting to improve adhesion, but the correct method depends on the plastic type and coating system. Sanding alone is usually not enough for polyethylene or polypropylene; those plastics often need a specialty adhesion promoter.

What is the hardest plastic to paint?

Polyethylene and polypropylene are among the hardest common plastics to paint because they have low surface energy and resist bonding. ABS is generally easier to paint. PET/PBT blends fall somewhere in between, depending on the exact formulation.

Can marine paint be used on plastic?

Marine paint may be used on some plastic surfaces if the surface is properly prepared and the coating system is compatible. However, marine exposure makes adhesion more demanding, so primer selection, surface preparation, and testing are essential.

How do I know if paint will stick to plastic?

The best way to know is to identify the plastic, follow the coating manufacturer’s instructions, and test adhesion in a small area before painting the full part. If the coating scratches off easily, lifts, bubbles, or peels, the surface preparation or primer system is not adequate.

Recommended Plastic Painting Products and Supplies

Bottom Paint Store carries primers, adhesion promoters, marine paints, sandpaper, cleaners, solvents, brushes, rollers, spray supplies, and related coating products for many marine and repair applications. The right product depends on the plastic type, surface condition, exposure level, and whether the part is rigid, flexible, indoor, outdoor, or marine-exposed.

This application and test can be used for topside paints and bottom paints.

Can You Paint Polyethylene, Polypropylene, ABS, and PET/PBT Plastics?

Yes, some plastics can be painted, but the surface preparation and primer choice are critical. ABS is usually easier to paint than polyethylene or polypropylene. Polyethylene and polypropylene are low-surface-energy plastics, which means paint does not naturally stick well without special preparation, adhesion promoter, flame treatment, or a compatible plastic primer.

PET and PBT blends can often be painted when the surface is cleaned, sanded, and primed correctly, but compatibility depends on the exact plastic blend and coating system. Before painting any plastic part, test adhesion in a small area and follow the paint or primer manufacturer’s instructions.

Plastic Paintability Comparison

Plastic Type Paintability Recommended Prep
Polyethylene Difficult Clean thoroughly, abrade if appropriate, and use a compatible adhesion promoter or specialty primer designed for polyethylene.
Polypropylene Difficult Requires careful cleaning and usually a plastic adhesion promoter or primer made for low-surface-energy plastics.
ABS Moderate to good Clean, lightly sand, remove dust, and use a compatible plastic primer before applying paint.
PET/PBT Blends Moderate Clean, sand, test adhesion, and use a primer recommended for the specific plastic blend and coating system.
Unknown Plastic Varies Identify the plastic if possible, test in a hidden area, and use an adhesion test before coating the full part.

Best Paint Prep Method by Plastic Type

Plastic Surface Best Approach Why It Matters
Polyethylene tanks, lids, panels, or molded parts Use specialty adhesion promoter or primer after cleaning and proper surface preparation Polyethylene is hard to bond to, so ordinary paint may peel without a compatible bonding system.
Polypropylene trim, covers, or flexible molded parts Use a primer or adhesion promoter designed for polypropylene Polypropylene has poor natural paint adhesion and often needs chemical or surface treatment.
ABS plastic parts Clean, scuff sand, prime, and paint ABS usually accepts coatings better than polyethylene or polypropylene when properly prepared.
PET/PBT blend parts Clean, abrade, prime, and test adhesion before full application Blend composition can affect how well primer and paint bond to the surface.
Glossy or slick plastic Degrease, dull the surface, and use plastic primer Paint needs a clean, dull, compatible surface to improve adhesion.
Flexible plastic Use flexible coating or additive if recommended A rigid coating may crack or peel if the plastic flexes during use.
Plastic exposed to water, sun, or abrasion Use a durable coating system and test carefully Outdoor and marine exposure increases the risk of coating failure if prep or primer is wrong.

Basic Steps for Painting Plastic

Step What to Do Why It Matters
1. Identify the plastic Look for a recycling code, manufacturer mark, product label, or material information. Different plastics require different primers and preparation methods.
2. Clean the surface Remove dirt, oil, wax, grease, mold release, silicone, salt, and other contaminants. Paint and primer will not bond well to a contaminated surface.
3. Sand or scuff when appropriate Lightly abrade the plastic if the product instructions allow it. A dull, abraded surface can improve mechanical adhesion.
4. Remove dust and residue Wipe the surface clean after sanding and allow it to dry completely. Dust and residue can interfere with primer and paint adhesion.
5. Apply adhesion promoter or plastic primer Use a primer specifically recommended for the plastic type. The primer is often the difference between a coating that bonds and one that peels.
6. Apply compatible paint Use thin, even coats and follow recoat times, dry times, and application instructions. Heavy coats can run, wrinkle, or fail to bond properly.
7. Allow full cure Let the coating cure fully before heavy handling, water exposure, or abrasion. Paint may feel dry before it has reached full hardness and adhesion.
8. Test adhesion Test a small coated area before committing to the full project. Some plastic blends reject coatings even after careful preparation.

What to Consider Before Painting Plastic

Before painting polyethylene, polypropylene, ABS, or PET/PBT blends, consider whether the part is flexible, exposed to sunlight, submerged, handled frequently, or subject to abrasion. A plastic part that bends, flexes, or gets wet may need a more specialized coating system than a rigid indoor part.

Compatibility is especially important with polyethylene and polypropylene. These plastics are often used because they resist chemicals and moisture, but that same resistance can make them difficult to paint. When long-term adhesion matters, surface preparation and primer selection are more important than the paint color or topcoat alone.

Common Questions About Painting Polyethylene, Polypropylene, ABS, and PET/PBT

Can you paint polyethylene?

Polyethylene can be painted only with the right preparation and compatible adhesion system. Standard paint usually does not stick well to polyethylene because it has low surface energy. A specialty adhesion promoter, plastic primer, or surface treatment is usually needed.

Can you paint polypropylene?

Polypropylene is difficult to paint because it naturally resists adhesion. For best results, clean the surface thoroughly and use an adhesion promoter or primer specifically designed for polypropylene or low-surface-energy plastics.

Can you paint ABS plastic?

Yes, ABS plastic is usually easier to paint than polyethylene or polypropylene. Clean the surface, lightly sand or scuff it, apply a compatible plastic primer, and then use a coating recommended for ABS or plastic surfaces.

Can you paint PET or PBT plastic blends?

PET and PBT blends can often be painted when properly cleaned, sanded, and primed, but the exact blend affects adhesion. Always test the coating system first and follow the primer and paint manufacturer’s compatibility recommendations.

Why does paint peel off plastic?

Paint often peels off plastic because the surface was contaminated, too glossy, too flexible, or incompatible with the coating. Low-surface-energy plastics like polyethylene and polypropylene are especially prone to peeling if they are painted without the correct adhesion promoter or primer.

Do you need primer before painting plastic?

In most cases, yes. A compatible plastic primer or adhesion promoter helps paint bond to the surface. This is especially important on polyethylene, polypropylene, PET/PBT blends, glossy plastics, flexible plastics, and parts exposed to outdoor or marine conditions.

Should plastic be sanded before painting?

Plastic is often lightly sanded or scuffed before painting to improve adhesion, but the correct method depends on the plastic type and coating system. Sanding alone is usually not enough for polyethylene or polypropylene; those plastics often need a specialty adhesion promoter.

What is the hardest plastic to paint?

Polyethylene and polypropylene are among the hardest common plastics to paint because they have low surface energy and resist bonding. ABS is generally easier to paint. PET/PBT blends fall somewhere in between, depending on the exact formulation.

Can marine paint be used on plastic?

Marine paint may be used on some plastic surfaces if the surface is properly prepared and the coating system is compatible. However, marine exposure makes adhesion more demanding, so primer selection, surface preparation, and testing are essential.

How do I know if paint will stick to plastic?

The best way to know is to identify the plastic, follow the coating manufacturer’s instructions, and test adhesion in a small area before painting the full part. If the coating scratches off easily, lifts, bubbles, or peels, the surface preparation or primer system is not adequate.

Recommended Plastic Painting Products and Supplies

Bottom Paint Store carries primers, adhesion promoters, marine paints, sandpaper, cleaners, solvents, brushes, rollers, spray supplies, and related coating products for many marine and repair applications. The right product depends on the plastic type, surface condition, exposure level, and whether the part is rigid, flexible, indoor, outdoor, or marine-exposed.

Plastic Painting Supply Checklist

  • Plastic cleaner, dewaxer, or surface prep solvent recommended for the coating system
  • Sandpaper or abrasive pad for scuffing when appropriate
  • Plastic adhesion promoter or primer
  • Paint compatible with the plastic and exposure conditions
  • Masking tape and protective coverings
  • Clean lint-free wiping cloths
  • Brush, roller, or spray equipment
  • Gloves, eye protection, and proper ventilation
  • Small test area for checking adhesion before full application

Choosing the Right Boat Paint

Last Updated: February 9, 2026

Quick Recommendation

Choosing the Right Boat Paint

  • Below the waterline: Use bottom paint (antifouling) to prevent algae, slime, and marine growth.
  • Above the waterline: Choose topside paint or polyurethane for durability, gloss, and UV resistance.
  • Match paint to hull material: Fiberglass, aluminum, and wood each require compatible primers and coatings.
  • Bottom line: The right boat paint depends on where it’s applied, how the boat is used, and the hull material.

Tip: Always check compatibility with any existing coatings before switching paint types to avoid adhesion problems.

There are many different boat paints and qualities, generally the more you spend the better the results. There are a variety of types including topside and bottom paints. Topside paints are meant to be used above the waterline and will not hold up under water. Bottom Paints (also called antifoulants or antifouling coatings) are pesticides that are only used below the waterline when you are trying to stop growth from occurring while your boat stays in the water over long periods of time.  See Related Article>: Do I need Bottom Paint?

The type of paint you choose for your boat will depend on the type of boat you have and the environment in which it will be used.

There are two main types of boat paint: antifouling and topside. Antifouling paint is designed to prevent marine growth from attaching to the hull of the boat, while topside paint is designed for the superstructure of the boat, such as the deck and cabin.

If you plan on using your boat in saltwater, it is important to choose a paint that is specifically designed for saltwater use. Saltwater is much more corrosive than fresh water, so a saltwater-specific paint will be more durable and longer lasting.

Using your boat in freshwater, will require a different paint. There are a few different types of paint you can choose from. Freshwater-specific paints are available, but they are not necessary if you do not plan on using your boat in saltwater.

Boat Paints

Duralux High Gloss Marine Enamel is affordable and easy to apply and only recommended for above the waterline or moderate use on the bottom (a day or so in the water, not extended periods). This topside paint works best in very thin coats; see the prep recommendations found on product page on “how to use” tab. Duralux marine enamels do have a color offering in a flat finish, those are limited to their camouflage paint colors. Marine Alkyd Enamels like Duralux are effective and low cost.

A step up from the marine enamels are polyurethane enamels. These products such as Blue Water Marine Mega Gloss Polyurethane,  Interlux Brightside,  and Pettit Easypoxy have a better flow and gloss.

The best performing and hardest application is either Awlgrip or Awlcraft 2000. These require a more technical application and require the use of proper primers, catalyst and thinners with each application.

Typically when people discuss bottom paint on a boat they are referring to Antifouling paint. Bottom paint prevents growth of organisms that attach to the hull and can affect a vessels speed, performance, and durability when boat is kept in the water for extended periods of time.  If you don’t have that problem, you may not need bottom paint. Antifouling bottom paint typically has a flat, dull finish that is used below the waterline.

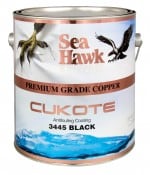
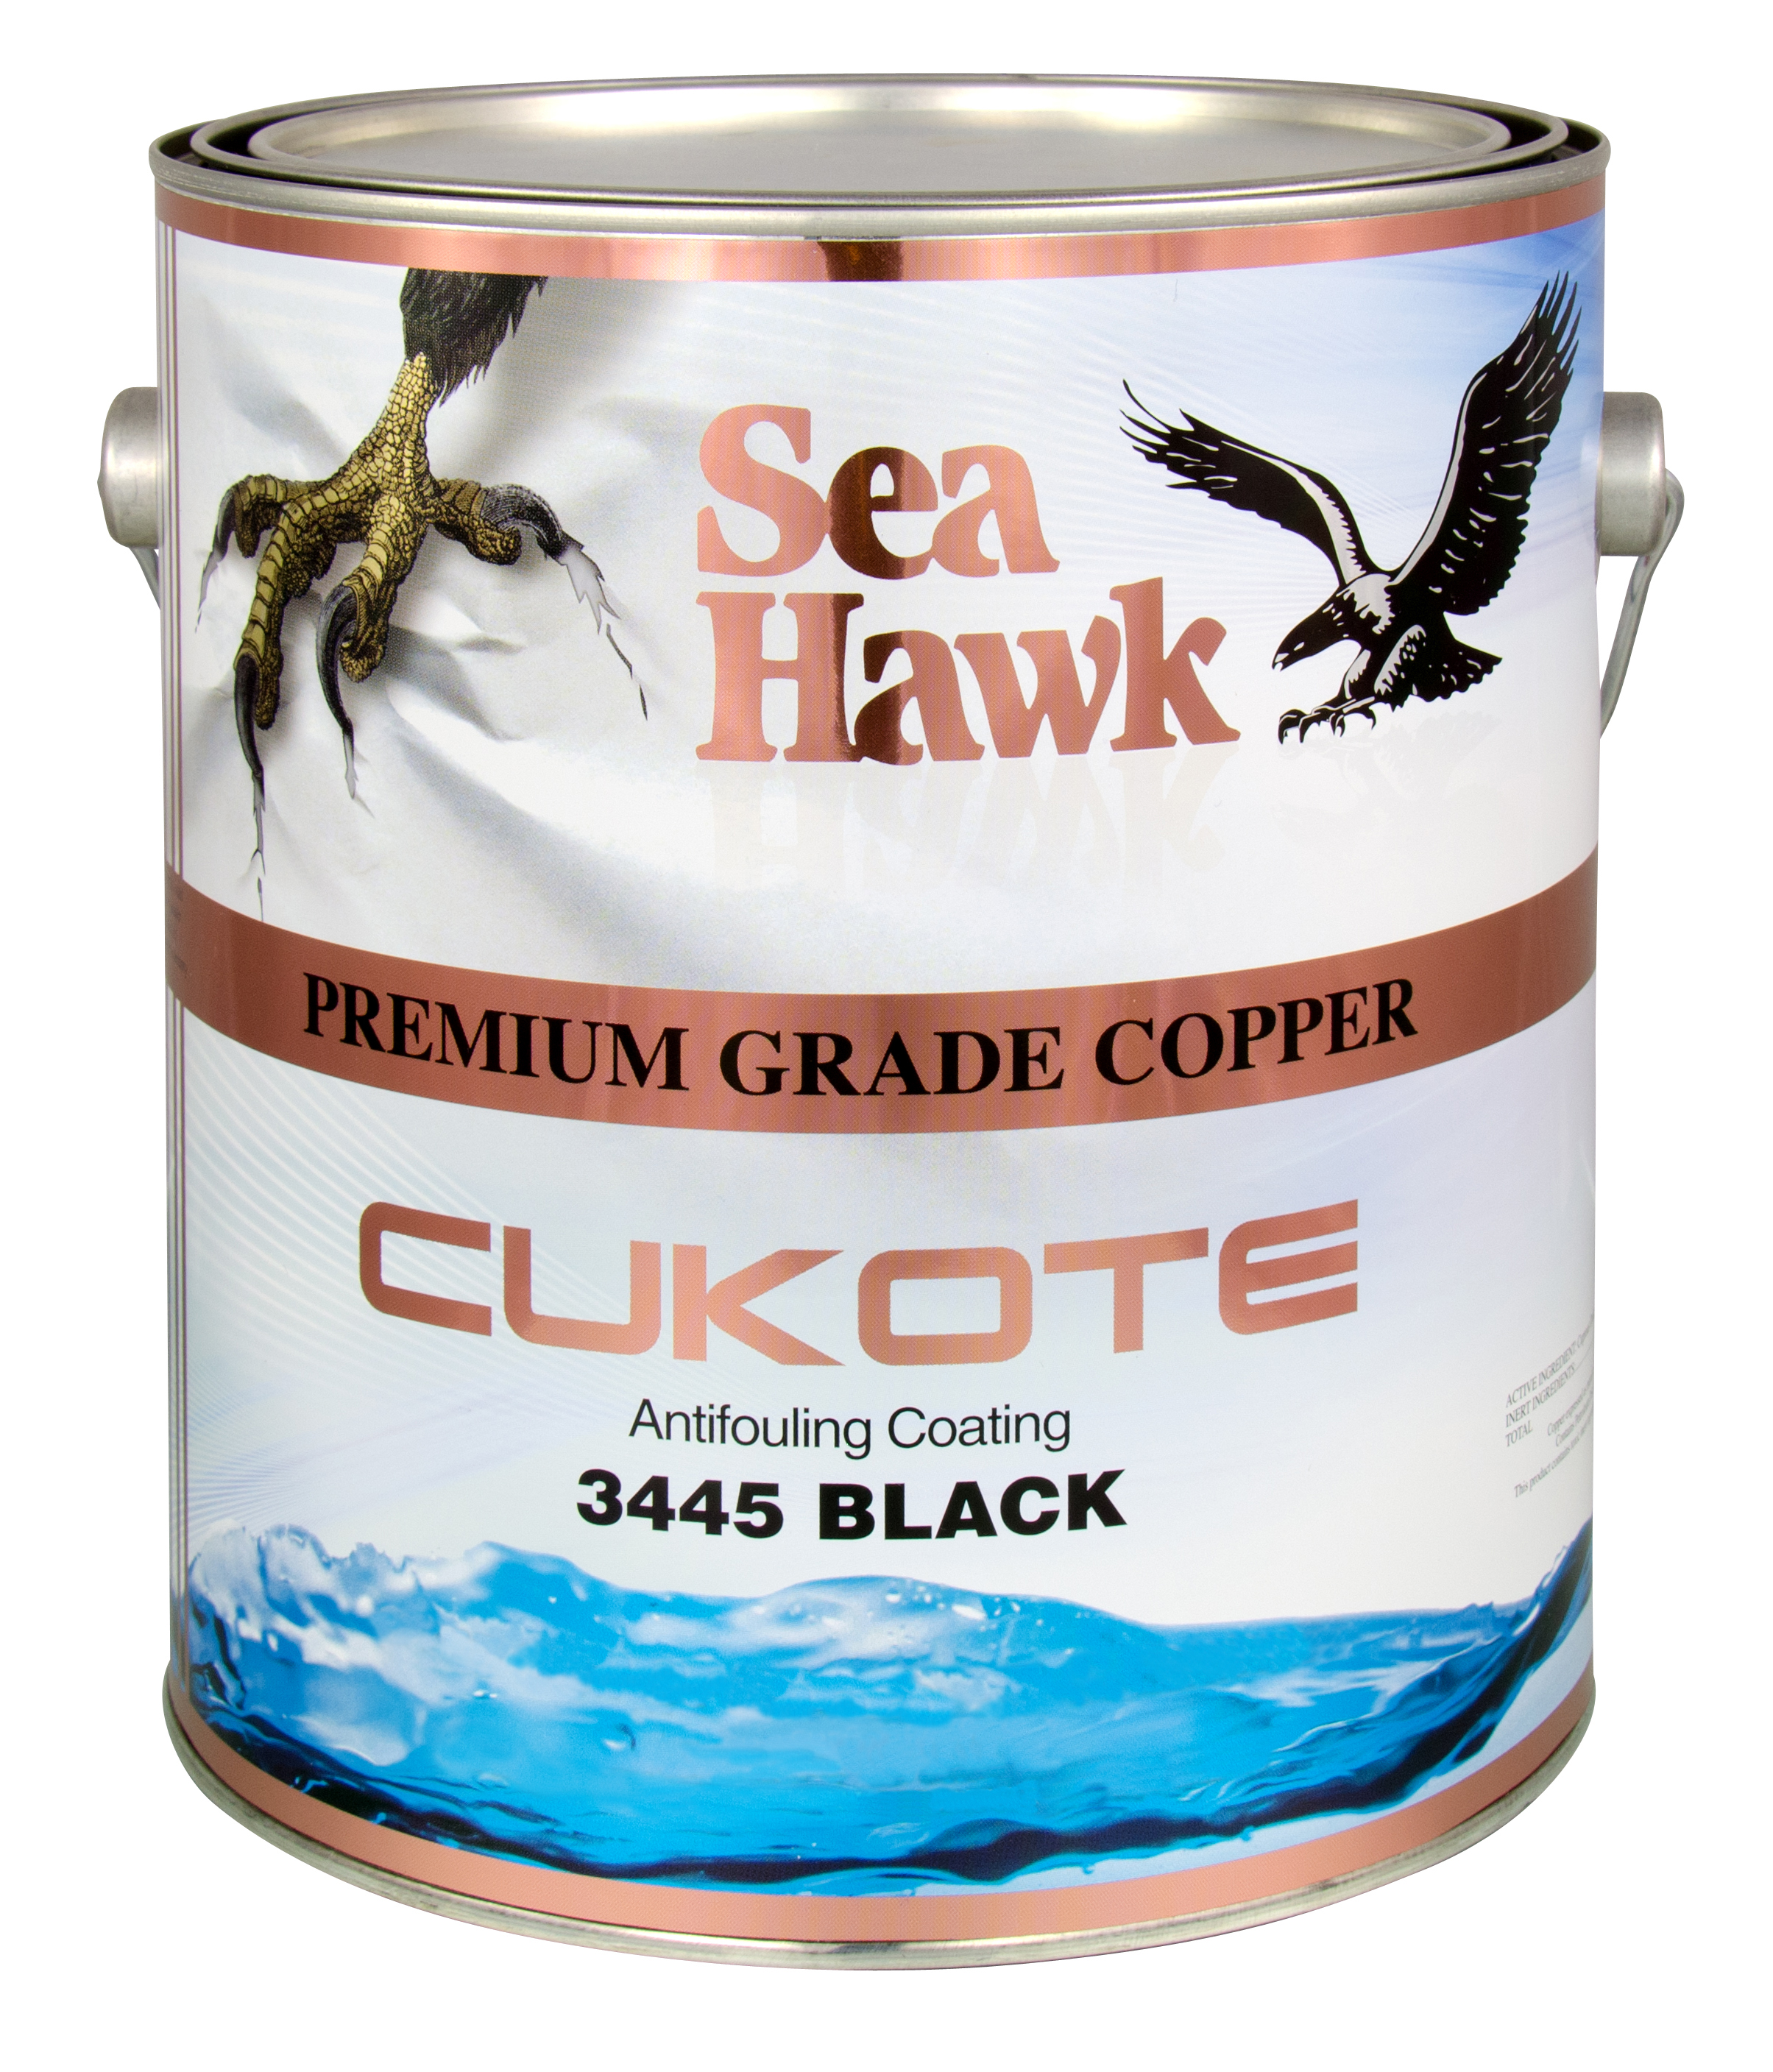
CUKOTE 2013There are generally two types of bottom paint both of which have several variations that create a multitude of products in the market place. The two different types or categories of bottom paint include hard bottom paint and ablative bottom paint. Related Article> What is the Difference Between Hard and Ablative Bottom Paint.

Once you have selected the type of paint you need, you will need to select a color. The color of your boat should be based on personal preference, but it is important to keep in mind that darker colors will absorb more heat than lighter colors.

Your boat paint choice ultimately depends on your budget and which boat paint colors meet the needs of your boat and usage.

Can I Reactivate Hard Bottom Paint?

sharkskin300x300

Hard Bottom Paint

According to Practical Sailor Magazine, March 2013 issue, this topic was discussed. It is generally regarded that after 72 hours of exposure to air that hard bottom paints will oxidize and lose antifouling  properties but test are showing otherwise. Of course you should always check with the manufacturer of your paint choice below are the guidelines to reactivate hard paint:


  • Launching of newly painted boats may be delayed up to 60 days after painting without sacrificing antifouling performance.
  • Boats painted between two and 12 months prior to launch date must be scuff-sanded with 220-grit production paper or abrasive pad before launching.
  • Boats painted more than 12 months prior to launch date must be lightly sanded with 100-grit production paper and recoated before launching.
  • Boats in the water for less than 24 hours (e.g. for in-the-water water testing) should be pressure washed lightly to remove dirt, salt or other contaminants and allowed to dry. These boats should still be considered newly painted and may be launched up to 60 days after the date of painting.
  • Boats in the water for more than 24 hours, but less than 30 days, should be pressure washed when hauled, then lightly sanded with 220-grit production paper immediately before re-launching. If necessary, launching may be delayed up to 60 days after the bottom has been sanded. Note: Boats re-launched within 72 hours of haulout do not need to be sanded before launching.
  • Boats in water for more than 30 days should be pressure washed when hauled, lightly sanded with 100-grit production paper and recoated with antifouling paint, even when re-launching will take place within 72 hours.

If there isn’t enought hard bottom paint on the surface it could flake off with sanding due to the thin layer.


What is the best paint for my boat?

A lot of factors contribute to what paint is best for your boat:

Are you painting the entire boat, or just the bottom? Is the boat in fresh water or salt water? Is your boat trailered?

What is on the bottom of the boat now: bottom paint, topside paint or gelcoat? Once an antifouling bottom paint has been applied only antifouling paint can go over it (unless you remove it). Gelcoat application is recommended over fiberglass, most resins and gelcoat. It can have difficulty adhering to other surfaces.

For topside only the Duralux Marine Enamel is an economical choice. It has several colors to choose from and features easy application.

Gelcoat is usually what is “original” to most boats; a bass boat will have metal flake mixed in. We sell metal flake that can be added to gelcoat or paint but we don’t sell any with it already mixed in.

Ablative bottom paint can help with the slime, will wear away slowly over time,  and it is suitable for trailered boats. Bottom paint is applied below the waterline only.

If you need assistance selecting the right boat paint for your needs feel free to call our technical support team Monday-Friday 9am-5pm EST 888-505-2313.

Do I Need Bottom Paint on My Boat?

Last Updated: Feb 10, 2026

Quick Recommendation

Do You Need Bottom Paint on Your Boat?

  • Yes—if your boat stays in the water: Boats kept in the water for weeks or months need bottom paint to prevent algae, slime, and marine growth.
  • Usually no—if you trailer your boat: Boats that are trailered and stored dry typically don’t need antifouling paint.
  • Water type matters: Saltwater and warm climates cause faster fouling than freshwater or colder regions.
  • Bottom line: Whether you need bottom paint depends on how long the boat stays in the water, where it’s kept, and how it’s used.

Tip: Applying bottom paint when it’s not needed adds cost and maintenance—choose antifouling only if your boating habits require it.

Sea Hawk Cukote Bottom PaintMost of the time when bottom paint is considered on a boat it is Antifouling paint. Bottom paint blocks growth of organisms that attach to the hull and can impact a vessels speed, performance, and durability when the boat is stored in water for extended periods of time. Antifouling bottom paint usually has a flat, dull finish that is used below the waterline. If you don’t have this challenge, you may not need bottom paint. 

If you don’t have a growth problem or would like a nice shine to your boat’s bottom look to our other items like gelcoat or a topside paint for moderate water exposure or an aluminum paint with no antifouling agents. Gelcoat adheres to most gelcoats or fiberglass/resins, see how to apply gelcoat.  A boat bottom with antifouling will need to have it removed via sanding, sandblasting or bottom paint remover before a different type of paint will adhere.

There are generally two types of bottom paint both of which have several variations that create a multitude of products in the market place. The two different types or categories of bottom paint include hard bottom paint and ablative bottom paint.

Hard Bottom Paint vs. Ablative Bottom Paint

Hard bottom paint is bottom paint that is a hard modified epoxy. After you apply hard bottom paint it is very durable and does not wear off. Hard bottom paints typically have a higher ratio of pesticides (usually copper) in them that are exposed in the outer surface of the bottom paint coating. As time goes by, the coating oxidizes and becomes less effective in combating marine growth. Hard bottom paint is generally used on boats when the boat sits for long periods of time without moving at all, or there is little movement of water (current/ tide) around the boat. You should not use a hard paint if you boat comes out of the water such as on a trailer or a lift. After 72 hours, the hard bottom paint will oxidize on the outer surface from the air and becomes ineffective. If you are trailering your boat, or keep it on a lift you should always use ablative bottom paint.

Ablative bottom paint, also known as self- polishing bottom paint, is softer and allows the coating to wear off at a controlled rate. Much like a bar of soap, once the boat moves in the water or there is a current and or tide, the outer layer slowly wears away. The wearing away of the self-polishing bottom paint allows for new, unoxidized paint to be exposed. Therefore, if you are trailering your boat, or it comes in and out of the water for any reason, the paint will oxidize within 72 hours. However, once placed back in service, that oxidized ablative paint wears away and exposes a new fresh outer coating with active protection. Ablative bottom paint is a newer technology then hard paint. It is the preferred bottom paint of most users since it typically lasts longer and continuously exposes a new active outer coating that protects against marine growth.

How long does bottom paint last on a boat?

In general, you should apply boat bottom paint once a year, however; some bottom paints can last for two years. If your boat is kept in the water or you use it regularly, you you have it checked annually to determine if it requires a new bottom paint coating.

For more how to use details see How to apply bottom paint to bare fiberglass or How to apply bottom paint over existing bottom paint.


How much does it cost to bottom paint a boat?

How much does it cost to bottom paint a boat?

The cost to paint the bottom of your boat depends on a number of factors including the size of your boat, the paint you choose and whether you use a primer or not. Other factors include whether you will paint your boat or hire someone to paint it. For example, Biocop TF by Sea Hawk, is a popular bottom paint and currently costs $275.77 a gallon and provides theoretical coverage of 315 square feet per gallon. If the bottom surface of your boat is 700 square feet you would theoretically need to purchase three gallons (Biocop is not offered in quarts) at a total cost of $827. 31 for the three gallons.

That may seem expensive for paint, however boat bottom paint uses antifouling properties in order to protect the boat’s bottom from organisms found in saltwater and other elements.

For information on calculating how much paint you need to paint your boat bottom you can refer to our Bottom Paint Calculator.

Applying Antifouling Paint to a Pontoon Boat

Last Updated: February 9, 2026

Quick Recommendation

Applying Antifouling Paint to a Pontoon Boat

  • Use aluminum-safe antifouling only: Choose copper-free or aluminum-compatible bottom paint for pontoon tubes.
  • Prep thoroughly: Degrease, remove oxidation, and lightly abrade the aluminum to ensure proper adhesion.
  • Prime correctly: Apply an etching or epoxy primer designed for aluminum before antifouling paint.
  • Bottom line: Long-lasting pontoon protection depends on aluminum-safe paint systems and proper surface preparation.

Tip: Never apply traditional copper-based antifouling directly to aluminum pontoons—it can cause rapid galvanic corrosion.

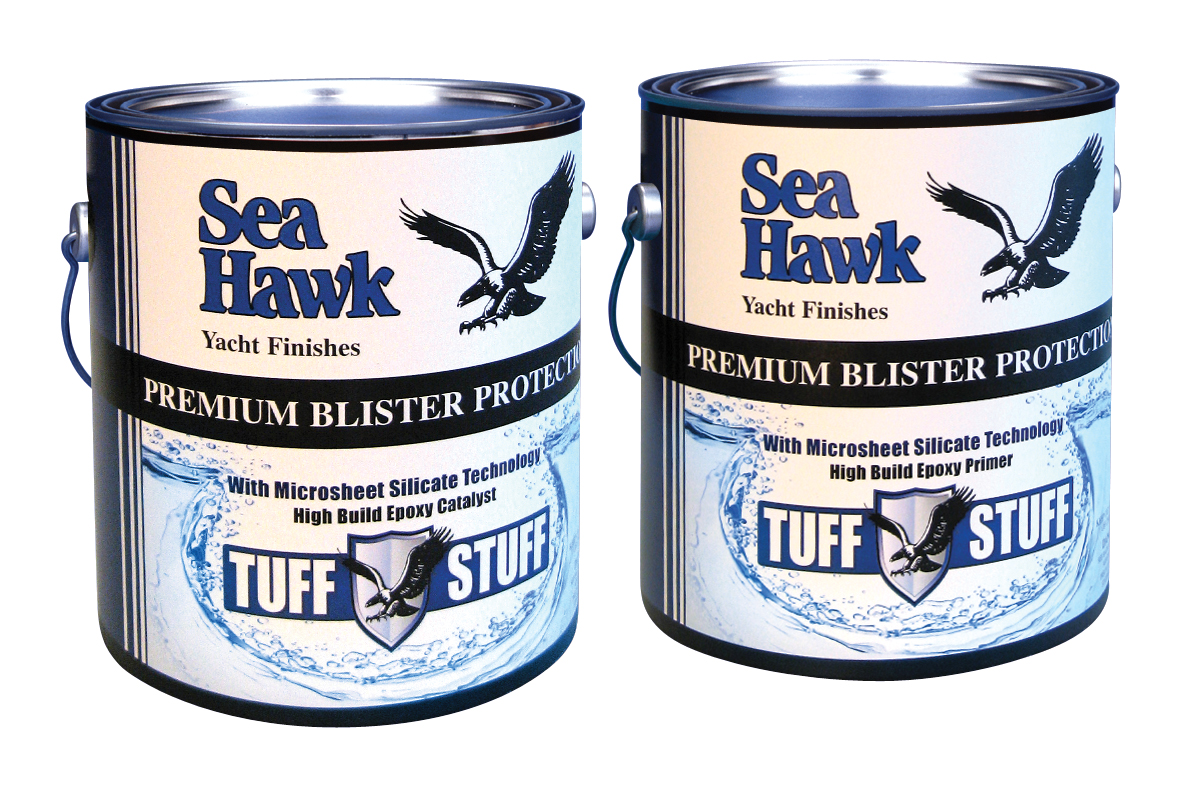
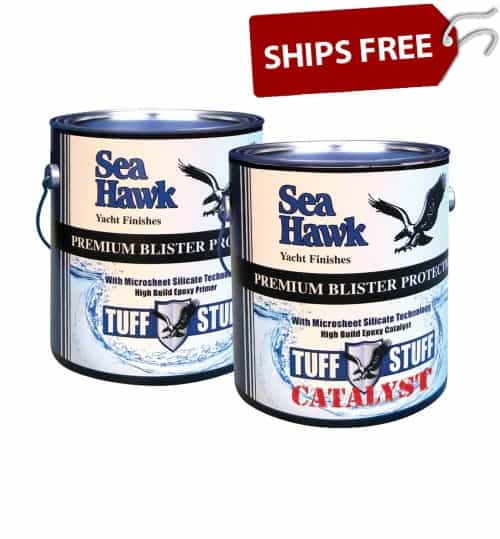
If you do not have any coatings at all on the bottom of the boat, we suggest to sand the pontoons with 80 grit and then apply Tuff Stuff High Build Epoxy. It is a water tight barrier coat designed for use under the waterline and with aluminum hulls. Tuff Stuff will insure that you protect the aluminum from corrosion, and also aid in the adhesion of the antifouling paint. Use 2 coats. You can apply the 2nd coat within a couple of hours of the first coat. See detailed instructions at How to Apply Marine Epoxy Primer”.

TUFFSTUFFnewAfter you apply Tuff Stuff marine epoxy primer on hull, be sure to use an aluminum safe antifouling paint. The bottom paint needs to be applied the same day as the Tuff Stuff marine epoxy primer. Antifoulants in general are designed to repel hard growth. For soft growth you should have an additional biocide that help with the algae. Colorkote is an excellent antifoul for aluminum pontoons used in salt water and/or fresh water. For a less expensive option, see Smart Solution Metal Free Antifouling paint.

WARNING: You should only use an aluminum safe antifouling like Smart Solution. Using any other type of copper based antifouling could severely damage your pontoons and will cause corrosion, pitting and eventually holes in your pontoon boat.

If you do not need antifouling paint and are in fresh water, we suggest using one of the products located in the “How to Paint an Aluminum Jon Boat article.

Links:

How to Video:

Eco-Clad Bottom Paint Review

eco cladAfter further review on the performance of Eco-Clad as a bottom paint, we are NOT offering this product to our customer base. Eco Clad is engineered to support a natural beneficial biofilm (slime) on the coated area. However, we have heard several complaints about the products’ poor performance when it comes to keeping growth off the boat. The company has done a great job of marketing Eco Clad everywhere, and claims better fuel economy and faster speeds.    This might be true, but performs only for a few months at best. After that you will see substantial marine growth and even worse fuel ecomony and speed along with the added costs of a new bottom job.

Our opinion and recommendation is to stay away from Eco-Clad unless you plan on keeping your boat in fresh water. Your are much better off using a traditional high quality bottom paint.

What is the difference in Hard Bottom Paint and Ablative Bottom Paint?

Last Updated: January 6, 2026

Hard Bottom Paint Vs. Ablative Bottom Paint

Quick Recommendation

Hard vs Ablative Bottom Paint: Which Should You Choose?

  • Choose Ablative (self-polishing) if you trailer, your boat sits at the dock for long periods, or you want a coating that wears away gradually to reduce paint buildup.
  • Choose Hard Bottom Paint if you want a tough, scrub-friendly finish, you race or want a smoother surface, or your boat stays in the water and you don’t mind periodic sanding to manage buildup.
  • Not sure? For most recreational boats, an ablative is the safer all-around choice; hard paint is best when you need maximum durability and frequent cleaning.

Tip: Always confirm compatibility with your previous bottom paint type and your boat’s typical water conditions (freshwater vs saltwater) before switching.

Hard Bottom Paint vs Ablative Bottom Paint

Hard bottom paint dries to a tough, durable coating that holds its biocide in a hard paint film. It is often a good choice for faster boats, trailered boats, racing boats, and boats that are cleaned regularly. Ablative bottom paint slowly wears away as the boat moves through the water, exposing fresh biocide over time and reducing paint buildup.

Quick Answer: Hard Bottom Paint vs Ablative Bottom Paint

Hard bottom paint dries to a tough, durable coating that holds its antifouling protection in a hard paint film. It is often a good choice for faster boats, racing boats, trailered boats, and boats that are cleaned or scrubbed regularly. Ablative bottom paint slowly wears away as the boat moves through the water, exposing fresh antifouling protection over time and reducing paint buildup.

For many recreational boats that stay in the water, ablative bottom paint is often the easier long-term maintenance choice because it gradually wears away instead of building up layer after layer. Hard bottom paint may be better when a smooth, durable, scrub-resistant finish is more important.

Hard Bottom Paint vs Ablative Bottom Paint Comparison

Feature Hard Bottom Paint Ablative Bottom Paint
How It Works Forms a hard coating that releases antifouling protection from the paint film. Gradually wears away to expose fresh antifouling protection.
Best For Fast boats, racing boats, trailered boats, and boats that are scrubbed often. Cruising boats, sailboats, powerboats, and boats kept in the water for extended periods.
Paint Buildup Can build up over time if old layers are not removed. Helps reduce buildup because the paint film gradually wears away.
Durability Very durable and more resistant to scrubbing and abrasion. Designed to wear away, so it is usually less scrub-resistant than hard paint.
Maintenance May require sanding or removal after repeated applications. Usually easier to recoat because old paint is gradually depleted.
Trailered Boats Often a good option because the coating is harder and more durable. Some ablative paints can be used on trailered boats, but product directions should be checked.
Hauling and Relaunching Some hard paints have launch-window limits after application. Many ablative paints are more flexible for seasonal haul-outs, depending on the product.
Performance Finish Can often be sanded smooth for racing or speed-focused applications. Good for general boating, but not usually chosen when the smoothest racing finish is the priority.
Long-Term Use Can require more surface prep over time due to paint buildup. Often preferred for easier seasonal maintenance and reduced coating buildup.

Best Bottom Paint Choice by Boat Use

Boat Use Better Choice Why
Boat stays in the water all season Ablative bottom paint Provides ongoing protection as the paint wears away and exposes fresh antifouling ingredients.
Boat is used frequently Ablative bottom paint Water movement helps the paint polish away and maintain antifouling performance.
Boat sits idle for long periods Hard bottom paint or premium ablative bottom paint Some paints perform better than others when a boat is not moving often, so product selection matters.
Fast powerboat Hard bottom paint Hard paint is more durable at higher speeds and can better tolerate cleaning.
Racing sailboat Hard bottom paint Can often be sanded or burnished smooth for a faster racing finish.
Cruising sailboat Ablative bottom paint Usually easier to maintain and reduces heavy paint buildup over time.
Trailered boat Hard bottom paint or trailerable ablative paint Hard paint handles abrasion well, but some ablatives are also designed for haul-out and relaunch use.
Boat owner wants less annual sanding Ablative bottom paint Ablative paint helps reduce buildup, which can mean less sanding and stripping over time.
Bottom is scrubbed by a diver Hard bottom paint Hard coatings usually tolerate cleaning and scrubbing better than softer ablative paints.

What to Consider Before Choosing Hard or Ablative Bottom Paint

Before choosing between hard and ablative bottom paint, consider how often the boat is used, how fast it runs, whether it is kept in the water or trailered, how often the bottom is cleaned, and how much paint buildup is already on the hull. The best paint depends on the boat, water conditions, existing paint, and maintenance routine.

If your boat stays in the water and you want easier seasonal maintenance, ablative bottom paint is often the better choice. If your boat is fast, frequently scrubbed, raced, or trailered, hard bottom paint may be the better fit. Always check the product instructions for compatibility, launch time, surface preparation, and whether the paint can be applied over your existing bottom paint.

Common Questions About Hard and Ablative Bottom Paint

What is hard bottom paint?

Hard bottom paint is an antifouling paint that dries to a firm, durable coating. It releases antifouling protection from the paint film while maintaining a hard surface. It is often used on faster boats, racing boats, trailered boats, and hulls that are cleaned regularly.

What is ablative bottom paint?

Ablative bottom paint is an antifouling paint that slowly wears away as the boat moves through the water. As the surface wears, fresh antifouling protection is exposed. This helps maintain performance and reduces heavy paint buildup over time.

Is hard bottom paint better than ablative bottom paint?

Hard bottom paint is not always better; it depends on the boat and how it is used. Hard paint is better for durability, speed, and scrubbing. Ablative paint is often better for easier maintenance, long-term buildup reduction, and boats kept in the water for extended periods.

Is ablative bottom paint better for recreational boats?

For many recreational boats, ablative bottom paint is a practical choice because it wears away gradually and reduces the need to remove heavy paint buildup later. It is especially useful for boats that remain in the water during the season.

Can you put ablative paint over hard bottom paint?

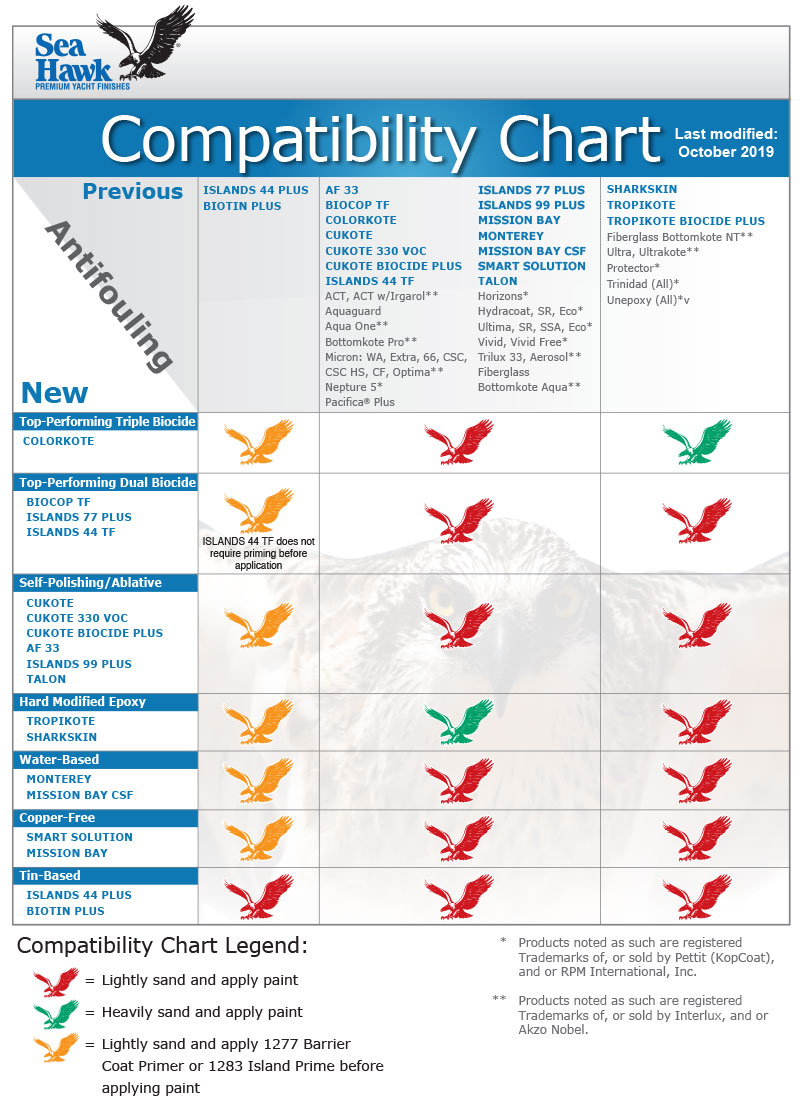
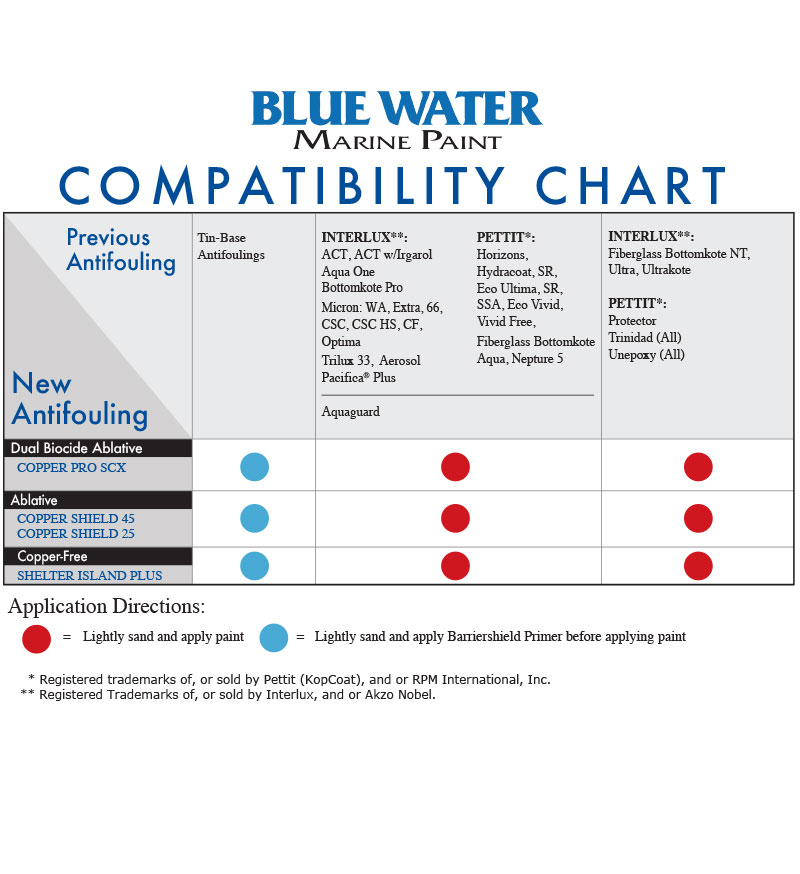
In many cases, ablative bottom paint can be applied over old hard bottom paint if the existing coating is sound, properly sanded, and compatible with the new paint. Always check the manufacturer’s compatibility chart before applying one bottom paint over another.

Can you put hard bottom paint over ablative paint?

Hard bottom paint should generally not be applied over soft or heavily worn ablative paint unless the old coating is removed or properly prepared according to the manufacturer’s instructions. A soft or unstable coating underneath can cause adhesion problems.

Does ablative bottom paint need to be sanded every year?

Ablative bottom paint may not require heavy sanding every year if the existing paint is still sound and compatible with the next coat. Light sanding, cleaning, or touch-up may be needed depending on the product, condition of the paint, and manufacturer’s recoat instructions.

Does hard bottom paint build up over time?

Yes, hard bottom paint can build up after repeated applications because the coating does not wear away the same way ablative paint does. Over time, too many layers may require sanding or stripping before repainting.

Which bottom paint is better for a trailered boat?

Hard bottom paint is often a good choice for trailered boats because it is more durable and abrasion resistant. However, some ablative paints are designed to tolerate haul-out and relaunching, so it is important to check the specific product instructions.

Which bottom paint is better for a fast boat?

Hard bottom paint is often preferred for fast boats because it creates a durable surface and can be sanded smooth. Some ablative paints can work on moderately fast boats, but high-speed use should always be checked against the paint manufacturer’s recommendations.

Which bottom paint requires less maintenance?

Ablative bottom paint often requires less long-term maintenance because it gradually wears away and reduces paint buildup. Hard bottom paint can be durable and scrub-resistant, but it may require more sanding or removal after multiple seasons of recoating.

Recommended Bottom Paint Products and Supplies

Bottom Paint Store carries hard bottom paints, ablative bottom paints, multi-season antifouling paints, primers, barrier coats, paint removers, sandpaper, rollers, trays, solvents, and related application supplies. The right product depends on your boat speed, hull material, water conditions, maintenance routine, and whether your existing bottom paint is compatible with the new coating.

For most recreational boats that stay in the water, ablative bottom paint is often the easier long-term maintenance choice because it gradually wears away instead of building up layer after layer. Hard bottom paint may be better when a smooth, durable, scrub-resistant finish is more important.

Hard Bottom Paint vs Ablative Bottom Paint Comparison

Feature Hard Bottom Paint Ablative Bottom Paint
How It Works Forms a hard coating that releases biocide from the paint film. Slowly wears away to expose fresh antifouling protection.
Best For Fast boats, racing boats, trailered boats, and boats that are scrubbed often. Cruising boats, sailboats, powerboats, and boats kept in the water for extended periods.
Paint Buildup Can build up over time if old layers are not removed. Reduces buildup because the paint film gradually wears away.
Durability Very durable and more resistant to scrubbing and abrasion. Designed to wear away, so it is less scrub-resistant than hard paint.
Maintenance May require sanding or removal after repeated applications. Usually easier to recoat because old paint is gradually depleted.
Trailered Boats Often a good option because the coating is harder and more durable. Some ablative paints can be used on trailered boats, but product directions should be checked.
Hauling and Relaunching Some hard paints have launch-window limits after application. Many ablative paints are more flexible for seasonal haul-outs, depending on the product.
Performance Finish Can be sanded smooth for racing or speed-focused applications. Good for general boating, but not usually chosen when the smoothest racing finish is the priority.
Long-Term Use Can require more surface prep over time due to paint buildup. Often preferred for easier seasonal maintenance and reduced coating buildup.

Best Bottom Paint Choice by Boat Use

Boat Use Better Choice Why
Boat stays in the water all season Ablative bottom paint Provides ongoing protection as the paint wears away and exposes fresh biocide.
Boat is used frequently Ablative bottom paint Water movement helps the paint polish away and maintain antifouling performance.
Boat sits idle for long periods Hard or premium ablative bottom paint Some paints perform better than others when a boat is not moving often, so product selection matters.
Fast powerboat Hard bottom paint Hard paint is more durable at higher speeds and can be cleaned or sanded smooth.
Racing sailboat Hard bottom paint Can be burnished or sanded smooth for a faster racing finish.
Cruising sailboat Ablative bottom paint Usually easier to maintain and reduces heavy paint buildup over time.
Trailered boat Hard bottom paint or trailerable ablative paint Hard paint handles abrasion well, but some ablatives are also designed for haul-out and relaunch use.
Boat owner wants less annual sanding Ablative bottom paint Ablative paint helps reduce buildup, which can mean less sanding and stripping over time.
Bottom is scrubbed by a diver Hard bottom paint Hard coatings usually tolerate cleaning and scrubbing better than softer ablative paints.

What to Consider Before Choosing Hard or Ablative Bottom Paint

Before choosing between hard and ablative bottom paint, consider how often the boat is used, how fast it runs, whether it is kept in the water or trailered, how often the bottom is cleaned, and how much paint buildup is already on the hull. The best paint depends on the boat, the water conditions, and the maintenance routine.

If your boat stays in the water and you want easier seasonal maintenance, ablative bottom paint is often the better choice. If your boat is fast, frequently scrubbed, raced, or trailered, hard bottom paint may be the better fit. Always check the product instructions for compatibility, launch time, surface preparation, and whether the paint can be applied over your existing bottom paint.

Common Questions About Hard and Ablative Bottom Paint

What is hard bottom paint?

Hard bottom paint is an antifouling paint that dries to a firm, durable coating. It releases biocide from the paint film while maintaining a hard surface. It is often used on faster boats, racing boats, trailered boats, and hulls that are cleaned regularly.

What is ablative bottom paint?

Ablative bottom paint is an antifouling paint that slowly wears away as the boat moves through the water. As the surface wears, fresh biocide is exposed. This helps maintain antifouling protection and reduces heavy paint buildup over time.

Is hard bottom paint better than ablative bottom paint?

Hard bottom paint is not always better; it depends on the boat and how it is used. Hard paint is better for durability, speed, and scrubbing. Ablative paint is often better for easier maintenance, long-term buildup reduction, and boats kept in the water for extended periods.

Is ablative bottom paint better for recreational boats?

For many recreational boats, ablative bottom paint is a practical choice because it wears away gradually and reduces the need to remove heavy paint buildup later. It is especially useful for boats that remain in the water during the season.

Can you put ablative paint over hard bottom paint?

In many cases, ablative bottom paint can be applied over old hard bottom paint if the existing coating is sound, properly sanded, and compatible with the new paint. Always check the manufacturer’s compatibility chart before applying one bottom paint over another.

Can you put hard bottom paint over ablative paint?

Hard bottom paint should generally not be applied over soft or heavily worn ablative paint unless the old coating is removed or properly prepared according to the manufacturer’s instructions. A soft or unstable coating underneath can cause adhesion problems.

Does ablative bottom paint need to be sanded every year?

Ablative bottom paint may not require heavy sanding every year if the existing paint is still sound and compatible with the next coat. Light sanding, cleaning, or touch-up may be needed depending on the product, condition of the paint, and manufacturer’s recoat instructions.

Does hard bottom paint build up over time?

Yes, hard bottom paint can build up after repeated applications because the coating does not wear away the same way ablative paint does. Over time, too many layers may require sanding or stripping before repainting.

Which bottom paint is better for a trailered boat?

Hard bottom paint is often a good choice for trailered boats because it is more durable and abrasion resistant. However, some ablative paints are designed to tolerate haul-out and relaunching, so it is important to check the specific product instructions.

Which bottom paint is better for a fast boat?

Hard bottom paint is often preferred for fast boats because it creates a durable surface and can be sanded smooth. Some ablative paints can work on moderately fast boats, but high-speed use should always be checked against the paint manufacturer’s recommendations.

Which bottom paint requires less maintenance?

Ablative bottom paint often requires less long-term maintenance because it gradually wears away and reduces paint buildup. Hard bottom paint can be durable and scrub-resistant, but it may require more sanding or removal after multiple seasons of recoating.

Recommended Bottom Paint Products and Supplies

Bottom Paint Store carries hard bottom paints, ablative bottom paints, multi-season antifouling paints, primers, barrier coats, paint removers, sandpaper, rollers, trays, solvents, and related application supplies. The right product depends on your boat speed, hull material, water conditions, maintenance routine, and whether your existing bottom paint is compatible with the new coating.
Bottom paint is generally used to keep the growth off of the bottom of your boat. There are generally two types of bottom paint both of which have several variations that create a multitude of products in the market place. The two different types or categories of bottom paint include a hard bottom paint, and an ablative bottom paint.

Sharskin Hard Bottom PaintHard Bottom Paint is bottom paint that is a hard modified epoxy. After you apply a hard bottom paint it is very durable and does not wear off. Hard Bottom Paints ypically have a higher ratio of pesticides (usually copper)  in them that are exposed in the outer surface of the bottom paint coating. As time goes buy, the coating oxidizes and becomes less effective in combating marine growth. Hard bottom paint is generally used on boats when the boat sits for long periods of time without moving at all, or there is little movement of water (current/ tide) around the boat. You should not use a hard paint if you boat comes out of the water such as on a trailer, or a lift. After 72 hours, the hard bottom paint will oxidize on the outer surface from the air and becomes ineffective. If you are trailering your boat, or keep it on a lift you should always use an ablative bottom paint.

AF-33 Ablative Bottom PaintAblative bottom paint, also known as self- polishing bottom paint, is softer and allows the coating to wear off at a controlled rate. Much like a bar of soap, once the boat moves in the water or there is a current and or tide, the outer layer slowly wears away. The wearing away of the self-polishing bottom paint allows for new, un-oxidized paint to be exposed. Therefore, if you are trailering your boat, or it comes in and out of the water for any reason, the paint will oxidize within 72 hours. However, once placed back in service, that oxidized ablative paint wears away and exposes a new fresh outer coating with active protection. Ablative bottom paint is a newer technology then hard paint. It is the preferred bottom paint of most users since it typically lasts longer and continuously exposes a new active outer coating that protects against marine growth.

Related Articles and links:

Hard Bottom Paint

Ablative Bottom Paint

Applying Bottom Paint

Bottom Paint Cross Reference Guide

See the table below for a listing of most bottom paints and how they compare by the top manufacturers.
Bottom Paint Cross Reference Guide.

Top Performing Bottom Paints

sea hawk paints
interlux_paints Pettit Paints Blue Water Marine Paints
Biocop TF Micron 66 Odyssey HD
Islands 77 Plus Micron 77
Colorkote Micron Extra with Biolux* Odyssey Triton

Self Polishing / Ablative Bottom Paints

Sea Hawk  Interlux Pettit Blue Water
Biocop TF Micron 66 Odyssey HD
Islands 77 Plus Micron 77
Micron Extra with Biolux* Ultima SR40*
Cukote Micron CSC Ultima SSA Copper Shield 45 Ablative
Monterey Fiberglass Bottomkote Aqua Hydrocoat SR*
Hydrocoat
Hydrocoat Eco
AF-33 Micron CSC Horizons Copper Shield 25
ACT Ultima SR40*
Mission Bay Micron CF Vivid Shelter Island Plus
Mission Bay CSF Fiberglass Bottomkote Aqua
Fiberglass Bottomkote NT Seamate Copper Shield 25

Hard Modified Epoxy Bottom Paints

Sea Hawk  Interlux Pettit Blue Water
Tropikote Ultra-Kote Trinidad 75
Trindad HD
Ultra with Biolux* Trinidad SR*
Trindad Pro*
Sharkskin Trinidad HD
Talon Unepoxy HRT

Aluminum Safe Bottom Paints

Sea Hawk  Interlux Pettit Blue Water
Smart Solution Pacifica Plus Ultima Eco
Micron CF* Odyssey Triton
Mission Bay Trilux 33 Vivid Shelter Islands Plus
Colorkote

Water Based Bottom Paints

Sea Hawk  Interlux Pettit Blue Water
Monterey Fiberglass Bottomkote Aqua Hydrocoat SR*
Hydrocoat
Hydrocoat Eco
Mission Bay CSF

Outdrive Bottom Paints

Sea Hawk  Interlux Pettit Blue Water
Smart Solution Trilux 33 Aerosol Alumaspray Plus Aerosol

Bottom Paint Primers

Sea Hawk  Interlux Pettit Blue Water
Bottom Paint Primer Primocon Tie Coat Primer 6627 BarrierShield Primer
Islands Prime
Shawkocon
1266 Non-Sanding Primer YPA200 No-Sand Primer Skip Sand Primer 6998
Barnacle Blocker Aerosol Primocon Aerosol
High Build Epoxy Primers
Sea Hawk  Interlux Pettit Blue Water
Tuff Stuff Interprotect 2000E Pettit Protect Bottom Protect 70, Bottom Protect

Bottom Paint Cleaners

Sea Hawk  Interlux Pettit Blue Water
S-80  Wax ‘N Grease Killer 202  Fiberglass Solvent Wash Bottom Prep D-95 973 Dewaxer
S-90  De-Waxing Etch & Cleaner 202V  Low VOC Fiberglass Solvent Wash Bio-Blue 92

Bottom Paint Removers / Strippers

Sea Hawk  Interlux Pettit Blue Water
Marine Paint Stripper Interstrip 299E

Speciality

Sea Hawk  Interlux Pettit Blue Water
N/A VC-17M Extra* Black Widow Racing
1959 Hard Racing Copper Bronze
Biocop TF Pint Booster

These bottom paint comparisons are the best match-ups of antifoulant brands and types by manufacturers. This information is the sole opinion of www.BottomPaintStore.com. Please consult each manufacturer for more specific product information and comparisons. 

*These items are currently out of stock from the manufacturer and are considered to be on phase-out.   Availability is very limited. 

Can you use water-based bottom paint over a marine epoxy primer?

Epoxy paint is a latex acrylic substance that may have a small amount of epoxy in the mix and provide a tough, durable protective coating that’s effortless to maintain. Putting a water-based bottom paint  (WBP) over a solvent based primer can be done with some modified application procedures. You do NOT want to make the window, or hot coat the water based paint over the solvent based primer such as Tuff Stuff high build marine epoxy primer. If you do, it will mud crack. So instead of putting on the WBP over the Solvent Primer in the same day, you need to wait for the primer to totally cure. Then you have to sand it with 80 grit sandpaper before apply WBP. This is a lot of extra work and very difficult to sand = extremely hard surface. So the best thing to do when using a high build solvent based epoxy is to coat it with a solvent based paint. That way you skip the extra time and labor with sanding.

Tuff Stuff Marine Epoxy Primer

What is the Best Bottom Paint Money Can Buy?

Best Bottom Paint

Best Performing Bottom Paint

The best bottom paint for boats that money can buy may NOT be the most expensive. You should buy the bottom paint that works best in your area. That will depend on the temperature of the water, tide changes, the nutrients in the water that feed unwanted growth, and many other factors.

The best bottom paint for you will be the bottom paint that stops the growth and does not break your wallet. If you buy the best performing bottom for the harshest fouling conditions and the warmest waters you would need Sea Hawk Paints Biocop TF  or another Top Performing Bottom Paint. This provides you the absolute maximum protection against hard and soft growth on the bottom of your boat. This solution is recommended for high growth areas, or if you are trying to goes as long as you possibly can between bottom jobs. If you are in cooler climates or lower fouling conditions you would NOT need to spend the extra money on Sea Hawk Biocop TF. A better choice that is less expensive and will work in these conditions is Sea Hawk AF-33 or the equivalent.

ALUMINUM BOATS: The best bottom paint for an aluminum boat or pontoons is a copper free bottom paint. You cannot put the paints mentioned above (Copper-Based) on aluminum because they contain copper and will react like a battery causing pitting (holes) on aluminum. Therefore, we recommend an Aluminum Safe Bottom Paint. A good choice for aluminum is  Sea Hawk Colorkote, it is copper free triple biocide paint  safe for aluminum. If the aluminum has never been painted the best practice is to prime with high build epoxy primer like Sea Hawk Tuff Stuff to insure good adhesion and protect against corrosion. If you are painting a pontoon boat for the first time – try our Pontoon Bottom Paint Kit.

Premium Outdrive bottom paint kitThe best bottom paint for the outdrives is to brush on Smart Solution. (pint size).  If your outdrive has never been painted before, you can use Barnacle Blocker Primer for priming the area application of bottom paint. A great value for this is the Premium Outdrive Bottom Paint Kit. If there is already a bottom paint on your running gear, just scuff sand and paint! Another option is to try an aerosol spray bottom paint. These are easy to apply.

For outdrives a foul release agent may be the choice for you, see here.

Do You Need Bottom Paint Thinner?

Last Updated: February 3, 2026

Quick Recommendation

Should You Thin Bottom Paint?

  • Only thin if the manufacturer allows it: Check the technical data sheet—some bottom paints should not be thinned at all.
  • Most common reason: Thinning is typically used for spray application to improve atomization and flow.
  • Use the correct thinner: Always use the brand-recommended reducer and stay within the specified percentage.
  • Bottom line: Thinning can help application, but over-thinning reduces film build and antifouling performance.

Tip: If rolling or brushing, most bottom paints need little to no thinning—stir thoroughly and test before adding reducer.

Bottom Paint is formulated to apply via brush or rolller. Under these normal application methods, there is no need to thin bottom paint (reduce bottom paint).

Bottom Paint Reducer

Bottom Paint Thinner

There are reducers for bottom paint, but these are used for spray applications, extremely hot climates (90F+) or if you applying to wood. (bottom paint should always be reduced by 20% for the first coat of bottom paint on wood.)

When used for these applications, please follow the manufacturers’ guidelines. (typically thin bottom paint no more than 10% unless barewood (20%) per application)). Be sure to use the correct thinner for the bottom paint that you are using. Do not mix competitive brands.

Don’t waste your money on bottom paint reducer unless your application meets these conditions. Otherwise, you are just spending more money thinning your bottom paint and waiting for it to dry! Remember that bottom is not like house paint, thinning bottom paint means that you are actually spreading less bottom paint over the surface. Bottom paint needs to be thick enough to repel growth as the paint film wears away over time.

What Is Bottom Paint?

Last Updated: February 3, 2026

Quick Recommendation

Choosing the Right Bottom Paint

  • Use Ablative Bottom Paint if your boat is trailered, hauled seasonally, or you want a coating that self-polishes to reduce paint buildup.
  • Use Hard Bottom Paint if your boat stays in the water year-round, is frequently cleaned, or you want a tougher surface that can be burnished.
  • Match paint to water type: Freshwater and saltwater environments require different antifouling strength.
  • Bottom line: The best bottom paint depends on how the boat is used, where it’s kept, and the hull material.

Tip: Always confirm compatibility with your existing bottom paint and hull material before switching products.

What is bottom paint

What is Bottom Paint?

If you don’t know what bottom paint is, you are not alone. A boater that keeps his/her boat in the water for an extended period of time, must have bottom paint on the bottom of the hull to prevent growth (fouling) from occurring.

Bottom Paint also called antifouling paint, boat bottom paint, and anti-foul paint, is a special marine paint that is formulated with pesticides to keep those marine critters from growing on the bottom of the hull. Copper is most common pesticide used in bottom paints, and will prevent hard growth. Hard growth is considered mussels, barnacles, or any other crustacean that can attach to the bottom of the boat. Hard growth mostly occurs in warmer water and salt water. However, depending on your geographical location, hard growth will occur in fresh water and nutrient rich cool waters as well.

Some boat bottom paint also combine other pesticides (biocides) with copper to prevent soft growth. Soft growth refers to algae and grass.

What are some of the top performing bottom paints and what is the difference between them?

  • Biocop TF Self-Polishing Bottom Paint was developed as an alternative to tin-based antifouling paints to protect against the harshest marine environments.
  • Islands 44 TF™ By Sea Hawk Paints is an advanced tin-free self-polishing antifoulant that will keep your hull bottom smooth and free of organic growth over multiple cruising seasons.
  • Sea Hawk ColorKote Triple Biocide Antifouling is the next generation hull coating built with Sea Hawk DNA. Incorporating self-polishing, triple biocide, low-leaching chemistry, vibrant colors, and multi-season performance, this is more than an antifouling paint.
  • Islands 77 Plus Antifouling Paint is an alternative to tin-based antifouling paints to protect against the harshest marine environments. Using the newest biocide technology.
  • Pettit Odyssey is a multi-season antifouling combines controlled polishing ablative technology with a high copper content to provide a paint film strong enough to handle the tough marine environment from coast to coast.
  • Interlux Micron Extra provides excellent, long lasting antifouling protection against all types of fouling. Micron Extra includes Biolux, to control slime.
  • Micron 66 is a long lasting Self Polishing Copolymer with Biolux® formulated to provide a level of antifouling protection not previously available in any paint.
  • Blue Water Marine Copper Shield is a multi-season antifouling protection against barnacles, algae, and hydroids in salt and fresh water on boat bottoms only.
  • Aquagard® Waterbased Anti-Fouling Bottom Paint is formulated especially to prevent barnacles, algae, slime and other fouling organisms on vessels immersed in salt, brackish and fresh water. Nontoxic fumes, soap and water clean‐up.

Why do you need bottom paint? If you are going to keep your boat in the water for more than a couple of days, you will need some bottom paint!

Related Articles:

What is the difference between Hard Bottom Paint and Ablative Bottom Paint?

Do I Need a Reducer For Bottom Paint?

Last Updated: January 30, 2026

Quick Recommendation

Do You Need a Reducer for Bottom Paint?

  • Use reducer only if specified: Always follow the manufacturer’s technical data sheet—not all bottom paints should be reduced.
  • Most common use: Reducers are typically added for spray application to improve flow and atomization.
  • Do not over-reduce: Excess reducer can weaken antifouling performance and reduce film thickness.
  • Bottom line: Reducer can help with application, but using the wrong type or amount can compromise paint performance.

Tip: If rolling or brushing, most bottom paints require little to no reducer—stir thoroughly and test first.

Reducers help the paint to dry faster or slower, depending upon the reducer you use. There is a warm weather reducer that makes it dry slower, and a cool weather reducer that make it dry faster.

Generally speaking, reducers should only be used in extreme weather conditions, or to thin the paint for a spray application.

Here is the link to reducers for bottom paint.

How to Apply Bottom Paint Over Existing Bottom Paint

Last Updated: February 3, 2026

Quick Recommendation

Can You Apply Bottom Paint Over Existing Bottom Paint?

  • Yes—if it’s compatible: Apply the same type of bottom paint (ablative over ablative, hard over hard) unless a barrier primer is used.
  • Prep is essential: Pressure wash, remove loose or flaking paint, and scuff-sand to ensure proper adhesion.
  • Switching paint types? Use a tie-coat or epoxy primer before changing from hard to ablative (or vice versa).
  • Bottom line: Repainting over existing bottom paint is fine when the surface is sound, clean, and properly prepped.

Tip: If the old paint is heavily built up or failing, stripping back to a stable layer—or to bare hull—will produce the best long-term results.

Bottom Painting is not very technical, but you must have a clean surface to insure good adhesion.

Refer to the Sea Hawk Compatibility Chart to determine if your existing coating is compatible with Sea Hawk antifoulant paint choice. To insure that your bottom paint adheres to your existing coating, it is important to have a clean prepared surface and an existing coating that is in good condition.

Known Compatibility of Existing Bottom Paint:
Power wash (pressure wash) to remove any loose paint, dirt, grease, or any other surface contaminants.
Scuff sand with 80 grit sandpaper, or scuff with a 3M Scotch-Brite® 7447 pad scrubbing thoroughly. Remove all residue and let dry.
Apply minimum of two coats of antifoulant. Allow 3 to 6 hours between coats and a minimum overnight dry. See the specific Technical Data Sheet for antifoulant being used. Some antifoulants may require more than 2 coats.

Unknown Compatibility* of Existing Antifoulant:
Power wash (pressure wash) to remove any loose paint, dirt, grease, or any other surface contaminants.
Scuff sand with 80 grit sandpaper, or scuff with a 3M Scotch-Brite® 7447 pad scrubbing thoroughly. Remove all residue and let dry.
Apply 1 coat of Bottom Paint PrimersHAWKocon or 1283 Island Primer (see respective technical data sheet)
Apply minimum of two coats of antifoulant. Allow 3 to 6 hours between coats and a minimum overnight dry. See the specific Technical Data Sheet for antifoulant being used. Some antifoulants may require more than 2 coats.

Poor Condition of Existing Antifoulant:
If previous coating is cracking, flaking or peeling then strip antifoulant with Marine Paint Stripper, or by sanding or commercial blast. Refer to Bare Fiberglass Application Guidelines for new antifoulant application.

How To Apply Bottom Paint To Bare Fiberglass

Last Updated: January 30, 2026

Quick Recommendation

Can You Apply Bottom Paint to Bare Fiberglass?

  • Yes—but prime first: Bare fiberglass typically needs an epoxy primer or barrier coat to ensure adhesion and long-term protection.
  • Prep correctly: Clean, de-wax, and sand to the proper profile before applying any primer or bottom paint.
  • Choose the right bottom paint: Match the paint type (ablative vs hard) to your water conditions and boat usage.
  • Bottom line: Bottom paint can go over bare fiberglass, but skipping the correct primer system is a common cause of peeling and premature failure.

Tip: If your fiberglass has never been bottom-painted, a barrier coat system is often the best long-term foundation before antifouling paint.


The following steps should be taken to insure good adhesion of bottom paint to a fiberglass or gelcoated hull.

Premium Blister Protection and Adhesion System ** Best Paint Option

  • Sand and Clean: Sand to a uniformly frosty, dull looking surface with 80-100 grit (no finer) sandpaper, rewash with S-80 Wax N’ Grease Killer or S-90 De-Wax Etch & Cleaner.
  • Apply Primer: Seal the surface with 2-3 coats of Tuff Stuff, or other high build epoxy primer. For Tuff Stuff, apply the first coat of primer and allow the surface to dry to become tacky. Temperature and humidity affect the dry time, but you will know when to apply your next coat of primer once the paint film becomes “tacky”. You should be able to firmly press your thumb into the paint film and leave a thumbprint without any primer coming off the surface. You should use this method in between coats of primer and your first coat of antifouling paint. When applying over multiple days, it is always best to go overnight between coats of primer instead going overnight between the final coat of primer and the first coat of bottom paint. Additional information can be found on the Tuff Stuff Technical Data Sheets.
  • Apply Bottom Paint: Apply minimum of two coats of Sea Hawk bottom paint. Allow 3 to 6 hours between coats and a minimum overnight dry. See the specific Technical Data Sheet for antifoulant being used. Some antifoulants may require more than 2 coats.

Sanding System** Better Paint Option

  • Sand and Clean: Sand to a uniformly frosty, dull looking surface with 80-100 grit (no finer) sandpaper, remove any residue.
  • Apply Bottom Paint: Apply minimum of two coats of bottom paint. Allow 3 to 6 hours between coats and a minimum overnight dry. See the specific Technical Data Sheet for antifoulant being used. Some antifoulants may require more than 2 coats.

Simple No Sand System ** Good Paint Option

  • Apply Primer: Apply one thin coating of 1266 Non-Sanding Primer. This coating is applied at a maximum of 1-2 mils WFT. Excessive buildup can cause a lack of adhesion. Minimum dry time is 20 minutes with a maximum of one hour.
  • Apply Antifoulant: Apply minimum of two coats of Sea Hawk antifouling paint. Apply first coat of antifouling within 2 hours of applying primer. Apply 2nd coat of antifouling allowing 3 to 6 hours between coats and a minimum overnight dry.

Note: Do NOT use a copper based paint on metal running gear and parts. You should use a metal free bottom paint such as Sea Hawk Outdrive Paint, priming it with Tuff Stuff first.

If the boat is taken down to gelcoat, is primer needed when applying bottom paint?

TUFFSTUFFnewPrimer for bottom paint is not necessary. However, if you use Tuff Stuff marine epoxy primer on the bare fiberglass, it will provide protection against blisters and any moisture. It will also improve adhesion to the hull. Tuff Stuff marine epoxy primer will last for many years. It cannot be applied over paint, it must be applied on gel coat (bare fiberglass).  It only needs to be applied once, while bottom paint should be applied every season or two depending on your conditions.

If you decide to use Tuff Stuff, here is the link. You should apply at least two coats.

See Related Article> Application of a Marine Epoxy Primer

Application of Marine Epoxy Primer to a Boat

Last Updated: January 30, 2026

Quick Recommendation

Applying Marine Epoxy Primer: What Matters Most

  • Use epoxy primer when: You need maximum adhesion and corrosion protection on fiberglass, aluminum, or steel—especially before bottom paint or topcoats.
  • Prep to bare, clean substrate: Degrease, sand to the recommended profile, and remove all contaminants before priming.
  • Mix and apply correctly: Follow the exact mix ratio, observe induction time if required, and apply within the recoat window.
  • Bottom line: Epoxy primer performance depends on surface prep, precise mixing, and timing—shortcuts lead to adhesion failure.

Tip: If you miss the recoat window, lightly sand before topcoating to ensure proper mechanical adhesion.

Marine Epoxy systems on the bottom of bare fiberglass is the best way to protect your boat against blisters. It also provides added adhesion of the bottom paint to the hull. Here are the steps that you need to take for proper application of a marine epoxy primer (barrier coat system) to the bottom of a boat.

Preparation

Clean
When painting a bare fiberglass / gel coat hull for the first time, it is extremely important that all contaminants such as grease, oil, wax, salt, or other foreign material are completed removed prior to sanding or application of a Sea Hawk System. Scrub the surface with a detergent soap and stiff bristle brush.

Sea Hawk s-80 Wax N Grease KillerA. Clean and de-wax fiberglass hull with S-80 Wax N’ Grease Killer solvent based dewax. Saturate cheesecloth rag and wipe thoroughly to remove any cleaner and contaminants. Be sure to remove any residue before it dries and change rags frequently to insure contaminants are completely removed.

OR

Sea Hawk S-90 Low VOC De-Waxing Etch & CleanerB. Apply S-90 De-Wax Etch & Cleaner with a maroon 3M Scotch-Brite® pad scrubbing thoroughly. Do not allow cleaner to dry on the surface and remove by flushing with water.Rinse entire surface with water and check for any beading on the surface which will indicate that wax is still present. If necessary repeat step 2 again until the surface is contaminant-free. Choose your system below.

Sand and Clean
Sand to a uniformly frosty, dull looking surface with 80-100 grit (no finer) sandpaper, rewash with S-80 Wax N’ Grease Killer S-90 De-Wax Etch & Cleaner .

Apply Marine Epoxy Primer
TUFFSTUFFnewSeal the surface with 2-3 coats of Tuff Stuff Epoxy Primer. Apply the first coat of marine epoxy primer and allow the surface to dry to become tacky. Temperature and humidity affect the dry time, but you will know when to apply your next coat of marine epoxy primer once the paint film becomes “tacky”. You should be able to firmly press your thumb into the paint film and leave a thumbprint without any high build marine epoxy primer coming off the surface. You should use this method in between coats of marine epoxy primer and your first coat of bottom paint.

Tip: When applying marine epoxy primer over multiple days, it is always best to go overnight between coats of marine epoxy primer instead going overnight between the final coat of marine epoxy primer and the first coat of bottom paint. When over coating Tuff Stuff Epoxy Primer it is important to meet the required over coating times in order to achieve the best adhesion because temperature and humidity control dry times. It is hard to give exact times of cure. An easier rule in epoxies is when the coating is dry to the touch, yet still has some tack, it is ready to be over coated. However, if the coating is completely cured (after 24 hours) it needs to be thoroughly sanded with 80 grit sand paper to remove shine. If the marine epoxy primer is not sanded after full cure, bottom paint will not adhere.

Apply Bottom Paint to Marine Epoxy Primer
Apply minimum of two coats of  bottom paint. Allow 3 to 6 hours between coats and a minimum overnight dry. See the specific Technical Data Sheet for bottom paint being used. Some bottom paint may require more than 2 coats.