Author Archives: Marketing

Navigating the Seasons: A Comprehensive Guide to Bottom Paint Maintenance for Boats

Maintaining your boat’s bottom paint is crucial for ensuring its longevity and performance. The frequency and type of maintenance required can vary based on your boat’s location, the type of water it operates in, and the climate. Here’s a seasonal guide to boat bottom paint maintenance tailored to different climates and water types:

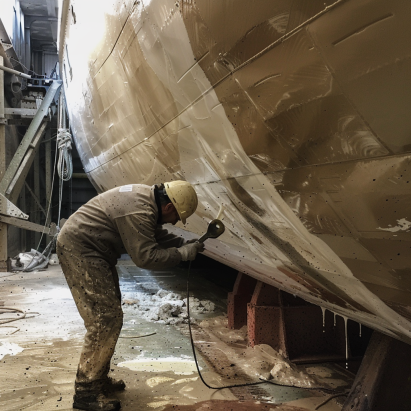
In spring, check for any signs of damage, such as peeling, blistering, or chipping. Look for marine growth, such as barnacles or algae, and remove them if necessary. If there are small areas with damage, sand them lightly and apply a fresh coat of bottom paint. If the bottom paint is significantly worn or damaged, consider applying a fresh coat of paint following the manufacturer’s instructions.

During the summer, clean the bottom of the boat regularly to prevent the buildup of marine growth. Use a soft brush or sponge and environmentally friendly cleaners to avoid damaging the paint. Also, check for any signs of wear or damage, especially after long periods of use.

In fall, if you’re in a colder climate, consider hauling out the boat before winter to protect it from freezing temperatures. Inspect the bottom paint for any signs of wear or damage that may have occurred during the summer months. If necessary, touch up any areas of the bottom paint that have been damaged or worn.

During winter, store the boat in a dry, protected area if possible, to prevent damage from freezing temperatures. If your boat is in the water during the winter, check the paint periodically for any signs of damage or wear.

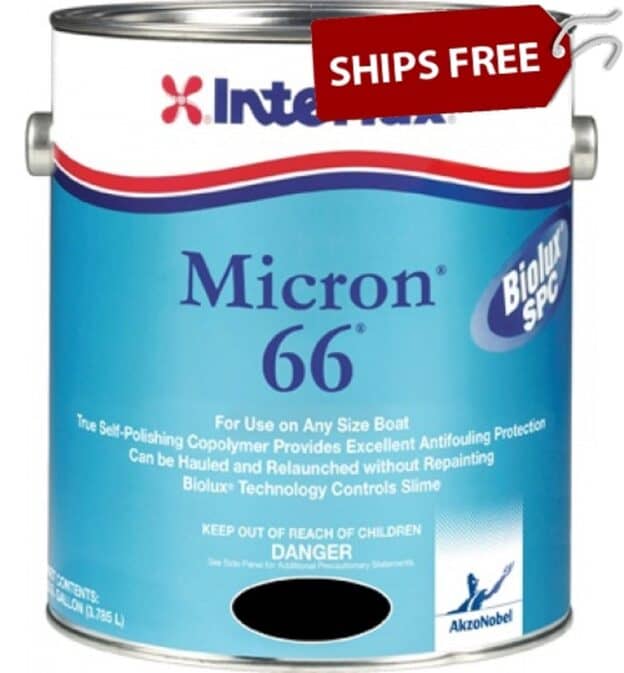
Talon is the top choice for a value-priced semi hard hybrid ablative marine bottom paint.

For different climates and water types, consider the following tips:

In warm water, marine growth tends to be more aggressive, so regular cleaning and inspection are essential. In colder climates, consider using a boat bottom paint that is specifically designed for cold water conditions. Saltwater can be more corrosive, so it’s important to choose a bottom paint that is suitable for saltwater use and to maintain it regularly. While freshwater is less corrosive than saltwater, it can still support marine growth, so regular cleaning and inspection are still necessary.

By following this seasonal guide and tailoring your maintenance routine to your boat’s location and the type of water it operates in, you can help ensure that your boat’s bottom paint remains effective, and your vessel stays protected.


What is the Best Resin for Boat Repair?

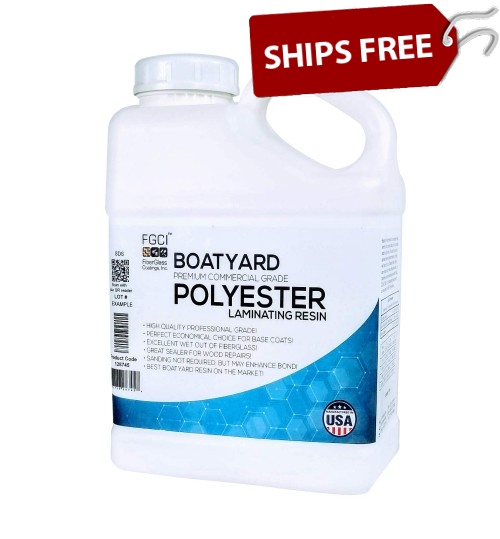
Boat repair often involves resin and selecting the right resin is a crucial element for strengthening repairs and ensuring their longevity. There are several types of resin used in boat repair, each with its own advantages and drawbacks. Polyester resin, a thermosetting resin that hardens when exposed to heat or a catalyst, is popular due to its affordability and ease of use. However, it may not be as strong or durable as other options and can be prone to cracking and shrinking over time.

What Resin Should You Use for Boat Repair?

For most fiberglass boat repairs, epoxy resin is often the best choice when strength, adhesion, and water resistance are the top priorities. Polyester resin is commonly used for gelcoat-compatible repairs and general fiberglass work, while vinylester resin offers strong water resistance and is often used as a middle ground between polyester and epoxy.

Quick Answer: What Is the Best Resin for Boat Repair?

Epoxy resin is often the best resin for boat repair when strength, adhesion, and water resistance are the top priorities. It bonds well to properly prepared fiberglass, wood, and many marine repair surfaces, making it a strong choice for structural repairs, below-waterline repairs, core repairs, and high-strength bonding.

Polyester resin is commonly used for general fiberglass repairs and gelcoat-compatible work, while vinylester resin is often used when better moisture resistance is needed than standard polyester resin provides. The best resin depends on the repair location, surface material, damage type, and final finish.

Best Resin Choice by Boat Repair Type

Boat Repair Type Best Resin Choice Why It Works
Structural fiberglass repair Epoxy resin Provides strong adhesion and high-strength bonding for damaged fiberglass areas.
Below-waterline repair Epoxy resin or vinylester resin Both are commonly used where water resistance and strong bonding are important.
Gelcoat-compatible repair Polyester resin Polyester resin is commonly used with traditional gelcoat systems.
Osmotic blister repair Epoxy resin or vinylester resin These resins are often chosen for moisture-prone fiberglass repairs.
Wood bonding or wood boat repair Epoxy resin Epoxy bonds well to wood and can help seal and reinforce wood repairs.
Small cosmetic fiberglass repair Polyester resin, gelcoat repair material, or epoxy filler The best option depends on whether the repair will be finished with gelcoat or paint.
Cost-conscious fiberglass work Polyester resin Polyester is widely used, economical, and suitable for many standard fiberglass repairs.
High-moisture fiberglass repair Vinylester resin Vinylester offers better water resistance than standard polyester and can be useful for underwater repair systems.

Epoxy vs Polyester vs Vinylester Resin for Boat Repair

Feature Epoxy Resin Polyester Resin Vinylester Resin
Best Use Structural repairs, bonding, wood repair, core repair, and below-waterline work General fiberglass repair, laminating, and gelcoat-compatible repairs Blister repair, underwater fiberglass work, and moisture-resistant repairs
Adhesion Excellent Moderate Good
Water Resistance Excellent Moderate Very good
Gelcoat Compatibility May require special preparation or compatible tie-coat before gelcoat Generally compatible with traditional gelcoat systems Often more gelcoat-compatible than epoxy, depending on the system
Ease of Use Good, but accurate measuring and mixing are important Good for many common fiberglass and gelcoat repairs Moderate; often used for more specific moisture-resistant repair needs
Cost Usually higher Usually lower Usually between polyester and epoxy
Best Overall Repair Resin Often the best choice for strength and adhesion Best for economical gelcoat-compatible fiberglass work Best middle-ground option for moisture resistance and fiberglass repair

When Epoxy Resin Is the Best Choice

Epoxy resin is usually the best choice when the repair needs maximum adhesion, strength, or water resistance. It is commonly used for structural fiberglass repairs, bonding hardware, repairing cores, sealing wood, reinforcing damaged areas, and many below-waterline repair projects.

Epoxy is especially useful when bonding to cured fiberglass or wood. However, if the repair will be finished with gelcoat, check the manufacturer’s instructions because gelcoat may not bond directly to epoxy without proper surface preparation or a compatible coating system.

When Polyester Resin Is the Best Choice

Polyester resin is a common choice for general fiberglass repair, laminating, and repairs that will be finished with gelcoat. It is widely used in fiberglass boatbuilding and is often more economical than epoxy resin.

Polyester resin can be a good fit for cosmetic fiberglass repairs, gelcoat-compatible repairs, and projects where matching a traditional fiberglass and gelcoat system is important. However, it usually does not bond as strongly to cured fiberglass as epoxy resin.

When Vinylester Resin Is the Best Choice

Vinylester resin is often used when improved water resistance is needed compared with standard polyester resin. It can be a good choice for blister repair, underwater fiberglass work, and repairs where moisture resistance is important.

Vinylester is often viewed as a middle ground between polyester and epoxy. It can provide better moisture resistance than polyester while still being useful in fiberglass laminating and certain gelcoat-related repair systems.

What to Consider Before Choosing Resin for Boat Repair

Before choosing a boat repair resin, identify whether the repair is cosmetic or structural, above or below the waterline, and whether the final finish will be gelcoat, primer, barrier coat, topside paint, or bottom paint. The best resin is the one that matches the repair, not simply the strongest or most expensive option.

You should also consider the existing material. Fiberglass, wood, old gelcoat, cured laminate, and previously painted surfaces may each require different preparation. Proper sanding, cleaning, measuring, mixing, and curing are just as important as choosing the resin itself.

Common Questions About the Best Resin for Boat Repair

Is epoxy resin the best resin for boat repair?

Epoxy resin is often the best choice for boat repair when strength, adhesion, and water resistance are most important. It is commonly used for structural repairs, wood repairs, core repairs, bonding, and many below-waterline applications.

Is polyester resin good for boat repair?

Yes, polyester resin is commonly used for fiberglass boat repair, especially when the repair will be finished with gelcoat. It is economical and widely used for laminating and general fiberglass work, but it usually does not bond as strongly to cured fiberglass as epoxy resin.

Is vinylester resin good for boat repair?

Yes, vinylester resin can be a good choice for boat repairs where improved moisture resistance is needed. It is often used for blister repair, below-waterline fiberglass work, and projects where better water resistance than standard polyester resin is desired.

What resin should I use below the waterline?

Epoxy resin or vinylester resin is often used for below-waterline repairs because both can provide strong bonding and improved moisture resistance. The repaired area may also need fairing, barrier coat, primer, or bottom paint depending on the project.

What resin should I use with gelcoat?

Polyester resin is commonly used with traditional gelcoat systems. Gelcoat may not bond directly over epoxy unless the surface is properly prepared and the products are compatible. If the repair must be gelcoated, check the product instructions before choosing the resin.

Can I use epoxy resin on a fiberglass boat?

Yes, epoxy resin is widely used on fiberglass boats. It bonds well to properly prepared fiberglass and is often chosen for structural repairs, reinforcement, bonding, and below-waterline repair work.

Can I use polyester resin over epoxy?

Polyester resin does not always bond well over cured epoxy. If you need to apply polyester resin, gelcoat, or another polyester-based product over epoxy, follow the manufacturer’s compatibility and surface preparation instructions carefully.

Do I need fiberglass cloth with resin?

Fiberglass cloth, mat, or tape is needed when the repair requires strength or reinforcement. Resin alone may seal or fill small areas, but holes, cracks, laminate damage, and structural repairs usually need fiberglass reinforcement.

What happens if resin is mixed incorrectly?

Incorrectly mixed resin may stay soft, cure too quickly, overheat, become brittle, or fail to bond properly. Always measure carefully, mix thoroughly, and follow the manufacturer’s recommended resin-to-hardener or catalyst ratio.

What is the easiest resin for DIY boat repair?

The easiest resin depends on the repair. Epoxy resin is often user-friendly for strong bonding and repairs when measured correctly. Polyester resin is common for gelcoat-compatible fiberglass work. For small repairs, a complete repair kit may be easier than buying separate resin, hardener, fillers, and reinforcement.

Recommended Resin Boat Repair Products and Supplies

Bottom Paint Store carries epoxy resin, polyester resin, vinylester resin, hardeners, MEKP catalyst, fiberglass cloth, fiberglass mat, fiberglass tape, marine fillers, fairing compounds, gelcoat repair products, primers, barrier coats, sandpaper, mixing cups, spreaders, brushes, gloves, and related fiberglass repair supplies. The right product depends on the repair size, surface material, repair location, and final coating system.

The right resin depends on the type of repair, the existing boat material, whether the repair is above or below the waterline, and how the surface will be finished. Small cosmetic repairs, structural fiberglass repairs, and below-waterline repairs may all require different resin systems.

Best Resin Choice by Boat Repair Type

Repair Type Recommended Resin Why It Works
General fiberglass repair Epoxy or polyester resin Both can be used for fiberglass work, but epoxy usually provides stronger adhesion while polyester is commonly used with gelcoat systems.
Below-waterline repairs Epoxy resin or vinylester resin These resins are often preferred where water resistance and strong bonding are important.
Small cracks, chips, and cosmetic damage Polyester resin, gelcoat repair material, or epoxy filler The best choice depends on whether the repair will be finished with gelcoat, paint, or another coating.
Structural fiberglass repairs Epoxy resin Epoxy is often chosen for high-strength bonding and reinforcing fiberglass cloth or fabric.
Gelcoat-compatible repairs Polyester resin Polyester resin is commonly used when the repair will be finished with traditional gelcoat.
Osmotic blister repair Epoxy or vinylester resin Both are commonly used in repair systems where moisture resistance is important.
Wood bonding or core repair Epoxy resin Epoxy bonds well to wood, fiberglass, and many repair surfaces when properly prepared.
Cost-conscious fiberglass work Polyester resin Polyester is typically more economical and widely used for many standard fiberglass repairs.

Epoxy vs Polyester vs Vinylester Resin

Resin Type Best For Considerations
Epoxy Resin Strong repairs, bonding, below-waterline work, wood repairs, fiberglass reinforcement, and structural applications Excellent adhesion and water resistance, but gelcoat may not bond directly without special preparation or compatible tie-coats.
Polyester Resin General fiberglass repair, gelcoat-compatible repairs, laminating, and cost-conscious projects Common and economical, but usually does not bond as strongly to cured fiberglass as epoxy.
Vinylester Resin Blister repair, underwater repairs, fiberglass laminating, and projects needing better water resistance than polyester Often considered a performance upgrade from polyester, but may be less commonly used by DIY boat owners than epoxy or polyester.

What to Consider Before Choosing Boat Repair Resin

Before choosing a resin, identify the repair location, surface material, depth of damage, and final finish. A repair above the waterline may have different requirements than a repair below the waterline. A cosmetic gelcoat repair may also require a different system than a structural fiberglass repair.

If the repair will be finished with gelcoat, polyester resin is often easier to match with traditional gelcoat systems. If the repair requires maximum adhesion, strength, or water resistance, epoxy resin is often the better choice. For blister repair or underwater fiberglass work, vinylester resin may also be worth considering.

Basic Resin Boat Repair Steps

Step What to Do Why It Matters
1. Inspect the damage Determine whether the damage is cosmetic, structural, above the waterline, or below the waterline. The location and severity of the damage determine which resin and repair method to use.
2. Remove loose or damaged material Grind, sand, or cut away cracked, loose, wet, or damaged fiberglass. Resin needs a stable, clean surface to bond properly.
3. Clean and dry the surface Remove wax, oil, dirt, salt, dust, moisture, and contaminants. Contamination can cause poor bonding or repair failure.
4. Choose the right resin and reinforcement Select epoxy, polyester, or vinylester resin and pair it with fiberglass cloth, mat, or filler as needed. The resin system must match the repair type and desired finish.
5. Mix according to directions Measure resin and hardener or catalyst carefully and mix thoroughly. Incorrect ratios can cause weak repairs, cure problems, or wasted material.
6. Apply resin and fiberglass Wet out fiberglass cloth or mat and build the repair in layers as needed. Proper wet-out and layering help restore strength to the damaged area.
7. Allow the repair to cure Let the resin cure fully according to the product instructions. Sanding, fairing, or coating too soon can weaken the repair or create finish problems.
8. Sand, fair, and finish Sand the repair smooth, fair the surface, and finish with gelcoat, primer, paint, barrier coat, or bottom paint as needed. The finish protects the repair and helps it blend into the surrounding surface.

Best Resin for Boat Repair Selection Checklist

  • Identify whether the repair is cosmetic or structural
  • Confirm whether the repair is above or below the waterline
  • Determine whether the final finish will be gelcoat, paint, barrier coat, or bottom paint
  • Choose epoxy resin for strong adhesion, wood bonding, and high-strength repairs
  • Choose polyester resin for many traditional fiberglass and gelcoat-compatible repairs
  • Choose vinylester resin when improved moisture resistance is important
  • Use fiberglass cloth, mat, or tape when reinforcement is needed
  • Measure resin, hardener, or catalyst carefully
  • Allow the resin to fully cure before sanding, fairing, coating, or launching

Common Questions About Resin for Boat Repair

What is the best resin for fiberglass boat repair?

Epoxy resin is often the best choice when strength, adhesion, and water resistance are most important. Polyester resin is commonly used for general fiberglass repairs and gelcoat-compatible work. Vinylester resin is often used when better water resistance is needed than standard polyester resin provides.

Can I use epoxy resin on a fiberglass boat?

Yes, epoxy resin is widely used for fiberglass boat repairs. It bonds well to properly prepared fiberglass and is often used for structural repairs, below-waterline repairs, core repairs, and high-strength bonding applications.

Can I use polyester resin for boat repair?

Yes, polyester resin is commonly used for fiberglass boat repair, especially when the repair will be finished with gelcoat. It is economical and widely used for laminating and general fiberglass work, but it may not bond as strongly to cured fiberglass as epoxy resin.

What is the difference between epoxy and polyester resin?

Epoxy resin generally provides stronger adhesion and better water resistance, making it a strong choice for demanding repairs. Polyester resin is more economical and commonly used in traditional fiberglass and gelcoat systems. The better choice depends on the repair type and final finish.

Can you put gelcoat over epoxy resin?

Gelcoat does not always bond well directly over cured epoxy unless the surface is prepared correctly and the products are compatible. If the repair will be finished with gelcoat, check the manufacturer’s instructions or consider using a resin system designed for gelcoat compatibility.

Is vinylester resin better than polyester resin?

Vinylester resin usually offers better water resistance and performance than standard polyester resin. It is often used for blister repair, underwater repairs, and projects where moisture resistance is important. Polyester resin may still be suitable for many general fiberglass repairs.

Do I need fiberglass cloth with resin?

You need fiberglass cloth, mat, or fabric when the repair requires strength or reinforcement. Resin alone can seal or fill certain small areas, but fiberglass reinforcement is usually needed for holes, cracks, structural damage, or laminate repairs.

How long does boat repair resin take to cure?

Cure time depends on the resin type, temperature, humidity, hardener or catalyst ratio, and thickness of the repair. Always follow the manufacturer’s directions before sanding, fairing, painting, applying gelcoat, or launching the boat.

Can resin be used below the waterline?

Yes, resin can be used for below-waterline repairs when the correct resin system is selected and the repair is sealed and finished properly. Epoxy and vinylester systems are commonly considered for moisture-prone repairs, followed by the proper barrier coat or bottom paint system when needed.

What happens if resin is mixed incorrectly?

Incorrectly mixed resin may cure too slowly, remain soft or sticky, become brittle, overheat, or fail to bond properly. Measure carefully, mix thoroughly, and follow the product’s recommended ratio and working time.

Recommended Resin Boat Repair Products and Supplies

Bottom Paint Store carries epoxy resin, polyester resin, vinylester resin, fiberglass cloth, fiberglass mat, hardeners, MEKP catalyst, fillers, fairing compounds, gelcoat repair products, primers, barrier coats, bottom paints, sandpaper, mixing supplies, and application tools for fiberglass boat repair. The right product depends on the repair size, location, surface material, and final coating system.

Vinyl ester resin is a step up in terms of strength and durability. It offers better resistance to moisture and chemicals, making it suitable for boats exposed to harsh marine environments. Although more expensive than polyester resin, vinyl ester resin provides a longer-lasting repair. Epoxy resin is considered the best option for boat repair due to its exceptional strength, durability, and adhesive properties. It forms a strong bond with fiberglass and other materials, making it ideal for high-stress areas of the boat. Epoxy resin is also highly resistant to moisture and chemicals, providing long-lasting protection against water intrusion and osmotic blistering.

When choosing a resin for boat repair, it is essential to consider the specific requirements of the repair and the desired performance characteristics. Polyester resin is suitable for small repairs and projects where cost is a significant factor. Vinyl ester resin offers better performance and durability, making it suitable for more extensive repairs or boats exposed to harsh environments. Epoxy resin is the premium choice for boat repair, providing unmatched strength and longevity.


Resin Boat Repair Supply Checklist

  • Epoxy, polyester, or vinylester resin
  • Hardener or MEKP catalyst, depending on the resin system
  • Fiberglass cloth, mat, or tape
  • Marine filler or fairing compound
  • Surface cleaner or dewaxer
  • Sandpaper and sanding blocks
  • Mixing cups, stir sticks, spreaders, and disposable brushes
  • Gloves, eye protection, and proper ventilation
  • Gelcoat, primer, barrier coat, topside paint, or bottom paint for finishing

The best resin for boat repair depends on your specific needs and the outcome you are looking for. Polyester resin is affordable and is easy to use. Vinyl ester resin offers better resistance to moisture and chemicals however it is more expensive. Epoxy resin is the top choice for boat repair, providing exceptional strength, durability, and adhesive properties. By understanding the characteristics of each resin type, boat owners can make informed decisions to ensure their repairs are strong, durable, and long-lasting. If you need any assistance selecting the right resin for your boat feel free to contact the our customer service team 888-505-2313.

What Kind of Resin is Used for Boats?

Resin is a critical component in the construction of boats, providing the necessary strength, durability, and protection against the elements. There are several types of resin used in boat building, each with its own unique properties and advantages. The three main types of resin commonly used in boat construction are polyester resin, vinyl ester resin, and epoxy resin.

What Kind of Resin Is Used for Boats?

The most common resins used for boats are epoxy resin, polyester resin, and vinylester resin. Epoxy resin is often chosen for strong repairs, bonding, wood sealing, and below-waterline work. Polyester resin is widely used in fiberglass boatbuilding and gelcoat-compatible repairs. Vinylester resin is often used when better water resistance is needed than standard polyester resin provides.

The best resin for your boat depends on the repair type, boat material, location of the repair, and final finish. A small cosmetic gelcoat repair may use polyester-based materials, while a structural fiberglass repair or below-waterline repair may call for epoxy or vinylester resin.

Boat Resin Types Comparison

Resin Type Best Used For What to Consider
Epoxy Resin Structural repairs, bonding, wood sealing, core repairs, fiberglass reinforcement, and below-waterline repairs Offers excellent adhesion and water resistance, but gelcoat may not bond directly unless the surface is prepared correctly or a compatible system is used.
Polyester Resin General fiberglass repairs, laminating, boatbuilding, and gelcoat-compatible repairs Common, economical, and widely used with gelcoat, but usually does not bond as strongly to cured fiberglass as epoxy resin.
Vinylester Resin Blister repair, below-waterline fiberglass work, and projects needing better moisture resistance than polyester Often considered a performance upgrade from polyester, with better water resistance, but may be less familiar to some DIY boat owners.
Gelcoat Resin Systems Cosmetic fiberglass repairs, chips, scratches, gouges, and final surface restoration Used to repair or restore the outer finish on many fiberglass boats, but it is not the same as structural laminating resin.

Best Resin Choice by Boat Project

Boat Project Recommended Resin Why
Fiberglass hull repair Epoxy, polyester, or vinylester resin The best choice depends on whether the repair is structural, cosmetic, above the waterline, or below the waterline.
Structural fiberglass repair Epoxy resin Epoxy is often chosen when strong adhesion and high-strength bonding are important.
Gelcoat repair Polyester-based gelcoat or gelcoat repair material Traditional gelcoat systems are commonly polyester-based and are used to match the original fiberglass finish.
Below-waterline repair Epoxy or vinylester resin These are often preferred where moisture resistance and strong bonding are important.
Osmotic blister repair Epoxy or vinylester resin Both are commonly considered for moisture-prone repairs and underwater fiberglass work.
Wood boat repair or wood bonding Epoxy resin Epoxy bonds well to wood and can help seal and reinforce wood repair areas.
Fiberglass laminating Polyester, vinylester, or epoxy resin The right choice depends on strength requirements, cost, compatibility, and whether gelcoat will be used.
Cost-conscious fiberglass repair Polyester resin Polyester resin is often more economical and widely used for standard fiberglass work.

Epoxy vs Polyester vs Vinylester Resin for Boats

Feature Epoxy Resin Polyester Resin Vinylester Resin
Adhesion Excellent Moderate Good
Water Resistance Excellent Moderate Very good
Common Marine Use Repairs, bonding, sealing, structural work, and below-waterline applications Fiberglass laminating, boatbuilding, and gelcoat-compatible repairs Blister repair, laminating, and moisture-resistant fiberglass work
Gelcoat Compatibility May require special preparation or compatible tie-coat Generally compatible with traditional gelcoat systems Often more gelcoat-compatible than epoxy, depending on the system
Ease for DIY Repairs Good, but measuring and mixing must be accurate Good for common fiberglass and gelcoat-related repairs Moderate; often used for more specific repair needs
Cost Usually higher Usually lower Usually between polyester and epoxy
Best Overall Strength Often the strongest choice for bonding and repair Good for general laminating, but usually less adhesive than epoxy Stronger and more water-resistant than standard polyester in many applications

What to Consider Before Choosing Boat Resin

Before choosing resin for a boat project, identify the surface material, repair location, type of damage, and final coating. A cosmetic gelcoat repair, a fiberglass laminate repair, a wood bonding project, and a below-waterline repair may all require different resin systems.

Compatibility is especially important. If the repair will be finished with gelcoat, polyester resin may be the easiest fit. If the repair requires maximum strength or water resistance, epoxy resin may be the better option. If the repair involves blistering or underwater fiberglass work, vinylester resin may also be worth considering.

Common Questions About Resin for Boats

What resin is best for boat repair?

Epoxy resin is often the best choice for strong boat repairs because it bonds well to fiberglass, wood, and many properly prepared surfaces. Polyester resin is commonly used for gelcoat-compatible repairs, while vinylester resin is often chosen for improved water resistance.

What resin is used to build fiberglass boats?

Many fiberglass boats are built with polyester resin or vinylester resin, depending on the manufacturer, performance requirements, and budget. Epoxy resin is also used in some high-performance, wood-epoxy, and specialty boatbuilding applications.

Is epoxy resin better than polyester resin for boats?

Epoxy resin usually provides stronger adhesion and better water resistance than polyester resin. Polyester resin is more economical and commonly used with traditional fiberglass and gelcoat systems. The better choice depends on whether strength, cost, compatibility, or finish is most important.

Can I use polyester resin on a boat?

Yes, polyester resin is commonly used on boats for fiberglass laminating, general repairs, and gelcoat-compatible work. It is widely used and cost-effective, but it may not bond as strongly to cured fiberglass as epoxy resin.

Can I use epoxy resin on a boat?

Yes, epoxy resin is widely used for boat repair, bonding, sealing, fiberglass reinforcement, wood repairs, and below-waterline work. It is a strong choice when adhesion and water resistance are priorities.

Can you put gelcoat over epoxy resin?

Gelcoat may not bond well directly over cured epoxy unless the epoxy is fully cured, properly sanded, cleaned, and compatible with the gelcoat system. If the final finish will be gelcoat, check the manufacturer’s instructions before choosing epoxy.

What is vinylester resin used for on boats?

Vinylester resin is often used for blister repair, fiberglass laminating, and below-waterline repairs where better water resistance is desired than standard polyester resin provides. It can be a useful middle ground between polyester and epoxy.

Do I need fiberglass cloth with resin?

Fiberglass cloth, mat, or tape is needed when the repair requires strength or reinforcement. Resin alone may seal or fill small areas, but structural repairs, holes, cracks, and laminate repairs usually need fiberglass reinforcement.

What happens if boat resin is mixed wrong?

Incorrectly mixed resin may stay soft, cure too quickly, overheat, become brittle, or fail to bond properly. Always measure carefully, mix thoroughly, and follow the manufacturer’s ratio, working time, and temperature recommendations.

Which resin should I use below the waterline?

Epoxy resin and vinylester resin are often considered for below-waterline repairs because they offer strong bonding and improved moisture resistance. The repair may also need fairing, barrier coat, primer, or bottom paint depending on the project.

Recommended Boat Resin Products and Supplies

Bottom Paint Store carries epoxy resin, polyester resin, vinylester resin, hardeners, MEKP catalyst, fiberglass cloth, fiberglass mat, fiberglass tape, fillers, fairing compounds, gelcoat repair products, primers, barrier coats, sandpaper, mixing supplies, and application tools. The right product depends on the repair type, surface material, location, and final finish.

Polyester resin is one of the most commonly used resins in boat building due to its affordability and ease of use. It is a thermosetting resin that hardens when exposed to heat or a catalyst. Polyester resin is often used in conjunction with fiberglass fabric to create a strong and lightweight composite material. It is suitable for a wide range of boat applications, from small recreational boats to larger vessels.

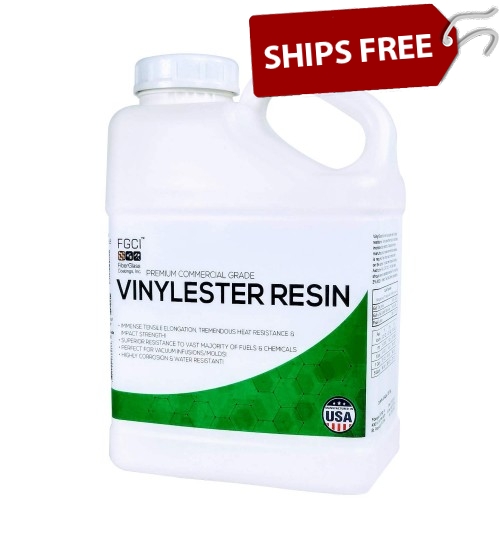
Vinyl ester resin is a step up from polyester resin in terms of performance. It offers better resistance to moisture and chemicals, making it ideal for use in harsh marine environments. Vinyl ester resin is also more flexible, which helps prevent cracking and delamination. This type of resin is often used in high-performance boats or in areas of the boat that are more prone to moisture exposure.Vinylester Resin, Gallon

Epoxy resin is considered the premium choice for boat construction due to its superior strength, durability, and adhesive properties. Epoxy resin is a two-part system consisting of a resin and a hardener, which are mixed together in the correct ratio to initiate the curing process. Epoxy resin forms a strong bond with fiberglass and other materials, making it ideal for high-stress areas of the boat. It is also highly resistant to moisture and chemicals, offering superior protection against water intrusion and osmotic blistering.

When choosing a resin for boat construction, it is essential to consider the specific requirements of the boat and the desired performance characteristics. Polyester resin is a cost-effective option that is suitable for a wide range of applications. Vinyl ester resin offers better performance in harsh marine environments but is more expensive than polyester resin. Epoxy resin is the premium choice for boat owners seeking the highest level of performance and durability.

The type of resin used in boat construction plays a significant role in determining the strength, durability, and overall performance of the vessel. Polyester resin is a popular choice for its affordability and ease of use, while vinyl ester resin offers better resistance to moisture and chemicals. Epoxy resin stands out as the premium choice, providing unmatched strength and durability. By understanding the characteristics of each type of resin, boat builders and owners can make informed decisions to ensure their vessels are built to last.

Link

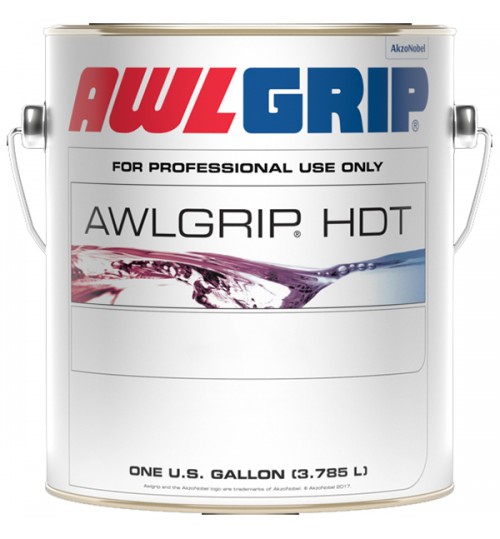
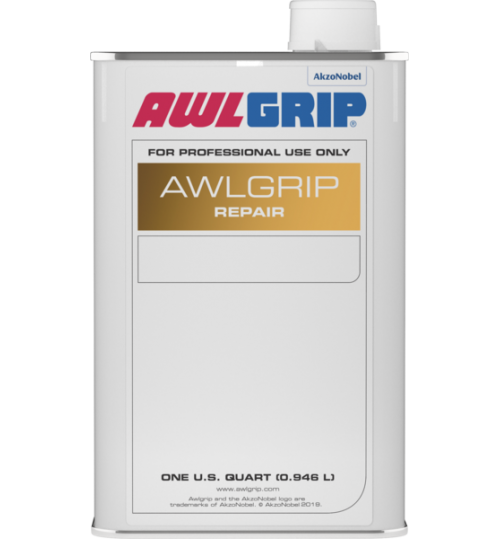
Awlgrip is a popular choice for boat owners looking to protect and beautify their vessels. However, achieving a flawless finish with Awlgrip requires attention to detail and the right techniques. In this guide, we’ll cover the essential steps and tips for applying to ensure professional results. see the full : Awlgrip Application Guide


To begin, preparation is key. Start by cleaning the surface thoroughly to remove any dirt, grease, or contaminants. Use a suitable cleaner for this purpose. Once the surface is clean, sand it using sandpaper to create a rough surface. This rough surface will promote better adhesion of the paint. Start with a coarse grit sandpaper and finish with a fine grit for a smooth.

After preparing the surface, the next step is priming. It’s crucial to choose the right primer for your project. Select a primer that is compatible with the substrate and topcoat requirements. Follow the manufacturer’s instructions for mixing and application of the primer. Using a spray gun for this step will yield the best results.

Once the surface is primed, you can begin applying the Awlgrip paint. Start by thoroughly mixing the paint and activator according to the manufacturer’s instructions. Use a high-quality spray gun and adjust the air pressure for optimal atomization. Apply the paint in thin, even coats, overlapping each pass slightly. Allow each coat to flash off according to recommended recoat times to avoid runs and sags.

After applying the paint, there are some finishing touches to consider. Lightly sanding between coats with a fine-grit sandpaper will promote adhesion between layers. Finally, apply the final coat of Awlgrip and allow it to cure fully according to the manufacturer’s instructions.

To ensure success with your Awlgrip application, follow these additional tips: pay attention to temperature and humidity conditions, ensure proper ventilation during application, wear appropriate protective gear, and clean up equipment and spills promptly with recommended solvents.

If you have any questions about choosing the right Awlgrip paint for your needs feel free to reach out to our technical support team. You can reach them via Live Chat or by calling 800.505.2313 Monday through Friday 9am-5pm EST.

A Guide to Choosing Marine Paint

Marine paint is specially formulated paint designed for use on boats and other marine vessels. It provides a protective barrier between the boat’s hull and the water, helping to prevent corrosion, osmosis, and the growth of marine organisms such as barnacles and algae. It is also designed to withstand the harsh marine environment, including exposure to saltwater, UV radiation, and abrasion.

The lifespan of marine paint can vary depending on factors such as the type of paint, the conditions in which the boat is used, and the level of maintenance. Generally, marine paint can last anywhere from 3 to 7 years or more.

Using marine paint offers several benefits, including protection against corrosion, osmosis, and marine growth. It also helps improve the appearance of your boat and can increase its resale value.

Marine paint can typically be applied over existing paint, but it’s important to properly prepare the surface to ensure good adhesion. This may involve cleaning, sanding, and applying a primer before painting.

When choosing marine paint, consider factors such as the type of surface you are painting, the conditions in which the boat will be used, and your budget. It’s also important to choose a paint that is compatible with any existing coatings.

Many marine paints are now formulated to be environmentally friendly, with low VOC (volatile organic compound) content and biocide-free options. Look for paints that are labeled as friendly or environmentally safe.


Maintaining and cleaning marine paint is essential for prolonging its life and protecting your boat. Regular cleaning with a mild detergent and water, along with periodic waxing and polishing, can help keep your marine paint looking its best.

Overall, marine paint plays a crucial role in protecting and maintaining your boat.  It is formulated to meet the unique challenges posed by the marine environment, providing long-lasting protection and performance for boats, ships, docks, and other marine structures. By understanding the different types of marine paint and how to choose and maintain them, you can ensure that your boat remains in top condition for years to come. I you need any assistance selecting the right marine paint for your needs please contact the Bottom Paint Store customer service team 888.505.2313.

A Guide to Ablative Paint

Ablative paint, also known as self-polishing antifouling paint, is a specialized marine coating designed to protect boat hulls from the growth of marine organisms such as barnacles, algae, and mollusks. Unlike traditional paints that form a hard barrier, ablative paint works through a process called “ablative action,” where the outer layer gradually wears away, releasing biocides that deter marine growth. This continuous wearing away of the paint helps to prevent the buildup of marine organisms on the hull.

The lifespan of ablative paint can vary depending on factors such as water conditions, boat usage, and the specific paint formula. Generally, ablative paint lasts one to three seasons before needing reapplication.

One of the key benefits of using ablative paint is its effectiveness at preventing marine growth, which can improve boat performance and fuel efficiency. Additionally, ablative paint is relatively easy to apply and maintain, as it does not require sanding between coats. This makes it a convenient choice for boat owners looking for an effective antifouling solution.


Ablative paint can typically be applied over other types of paint after proper surface preparation. It’s important to follow the manufacturer’s instructions for compatibility and preparation. Application of ablative paint involves cleaning and preparing the hull surface, applying the paint evenly, and allowing it to dry before launching the boat.

Many ablative paints are formulated to be environmentally friendly, but it’s important to check the product specifications and use guidelines to ensure proper handling and disposal. Ablative paint can be used in freshwater, but its effectiveness may vary compared to use in saltwater due to differences in marine growth and environmental conditions.

There are two main types of ablative paints: self-polishing and non-polishing. Self-polishing ablative paints wear away gradually, releasing biocides and polishing the surface to maintain effectiveness. Non-polishing ablative paints rely on the leaching of biocides without significant surface polishing.

To choose the right ablative paint for your boat, consider factors such as the type of water you will be boating in (saltwater or freshwater), the speed and frequency of use of your boat, and the specific antifouling needs based on the local marine environment. Following manufacturer recommendations for application and maintenance is crucial to ensure optimal performance of the ablative paint. If you need any help selecting the right ablative paint for your boat just give us a call 888.505.2313 M-Fri 9am – 5pm EST.

Awlgrip Paint: Frequently Asked Questions Answered

In this guide to awlgrip paint, we’ll address some of the most frequently asked questions we get every day, (well Monday to Friday to be exact), about Awlgrip Marine paint. We hope this can help you make an informed decision and achieve the results you want.

1. What is Awlgrip paint?
Awlgrip is a high-performance marine coating renowned for its durability, gloss retention, and superior finish. It is specially formulated for use on boats and yachts, providing excellent protection against harsh marine environments.

2. How do I apply Awlgrip paint?
Like all painting projects, proper surface preparation is key to successful application. Start by thoroughly cleaning and sanding the surface, then apply the paint using spraying, rolling, or brushing. Depending on which Awlgrip paint you are using you will want to follow the Awlgrip Marine’s instructions regarding thinning ratios and application temperature for best results.

3. Is Awlgrip paint suitable for my boat?
Awlgrip paint is compatible with a wide range of boat materials, including fiberglass, aluminum, steel, and wood. Whether you have a sailboat, powerboat, or yacht, Awlgrip paint can be an excellent paint in providing the protection and aesthetic appeal your vessel deserves.

4. What are the advantages of using Awlgrip paint?
Awlgrip paint offers numerous benefits, including exceptional durability, UV resistance, chemical resistance, and long-lasting gloss retention. It provides superior protection against fading, chalking, and abrasion, ensuring your boat looks pristine for years to come.

5. How long does Awlgrip paint take to dry/cure?
Awlgrip typically dries to the touch within a few hours and fully cures within 24 to 48 hours, depending on environmental conditions such as temperature and humidity. Proper curing is essential for optimal performance and durability.

6. Can Awlgrip paint be applied over existing coatings?
In most cases, it can be applied over properly prepared existing coatings. However, it’s essential to ensure good adhesion by thoroughly cleaning and sanding the surface and using compatible primers if necessary.

7. How do I maintain Awlgrip paint?
Regular maintenance is key to preserving the beauty and integrity of Awlgrip paint. Clean the surface regularly with mild soap and water, avoid harsh chemicals and abrasive cleaners, and apply a quality wax or polish to protect the finish from UV damage and oxidation.

8. Is Awlgrip paint toxic?
While Awlgrip paint contains solvents and other chemicals, proper ventilation and safety precautions can minimize exposure to harmful fumes. Always wear appropriate personal protective equipment and work in a well-ventilated area.

9. Can Awlgrip paint be used below the waterline?
Awlgrip paint is not typically recommended for below-the-waterline applications, as it may not provide sufficient protection against osmosis and marine growth.

10. How can I achieve a specific finish with Awlgrip paint?
Whether you’re aiming for a high-gloss, matte, or metallic finish, Awlgrip paint offers versatility and customization options. Experiment with additives, sanding techniques, and topcoat options to achieve the perfect finish for your boat.

These are most of the frequently asked questions we receive. Now you’re equipped to embark on your Awlgrip painting project with confidence. As we field more questions we’ll update this post. Remember to prioritize proper surface preparation, follow manufacturer guidelines, and invest in quality materials for outstanding results that will have your vessel standing out in the water.

If you have any questions feel free to contact the Bottom Paint Store technical support team 800.555.2313.

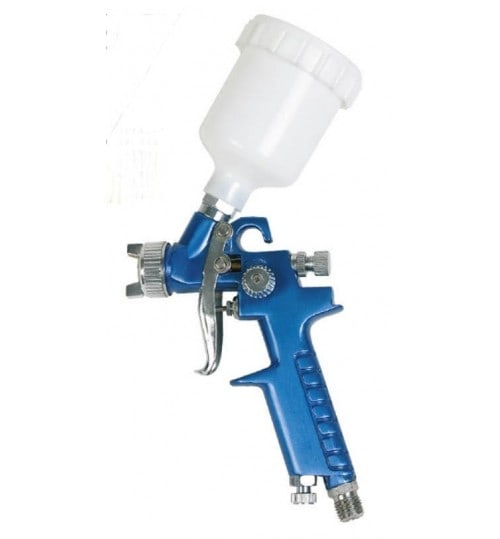
A Comprehensive Guide to Gel Coat Spray Guns

We get asked a lot of questions about applying gel coat so we thought we would offer this guide as a way to help you understand one of the best methods, gel coat spray guns. Gel coat spray guns are invaluable tools for achieving professional finishes in gel coating projects. Whether you’re a seasoned pro or a DIY enthusiast, understanding how these spray guns work and how to choose the right one can make a significant difference in your project’s outcome. In this guide, we’ll cover everything you need to know about gel coat spray guns, from their types and benefits to safety precautions and maintenance tips.

What is a Gel Coat Spray Gun?

Let’s start off by explaining that a gel coat spray gun is a specialized tool designed for applying gel coat, a type of resinous material, onto surfaces to create a smooth and durable finish. These guns atomize the gel coat, breaking it down into tiny droplets that are then sprayed evenly onto the surface, ensuring an even coating.


Types of Gel Coat Spray Guns

There are two main types of gel coat spray guns: conventional and HVLP (High Volume Low Pressure). Conventional spray guns use high pressure to atomize the gel coat, while HVLP guns use lower pressure, resulting in less overspray and a more efficient use of material.

Benefits of Using a Gel Coat Spray Gun

Gel coat spray guns allow for quick and efficient application, saving time and effort. The atomized spray creates a smooth and uniform coating, reducing the need for sanding and polishing. They also use less material compared to traditional methods, saving money in the long run.

Choosing the Right Gel Coat Spray Gun

When deciding which one is right for you, consider the size of your project, the type of gel coat you’re using, and your budget. It’s also important to choose one that is compatible with your compressor and other equipment.

Safety Precautions

Always wear protective gear, such as a respirator, goggles, and gloves, to protect yourself from fumes and overspray. Work in a well-ventilated area and follow the manufacturer’s instructions for proper use.

Using a Gel Coat Spray Gun

We’re often asked if it is difficult to use a gel coat spray gun. It really depends, it can be challenging for beginners, but with practice and proper technique, it becomes easier over time. Here are a few factors that can affect the difficulty level:

  • Skill level: If you’re new to spray painting or using spray guns in general, there will be a learning curve. Familiarizing yourself with the equipment and practicing on scrap materials can help improve your skills.
  • Adjusting settings: Gel coat spray guns typically have adjustable settings for things like air pressure, fluid flow, and fan pattern. Learning how to properly adjust these settings for your specific project and materials is crucial for achieving desired results. Again, practice before applying on your boat. You’ll be glad you did.


Cleaning and Maintenance

To keep your gel coat spray gun in good condition, clean it thoroughly after each use. Use a solvent recommended by the manufacturer to remove any gel coat residue. Regularly inspect the gun for signs of wear and tear and replace any damaged parts as needed.

As you can tell, gel coat spray guns are essential tools for achieving professional finishes in gel coating projects. By understanding how they work and following best practices for their use and maintenance, you can ensure a smooth and durable finish for your projects. If you have any questions about gel coat for boats contact our technical services team via Live Chat or by calling 888-505-2313.

The Magic of Gel Coat Repair Kits

Gel coat repair kits play a vital role in ensuring that boat owners can easily maintain the impeccable appearance of their vessels. These kits are specifically designed for simplicity and effectiveness, making them accessible even to individuals with limited experience in boat maintenance.

Comprehensive in nature, gel coat repair kits typically include a variety of components. These components often consist of gel coat in different colors to match the boat’s original finish, along with hardener for curing and application tools like brushes or syringes. With these kits, boat owners can address minor damages in a convenient and hassle-free manner. Whether it’s a small scratch, chip, or a more significant gouge, the right tools can be found within the kit to effectively address the specific issue at hand.

The application process of gel coat repair kits is designed to be straightforward, generally accompanied by clear instructions. Users can easily mix the components, apply the gel coat mixture to the damaged area, and allow it to cure. As a result, a seamless integration with the existing surface is achieved, creating a durable and smooth finish. This not only restores the gel coat’s integrity but also prevents further deterioration, ensuring the long-term protection of the boat.

From a financial perspective, gel coat repair kits offer a cost-effective solution for maintaining a boat’s appearance. By proactively addressing minor damages, boat owners can avoid more extensive and expensive repairs in the future. This empowers boat enthusiasts to navigate the seas with a sense of pride, knowing they have a reliable solution on board to keep their vessel looking as good as new.

In summary, gel coat repair kits are essential tools for boat owners. They provide an easy and effective solution for maintaining the appearance of boats, regardless of the owner’s level of experience. With their comprehensive nature and straightforward application process, these kits enable boat enthusiasts to address minor damages promptly and cost-effectively. By using gel coat repair kits, boat owners can maintain the integrity of their vessel’s finish, enhance its longevity, and navigate the waters with confidence.

The Significance of Teak Sealer in Marine Maintenance

Teak wood holds a revered position in maritime settings due to its exceptional durability and natural beauty. To harness and preserve these valuable qualities, it is imperative to integrate a top-tier teak sealer into your marine maintenance routine.

Teak sealers serve as a robust defense mechanism, protecting against the formidable forces of the marine environment. Without proper protection, teak wood is vulnerable to the detrimental effects of relentless UV rays, corrosive saltwater, and environmental pollutants. However, a high-quality sealer creates an impermeable barrier, ensuring the wood remains resilient over time.

Beyond protection, marine teak sealer can play a pivotal role in retaining the wood’s innate aesthetic appeal. Teak is renowned for its warm, golden-brown hue, and a well-applied sealer acts as a guardian, preserving this natural coloration. Not only does this enhance the overall appearance of boat decks or furniture, but it also contributes to a cohesive and inviting marine atmosphere.

The application and maintenance of a teak sealer are designed to be user-friendly. The sealer penetrates the teak’s surface, creating a durable and enduring shield. With regular and straightforward reapplication, teak surfaces can be kept looking fresh and well-protected.

Moreover, a teak sealer actively contributes to the wood’s longevity by preventing moisture ingress and inhibiting the growth of mold and mildew. By taking this proactive approach, not only do you safeguard your investment, but you also minimize the need for frequent repairs or replacements. Thus, a teak sealer is a wise choice for any boat owner seeking both practicality and enduring elegance on the open waters.

In conclusion, the integration of a high-quality teak sealer into your marine maintenance routine is crucial for preserving the beauty and durability of teak wood. The sealer acts as a powerful defense against the damaging effects of UV rays, saltwater, and environmental pollutants. Furthermore, it retains the wood’s natural coloration, enhances the overall appearance of boat decks and furniture, and creates an inviting marine atmosphere. With user-friendly application and maintenance, teak sealers provide an enduring shield that prevents moisture ingress and the growth of mold and mildew. By investing in a teak sealer, boat owners can protect their teak surfaces, minimize the need for frequent repairs, and enjoy the practicality and timeless elegance that teak wood brings to the open waters.


what is zinc chromate used for

Boat Paint: A Guide to Protecting and Personalizing Your Vessel

When it comes to sailing, boat paint plays a crucial role in both aesthetics and preservation. Beyond its practical function of shielding vessels from the harsh marine environment, boat paint allows owners to express their style and create a unique maritime identity. In this article, we will explore the intricacies of boat paint, from its importance in protecting against the elements to its role in enhancing the overall allure of your vessel.

The primary purpose of boat paint is to provide robust protection against the relentless forces of the sea. The sun’s UV rays, corrosive saltwater, and harsh weather conditions can quickly deteriorate a boat’s surface. To combat these threats, a high-quality marine-grade paint acts as a resilient barrier, effectively preventing corrosion, fading, and ensuring the longevity of your vessel.

However, boat paint goes beyond its practical function; it is a canvas of possibilities that allows owners to personalize their boats. With a wide range of colors and finishes available, boat owners can make a distinct statement on the water. Whether you prefer a classic, pristine white for timeless elegance or a bold, vivid hue for a modern flair, boat paint becomes the brushstroke that defines your boat’s personality.

The choice of boat paint is not purely a matter of aesthetics; it is an expression of your style and personality. By carefully selecting the color and finish, you can create a unique maritime identity that reflects your taste and preference. Whether you aim for a sleek, polished appearance or a weathered, rugged charm, the right boat paint becomes your vessel’s visual identity.

However, the artistry involved in boat paint doesn’t end with color selection. The application process is equally important and requires precision and expertise. Proper surface preparation, including thorough cleaning and priming, sets the foundation for a durable finish. Skilled layering of multiple coats ensures a smooth and long-lasting result. A well-executed application not only enhances the boat’s aesthetic appeal but also ensures maximum protection against the elements.

In conclusion, boat paint goes beyond preservation; it is a means of creating a vessel that sails in style. Choosing the right boat paint allows you to protect your boat while expressing your personal style. By combining functionality and aesthetics, boat paint transforms your vessel into a floating work of art that is ready to weather the seas with grace and individuality.


The Ultimate Guide to Choosing Aluminum Boat Paint

Owning a boat is an adventure that offers endless fun, however it also comes with the responsibility to take care of your vessel so that it performs at its best. One of the essential maintenance processes is painting, especially for aluminum boats. As a boat owner, you want your investment to last as long as possible, and choosing the right paint is paramount.

Aluminum boats are exposed to harsh marine environments, making paint a vital element in maintaining their integrity and performance. The wrong paint choice could result in corrosion and premature wear, so you need to choose wisely. In this blog post, we’ll provide you with all the information you need to make an informed decision when choosing aluminum boat paint.

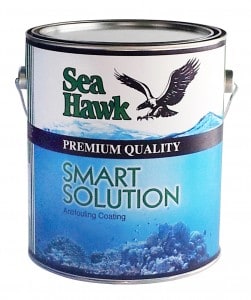
Sea Hawk Smart Solution Outdrive Paint

  1. Type of Aluminum Boat Paint

The first decision you need to make is choosing the type of paint. You can use either one or two-part paints, and both have their advantages and disadvantages. Two-part paints have a longer lifespan, resist fading, and provide a glossy finish. They’re also more expensive and hard to apply. Single-part paints, on the other hand, are cheaper, easier to apply and dry faster. However, they’re not as durable and aesthetic as their two-part counterparts.

  1. Surface Preparation

Before painting, ensure that the surface is clean and free of debris. If your boat has any damage or corrosion, make necessary repairs and fix any leaks. Once the surface is clean and smooth, apply a primer to prevent any future damage. Primer helps the paint bond to the aluminum and improves adhesion, enhancing paint longevity. It’s essential to follow the manufacturer’s instructions for preparation and application.

  1. Color and Aesthetics

The color and aesthetics of your boat can be a significant factor in the paint selection process. Some people prefer dull colors, while others opt for bright and bold colors to stand out on the water. The right paint color can match your boat’s interior or exterior decor, providing it with a unique look. You can also add features like metallic flake or pearl to enhance the boat’s shimmer in the sunlight.

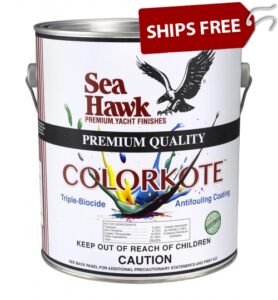
Colorkote

  1. Environmental Considerations

Another factor to consider when choosing aluminum boat paint is the environment you’ll be operating in. If you’re in a saltwater area, you may want to consider paints that are salt-resistant, as saltwater can cause corrosion. Some places have strict pollution regulations, so you may need to choose a paint that complies with environmental standards. Some paints are also formulated to withstand extreme temperatures, which is ideal for areas that experience extreme summer heat or winter cold.

  1. Manufacturer’s Reputation

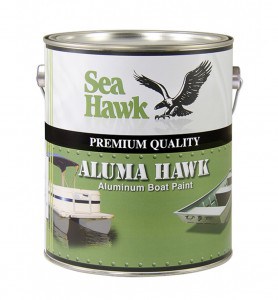
Choose a reputable manufacturer with a history of making quality boat paint. Check online reviews and feedback from other boat owners to see how different paints perform. Some of the top brands in the market today include Interlux, Pettit, and Sea Hawk, each with their unique formulas designed to serve specific purposes.

Interlux paint reviews

Choosing the right aluminum boat paint can be a challenging, however with the right information, you can make an informed decision. Consider the type of paint, surface preparation, aesthetics, environmental considerations, and the manufacturer’s reputation when making your choice. Remember that the right paint will not only enhance your boat’s look but also protect it from damage, ensuring longevity and optimal performance. We hope this guide has been helpful in your search for the right aluminum boat paint for your needs. If you need additional assistance, feel free to contact Bottom Paint Store’s technical support team.

boat paint vs gelcoat

Gelcoat vs Boat Paint: Which One Is Right for You?

Last Updated: January 27, 2026

Quick Recommendation

Should You Use Gelcoat or Boat Paint?

Use gelcoat when you are repairing or restoring the original fiberglass surface and want a thick, durable finish that matches the boat’s existing gelcoat. Use boat paint when you want an easier refinishing option, a new color, or a coating system designed for topsides, decks, or below-the-waterline protection.

For most fiberglass boat owners, the right choice depends on the condition of the surface, where the coating will be used, and how much preparation and finishing work you want to do. Gelcoat is often best for fiberglass repairs and original-style restoration, while marine paint is often easier for cosmetic updates, color changes, and ongoing maintenance.

Gelcoat vs Boat Paint Comparison

Feature Gelcoat Boat Paint
Best Use Fiberglass repair, restoration, and matching original gelcoat surfaces Refinishing topsides, decks, cabins, and underwater areas with the proper paint system
Surface Type Most commonly used on fiberglass boats Can be used on fiberglass, wood, aluminum, steel, and other properly prepared marine surfaces
Application Difficulty More labor-intensive and usually requires careful mixing, sanding, and polishing Often easier for DIY boat owners, depending on the paint type
Finish Thick, hard, glossy finish when applied and polished correctly Available in gloss, semi-gloss, satin, non-skid, antifouling, and specialty finishes
Color Changes Possible, but can require more effort to apply and finish evenly Usually better for changing or refreshing the color of a boat
Repairs Excellent for chips, gouges, scratches, and fiberglass cosmetic repairs Good for recoating larger areas after proper priming and surface preparation
Below the Waterline Not a substitute for antifouling bottom paint Bottom paint is specifically designed for underwater antifouling protection
Maintenance Can be sanded, compounded, polished, and repaired Can often be touched up or recoated more easily, depending on the coating system
Best For DIY? Good for small repairs, but larger jobs require more skill Often better for DIY refinishing and repainting projects

Best Choice by Boat Project

Project Better Choice Why
Repairing small chips or gouges in fiberglass Gelcoat Gelcoat repair products are designed to fill and blend damaged fiberglass surfaces.
Restoring faded fiberglass Gelcoat first, paint if needed Light oxidation may be restored by compounding and polishing gelcoat before repainting is necessary.
Changing the color of the boat Boat paint Marine topside paint is usually easier and more practical for full color changes.
Painting the bottom of the boat Bottom paint Antifouling bottom paint is designed to help protect underwater hull areas from marine growth.
Painting decks or walkways Boat paint with non-skid additive Deck coatings and non-skid systems help improve traction and durability in high-traffic areas.
Professional fiberglass restoration Gelcoat Gelcoat can restore the original fiberglass-style finish when properly sprayed, cured, sanded, and polished.
DIY topside refinishing Boat paint One-part topside paints are generally easier for boat owners to apply with brush, roller, or spray methods.
Fixing below-waterline fiberglass damage Fiberglass repair, barrier coat, then bottom paint The damaged area should be repaired and sealed before applying the proper underwater coating system.

What to Consider Before Choosing Gelcoat or Boat Paint

Before deciding between gelcoat and boat paint, look at the surface condition, location of the repair, desired finish, and how the boat is used. If the existing gelcoat is only faded or lightly oxidized, it may be possible to restore it with cleaning, compounding, and polishing before applying new coating.

If the surface has chips, gouges, cracks, or exposed fiberglass, gelcoat repair may be the better first step. If the surface is sound but unattractive, stained, or ready for a new color, a marine paint system may be more practical. For underwater hull areas, use products designed for below-the-waterline applications, such as barrier coat and antifouling bottom paint.

Common Questions About Gelcoat vs Boat Paint

Is gelcoat better than boat paint?

Gelcoat is better when repairing or restoring a fiberglass boat’s original surface. Boat paint is often better when you want to refinish, change color, or apply a coating designed for topsides, decks, or underwater protection. The better choice depends on the project, not just the product.

Can you paint over gelcoat?

Yes, you can paint over gelcoat if the surface is clean, dry, sound, sanded, and properly prepared. Faded or oxidized gelcoat should be cleaned and sanded before painting, and some projects may require primer for proper adhesion and long-term performance.

Can you apply gelcoat over paint?

Gelcoat should generally not be applied over standard boat paint unless the product manufacturer specifically allows it. Gelcoat is usually applied over fiberglass, properly prepared gelcoat, or compatible repair materials. If the surface is painted, the paint may need to be removed before gelcoat repair.

Should I restore faded gelcoat or repaint the boat?

If the gelcoat is faded but still thick and intact, try cleaning, compounding, and polishing first. If the gelcoat is badly worn, cracked, thin, stained, or difficult to restore, repainting or re-gelcoating may be a better option.

What is the difference between gelcoat and topside paint?

Gelcoat is the thick outer finish commonly found on fiberglass boats. Topside paint is a marine coating used above the waterline on hull sides, cabins, decks, and trim. Topside paint is often easier to apply for refinishing, while gelcoat is commonly used for fiberglass repairs and original-style restoration.

Can gelcoat be used below the waterline?

Gelcoat is used on fiberglass hulls, but it is not the same as antifouling bottom paint. If the boat stays in the water, the underwater hull usually needs the proper bottom paint system to help reduce marine growth.

Does boat paint last longer than gelcoat?

It depends on the product, surface preparation, exposure, maintenance, and where the coating is used. A properly maintained gelcoat surface can last many years, while a high-quality marine paint system can also provide long-lasting protection when applied correctly.

Is gelcoat harder to apply than boat paint?

Gelcoat is usually more difficult to apply and finish than one-part boat paint. Gelcoat often requires accurate catalyst mixing, careful film thickness, curing, sanding, compounding, and polishing. Many boat paints are easier for DIY users, especially for topside refinishing.

Can I use automotive paint instead of boat paint?

Automotive paint is not usually the best choice for boats because marine coatings are designed for water, UV exposure, salt, abrasion, and marine conditions. For best results, use a coating system made for the surface and environment where the boat will be used.

Do I need primer before painting over gelcoat?

Some marine paints can be applied over properly prepared gelcoat, while others require primer. Primer may improve adhesion, help seal repairs, and create a better surface for the final coating. Always follow the paint manufacturer’s instructions for surface preparation and primer requirements.

Recommended Gelcoat, Boat Paint, and Repair Supplies

Bottom Paint Store carries gelcoat repair products, marine topside paints, bottom paints, primers, barrier coats, fiberglass repair materials, fairing compounds, sandpaper, solvents, and application supplies. The right product depends on whether you are repairing fiberglass, restoring gelcoat, repainting topsides, refinishing decks, or protecting the bottom of the boat.

Gelcoat vs Boat Paint: Which One Should You Choose?

  • Choose Gelcoat if you’re repairing or restoring a fiberglass surface and need a thick, durable, original-style finish that can be sanded and polished.
  • Choose Boat Paint if you want a simpler application, faster results, or a cosmetic refresh—especially on larger surfaces.
  • Use paint above the waterline for ease and appearance; use bottom paint below the waterline for antifouling protection.
  • Bottom line: Gelcoat excels at repairs and durability, while boat paint is best for ease of application and color changes.

Tip: Gelcoat is not antifouling—boats kept in the water still require proper bottom paint below the waterline.

When it comes to boat repair and maintenance, choosing the right kind of coating is crucial to ensure the longevity and overall aesthetics of your vessel. Gelcoat and boat paint are two of the most used coatings for boats, but what are their differences? Which one should you use? In this blog post, we’ll explore and compare the features of gelcoat and boat paint to help you make an informed decision.

First, let’s define what gelcoat and boat paint are.

Gelcoat is a protective layer that’s applied directly to the boat’s fiberglass, while boat paint is a coating that can be applied over gelcoat, or directly to other materials like wood or aluminum. Gelcoat is known for its durability and resistance to water, UV rays, and harsh weather conditions. However, it can scratch and crack over time if it is not maintained properly. On the other hand, boat paint offers more flexibility in terms of colors and finish, however it may require more maintenance and upkeep.

Gelcoat or Boat Paint Project Checklist

  • Identify whether the surface is fiberglass, existing gelcoat, old paint, wood, aluminum, or steel
  • Determine whether the project is above or below the waterline
  • Decide whether you are repairing damage, restoring shine, or changing color
  • Clean, dewax, sand, and prepare the surface before coating
  • Use gelcoat repair products for chips, gouges, and fiberglass cosmetic repairs
  • Use topside paint for above-waterline refinishing and color changes
  • Use bottom paint for underwater antifouling protection
  • Use primer or barrier coat when required by the coating system
  • Follow the manufacturer’s instructions for dry time, cure time, sanding, and recoat windows

Composition and Application

Gelcoat is a resin-based coating that is applied directly to the fiberglass surface of a boat during the manufacturing process. It is typically thick and durable, with a glossy finish that can be easily polished. Gelcoat can be pigmented to match different colors and styles, but it is usually white.

When it comes to application, gelcoat is best applied using a gelcoat spray gun or roller, while boat paint can be applied using a spray gun, roller, or brush. Gelcoat can be easily repaired by sanding the damaged area and reapplying the gelcoat, while boat paint repairs may require sanding, filling, and repainting the entire affected area for a seamless finish.

In terms of durability, gelcoat is known for its strength and can last for many years, while boat paint may require repainting every five to ten years, depending on the quality of the paint and the maintenance of the vessel. Gelcoat also blends into the fiberglass, providing a smoother finish that can hide minor imperfections, while boat paint may highlight any dents, cracks, or other irregularities on the surface.

When it comes to cost, gelcoat is generally less expensive than boat paint. However, depending on the quality and extent of the repair or maintenance needed, the cost can vary for both coatings. Gelcoat repairs can range from a few hundred dollars to thousands of dollars, while boat paint jobs can cost from a few thousand dollars to tens of thousands of dollars.

In conclusion, choosing between gelcoat and boat bottom paint depends on your preferences, needs, and budget. If you’re looking for a durable, low-maintenance coating that can blend into the fiberglass and withstand harsh weather conditions, gelcoat may be the better option for you. On the other hand, if you want more flexibility in terms of colors and finish, don’t mind the extra maintenance required, and can afford the cost, boat paint may be the way to go. Ultimately, it’s important to consult with a professional boat service provider to help you make the right decision for your vessel.


Link

Are you experiencing a drop in RPM on your high-performance boat? Your propeller might be the culprit. Understanding propeller troubleshooting is essential for maintaining peak performance on the water. Here are five signs indicating fouling issues that could be impacting your propeller’s RPM:

1. Reduced RPM without Engine Changes

If you notice a decrease in RPM without any changes to the engine or throttle settings, it could indicate fouling. This sign often points to a propeller clogged with debris or marine growth.

2. Vibrations During Operation

Excessive vibrations during operation are a clear indicator of propeller issues. Fouling, such as tangled fishing lines or seaweed wrapped around the propeller, can cause these vibrations, affecting RPM.

3. Unusual Noise Levels

An increase in unusual noise levels, such as rattling or humming, could signal fouling problems. Inspect the propeller for foreign objects or damage that might be hindering its performance.

4. Sluggish Acceleration

Fouling can lead to sluggish acceleration, impacting your boat’s ability to reach optimal speeds. If you’re experiencing delayed acceleration despite full throttle, it’s time to inspect the propeller.

5. Decreased Fuel Efficiency

An unexpected decrease in fuel efficiency could be linked to fouling issues with the propeller. When the propeller struggles due to fouling, it requires more power, resulting in increased fuel consumption.

Conclusion: Addressing Fouling Issues for Peak Performance

Maintaining a high-performance boat involves regular propeller maintenance and troubleshooting. If you’re encountering reduced RPM or any of the mentioned signs, promptly inspect the propeller for fouling issues. Clearing debris, cleaning the propeller, or seeking professional assistance can restore optimal RPM and performance.

In summary, understanding the signs of fouling issues affecting your propeller’s RPM is crucial for ensuring your high-performance boat operates at its best. Keep an eye out for these indicators and address any fouling promptly to enjoy smooth and efficient sailing experiences.

PropGlide® provides a highly effective solution to address propeller problems caused by fouling. PropGlide® specialized product is designed to prevent marine growth from adhering to propellers, significantly reducing fouling-related issues and their impact on propeller performance.

How to repair gauges in a fiberglass boat

Are your boat’s gauges not working properly? The good news is repairing gauges in a fiberglass boat can be a straightforward process if the damage is minimal and limited to the gauge itself. In this blog post we’ll cover how to repair it.

Tools and Materials Needed:

  • Replacement gauge (if necessary)
  • Screwdrivers
  • Pliers
  • Wire stripper and crimping tool
  • Heat gun or lighter
  • Electrical tape or heat shrink tubing
  • Marine-grade adhesive/sealant (e.g., 3M 5200)
  • Sandpaper (various grits)
  • Fiberglass repair kit (if there are cracks around the gauge)

Step-by-Step Instructions:

Assess the damage

First start off by examining the gauge and the surrounding area for any visible damage. If the gauge is simply malfunctioning, you may not need to repair the fiberglass itself. However, if there are cracks or holes around the gauge, you’ll need to address those as well.

Disconnect the power

Make sure your boat’s electrical system is turned off, and disconnect the power to the gauge by removing the appropriate fuse or disconnecting the battery.

Remove the Old Gauge:

Use a screwdriver or pliers to carefully remove the screws or fasteners holding the old gauge in place. Gently pull the gauge out of its mounting hole.

Disconnect the Wiring:

Carefully disconnect any electrical wiring connected to the old gauge. Take note of the wire colors and their corresponding terminals.

Test the Replacement Gauge (if applicable):

If you have a replacement gauge, test it to make sure it works before installing it. Connect the wires according to the manufacturer’s instructions and verify that it functions properly.

Prepare the Mounting Hole:

If the old gauge left any adhesive or sealant residue in the mounting hole, clean it thoroughly. Sand the edges of the hole lightly to create a clean, rough surface for better adhesion.

Install the Replacement Gauge:

Connect the wires to the corresponding terminals on the new gauge. Use crimp connectors and cover the connections with heat shrink tubing or electrical tape to protect against moisture. Insert the new gauge into the mounting hole and secure it with screws or fasteners.

Seal Around the Gauge:

Apply a marine-grade adhesive/sealant (such as 3M 5200) around the edges of the gauge where it meets the fiberglass. This will create a watertight seal and prevent moisture from getting behind the gauge.

Reconnect Power:

Reconnect the power to the gauge by reinstalling the appropriate fuse or reconnecting the battery.

Test the Gauge:

Turn on the boat’s electrical system and test the new gauge to ensure it’s functioning correctly.

Repair Cracks (if needed):

This typically involves sanding, applying fiberglass resin, and/or a fiberglass Fiberglass Chopped Strand Mat  and allowing it to cure.

If there were cracks or damage in the fiberglass surface around the old gauge see our How to Repair a Fiberglass Boat: A Step By Step Guide.

Final Inspection:

Once the repair is complete and the adhesive/sealant has cured, inspect the area around the gauge to ensure there are no visible cracks or gaps.

Fiberglass boat repair is an on-going process and by following these steps, you should be able to repair or replace gauges in your fiberglass boat. If you’re unsure about any aspect of the repair or if the damage is extensive, consider consulting a professional boat repair technician for assistance.

duck boat paint

Essential Tips to Pick the Best Bottom Paint for Duck Boats

When it comes to owning a duck boat, maintenance is crucial to keep it functioning properly and to prolong its lifespan. Duck boats require extra care and attention, especially when it comes to bottom paint. Choosing the right bottom paint can go a long way in protecting your boat from harsh conditions and reducing maintenance costs. In this blog post, we’ll discuss some essential tips to pick the best boat bottom paint for duck boats.

Aluma Hawk by Sea Hawk is an excellent aluminum boat paint widely popular for duck boats.

1. Water Conditions:

The first thing you want to consider is the water conditions your boat will operate in. This is vital when it comes to choosing the right paint. If you’re boating in saltwater, you’ll need paint that’s effective at preventing corrosion. If you’re in freshwater, you can choose a paint that’s effective at reducing mold and mildew growth. The type of bottom paint you choose will vary based on the water conditions.

2. Type of Boat:

Different types of boats have different requirements for bottom paint. Duck boats generally need a paint that’s durable and provides good antifouling protection since they are prone to being in shallow water. Before purchasing the paint, check your boat manufacturer’s recommendations and specifications to ensure that it’s safe for duck boats.

3. Quality of Paint:

The quality of bottom paint is essential to the overall protection of your boat. Poor quality paints may not work well, and besides they might need to be reapplied quite often, which can be a tedious and expensive process. Select a good quality paint that offers long-lasting durability, antifouling protection, and is resistant to the weather conditions.

4. Specific Bottom Paint Features:

Consider the features provided by the manufacturer. Paint with features such as self-polishing, non-toxic, or eco-friendly paints are good choices. The self-polishing feature ensures that the bottom paint remains smooth over time while preventing weed growth. Non-toxic and eco-friendly paint options are a good choice for those who want to reduce their impact on the environment.

5. Maintenance:

The maintenance requirements for the bottom paint plays a significant role in the type of paint you choose. Some paints require sanding before reapplication, while others don’t require sanding at all. Again, we recommend reading the manufacturer’s instructions and guidelines before purchasing bottom paint.

Duralux duck boat drab offers a great color choice for those seeking duck boat drab and a quality paint.

In conclusion, follow these steps in choosing the best and correct bottom paint for your duck boat to ensure the protection of your boat. Remember to consider the water conditions, the type of boat, the quality of the paint, specific features of the paint, and maintenance requirements. Spend time researching to ensure that you make the best choice of bottom paint for your duck boat. If you would like to talk with an expert, you can call the Bottom Paint Store technical team for advice. Remember, proper care and maintenance, including the use of good bottom paint, can preserve your boat and keep it in top condition for years to come.

How to Paint Your Fiberglass Boat

Last Updated: February 17, 2026

Quick Recommendation

How to Paint Your Fiberglass Boat

  • Choose the right paint: Use bottom paint below the waterline and topside polyurethane above it.
  • Prep is everything: Clean, de-wax, sand thoroughly, and repair any cracks or damage before priming.
  • Prime when needed: Apply an epoxy or compatible primer to improve adhesion and durability.
  • Bottom line: A long-lasting fiberglass paint job depends on proper prep, correct primer, and using the right coating for the application area.

Tip: Always check compatibility with any existing coatings before repainting to avoid peeling or adhesion failure.


Whether you’re an avid boater or simply enjoy the occasional ride at sea, taking care of your boat is essential to its longevity and performance. One of the key ways to properly maintain your boat is by painting it. If you have a fiber glass boat, painting it gives it a fresh new look and also helps protect it from harsh elements like UV rays and saltwater. However, painting a fiberglass boat can be a daunting task if you’ve never done it before. But don’t worry, in this how to guide we’ll show you everything you need to know to paint your fiberglass boat with ease!

Step 1: Preparation is Key

Before you can start painting your fiberglass boat, it’s important to first prepare it. Start by washing your boat thoroughly with soap and water to remove any dirt, grime, or debris. Next, sand the entire surface of the boat with a fine-grit sandpaper to create a smooth and even surface. Be sure to remove any flakes or chips found on the surface of the fiberglass. Finally, rinse the boat with clean water and allow it to dry completely.

Step 2: Pick the Right Paint

Choosing the right paint for your fiberglass boat is essential in ensuring the longevity of your paint job. It’s recommended that you use marine-grade paint to ensure durability and longevity for your boat. Marine-grade paint is specifically designed for use in saltwater conditions, making it perfect for your fiberglass boat. Additionally, be sure to choose a paint that’s compatible with your boat’s surface. Some paints are made specifically for aluminum or wooden boats, so be sure to read the product label carefully.

Step 3: Apply the Primer

After preparing your boat and choosing the right paint, it’s time to apply the primer. The primer acts as a base coat, helping adhesion between the paint and the fiberglass. Apply the boat primer using a roller or spray gun, starting from the top of the boat and working down. Be sure to follow the manufacturer’s instructions for optimal results. Once the primer is dry, sand it down gently to create a smooth surface for the paint to adhere to.

Step 4: Apply the Paint

Now that the primer has been applied and sanded, it’s time to apply the paint to your fiberglass boat. Follow the manufacturer’s instructions carefully while applying the paint. Begin by working from the top of the boat and working down. Use long, even strokes to create a smooth surface with no drips, bumps, or brush marks. It’s recommended that you apply two coats of paint to ensure complete coverage. Finally, allow the paint to dry completely before moving on to the next step.

Step 5: Finishing Touches

The final step is applying the finishing touches. Once your paint has completely dried, apply a clear coat of marine-grade sealant to help protect the paint from UV rays, saltwater, and other harsh elements. Additionally, you may want to replace any decals or stickers that were removed during the painting process. Finally, inspect your boat for any chips, flakes, or blemishes, touching them up as necessary to create a flawless finish. Painting a fiberglass boat can seem like a challenging task, but with proper preparation and the right tools and materials, it can be a manageable DIY project. Be sure to prepare your boat properly, choose the right paint, and apply the primer, paint, and finishing touches carefully. With these steps, your fiberglass boat will not only look great but also be protected from harsh elements. If you have questions or need assistance selecting the right paint you can always contact the team at Bottom Paint Store.

Choosing the Right Paint for your Jet Ski

Choosing the Right Paint for your Jet Ski

If you’re a proud owner of a jet ski, you know just how important it is to keep it looking shiny and new. And that means maintaining it with the right type of paint that will not only protect it from the elements but will also resist fading and peeling over time. But with so many types of paint available in the market, selecting the right one can be overwhelming. In this comprehensive guide, we’ll take a closer look at which type of paint is best suited for your jet ski.

Understanding the Types of Paint for Your Jet Ski

Before you can choose the right paint for your jet ski, it’s important to understand the types of paint available. There are two main types of paint that work well on fiberglass and gel-coat surfaces: acrylic marine paint and epoxy marine paint. Acrylic marine paint is great for jet skis that require frequent recoating and touch-ups since it dries faster. On the other hand, epoxy marine paint offers greater durability and resistance to chemicals and abrasion. It’s also more expensive and takes longer to dry.

Preparing the Surface

It’s important before you start painting your jet ski to prepare the surface by cleaning and sanding it thoroughly. Start by washing the entire jet ski with soapy water and then rinse it off with clean water. Then, use a degreaser to remove any traces of oil or grease that might interfere with the adhesion of the paint. Once the surface is clean and free of contaminants, sand it with a fine-grit sandpaper to create a rough surface that will allow the paint to adhere better.

Applying the Paint

Once the surface is prepared, it’s time to apply the paint. Begin by applying a primer coat that is formulated for use on fiberglass surfaces. This will not only help the paint to adhere better but also seal any cracks or imperfections on the surface. Then, apply the first coat of paint and allow it to dry completely before applying additional coats. Make sure to follow the manufacturer’s instructions on how to apply and dry each coat to achieve the best results.

Maintenance and Touch-ups

Once you’re done painting your jet ski, it’s important to maintain it properly to ensure that the paint lasts as long as possible. Avoid exposing it to harsh chemicals or extreme temperatures that could damage the paint and rest assured that your efforts will pay off in the long run. From time to time, you may need to touch up the paint, especially in areas that are prone to getting chipped or scratched. Be sure to use the same type of paint and primer that you used originally to ensure a perfect match.

In summary, choosing the right type of paint for your jet ski can be daunting, but knowing what to look for and following the right steps will make the process a lot easier. Remember to use a marine acrylic or epoxy paint, prepare the surface properly, apply the paint in several coats, and maintain it regularly. By following these simple guidelines, your jet ski should look real good for years to come. And if you need any assistance selecting or applying the right paint you can always contact the friendly tech support team at Bottom Paint Store.

a guide for selecting the right boat paint

How to select marine paint

Ahoy there, fellow seafarers! Are you ready to sail the high seas with style and pizzazz? Selecting the right marine paint is critical to the appearance, longevity, and performance of a boat. Marine paint not only adds an aesthetic appeal to the boat but also protects the hull from environmental elements such as water, sunlight, and salt. It can also help reduce the drag and improve fuel efficiency of the boat.

When choosing marine paint, there are several factors to consider such as the type of paint, the water conditions in which the boat will be used, the type of hull material, the application method, and the expected maintenance. These factors can affect the durability and effectiveness of the paint, as well as the overall appearance of the boat. So, don’t be like a sailor who forgot to batten down the hatches – take the time to select the right boat paint. Your boat (and your reputation as a savvy boater) will thank you.

KEY TAKEAWAYS

  • Choosing the right marine paint is important for both the appearance and protection of your vessel.
  • There are different types of marine paints, such as antifouling paint, topside paint, and bottom paint, each with its own purpose and application.
  • When selecting marine paint, it’s important to consider factors such as water conditions, hull material, and application method.
  • Proper application of marine paint is crucial for achieving a smooth, even finish and ensuring the paint lasts as long as possible.
  • Maintaining your boat paint with regular cleaning and touch-ups can help preserve the value of your vessel and keep it looking great.

Types of marine paints

There are several types of marine paints available in the market, each designed for a specific purpose. Here are some of the most common types of boat paints:

Antifouling paint – Antifouling paint is designed to protect the hull of the boat from the growth of marine organisms, such as algae and barnacles. It contains biocides that inhibit the growth of these organisms, preventing them from attaching to the hull. Antifouling paint is best used in saltwater or brackish water environments.

Topside paint – Topside paint is used to protect the upper part of the boat above the waterline. It can be used on the deck, cabin, and other areas exposed to sunlight and harsh weather conditions. Topside paint comes in a variety of finishes, from matte to glossy, and can be customized to match the desired look of the boat.

Bottom paint – Bottom paint is designed to protect the hull of the boat below the waterline. It prevents the growth of marine organisms, such as barnacles and mussels, which can cause drag and reduce the boat’s performance. Bottom paint is best used in saltwater or freshwater environments.

Epoxy paint – Epoxy paint is a two-part paint system that is highly durable and resistant to water, chemicals, and abrasion. It is commonly used as a primer or barrier coat to protect the hull from moisture and corrosion. Epoxy paint can also be used as a topcoat for added protection and a glossy finish.

Varnish – Varnish is a clear, protective coating used to enhance the natural beauty of wood on the boat. It provides UV protection, moisture resistance, and durability to the wood, making it last longer and maintain its appearance.

The type of marine paint to use depends on the intended use of the boat and the environmental conditions in which it will be used. For example, antifouling paint* is best used in saltwater environments to prevent marine growth, while topside paint can be used to enhance the boat’s appearance and protect it from UV rays. Bottom paint is ideal for boats that spend a lot of time in the water, while varnish is suitable for boats with wooden surfaces that need protection and a glossy finish.

Factors to consider when selecting marine paint

When selecting the right marine paint, there are several factors that should be taken into account. Here are some of the most important factors to consider:

Water conditions – The type of water in which the boat will be used is a critical factor to consider when choosing boat paint. Saltwater, freshwater, and brackish water each have different environmental conditions that can affect the performance and durability of the paint. Saltwater, for example, can be corrosive and requires a more durable paint that can withstand the harsh environment.

Hull material – The material of the boat’s hull is another important factor to consider when selecting boat paint. Different types of paint are designed to adhere to specific materials, such as fiberglass, aluminum, or wood. It’s important to choose a paint that is compatible with the hull material to ensure proper adhesion and maximum protection.

Application method – The application method of the paint can also affect the final appearance and performance of the paint. Some types of paint, such as epoxy paint, require a specific application method, while others, such as topside paint, can be applied using a brush, roller, or spray. It’s important to choose a paint that can be applied using the desired method and to follow the manufacturer’s instructions for the best results.

Expected maintenance – The expected maintenance of the boat paint is another factor to consider when selecting boat paint. Some types of paint, such as antifouling paint**, require more frequent maintenance, such as cleaning and touch-ups, to maintain their effectiveness. It’s important to choose a paint that fits your maintenance schedule and skill level.

Tips for evaluating these factors and making an informed decision

Consult with a professional or a trusted boat maintenance expert, such as Bottom Paint Store, to help you evaluate the different factors and choose the right boat paint for your needs. offers free technical assistance.

Research different brands and types of marine paint to compare their performance, durability, and cost-effectiveness.

Check the manufacturer’s recommendations and application instructions to ensure compatibility with your boat’s hull material and the intended application method.

Consider the expected lifespan of the paint and the frequency of maintenance required to ensure the paint remains effective.

Finally, remember that selecting the right marine paint is an investment in the long-term performance and appearance of your boat, so take the time to make an informed decision.

Applying marine paint

Properly applying marine paint is crucial to achieving a smooth, durable finish that protects your boat from the harsh marine environment. Here’s why it’s important and how to do it:

A proper application ensures the paint adheres to the surface and forms a protective barrier against the elements.

Applying paint unevenly or too thinly can result in a weak bond that can crack, peel, or fade prematurely.

Proper application also ensures the paint dries evenly and maintains its color and gloss for longer.

Step-by-step instructions for applying marine paint

Surface Preparation: Before applying any paint, clean the surface thoroughly to remove any dirt, grease, or other contaminants. Sand the surface to create a rough texture that promotes adhesion.

Primer: Apply a primer to the surface to promote adhesion and provide a smooth base for the paint. Allow the primer to dry completely before applying the paint.

Application: Apply the paint using a brush, roller, or spray gun, depending on the type of paint and the desired finish. Apply the paint in thin, even coats, and avoid overloading the brush or roller.

Drying: Allow each coat to dry completely before applying the next coat. Follow the manufacturer’s instructions for the recommended drying time between coats.

Sanding: Sand the surface lightly between coats to create a smooth texture and promote adhesion.

Final Coat: Apply the final coat of paint using the same technique as the previous coats. Allow the final coat to dry completely before using the boat.

Tips for achieving a smooth, even finish:

Use high-quality paint and tools to achieve a professional-looking finish.

Apply the paint in thin, even coats to prevent runs and drips.

Avoid painting in direct sunlight or high humidity to prevent the paint from drying too quickly or not drying properly.

Follow the manufacturer’s instructions for the recommended number of coats and drying time between coats.

Sand the surface lightly between coats to create a smooth texture and promote adhesion.

Use a high-quality brush or roller to ensure the paint goes on evenly.

Keep the paint mixed well to maintain consistency throughout the application process.

Maintaining marine paint

Properly applying marine paint is crucial to achieving a smooth, durable finish that protects your boat from the harsh marine environment. A proper application ensures the paint adheres to the surface and forms a protective barrier against the elements. Applying paint unevenly or too thinly can result in a weak bond that can crack, peel, or fade prematurely. It also ensures the paint dries evenly and maintains its color and gloss for longer.

Where to buy marine paint

In summary, choosing the right marine paint is essential for protecting your vessel from the harsh marine environment and ensuring it looks its best. Factors like water conditions, hull material, and application method should all be taken into account when selecting the right paint for your boat. Once you’ve chosen the right paint, be sure to apply it properly to achieve a smooth, even finish. And remember, a well-maintained paint job not only looks great but can also help preserve the value of your boat.

So, don’t be like a bad paint job – sloppy, uneven, and ultimately disappointing. Take the time to select the right paint and apply it properly. Your boat (and your wallet) will thank you. Bottom Paint Store has a huge selection of marine paint at discounted prices and if you need technical assistance, feel free to contact us Monday to Friday 9am-5pm EST 888.505.2313.

Source:

*Wikipedia Anti-fouling paint

** Marine fouling and its prevention ; prepared for Bureau of Ships, Navy Dept.

how to choose bottom paint

How to choose the right bottom paint for my boat

If you’ve owned a boat for any length of time you know, bottom paint is an essential component of boat maintenance, particularly for boats that are kept in the water for extended periods. It’s crucial because the bottom of a boat is exposed to harsh elements such as saltwater, algae, and other marine organisms, which can cause damage and reduce the performance of the vessel.

Applying a high-quality bottom paint to the hull of the boat can help protect it from these elements, preventing the growth of algae and other marine organisms, reducing drag, and improving the boat’s overall performance. Bottom paint also helps prevent corrosion and other types of damage to the hull, which can ultimately extend the lifespan of the boat. By investing in quality bottom paint and regularly maintaining it, boat owners can ensure that their vessel remains in good condition and performs at its best for years to come.

Why Bottom Paint Matters

Bottom paint protects your boat’s hull from marine growth like barnacles and algae. It also improves fuel efficiency and reduces maintenance. Choosing the right paint depends on your boat’s material, usage, and environment.

Types of Bottom Paint

Paint Type Best For Key Features Hull Compatibility
Ablative Frequent use, seasonal haul-outs Self-polishing, wears off over time Fiberglass, wood
Hard (Epoxy) High-speed boats, long stays Durable, smooth finish Fiberglass, aluminum
Hybrid Mixed-use scenarios Combines ablative and hard traits Fiberglass, wood

The Different types of bottom paints available

There are several different types of bottom paints available for boats, each with its own unique properties and benefits. Here are some of the most common types of bottom paint:

Hard bottom paint – This type of paint is designed for boats that are used frequently and require a durable, long-lasting paint that can withstand abrasion and harsh marine environments.

Soft bottom paint – Soft bottom paints are ideal for boats that are stored on land for extended periods and are less frequently used. These paints offer excellent antifouling protection, but they may require more frequent reapplication.

Ablative bottom paint – This type of paint is formulated to wear away slowly over time, gradually releasing biocides to prevent fouling. Ablative bottom paints are ideal for boats that are used frequently and require continuous antifouling protection.

Copper-free bottom paint – Copper-free bottom paints are becoming increasingly popular due to concerns about the environmental impact of copper on marine ecosystems. These paints use alternative antifouling agents, such as zinc or biocides, to prevent fouling.

Hybrid bottom paint – Hybrid bottom paints combine the benefits of multiple types of bottom paints, offering excellent antifouling protection, durability, and environmental safety. These paints are a great option for boaters who want the best of all worlds.

When choosing a bottom paint, it’s essential to consider factors such as the boat’s usage patterns, the type of water the boat will be used in, and environmental regulations governing antifouling agents. It’s also important to choose a paint that is compatible with your boat’s existing paint and surface preparation.

Match Paint to Your Boating Environment

  • Saltwater: Requires stronger antifouling protection.
  • Freshwater: Less aggressive paints may suffice.
  • Warm climates: Faster growth = more frequent repainting.
  • Cold climates: Slower growth = longer paint life.

Hull Material Compatibility

  • Fiberglass: Compatible with most bottom paints.
  • Aluminum: Use copper-free or zinc-based paints to prevent galvanic corrosion.
  • Wood: Needs breathable, flexible coatings to prevent moisture trapping.

Application Tips

  • Clean and sand the hull thoroughly.
  • Apply a primer if switching paint types.
  • Follow manufacturer’s instructions for mixing and drying times.
  • Use proper PPE and ensure good ventilation.

Frequently Asked Questions

Q: How often should I repaint? A: Every 1–2 seasons, depending on usage and paint type.

A: Every 1–2 seasons, depending on usage and paint type.

Q: Can I switch paint types? A: Yes, but a barrier coat may be needed to prevent incompatibility.

A: Yes, but a barrier coat may be needed to prevent incompatibility.

Q: What’s the best paint for trailered boats? A: Often none—unless stored in water for extended periods.

A: Often none—unless stored in water for extended periods.


Bottom Paint

What are the factors to consider when choosing bottom paint?

There are several factors to consider. Here are some of the most important ones:

Boat usage: The type of bottom paint you choose will depend largely on how often you use your boat and the type of water you’ll be operating in. Boats that are used frequently and kept in the water year-round may require a different type of paint than those that are only used seasonally or kept on land.

Hull material: The type of material your boat’s hull is made from can affect the type of bottom paint you can use. For example, some types of bottom paint may not be compatible with certain hull materials, such as aluminum or fiberglass.

Water conditions: The type of water you’ll be operating in can also affect the type of bottom paint you need. For example, boats operating in saltwater may require a different type of paint than those operating in freshwater.

Antifouling properties: Antifouling properties are an essential consideration when choosing bottom paint. The paint you choose should be effective at preventing fouling and protecting your boat from marine organisms.

Environmental regulations: Many areas have regulations governing the use of certain types of bottom paints due to their potential impact on the environment. Before choosing a bottom paint, be sure to check local regulations to ensure you’re using a product that’s allowed in your area.

Compatibility with existing paint: It’s important to choose a bottom paint that’s compatible with your boat’s existing paint and surface preparation. Using an incompatible paint can lead to adhesion issues and other problems.

Personal preference and budget are also important factors to consider when choosing bottom paint for your boat.

When it comes to personal preference, you may have a particular type or brand of bottom paint that you prefer based on past experience or recommendations from other boaters. It’s important to choose a product that you feel comfortable using and that meets your specific needs.

Budget is also an important consideration. Bottom paint can range in price depending on the type, brand, and quality of the product. While it may be tempting to choose a cheaper option to save money, it’s important to remember that high-quality bottom paint is an investment in the long-term health and performance of your boat. In the end, choosing a quality product may actually save you money in the long run by reducing the need for frequent repainting and repairs.

It’s important to weigh these factors against the other considerations mentioned earlier, such as boat usage, water conditions, and environmental regulations. By finding a balance between these various factors, you can choose a bottom paint that meets your needs while staying within your budget.

In addition to these basic types, there are also specialized bottom paints that are designed for specific conditions, such as warm water or extreme fouling. It’s important to choose a bottom paint that’s appropriate for your specific needs and usage patterns, and to consider factors such as your boat’s hull material, water conditions, and local environmental regulations when making your selection.

What is the paint application process?

The application process for bottom paint can vary depending on the type of paint you choose, but generally, it will involve surface preparation, choosing the right application method, and applying the paint. Here’s a breakdown of the steps involved:

Surface Preparation:

Proper surface preparation is critical to ensuring that the bottom paint adheres well and provides effective protection against fouling. Before applying the paint, you’ll need to clean and prepare the hull surface by removing any old paint, dirt, oil, or other contaminants. This may involve sanding, scraping, or pressure washing, depending on the condition of the surface.

Choosing the Right Application Method:

There are several different methods for applying bottom paint, including brush, roller, and spray. The method you choose will depend on the type of paint you’re using, the size and shape of your boat, and your personal preference. Some types of bottom paint may require a specific application method, so be sure to read the manufacturer’s instructions carefully.

Applying the Bottom Paint:

Once the surface is clean and prepared, and you’ve chosen the right application method, it’s time to apply the paint. Be sure to follow the manufacturer’s instructions carefully, and apply the paint evenly and smoothly. Depending on the type of paint you’re using, you may need to apply multiple coats to achieve the desired level of protection. Be sure to allow each coat to dry thoroughly before applying the next.

After the paint has been applied, be sure to clean up any tools or equipment and dispose of any leftover paint or solvents in accordance with local regulations. Proper disposal is important to protect the environment and prevent pollution.

The application process involves proper surface preparation, choosing the right application method, and applying the paint according to the manufacturer’s instructions. By following these steps carefully, you can ensure that your boat’s bottom paint provides effective protection against fouling and extends the life of your vessel.

How do I know how many coats of bottom of bottom paint to apply?

The number of coats of bottom paint you should apply can depend on the type of paint you’re using, as well as the manufacturer’s recommendations. Generally, bottom paint manufacturers will specify the recommended number of coats on the product label or in the application instructions.

In most cases, two coats of bottom paint are recommended for optimal performance and protection. However, some paints may require more or fewer coats, so it’s important to consult the manufacturer’s instructions for guidance.

Factors such as the condition of your boat’s hull and the type of water and marine life in your area can also impact the number of coats of bottom paint needed for adequate protection.

It’s important to note that applying too many coats of bottom paint can actually be counterproductive and lead to issues such as cracking or peeling. Therefore, it’s best to follow the manufacturer’s instructions and apply the recommended number of coats for the specific paint you’re using.

Maintenance and Repainting

Maintaining your boat’s bottom paint is essential to ensure that it continues to provide effective antifouling protection and prolong the life of your vessel. Here are some tips for maintaining your boat’s bottom paint:

Regular Cleaning: Regularly cleaning your boat’s hull will help to remove any dirt, grime, or debris that can build up on the surface and reduce the effectiveness of the bottom paint. Use a soft-bristled brush or a pressure washer to gently clean the hull, being careful not to damage the paint.

Inspect the Paint: Regularly inspecting your boat’s bottom paint can help you to catch any problems early on and prevent them from becoming more serious. Look for signs of chalking, cracking, or peeling, which can indicate that the paint is no longer providing effective protection.

Address Any Problems Promptly: If you notice any problems with your boat’s bottom paint, such as chalking, cracking, or peeling, it’s important to address them promptly. This may involve sanding, scraping, or repainting the affected areas to restore the protective coating.

Repaint as Needed: Over time, all bottom paints will wear away and lose their effectiveness. Depending on the type of paint you’re using and the conditions in which you use your boat, you may need to repaint every 1-3 years to maintain effective antifouling protection.

When it comes time to repaint your boat’s bottom, the process will be similar to the initial application process. You’ll need to prepare the surface by cleaning and sanding the hull, choose the appropriate type of paint, and apply it according to the manufacturer’s instructions. It’s important to choose a high-quality paint and to follow proper application techniques to ensure that your boat’s bottom paint continues to provide effective protection for years to come.

How do I know when it’s time to repaint bottom paint?

Knowing when to repaint your boat’s bottom paint can depend on several factors, such as the type of paint used, the conditions in which your boat is used, and the level of fouling on the hull. Here are some general signs that it may be time to repaint your boat’s bottom paint:

It has been several years since the last application: Most bottom paints have a lifespan of around 2-3 years, after which they will begin to lose their effectiveness.

The paint is visibly worn or peeling: If you can see patches of bare hull or the paint is peeling, it’s a good indication that it’s time to repaint.

Increased fouling: If you notice an increase in fouling, such as barnacles or algae, on your boat’s hull, it may be time to repaint with a more effective antifouling paint.

Reduced performance: If your boat is slower than usual or handling differently, it may be due to a buildup of fouling or worn-out bottom paint.

Inspection reveals wear or damage: During routine maintenance, if you notice any wear, scratches, or damage to the bottom paint, it may be time to repaint to prevent further damage.

It’s important to note that regular maintenance and cleaning can extend the lifespan of your bottom paint and help you catch any issues before they become too severe. If you are unsure whether it’s time to repaint your boat’s bottom paint, consult with a marine professional or bottom paint manufacturer for guidance.

KEY TAKEAWAYS

  • Choose a bottom paint that is suitable for the type of water and conditions in which your boat will be used.
  • Consider the type of hull material your boat has, as some paints may not be compatible with certain materials.
  • Choose the appropriate type of bottom paint based on the level of fouling in your area and the type of marine life that is present.
  • Select a paint that is compatible with any existing coatings on your boat’s hull.
  • Consider the application method and how easy it will be to apply and maintain the paint.
  • Make sure to properly prepare the surface before applying the bottom paint to ensure optimal performance.
  • Follow the manufacturer’s instructions for application, drying times, and maintenance to maximize the lifespan of the bottom paint.

Where can I buy bottom paint?

You can buy bottom paint at Bottom Paint Store, an online store that specializes in selling premium marine paints, gel coat, varnish, and supplies.

When shopping at a bottom paint store, you will find a wide variety of bottom paint, including antifouling paints, ablative paints, hard paints, and more. These paints come in different colors, sizes, and formulations to meet the needs of different types of vessels and boating conditions.

Alright, we’ve covered a lot. So, to wrap things up, choosing the right bottom paint for your boat is crucial to keeping your vessel in tip-top shape. You want to make sure you pick a paint that’s suited for your boat’s specific needs and the conditions it’ll be facing. You also want to make sure you follow the manufacturer’s instructions for application and maintenance, so you get the most bang for your buck. Remember, keeping your boat’s bottom clean and protected not only helps it perform better on the water, it also helps you avoid costly repairs down the line!

Painting Your Boat with Interlux Bottom Paint: A Step-By-Step Guide

So, you’ve decided to spruce up your boat and give it a fresh coat of paint? Congratulations! You’ve made an excellent decision. But before you get started, let’s go over the basics of how to properly use Interlux bottom paint so that you can ensure a beautiful, long-lasting finish.

First things first—you will need to gather all the necessary supplies and materials for the job. These include a good quality boat paint (Interlux makes some great options), a brush or roller, sandpaper, primer, and other necessary materials such as tape and drop cloths. Once you have everything you need, it’s time to get down to business!

Start by sanding the entire surface of your boat with medium-grit sandpaper. This will help create a smooth surface for the paint to adhere to. Next, wipe down the area with water and detergent or acetone before rinsing thoroughly with clean water. Now it’s time for priming! Primer helps create an even basecoat that will provide extra protection against corrosion and abrasion from saltwater or other elements. Allow the primer to dry completely before moving on to painting your boat with Interlux bottom paint.

Interlux bottom paints are designed specifically for boats and are formulated with exceptional durability in mind—so make sure you follow their instructions carefully. Generally speaking, painting should be done in thin layers from top to bottom in order to avoid drips or runs in the paint job. Once each layer is dry (be sure not to rush this step!), apply another thin layer until the desired color is achieved. Finally, allow the paint ample time to cure before taking your boat out on its maiden voyage!

Final thoughts

With these tips in mind, painting your boat with Interlux bottom paint can be an easy and enjoyable experience. Remember—take your time throughout each step of the process so that you can achieve a beautiful finish that lasts for years! Happy boating!
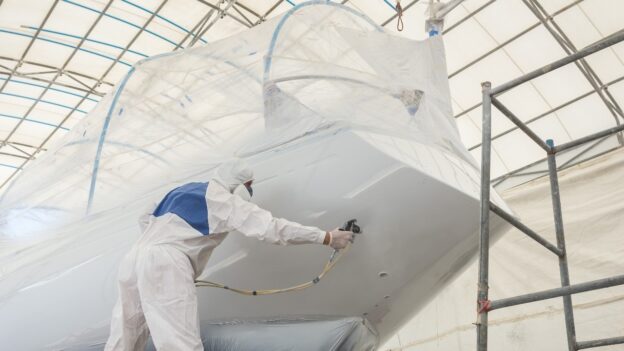
Awlgrip Color Chart

Trying to decide the right Awlgrip color to paint your boat this season? Well, consider yourself lucky because Awlgrip has a color selection tool to help you choose the right color for your boat. Not only is Awlgrip one of the best quality boat paints on the market, but it also comes in a wide range of colors to suit a wide range of boats. So, whether you’re looking for a classic white or something more eye-catching, you’re sure to find the perfect shade in the Awlgrip color chart. And once you’ve decided on a color, you can place your Awlgrip paint order with Bottom Paint Store.

Go here to find the Awlgrip Color Chart tool and explore all the colors available for your vessel.

How to Repair a Fiberglass Boat: A Step by Step Guide

Last Updated: January 26, 2026


Quick Recommendation

How to Repair a Fiberglass Boat: What to Do First

  • Assess the damage: Cosmetic damage can be fixed with gelcoat repair, while cracks or soft spots require fiberglass and epoxy repair first.
  • Prep thoroughly: Clean, grind, and feather damaged areas so new fiberglass and gelcoat bond properly.
  • Repair in layers: Rebuild structure with fiberglass and resin, then finish with gelcoat for protection and appearance.
  • Bottom line: Long-lasting fiberglass repairs depend on proper damage assessment, structural repair first, and careful surface finishing.

Tip: If the fiberglass flexes or feels soft, do not skip structural repair—gelcoat alone will not fix the problem.

Quick Answer: How Do You Repair a Fiberglass Boat?

To repair a fiberglass boat, first clean and sand the damaged area, remove loose or cracked material, then rebuild the surface using fiberglass cloth, resin, filler, or gelcoat depending on the severity of the damage. Small scratches and chips may only need gelcoat repair, while cracks, gouges, soft spots, and holes may require fiberglass reinforcement.

The most important part of any fiberglass boat repair is preparation. The damaged area must be clean, dry, sanded, and properly shaped before applying resin, fiberglass cloth, fairing compound, primer, or gelcoat. Skipping the prep work can lead to poor adhesion, visible repairs, or damage that returns later.

Best Repair Method by Type of Fiberglass Damage

Type of Damage Recommended Repair Why It Works
Light scratches Wet sanding, buffing, and polishing Restores the surface when the damage has not cut deeply into the gelcoat.
Gelcoat chips Gelcoat paste or gelcoat repair putty Fills small surface chips and restores color and protection to the outer layer.
Hairline cracks Open the crack, clean it, and fill with gelcoat or marine filler Helps prevent the crack from spreading and creates a stronger repair than covering it only at the surface.
Deep gouges Marine filler, fairing compound, and gelcoat Builds the damaged area back to shape before finishing the surface.
Small holes Fiberglass cloth or mat with resin, then fairing and gelcoat Adds strength behind the repair instead of relying only on filler.
Larger holes or structural damage Layered fiberglass cloth and resin repair Rebuilds strength by replacing the missing or damaged fiberglass laminate.
Soft spots Inspect the core, remove damaged material, and rebuild with fiberglass and resin Soft spots may indicate deeper moisture or core damage that surface filler will not fix.
Cosmetic discoloration Cleaning, compounding, polishing, or new gelcoat Restores appearance when the fiberglass structure is still sound.

Basic Fiberglass Boat Repair Steps

Step What to Do Why It Matters
1. Inspect the damage Determine whether the damage is only cosmetic or goes into the fiberglass laminate. The repair method depends on whether you are fixing gelcoat, filler, fiberglass, or structural damage.
2. Clean the area Remove wax, grease, dirt, salt, and loose material before sanding. Resin, filler, and gelcoat need a clean surface to bond correctly.
3. Sand and shape the repair area Sand around the damage and taper the edges if fiberglass cloth will be used. A properly sanded surface improves adhesion and helps the repair blend into the surrounding hull.
4. Apply fiberglass, filler, or gelcoat Use the correct repair material based on the depth and size of the damage. Small cosmetic repairs and larger structural repairs require different products.
5. Let the repair cure Allow the resin, filler, or gelcoat to cure according to the manufacturer’s directions. Rushing the cure time can weaken the repair or make sanding and finishing more difficult.
6. Sand, fair, and finish Sand the cured repair smooth, then apply gelcoat, primer, paint, or bottom paint as needed. The final finish protects the repair and helps it match the surrounding surface.

What to Consider Before Repairing Fiberglass

Before starting a fiberglass boat repair, identify whether the damage is above or below the waterline, cosmetic or structural, and whether the area is dry. Repairs below the waterline need special attention because the finished surface must resist water intrusion and may also need barrier coat or bottom paint after the repair is complete.

For small gelcoat chips, scratches, and surface cracks, a gelcoat repair product may be enough. For deeper gouges, holes, and impact damage, you may need fiberglass cloth, resin, hardener, fairing compound, sandpaper, masking materials, and a finishing product such as gelcoat, topside paint, or bottom paint.

Common Questions About Fiberglass Boat Repair

Can you repair a fiberglass boat yourself?

Yes, many small fiberglass boat repairs can be handled by a careful DIY boat owner. Scratches, chips, minor cracks, and small gouges are usually manageable with the right materials and preparation. Larger holes, soft spots, or structural damage may require more advanced repair skills or professional help.

What is the best product to repair fiberglass boat damage?

The best product depends on the type of damage. Gelcoat paste or gelcoat repair putty is often used for small cosmetic chips. Fiberglass cloth and resin are better for holes and structural repairs. Fairing compound is used to smooth and shape the repaired area before finishing.

What is the difference between gelcoat repair and fiberglass repair?

Gelcoat repair fixes the outer cosmetic and protective surface of the boat. Fiberglass repair fixes the laminate underneath when the damage is deeper, cracked, punctured, or weakened. Many repairs require both: fiberglass for strength and gelcoat for the finished surface.

Do you need fiberglass cloth for every boat repair?

No. Fiberglass cloth is usually not needed for very small surface scratches or shallow gelcoat chips. It is used when the repair needs added strength, such as holes, deeper cracks, gouges, or areas where the fiberglass laminate has been damaged.

Can you use Bondo on a fiberglass boat?

Automotive body filler is not usually the best choice for marine fiberglass repairs, especially below the waterline. Marine-grade fillers, epoxy fillers, polyester fillers, fairing compounds, and fiberglass repair materials are better suited for boats because they are designed for wet and demanding marine environments.

How do you repair a hole in a fiberglass boat?

To repair a hole in a fiberglass boat, grind or sand the damaged area, taper the edges, clean the surface, then rebuild the area with layers of fiberglass cloth or mat and resin. Once cured, the repair is sanded, faired smooth, and finished with gelcoat, paint, or bottom paint.

Can you repair fiberglass below the waterline?

Yes, fiberglass below the waterline can be repaired, but the repair must be sealed and finished correctly to prevent water intrusion. Depending on the job, the repaired area may need epoxy barrier coat, primer, and antifouling bottom paint after the fiberglass work is complete.

How long does fiberglass boat repair take to cure?

Cure time depends on the repair product, temperature, humidity, hardener ratio, and thickness of the application. Always follow the manufacturer’s instructions before sanding, fairing, painting, or putting the boat back in the water.

Should I use epoxy resin or polyester resin for fiberglass boat repair?

Both epoxy and polyester resin are used in fiberglass boat repair. Epoxy typically provides excellent adhesion and water resistance, while polyester resin is commonly used with gelcoat systems. The best choice depends on the repair location, existing material, and final finish.

Recommended Fiberglass Repair Products

Bottom Paint Store carries fiberglass repair materials for small cosmetic fixes and larger boat repair projects, including gelcoat repair products, fiberglass cloth, fiberglass mat, polyester resin, epoxy resin, hardeners, fairing compounds, fillers, primers, and finishing coatings. Choosing the right product depends on the size of the damage, whether the repair is above or below the waterline, and whether the final surface will be gelcoated, painted, or bottom painted.


If you’re a boat enthusiast, you know that there’s nothing quite like the feeling of cruising out on the open water. But what do you do when your beloved vessel starts to show signs of wear and tear? If you have a fiberglass boat, you’re in luck. In this blog post, we’ll walk you through everything you need to know about repairing your fiberglass boat, from small cracks to large holes. So, whether you’re a seasoned pro or a complete novice, read on for our step-by-step guide on how to repair a fiberglass boat.

KEY TAKEWAYS

  1. Clean the Area
    The first step in boat fiberglass repair is to clean the area that needs to be repaired. This step is important because it will allow the repair materials to bond properly with the existing fiberglass. Use a mild soap and water solution to clean the area and then dry it thoroughly with a clean cloth.
  2. Cut Out the Damaged Area
    Once the area is clean, use a sharp knife or razor blade to cut out the damaged area. Be sure to cut away any loose or damaged fiberglass so that you have a clean, smooth surface to work with.
  3. Apply the Repair Material
    There are a variety of repair materials that can be used for fiberglass boat repair. The type of material you use will depend on the size and severity of the damage. For small repairs, you can use a fiberglass repair kit; for larger repairs, you may need to use a sheet of fiberglass cloth and some resin. Follow the instructions that come with your chosen repair material to apply it to the damaged area.

Repairing Small Cracks and Scratches

One of the most common problems that boat owners face is small cracks and scratches in the hull. While these may not seem like a big deal at first, they can quickly turn into larger problems if left unaddressed. The good news is that small cracks and scratches are relatively easy to fix with some basic supplies.

Polyester Resin is a great choice for fiberglass repairs

Here’s what you’ll need:

-Fiberglass cloth
-Resin
-Hardener
-Sandpaper
-Putty knife or spreader
-Measuring cup
-Gloves
-Eye protection

Once you have all of your supplies, follow these steps to repair small cracks and scratches in your fiberglass boat:

  1. Clean the area around the crack or scratch with sandpaper to rough up the surface and allow the resin to adhere better.
  2. Cut a piece of fiberglass cloth to size and lay it over the crack or scratch.
  3. Mix together the resin and hardener in a measuring cup, according to the application guidelines.
  4. Use a putty knife or spreader to apply the resin mixture over the fiberglass cloth, making sure to work it into any crevices.
  5. Allow the resin to cure for 24 hours before sanding down any excess material.
  6. Your fiberglass boat is as good as new!

Fixing Large Holes in Fiberglass Boats

While small cracks and scratches are relatively easy to fix, large holes can be much more challenging—but not impossible! With some patience and elbow grease, you can patch up even the biggest holes in your fiberglass boat hull. Here’s what you’ll need:

-Fiberglass cloth
-Resin mixture (resin and hardener)
-Putty knife or spreader -Sandpaper -Measuring cup -Gloves -Eye protection -Plywood (optional)

Fiberglass Boat Repair Supply Checklist

  • Fiberglass cloth or fiberglass mat
  • Polyester resin or epoxy resin
  • Hardener or catalyst
  • Gelcoat paste, gelcoat repair kit, or marine filler
  • Fairing compound for smoothing deeper repairs
  • Sandpaper in multiple grits
  • Mixing cups, stir sticks, spreaders, and gloves
  • Primer, topside paint, barrier coat, or bottom paint when needed

Follow these steps to repair large holes in your fiberglass boat hull:

  1. If necessary, use plywood to create a temporary patch for the hole until the resin has cured. This will help keep water out of the hole while you’re working on it.
  2. Cut a piece of fiberglass cloth to size and lay it over the hole.
  3. Use a putty knife or spreader to apply the resin mixture over the fiberglass cloth, making sure to work it into any crevices.
  4. Allow the resin to cure for 24 hours before sanding down any excess material and removing any plywood patches.
  5. Your fiberglass boat is as good as new!


How to Repair a Fiberglass Boat Chart

Performing each step carefully—from inspection to final finishing—ensures a strong, durable fiberglass repair and restores your boat’s structural integrity and appearance.

Conclusion:

No matter how experienced you are as a boat owner, sooner or later you’re going to need to make some repairs—and if you have a fiberglass boat, that means getting familiar with some basic repair techniques. In this blog post, we’ve walked you through everything you need to know about repairing small cracks and scratches, as well as large holes in your hull. So, whether you’re dealing with cosmetic damage or something more serious, now you know how to fix it!

If you have any questions about how to repair your fiberglass boat, please feel free to reach out to the Bottom Paint Store technical assistance team by phone at 888-505-2313, or via Live Chat found on the website. We have a wide selection of fiberglass and gelcoat putties, resins, restoration solutions, repair kits, and tools/materials.

Interlux paint reviews

Interlux Paint Reviews

Interlux, a division of AkzoNobel, is one of the world’s largest manufacturers of high-performance boat paint, yacht coatings and marine protection. high performance boat paint, yacht coatings and marine protection.

For over a hundred years, the Interlux brand has been creating the most innovative coating solutions to protect, beautify and improve the performance of all types of boats.

The following are reviews we have received from our customers who have purchased Interlux. The reviews have been collected through Verified Reviews, an independent rating company.

I have used this primer many times, it is great for ALL epoxy primer applications. It goes on smoother than PrimeKoat, sands easier, comes in 2 tints, mixes easier, better in all respects except does not have quite the coverage of PrimeKoat. Interlux Interprotect 2000E Epoxy Primer – John B.

The paint was great! Interlux Ultra Kote- Jon Z.

Good stuff. Interlux Pacifica Plus – Thomas P.

We have use this product in the past and it is excellent. – Interlux Interprotect 2000E Epoxy Primer.- Captain Steve G.

I’ve had very good luck with this product on my charter boat. – Interlux Act – David M.

Good. – Interlux Primocon – Gary W.

I am new to Trilux 33 but I have had good experience with Interlux. – David M.

Best paint for my outdrive. –

Top of the line quality for a great price. Great product. – Micron 66 by Interlux – Scott H.

Excellent product. – Interlux Interprotect 2000E Epoxy Primer – Charles P.

Product is very good and cost effective. – Interlux Act – anonymous.

Have used multiple times and always exceeds expectations. A good inexpensive product for a boat that is trailer sailed as this one is. – Interlux Ultra Kote- Ken C.

This is the 5 (th) time using Pacific Plus and it is a good product. – Interlux Pacifica Plus

Good price. – David K.