The Different Types of Boat Paint


In this article, we will briefly describe some of the different types of boat paint that can be used to repair, restore, protect, and make your boat looks its best.

Quick Answer: What Are the Different Types of Boat Paint?

The main types of boat paint include bottom paint, topside paint, deck paint, gelcoat, primers, barrier coats, varnish, and specialty marine coatings. Each type is designed for a different part of the boat, so the best choice depends on whether you are painting below the waterline, above the waterline, decks, fiberglass, wood, aluminum, steel, or underwater running gear.

For most boat owners, the most important distinction is between bottom paint and topside paint. Bottom paint is used below the waterline to help prevent marine growth. Topside paint is used above the waterline to improve appearance and protect exposed surfaces from sun, salt, moisture, and wear.

Boat Paint Types Comparison

Boat Paint Type Best Used For What It Does
Bottom Paint Hull areas below the waterline Helps reduce barnacles, algae, slime, and other marine growth on boats kept in the water.
Ablative Bottom Paint Cruising boats, sailboats, powerboats, and seasonal use Gradually wears away to expose fresh antifouling protection and reduce paint buildup.
Hard Bottom Paint Fast boats, racing boats, trailered boats, and boats cleaned regularly Forms a durable coating that resists scrubbing and can be sanded smooth.
Topside Paint Hull sides, cabins, trim, and surfaces above the waterline Provides color, gloss, UV resistance, and protection for exposed marine surfaces.
Deck Paint Boat decks, walkways, cockpit floors, and high-traffic areas Protects surfaces from wear and can be used with non-skid additives for better traction.
Gelcoat Fiberglass repair, restoration, chips, gouges, and cosmetic repairs Restores or repairs the original fiberglass surface and creates a hard, glossy finish.
Marine Primer Prepared fiberglass, wood, metal, or old paint before topcoating Improves adhesion, sealing, and surface uniformity before applying finish coats.
Epoxy Barrier Coat Fiberglass hulls below the waterline Helps seal the hull and protect against water intrusion before bottom paint is applied.
Marine Varnish Wood trim, teak, mahogany, rails, hatches, and brightwork Protects wood from sunlight, moisture, salt, and weather while enhancing appearance.
Specialty Coatings Props, running gear, inflatables, aluminum, steel, or specific substrates Designed for surfaces or conditions that require a specialized coating system.

Best Boat Paint Choice by Project

Project Recommended Paint Type Why
Painting the bottom of a boat kept in the water Antifouling bottom paint Bottom paint is designed to help prevent marine growth below the waterline.
Painting the hull sides above the waterline Topside paint Topside paint provides gloss, color, UV resistance, and weather protection.
Painting boat decks or walkways Deck paint with non-skid additive Helps protect high-traffic areas and improve traction underfoot.
Repairing fiberglass chips or gouges Gelcoat repair product Gelcoat is commonly used to repair and blend damaged fiberglass surfaces.
Sealing a fiberglass hull before bottom paint Epoxy barrier coat Barrier coat helps seal fiberglass before antifouling paint is applied.
Painting aluminum boats Aluminum-safe primer and paint system Aluminum requires compatible coatings, especially below the waterline.
Restoring exterior wood trim Marine varnish or polyurethane varnish Varnish protects wood while enhancing the natural grain and appearance.
Painting propellers and running gear Specialty running gear coating Props, shafts, and running gear need coatings designed for metal, motion, and underwater exposure.
Changing the color of a fiberglass boat Topside paint or professional marine paint system Marine paint is often more practical than re-gelcoating for larger color changes.

What to Consider Before Choosing Boat Paint

Before choosing boat paint, first identify where the coating will be used. A paint designed for topsides should not automatically be used below the waterline, and bottom paint should not be used as a general-purpose finish for decks, cabins, or trim. The coating must match the surface, exposure, and purpose.

You should also consider the boat material, existing coating, water conditions, boat speed, storage method, and maintenance routine. Fiberglass, wood, aluminum, steel, and previously painted surfaces may each require different primers, preparation steps, and compatible paint systems.

Bottom Paint vs Topside Paint

Feature Bottom Paint Topside Paint
Used Where? Below the waterline Above the waterline
Main Purpose Helps reduce marine growth Improves appearance and protects from sun, salt, and weather
Finish May be matte, semi-smooth, hard, or ablative depending on the product Usually chosen for gloss, color, and appearance
Common Surfaces Underwater fiberglass, wood, steel, or properly prepared aluminum Fiberglass, wood, metal, cabins, hull sides, and trim above the waterline
Can It Be Used Interchangeably? No. Bottom paint is not a substitute for topside paint. No. Topside paint is not a substitute for antifouling bottom paint.

Common Questions About the Different Types of Boat Paint

What kind of paint do you use on a boat?

The kind of paint you use depends on the part of the boat being painted. Use bottom paint below the waterline, topside paint above the waterline, deck paint for walkways and cockpit areas, gelcoat for fiberglass repairs, and marine varnish for exposed wood.

What is the difference between bottom paint and topside paint?

Bottom paint is used below the waterline to help prevent marine growth. Topside paint is used above the waterline to protect and improve the appearance of hull sides, cabins, trim, and other exposed surfaces. They are designed for different jobs and should not be used interchangeably.

What paint should I use below the waterline?

Below the waterline, use antifouling bottom paint that is compatible with your hull material, existing paint, water conditions, and boat usage. In some cases, a primer or epoxy barrier coat may be needed before applying bottom paint.

What paint should I use above the waterline?

Above the waterline, use marine topside paint, polyurethane paint, enamel, or another coating designed for exterior marine exposure. These paints are made to provide color, gloss, UV resistance, and protection against salt, moisture, and weather.

Can I use regular paint on a boat?

Regular household or non-marine paint is usually not recommended for boats. Marine paints are designed for water exposure, sunlight, salt, abrasion, flexing, and the specific surfaces found on boats. Using the wrong paint can lead to peeling, fading, poor adhesion, or coating failure.

Is gelcoat the same as boat paint?

No. Gelcoat is the original outer finish used on many fiberglass boats and is often used for fiberglass repairs. Boat paint is a coating applied over a prepared surface for protection, color, or antifouling performance. Gelcoat and boat paint are related, but they are not the same product.

Do I need primer before painting a boat?

Primer may be needed depending on the surface, existing coating, and paint system. Primers can improve adhesion, seal repairs, create a smoother surface, and help the finish coat perform properly. Always follow the paint manufacturer’s surface preparation and primer recommendations.

What is the best boat paint for fiberglass?

The best boat paint for fiberglass depends on the area being painted. Use bottom paint below the waterline, topside paint above the waterline, deck paint for walking surfaces, and gelcoat repair products for chips, gouges, or cosmetic fiberglass repairs.

What is the best boat paint for aluminum?

Aluminum boats require coatings that are compatible with aluminum. Use an aluminum-safe primer and paint system, especially below the waterline. Avoid copper-based bottom paints on aluminum unless the product is specifically labeled safe for aluminum use.

How do I know which boat paint to buy?

Start by identifying the surface material, where the paint will be used, and whether the area is above or below the waterline. Then check the existing coating, compatibility requirements, water conditions, and manufacturer instructions before selecting primer, paint, or related products.

Recommended Boat Paint Products and Supplies

Bottom Paint Store carries bottom paint, topside paint, deck paint, gelcoat repair products, primers, epoxy barrier coats, marine varnish, specialty coatings, rollers, brushes, sandpaper, solvents, cleaners, paint removers, and application supplies. The right product depends on your boat material, project type, existing coating, and whether the surface is above or below the waterline.

What Are the Different Types of Boat Paint?

The main types of boat paint include bottom paint, topside paint, deck paint, gelcoat, primers, barrier coats, varnish, and specialty marine coatings. Each type is designed for a different part of the boat, so the best choice depends on whether you are painting below the waterline, above the waterline, decks, fiberglass, wood, aluminum, steel, or underwater running gear.

For most boat owners, the most important distinction is between bottom paint and topside paint. Bottom paint is used below the waterline to help prevent marine growth. Topside paint is used above the waterline to improve appearance and protect exposed surfaces from sun, salt, moisture, and wear.

Boat Paint Types Comparison

Boat Paint Type Best Used For What It Does
Bottom Paint Hull areas below the waterline Helps reduce barnacles, algae, slime, and other marine growth on boats kept in the water.
Ablative Bottom Paint Cruising boats, sailboats, powerboats, and seasonal use Gradually wears away to expose fresh antifouling protection and reduce paint buildup.
Hard Bottom Paint Fast boats, racing boats, trailered boats, and boats cleaned regularly Forms a durable coating that resists scrubbing and can be sanded smooth.
Topside Paint Hull sides, cabins, trim, and surfaces above the waterline Provides color, gloss, UV resistance, and protection for exposed marine surfaces.
Deck Paint Boat decks, walkways, cockpit floors, and high-traffic areas Protects surfaces from wear and can be used with non-skid additives for better traction.
Gelcoat Fiberglass repair, restoration, chips, gouges, and cosmetic repairs Restores or repairs the original fiberglass surface and creates a hard, glossy finish.
Marine Primer Prepared fiberglass, wood, metal, or old paint before topcoating Improves adhesion, sealing, and surface uniformity before applying finish coats.
Epoxy Barrier Coat Fiberglass hulls below the waterline Helps seal the hull and protect against water intrusion before bottom paint is applied.
Marine Varnish Wood trim, teak, mahogany, rails, hatches, and brightwork Protects wood from sunlight, moisture, salt, and weather while enhancing appearance.
Specialty Coatings Props, running gear, inflatables, aluminum, steel, or specific substrates Designed for surfaces or conditions that require a specialized coating system.

Best Boat Paint Choice by Project

Project Recommended Paint Type Why
Painting the bottom of a boat kept in the water Antifouling bottom paint Bottom paint is designed to help prevent marine growth below the waterline.
Painting the hull sides above the waterline Topside paint Topside paint provides gloss, color, UV resistance, and weather protection.
Painting boat decks or walkways Deck paint with non-skid additive Helps protect high-traffic areas and improve traction underfoot.
Repairing fiberglass chips or gouges Gelcoat repair product Gelcoat is commonly used to repair and blend damaged fiberglass surfaces.
Sealing a fiberglass hull before bottom paint Epoxy barrier coat Barrier coat helps seal fiberglass before antifouling paint is applied.
Painting aluminum boats Aluminum-safe primer and paint system Aluminum requires compatible coatings, especially below the waterline.
Restoring exterior wood trim Marine varnish or polyurethane varnish Varnish protects wood while enhancing the natural grain and appearance.
Painting propellers and running gear Specialty running gear coating Props, shafts, and running gear need coatings designed for metal, motion, and underwater exposure.
Changing the color of a fiberglass boat Topside paint or professional marine paint system Marine paint is often more practical than re-gelcoating for larger color changes.

What to Consider Before Choosing Boat Paint

Before choosing boat paint, first identify where the coating will be used. A paint designed for topsides should not automatically be used below the waterline, and bottom paint should not be used as a general-purpose finish for decks, cabins, or trim. The coating must match the surface, exposure, and purpose.

You should also consider the boat material, existing coating, water conditions, boat speed, storage method, and maintenance routine. Fiberglass, wood, aluminum, steel, and previously painted surfaces may each require different primers, preparation steps, and compatible paint systems.

Bottom Paint vs Topside Paint

Feature Bottom Paint Topside Paint
Used Where? Below the waterline Above the waterline
Main Purpose Helps reduce marine growth Improves appearance and protects from sun, salt, and weather
Finish May be matte, semi-smooth, hard, or ablative depending on the product Usually chosen for gloss, color, and appearance
Common Surfaces Underwater fiberglass, wood, steel, or properly prepared aluminum Fiberglass, wood, metal, cabins, hull sides, and trim above the waterline
Can It Be Used Interchangeably? No. Bottom paint is not a substitute for topside paint. No. Topside paint is not a substitute for antifouling bottom paint.

Common Questions About the Different Types of Boat Paint

What kind of paint do you use on a boat?

The kind of paint you use depends on the part of the boat being painted. Use bottom paint below the waterline, topside paint above the waterline, deck paint for walkways and cockpit areas, gelcoat for fiberglass repairs, and marine varnish for exposed wood.

What is the difference between bottom paint and topside paint?

Bottom paint is used below the waterline to help prevent marine growth. Topside paint is used above the waterline to protect and improve the appearance of hull sides, cabins, trim, and other exposed surfaces. They are designed for different jobs and should not be used interchangeably.

What paint should I use below the waterline?

Below the waterline, use antifouling bottom paint that is compatible with your hull material, existing paint, water conditions, and boat usage. In some cases, a primer or epoxy barrier coat may be needed before applying bottom paint.

What paint should I use above the waterline?

Above the waterline, use marine topside paint, polyurethane paint, enamel, or another coating designed for exterior marine exposure. These paints are made to provide color, gloss, UV resistance, and protection against salt, moisture, and weather.

Can I use regular paint on a boat?

Regular household or non-marine paint is usually not recommended for boats. Marine paints are designed for water exposure, sunlight, salt, abrasion, flexing, and the specific surfaces found on boats. Using the wrong paint can lead to peeling, fading, poor adhesion, or coating failure.

Is gelcoat the same as boat paint?

No. Gelcoat is the original outer finish used on many fiberglass boats and is often used for fiberglass repairs. Boat paint is a coating applied over a prepared surface for protection, color, or antifouling performance. Gelcoat and boat paint are related, but they are not the same product.

Do I need primer before painting a boat?

Primer may be needed depending on the surface, existing coating, and paint system. Primers can improve adhesion, seal repairs, create a smoother surface, and help the finish coat perform properly. Always follow the paint manufacturer’s surface preparation and primer recommendations.

What is the best boat paint for fiberglass?

The best boat paint for fiberglass depends on the area being painted. Use bottom paint below the waterline, topside paint above the waterline, deck paint for walking surfaces, and gelcoat repair products for chips, gouges, or cosmetic fiberglass repairs.

What is the best boat paint for aluminum?

Aluminum boats require coatings that are compatible with aluminum. Use an aluminum-safe primer and paint system, especially below the waterline. Avoid copper-based bottom paints on aluminum unless the product is specifically labeled safe for aluminum use.

How do I know which boat paint to buy?

Start by identifying the surface material, where the paint will be used, and whether the area is above or below the waterline. Then check the existing coating, compatibility requirements, water conditions, and manufacturer instructions before selecting primer, paint, or related products.

Boat Paint Selection Checklist

  • Identify whether the surface is above or below the waterline
  • Confirm the boat material: fiberglass, wood, aluminum, steel, or inflatable surface
  • Check the condition and type of existing paint or gelcoat
  • Decide whether the goal is antifouling protection, appearance, repair, traction, or wood protection
  • Choose the correct primer or barrier coat when required
  • Confirm compatibility before painting over an old coating
  • Check dry time, recoat time, cure time, and launch window
  • Use marine-grade rollers, brushes, sandpaper, solvents, and safety supplies

Recommended Boat Paint Products and Supplies

Bottom Paint Store carries bottom paint, topside paint, deck paint, gelcoat repair products, primers, epoxy barrier coats, marine varnish, specialty coatings, rollers, brushes, sandpaper, solvents, cleaners, paint removers, and application supplies. The right product depends on your boat material, project type, existing coating, and whether the surface is above or below the waterline.

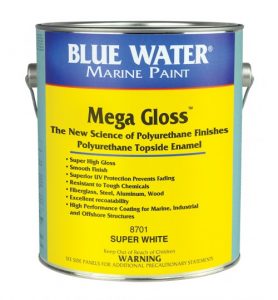
Topside boat paint is a type of paint you apply above the waterline of a boat. This can include the sides of the hull, deck, as well as interior. Marine topside paints usually consist of one-part polyurethane, two-part polyurethane, and alkyd marine enamel. There are also buffable, two-part acrylic urethanes. Due to the sun’s rays, your boat is vulnerable to UV damage so coating your upper hull and deck with good topside paint can go a long way to protecting your boat.
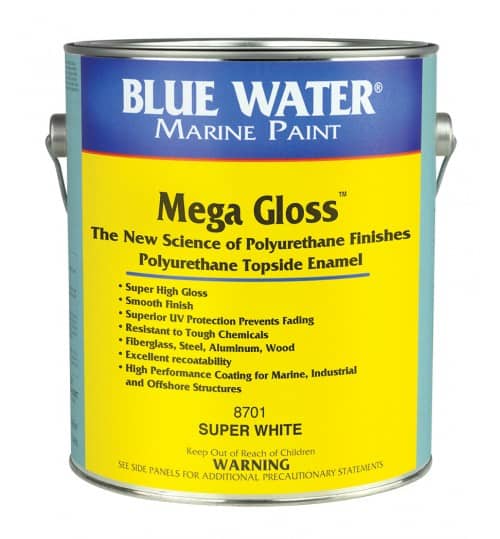
Blue Water Marine Topside Paints are superior in quality, higher in value and typically, priced better than store brands


Aluminum boat paint can be used for many purposes including to camouflage, decorate, refurbish, or restore and touch up aluminum boat surfaces. Paint that is safe for aluminum and can be applied without a primer and can be used below or above the waterline. If you don’t take care of your aluminum boat, it will eventually start to show its age. One way to keep your aluminum boat looking new is to touch up the paint when it starts to fade or chip. Touching up the paint on your aluminum boat is a relatively simple process.

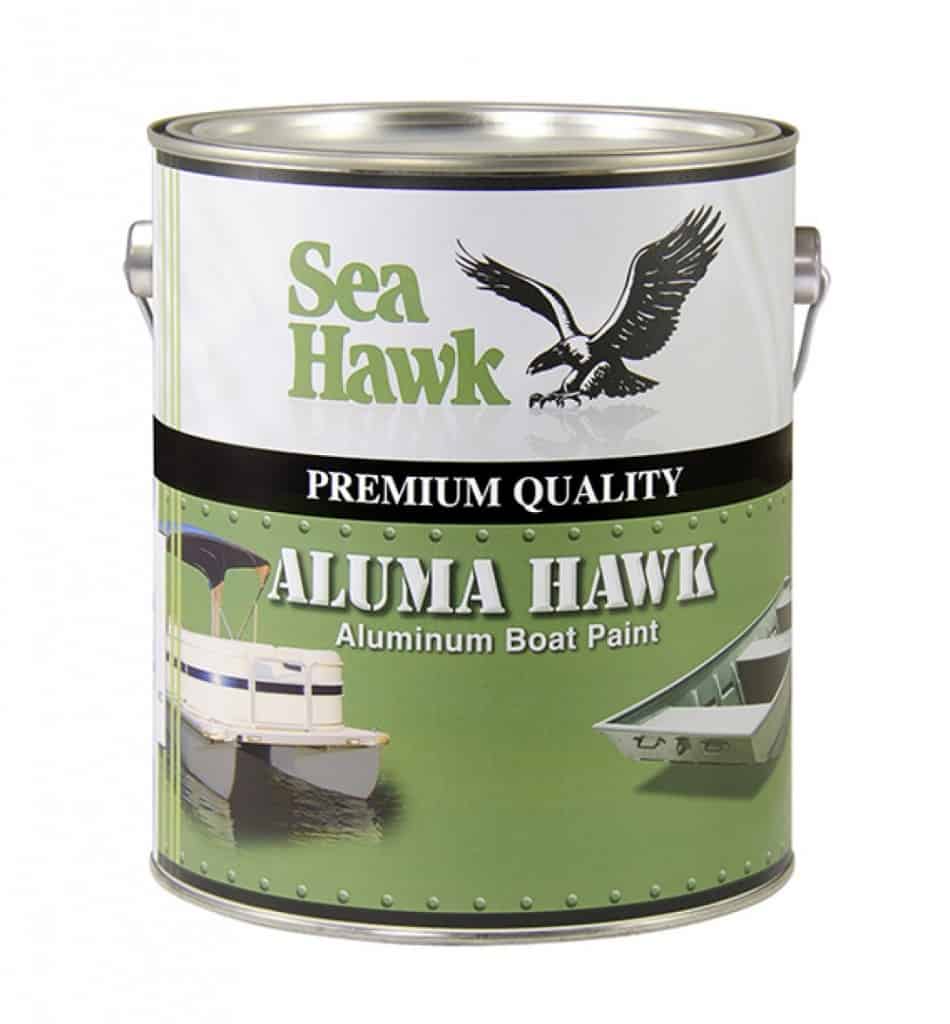
Aluma Hawk is a high-solids, quick drying corrosion inhibiting coating designed for use on aluminum. It requires no primer and can be applied below or above the waterline with no antifouling characteristics; it also contains dual purpose phenolic resin which makes it possible to use as both primer (for metals) AND topcoat if needed!
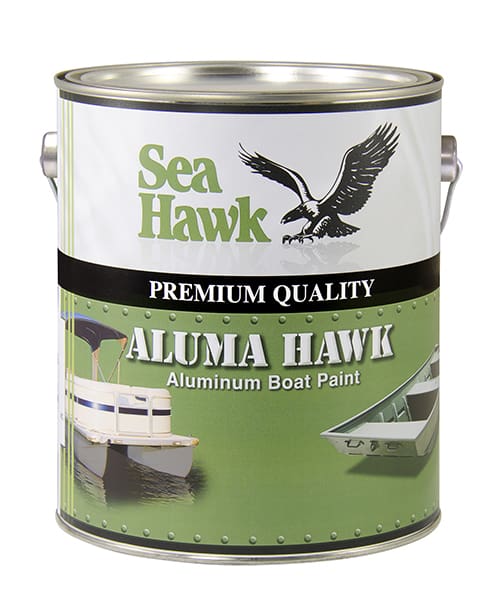
Aluma Hawk Paint
Aluma Hawk is a fast drying, high-solids, corrosion-inhibiting coating designed for use on aluminum with no need for a primer.

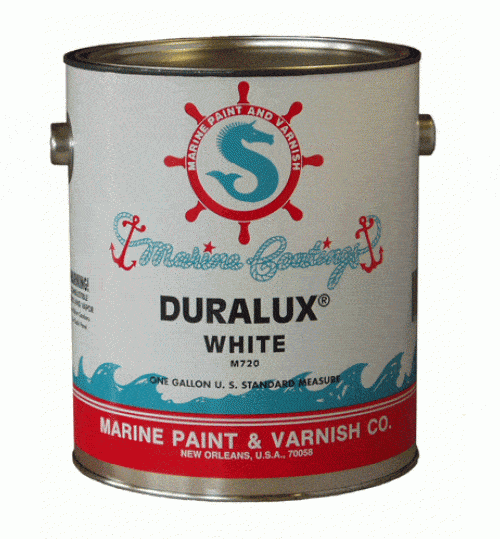
Duralux Paint is available in a variety of colors to satisfy the most discriminating boat owner’s eye, Duralux offers a complete line of products including enamels and spar varnish. Duralux aluminum boat paint is a solid choice for those who want great protection for their aluminum boat.

Duralux Aluminum Boat Green


Fiberglass coatings usually consist of gelcoat, gelcoat putties, resins, restoration solutions, repair kits, and tools/materials. Gel coats are often used to touch up or repair a boat’s finish. They have a much shorter shelf life and can be a lot more difficult to apply than paint so the manufacturer’s instructions must be carefully followed to ensure a successful result.
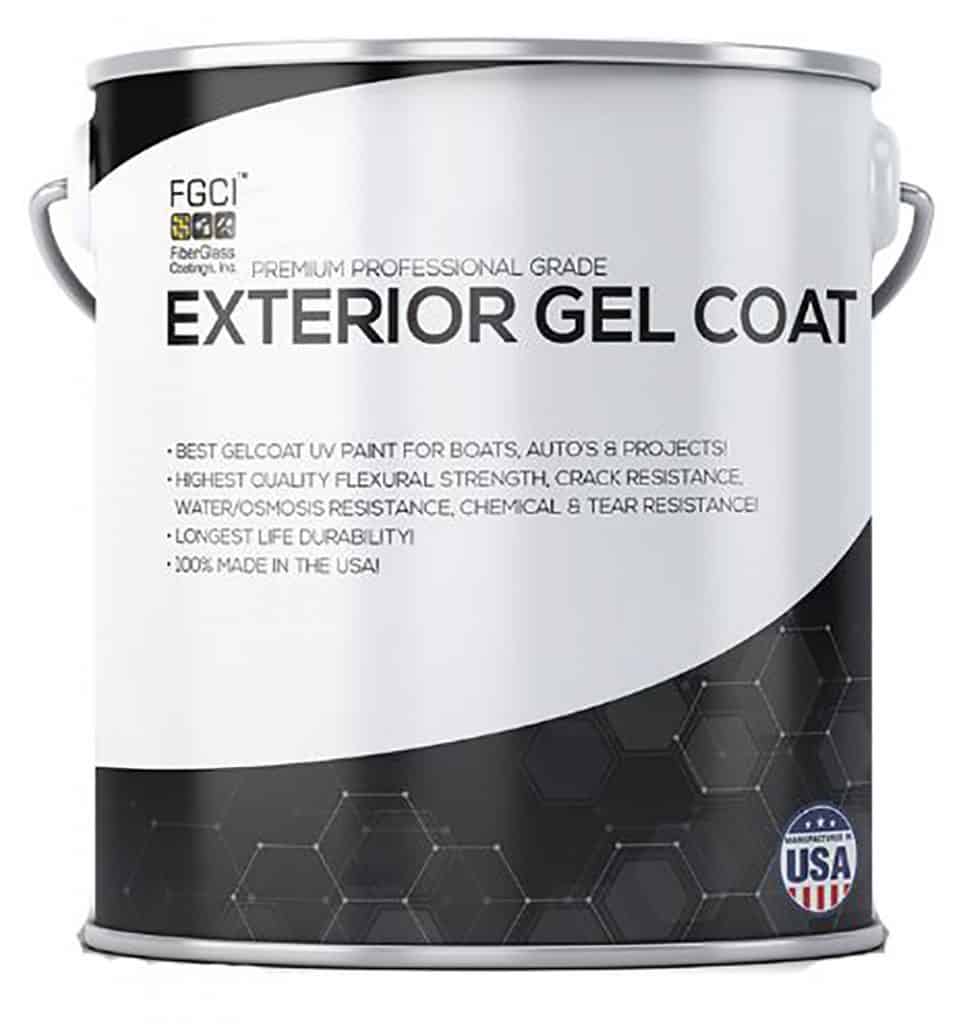
 

Gelcoat can be used to patch existing gel coat, fiberglass repairs, and new construction and projects.


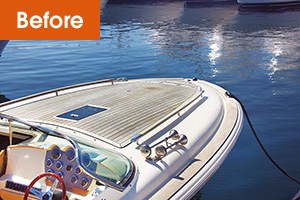
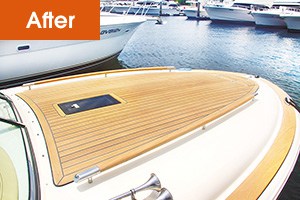
Wood boat paint typically includes traditional types of oil-based finishes, as two-part paints tend to be less flexible. Because wood can flex and swell, especially along seams, expensive finishes will not last any longer than traditional stain or paint. Teak can be used to prevent fading on a boat’s wood finish. If left untreated, it will often fade which leads to the need to clean or treat the wood so it is not susceptible to rot, mildew, and discoloration.
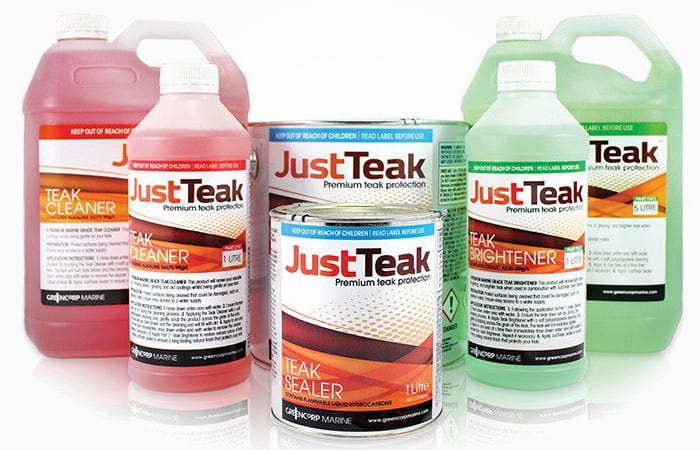
Teak wood cleaner
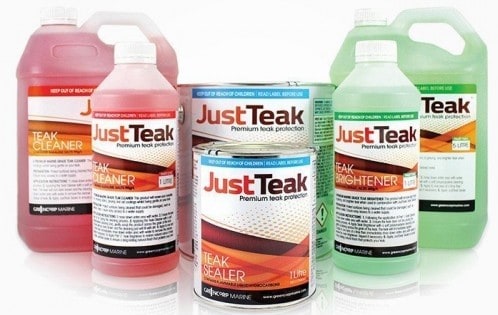
Just Teak is a simple solution to clean, brighten & protect your teak.


Bottom boat paint is antifouling paint or coating designed to diminish weeds, barnacles, and other aquatic organisms that can attach below the waterline of a boat and cause damage. Bottom paint includes ablative bottom paint, hard boat bottom paint, aluminum safe bottom paint, primers for bottom paint, and boat bottom paint remover.
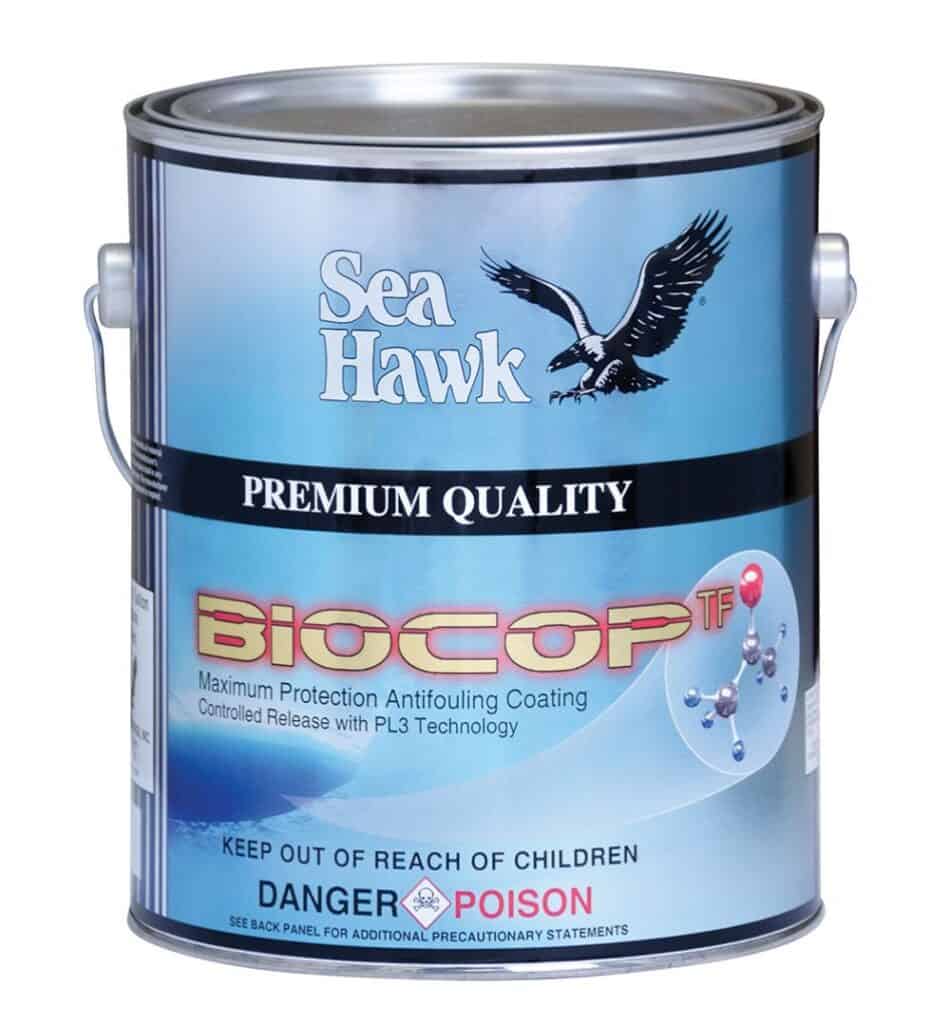
Biocop bottom paint uses the newest biocide technology which is safe for the environment.

Boat Paint Selection Checklist

  • Identify whether the surface is above or below the waterline
  • Confirm the boat material: fiberglass, wood, aluminum, steel, or inflatable surface
  • Check the condition and type of existing paint or gelcoat
  • Decide whether the goal is antifouling protection, appearance, repair, traction, or wood protection
  • Choose the correct primer or barrier coat when required
  • Confirm compatibility before painting over an old coating
  • Check dry time, recoat time, cure time, and launch window
  • Use marine-grade rollers, brushes, sandpaper, solvents, and safety supplies

If you need assistance selecting the right marine boat paint for your next project see Bottom Paint Store’s how-to articles or call our technical support department Monday-Friday from 8:30-5:00 pm EST 888-505-2313.

Using a Signal Coat Indicator for Repainting Ablative Antifouling Paint

Antifouling paint is a type of underwater hull paint, also known as bottom paint. These specialized coatings are designed for the exterior of the hull of a ship or boat and combat the growth, as wells as, the detachment of underwater organisms, such as seaweed, algae, and barnacles. These aquatic life forms bind to the hull and impact a vessel’s performance and longevity.

Anti-fouling paints are often applied as one component of a multi-layering process which can have other benefits in addition to their antifouling properties, such as acting as a barrier against corrosion on metal hulls that will degrade and weaken the metal, or improving the flow of water past the hull of a boat or yacht.

Boaters recognized early on it is important to keep the bottom of their craft free of barnacles due to loss of speed and performance. The key is knowing when to pull your boat out of the water for a new bottom paint application. Ablative paints are typically reapplied every 1–3 years. One way to ensure you reapply your ablative antifouling paint when it’s needed is by adding a signal coat or flag coat.

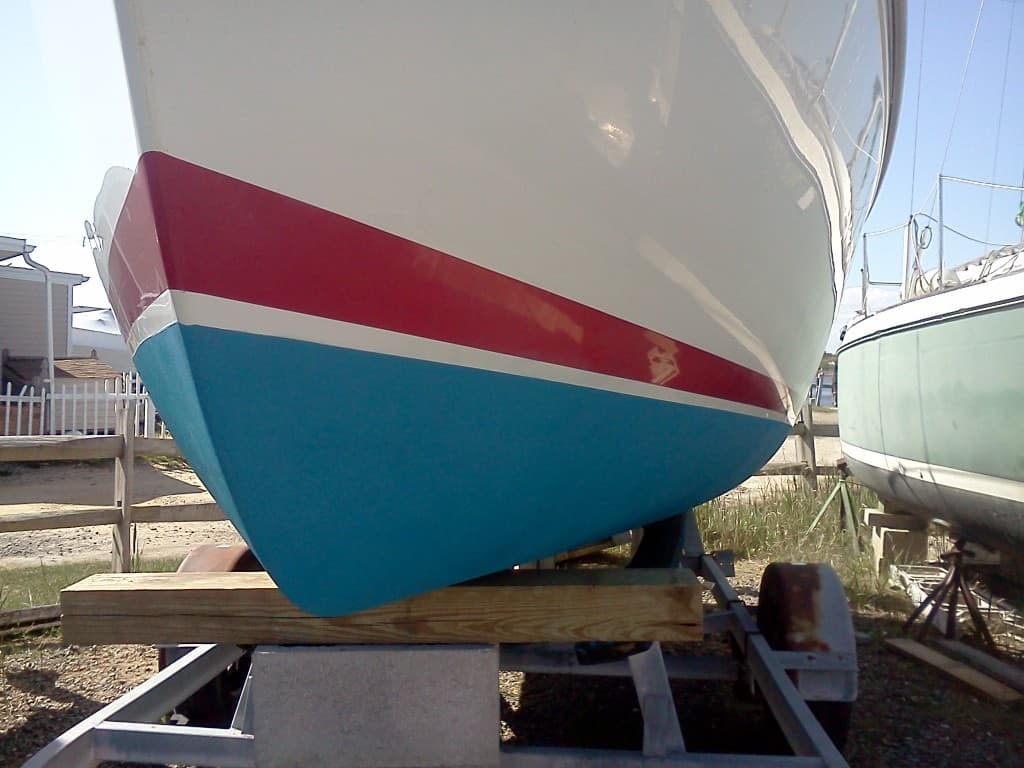
To apply a signal/flag coat, when you are getting multiple coats of ablative bottom paint applied to your hull, make the first coat a different color. For example, if the bottom is going to be painted blue, make the first coat red. When the blue paint wears off and you see the red flag coat, it is time to repaint.

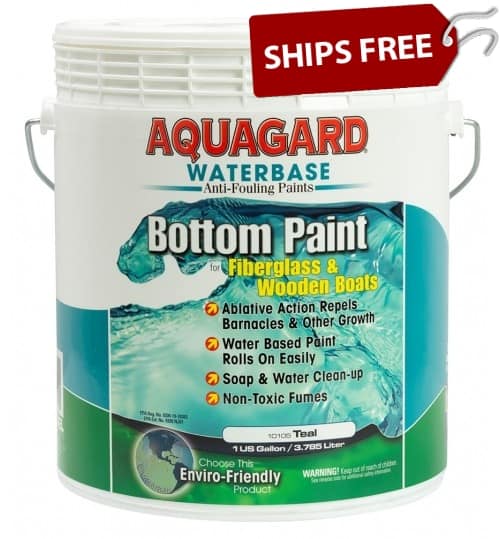
ablative bottom paint
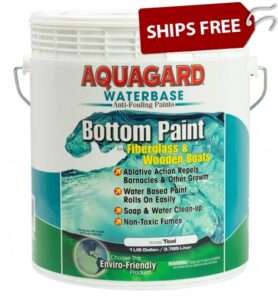
Aquaguard is an excellent antifouling bottom paint

If you need further assistance with your boat painting project feel free to contact our technical team Monday-Friday 8:30-5:00 pm EST.

Antifouling Paint for Inflatable Boats

Be sure to apply a water-based ablative antifouling paint to your inflatable boat

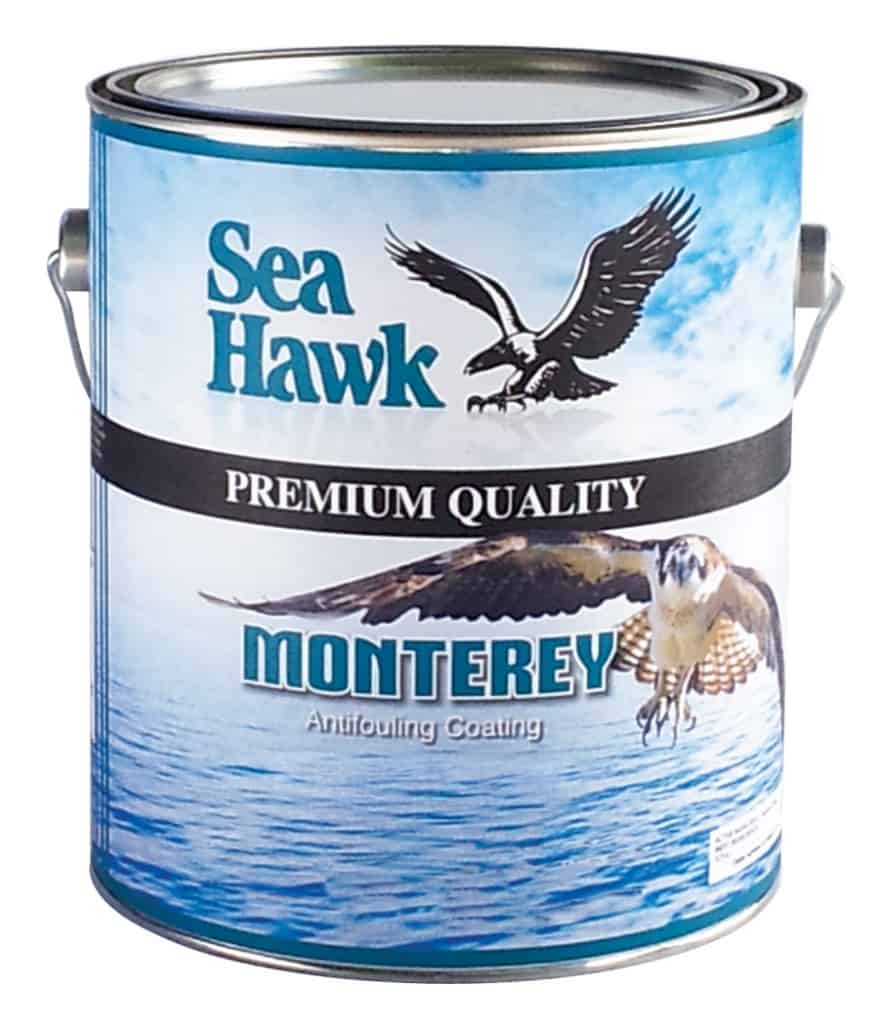
Inflatable boats have become very popular due to their flexibility and variety of uses. If your inflatable-bottom dinghy stays in the water for long periods of time and you have decided to apply antifouling paint you have a few options. You’ll want to apply a water-based ablative antifouling such as Monterey by Sea Hawk or Aquagard. One quart of Monterey is enough for two coats on an 8-10′ boat. Avoid copper-based paint on aluminum. Before application clean the area with a maroon Scotchbrite pad for good adhesion. These paints tend to be flexible and adhere well to PVC and Hypalon but since they are ablative they can easily rub off so be careful when storing your dinghy on deck or deflating it for longer storage to protect surrounding areas from paint.

Monterey Bottom Paint

If you need further assistance with your inflatable boat paint project do not hesitate to contact our technical team Monday-Friday 8:30-5:00 pm EST.

Using Webbing Solution

Webbing Solution is a clear liquid added to gelcoat to obtain spatter or cobweb effects. It is mixed with a gelcoat of one color and sprayed onto a contrasting colored surface.

Decorative effects produced by the webbing mixture will vary, and relate directly to techniques or gun adjustments. A fine hairline spider web pattern results from plenty of air and scanty material flow. Coarse and splotchy patterns are created by fuller material flow and decreased air volume. While our webbing solution is only tested with gelcoat, customers do use with paint achieving similar results.

The manufacturer suggests on the initial coat you add the wax and while gelcoat is still tacky before it comes to a full air cure, you apply the contrast color of webbing (which should have the wax added too).

If you are applying webbing over a fully cured gelcoat, sand with 150 grit, clean with acetone, and then apply the webbing.

Mix 2 parts gelcoat to 1 part webbing.
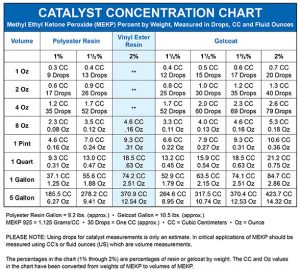
Mix proper amount MEK-P for the amount of gelcoat.
Shoot at 10 to 12 PSI.

Add to colored gelcoat to obtain desired webbing effect. Test in an inconspicuous area to determine satisfactory results

Testing for Compatibility of Topside Paint with Awlgrip Topcoat

SURFACE PREPARATION
COATINGS COMPATIBILITY & ADHESION
TESTS (ABOVE WATER ONLY)


Test One: Cross Hatch Adhesion (See diagram above)

  1. Select test area(s) on the surface to be painted. Thoroughly clean,
    de-wax and degrease this area.
  2. With a sharp blade, cut 6 lines vertically and 6 lines horizontally to give
    a box of 25 squares. The cuts must be deep enough to reach the
    substrate. On thick fairing systems this test may have to be done to
    several different layers.
  3. Apply 3M #610, #895 or #898 3M Scotch Brand Filament Tape (or
    similar type of packaging tape) over the scribed area, making certain
    that the tape is tightly adhered to the test surface. Do not use
    masking tape.
  4. With an abrupt yank, pull the tape back parallel to the surface. Pulling
    the tape straight up will give no test at all.
  5. Examine the test surface. If any square of old coating in the scribed
    area is removed, the adhesion has failed. All the failed layers must
    be removed.

Test Two: Solvent Resistance

  1. Saturate a cotton ball or small wad of cloth with one of the
    Awlgrip Topcoat or Primer Reducers (T0003 or T0006).
  2. Tape the reducer-saturated ball to the scribed area surface for
    30 minutes.
  3. After 30 minutes remove the cotton ball. If the reducer has dissolved
    or severely softened the old coating, the coating is incompatible and
    must be removed. If the scribed area has remained intact, allow a
    15 minute recovery period and repeat all steps in Test One again.
  4. If any square areas are removed, all the failed layers must be
    removed.

Test Three: Coating Compatibility
If the old coating is still intact after Tests One and Two, perform
Test Three.

  1. Lightly sand a small test area with 220 grit paper. Clean the sanded
    areas thoroughly with Awlgrip Wipe-Down Solvent (NA/AP:
    Awlprep T0008 ; EU: Surface Cleaner T0340) and using clean cloths.
  2. Paint a small patch of the surface with Awlgrip Topcoat. Do not use
    masking tape on the edges of the test application as the paint edges
    created by the tape will ‘print through’ and be visible in the finish.

How to repair a hole on the side of your boat

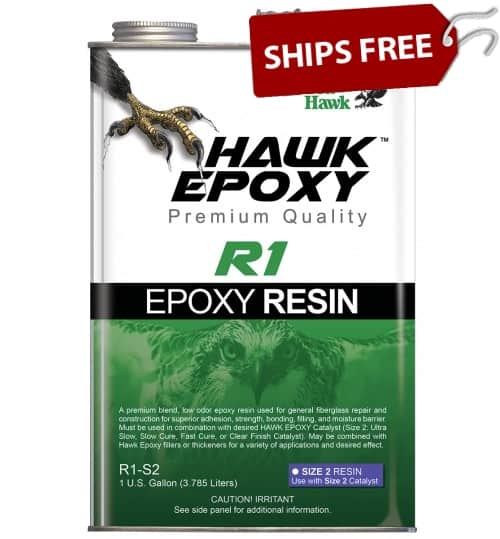
Repairing a hole on the side of your boat is possible by following this guide and using epoxy resins for wooden boats.

Begin by inspecting the hole for any cracks that extend away from the
hole and clearly mark the entire area that needs to be patched. You want to be sure to extend your mark out beyond the damaged area by a few inches.

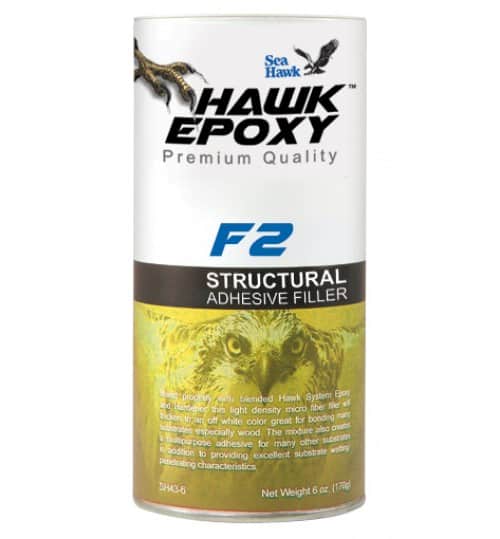
Hawk Epoxy f2 Structural Adhesive Filler

Cut the marked area with a hand saw making sure the hole is beveled in order to allow layers of fiberglass to fill the hole. Measure the thickness of the hull substrate and multiply it by 10. This is the distance from the hole edges that the bevel needs to accommodate.

Use a power sander with a 50 grit sanding disc to bevel from the whole edge out to your mark. Fiberglass layers are going to be placed on the outside of the hull. Use a flat backing on the inside of the hole to keep the wet fiberglass cloth from caving into the hole.

Next cut six pieces of fiberglass bi-axle cloth with the first piece being the size and shape of the outer edge of the bevel. The final sixth piece being the size of the hole itself. Remember it is important to use fiberglass bi-axle cloth for hole repairs.

Wet out the beveled area of the hole with a mixed epoxy. Lay the cut fiberglass bi-axle cloth on a piece of plastic going from large to small pieces. Make sure to wet each piece as you place them on top of the next piece. When wetted out properly the bi-axle cloth will become transparent. Put the wet out pile of fiberglass bi-axle cloth into a piece of peel ply, with the small pieces down. Next, mix the Hawk epoxy f2 filler and hawk epoxy resin catalyst until you reach a soft butter consistency.  

Hawk Epoxy Resin Catalyst

Brush this mixture onto the beveled area of the hull and be sure to center your filler. Wipe off any extra leftover epoxy from the hull, squeegeeing out the air pockets and wiping with a clean cloth that has been dampened with solvent. This will be a lot easier than sanding it off later. Allow the patch to cure for the recommended cure time (overnight is typically sufficient) per the instructions on the hawk epoxy resin can label.

Once it has cured, remove the repair area backing on the inside of the hull. The repair area on the inside of the hull can be left untreated if it will not be exposed to sunlight. Remove blush with soap and water. Next sand off any rough areas on the outside of the hull with 80 grit sandpaper and then sand with 100 grit sandpaper the entire repair area so it is completely smooth (this may require a disc sander if it’s too difficult to sand by hand). You can dust off the area a clean cloth, air gun or brush it off with a clean brush.

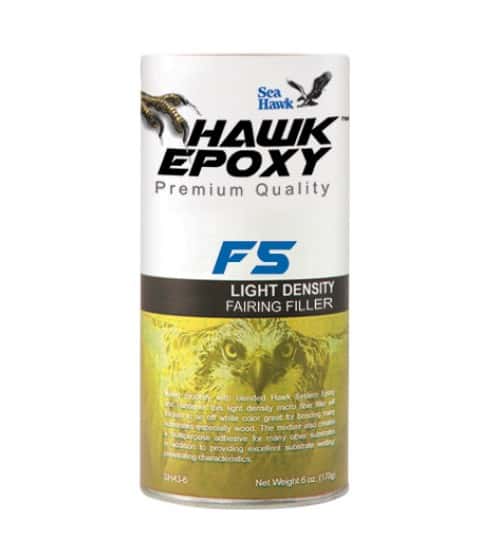
F5 Light Density Fairing Filler

Prepare a batch of Hawk epoxy resin and catalyst. Apply coats to the repair area with wet epoxy, with the remainder of the Hawk epoxy resin mixed in the Hawk epoxy f5. Lightly mix filler until density is a medium thickness
with no sag consistency.

Next, spread the mixture onto the repair area and squeegee the area until as smooth as possible. Allow the area to cure until you can push the corner of the squeegee into the surface and only a slight indentation remains. Repeat the process with Hawk epoxy mixed resin and f5 light density filler, adding another coat of this mixture onto the repair area. Let this cure for 10 to 12 hours.

Remove the blush with soap and water and sand the repair area with a smooth 80 grit sandpaper.

To add color, mix another small batch of Hawk epoxy and introduce the liquid dispersion as this will seal and fill any low areas. Now that you have a strong and
sturdy hull side you are ready for paint!

what is zinc chromate used for

What Is Zinc Chromate Used For?

Last Updated: January 27, 2026

Quick Recommendation

What Is Zinc Chromate Used For?

  • Primary use: Zinc chromate is a corrosion-inhibiting primer commonly used on aluminum and other non-ferrous metals.
  • Best applications: Ideal as a base primer under marine or industrial coatings where corrosion protection is critical.
  • Compatibility matters: Must be applied to clean, properly prepped metal and topcoated with compatible paints.
  • Bottom line: Zinc chromate helps prevent corrosion and improve paint adhesion, but it must be used correctly and safely.

Tip: Zinc chromate contains hazardous compounds—always follow safety guidelines and local regulations when handling or applying it.

Zinc chromate is used for a wide range of applications. It is an odorless chemical compound primarily used as an industrial paint coating. The compound is a beneficial coating because it is an anti-corrosive and an anti-rust primer. It is primarily used to coat aluminum and iron materials. Developed by the Ford Motor Company during the 1920s, it was historically used on aircraft by the US military during the 1930s and 1940s. It is also widely used as a paint coating for the aerospace and automotive industries, as well as, a coating for boats, due to its ability to destroy organic growth on the surface and to protect aluminum from corrosion.

Zinc chromate is on the hazardous substance list and regulated by OSHA because studies have shown that not only is zinc chromate highly toxic, but it is also a carcinogen. It has been cited by ACGIH, NIOSH, DEP, IARC, HHAG, and EPA.

What is zinc chromate used for

Duralux ZinKromate is a high-quality synthetic primer for use in light to moderate marine exposures. It is lead and chromate free so it is safe to use; however, it offers all of the performance and quality characteristics of zinc chromate without the health and application hazards. It has good chemical and corrosion resistance, dries fast, and allows single finish coat coverage when using a like-colored topcoat. ZinKromate performance primer adheres very well to steel, iron, aluminum, or partially rusted galvanized surfaces.

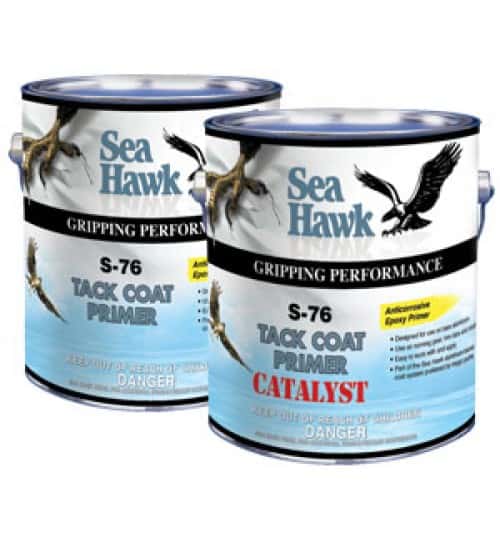
S-76 Strontium Chromate Tack Coat Primer is for use on properly prepared steel, aluminum, or galvanized steel. S-76 is an anti-corrosive strontium chromate-based primer that is specifically designed for underwater metal surfaces including hulls, running gear, and the lower units of outboards and I/O’s. It provides an excellent barrier to reduce the pitting of the metal from galvanic corrosion.

S-76 Strontium Chromate Tack Coat Primer

Stromate Chromate tack coat primer may be used on bare aluminum in conjunction with Tuff Stuff High Build Epoxy to form a barrier for the application of copper-based antifoulants.

If you have any questions about ZinKromate primer or Stromate Chromate tack coat primer, please call our technical expert team at 888-505-2313 Monday to Friday 8 am-5:00 pm EST.

Gelcoat Putty – Repair Spider Cracks And Fill Gouges!

Last Updated: February 16, 2026

Quick Recommendation

Using Gelcoat Putty to Repair Spider Cracks & Gouges

  • Best for cosmetic damage: Gelcoat putty works well on spider cracks, chips, and surface gouges where the fiberglass structure is still solid.
  • Prep properly: Grind or open cracks slightly, clean thoroughly, and remove wax before applying putty.
  • Apply and finish carefully: Fill slightly proud of the surface, allow full cure, then sand smooth and polish.
  • Bottom line: Gelcoat putty restores appearance and surface protection, but structural cracks require fiberglass repair first.

Tip: For best color match, test a small area first and polish after sanding to blend the repair.

Gelcoat putty is an indispensable part of any boat owner’s toolkit, providing a simple way to make quick and reliable repairs on any gelcoat surface. Perfect for fixing anything from spider cracks to fill in gouges and scratches, and is an easy-to-use solution that leaves a smooth finish and every application has the potential to restore gelcoat surfaces and make them look like new again. This dependable material is simple enough even novice motorboat and sailboat owners can use it without having to take their vessels out of the water for professional repair. Gelcoat putty can help anyone keep their boats looking shipshape with minimal effort.

There are many ways to repair spider cracks in boats, using our Gelcoat Repair Putty is an easy and fast way of doing it!

First, you will need to determine your spider cracks are only that, spider cracks. To do so, you will need to inspect the area for any sign of broken support. If the surface is steady and looks solid, then you have spider cracks.

In order to properly fix any spider cracks, you will have to open the cracks to fill them up correctly. This can be done by using a Dremel. Once the crack is open and it has a good size you can sand and clean the area. For cleaning, you may use acetone or soap and water.

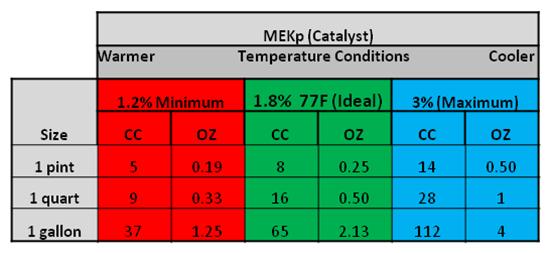
Now, you are ready to use the Gelcoat Putty. Mix in a 1-1/2% ratio of MEK-P Catalyst into the putty and mix it properly. Use a putty knife to fill in the spider cracks. Once dry, sand the surface to a smooth finish.

For filling gauges and cracks, some tips:

This product uses MEKP, just like gelcoat so your working time is 8-18 minutes, depending on temperature. If catalyzed at 1% and it is in perfect conditions (77 F) you have a longer work time. To extend work time cool product down before use.

If filling holes, fill a little high to allow for shrinkage. Once it dries you can easily smooth it out with sandpaper. Recommended thickness at 1/4″.

Tip: You can apply gelcoat to match the color of your boat over the repair, or you can use our pigments to tint the gelcoat putty and complete the repair all at once!

Shipping Questions

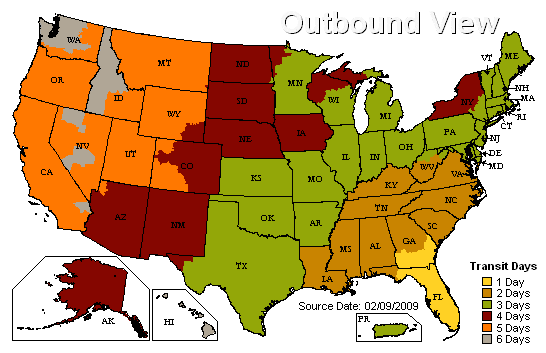
How long will it take to receive my order via UPS Ground shipping?  The time to ship can be seen on most product pages and may vary by product. Most orders are placed before 2:00 EST. Monday-Friday is shipped the same day with a few exceptions that will be noted on the product page. Gelcoat/Resin materials along with any specialty colors typically ship in 2-4 business days. After the product leaves the warehouse, standard UPS shipping times apply. The map below shows estimated shipping times for items shipped via UPS Ground from our main warehouse In Florida, to destinations in the US. Please note that your order may ship from a manufacturer, or another warehouse resulting in less or more time stated in the map.

Not all items are stocked in the same warehouses, so you may get multiple tracking numbers if you order several items.

If you need exact delivery dates for your potential order or expedited shipping, please create an account and add all the items to your cart. Then email us or give us a call and we will be able to see the items in your order and determine exact delivery times and any expedited shipping rates if requested.

Do You Ship Outside of the US? No. We only ship to the continental US.

All Other Countries or outside the continental U.S.: Items can be purchased and shipped outside the US through the use of a freight forwarder. Items will be shipped through our designated carriers to the US freight forwarding company of your choice.  After you pre-arrange a freight forwarding company, they will provide the necessary documents for export, charge you for the freight to the final destination, and provide you with a US shipping address. We will ship your order to the US freight forwarder as you indicate on the orders’ shipping address. NOTE: We do not offer customer pickup for international shipments. Our carriers must ship to your designated US freight forwarder.

Do you have overnight shipping? This is not typically offered since the cost is about 3-4 times that of regular ground shipping and most of our items are considered hazardous material and travel via ground only.

Thinning Gelcoat and Using PVA

Gelcoat does not fully cure without first supplementing it with a surfacing agent or wax additive sanding aid. Gelcoat may be thinned for use in a Portable Preval Sprayer with styrene monomer. You can spray it with polyvinyl alcohol (PVA) before gelcoat reaches its gel stage (5-10 min.), or add 1oz per quart of a wax additive sanding aid.

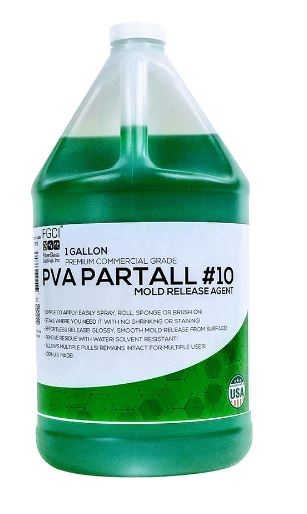
PVA or Partall Film #10 is a release agent that helps with removing parts from a mold or can be used as a surfacing agent when using gelcoat without a wax additive (sanding aid).

PVA is soluble in water making it easy to wash off. Applying can be achieved by spraying or wiping the green liquid on with a sponge. It will foam slightly but dry to a clear, glossy shine. It can take 15-30 minutes depending on temperature.

For spraying gelcoat our FGCI brand does not recommend thinning.

Generally, you should not add more than 10% Styrene by volume. Patch Booster is an additive that will thin out gelcoat and not affect colors. Follow manufacturers instructions as added Mekp may be needed.

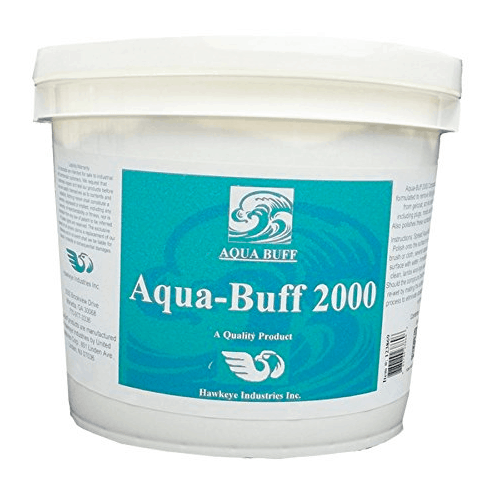
Another thinning alternative is the Duratec High Gloss Additive. This is used with gelcoat for many reasons. Mixed at a 50/50 ratio this will produce a high gloss finish and will serve as a thinner for your gelcoat, that is why this is commonly used when spraying gelcoat. In addition, you’ll omit any additional sanding aid. After waiting a full 24 hours you can buff when cured, for a hi-gloss use 600 or higher grit paper and buff with Aqua Buff 2000 compound. Follow the manufacturer’s technical data sheet as an extra hardener may be needed. Some customers use Styrene for thinning but the manufacturer warns it can affect the gelcoat colors although this is the most cost-effective option and doesn’t have the added wax.

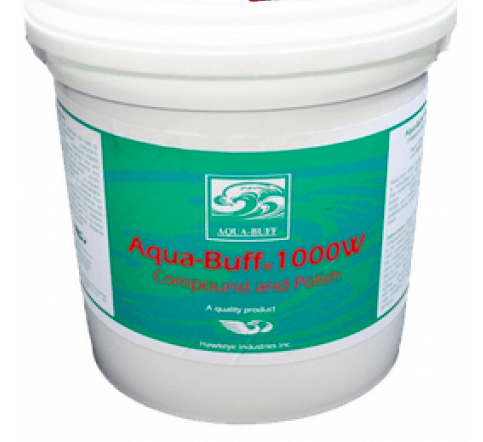
Aqua Buff 1000-W and Aqua Buff 2000

If you are looking to remove some unwanted scratches on your boat or to bring back shine into your gelcoat, Aqua Buff is for you!

Aqua Buff is a polishing compound that we offer in two variations: Aqua Buff 1000-W and Aqua Buff 2000. It is mainly used as a way to remove heavy oxidation, sanding scratches, and swirl marks from gelcoat. There are no oils or polymers in Aqua Buff, so the surface you see is the true surface.

The Aqua Buff 1000-W is used for deep scratches and heavy oxidation. It has a blue-green color which is why is not recommended for white hulls. Use Aqua Buff 1000-F on white surfaces. Aqua Buff 1000-W removes 320 – 600 grit scratches.

Aqua Buff 2000 is used for finer scratches, swirl marks, and light oxidation. Use it to remove 1000 grit scratches and higher. Cleans and removes scratches from Fiber-Reinforced-Plastic parts, metals, and painted surfaces. It is strong enough for most uses and provides a shiny finish.

Application Instructions

  1. Apply a small portion of Aqua–Buff 1000-W or 2000 on the surface using a brush or microfiber cloth (stick to a small area)
  2. Use a spray bottle to mist the surface with water. Only use about a coin-size amount of compound per square foot.
  3. Immediately machine buff* with a clean, damp, compound pad.
    Use wool or wool/blend pads only.

*Use machine buffers that generate at least 2500 rpm for best results.

For the best techniques and tips on how to apply Aqua Buff please watch the video below.

Which Fiberglass Cloth to Choose?

Last Updated: March 3, 2026

Quick Recommendation

Which Fiberglass Cloth Should You Choose?

  • For structural repairs: Use woven fiberglass cloth for strength and clean finishing.
  • For building thickness quickly: Choose biaxial cloth for added reinforcement and multi-directional strength.
  • For smooth cosmetic layers: Use lighter-weight cloth that wets out easily and sands smoothly.
  • Bottom line: Select fiberglass cloth based on repair size, structural needs, and finish requirements.

Tip: Always match the cloth weight and weave to the resin system you’re using for best bonding and performance.


Depending on the job at hand, we offer a few types of fiberglass cloth to choose from and different cloths are used for different jobs. They are available in different widths and are sold by the roll or yard.

Mat– This mat is used for parts and is great for not showing fiberglass patterns through gelcoat. Mat has many small fibers thrown together on a binder and is the most used, basic cloth. There is no specific direction to the fibers, making them strong and light. Sold in ¾ oz up to 2 oz thickness.

Woven Roving-This weave has long fibers weaved together like a cloth. It is extremely thick and durable making it heavier than other fiberglass materials. This often shows pattern through gelcoat and is used for heavy-duty items. Sold in 18 and 24 oz thickness.

Double Bias Non Woven- 1808, the first number is the woven roving thickness (18oz) and 08 is the mat thickness (3/4 oz). This is a combination of woven roving on one side and mat on the other, making it very durable and usually used for boat and house decks as it is very rigid.

Fiberglass Cloth– This is sold in 4, 6, 8 and 10 oz thickness and is very fine. While being rigid it is also used for anything that is see-through, such as surfboards as it’s thin, lightweight, and shows well with clear resin.

Teak Oil vs. Teak Sealer – What’s the difference?

Last Updated: February 16, 2026

Quick Recommendation

Teak Oil vs. Teak Sealer: Which Should You Use?

  • Choose Teak Oil if you want a natural look that enhances grain and color, and you don’t mind frequent reapplication.
  • Choose Teak Sealer if you want longer-lasting protection with better resistance to UV damage, mildew, and moisture.
  • Maintenance difference: Teak oil penetrates and darkens wood; sealers form a protective barrier that lasts longer.
  • Bottom line: Teak oil offers simplicity and appearance, while teak sealer offers extended protection and reduced maintenance.

Tip: Always clean and fully dry teak before applying either product to ensure proper absorption and performance.

Well-maintained teak woodwork is highly prized and teak wood owners want to do everything they can to keep it looking great. However, the market is saturated with many teak products and it can be confusing to know which will work best for you. This article can be your guide to teak oil and teak sealer.


Quick Answer: Teak Oil vs. Teak Sealer

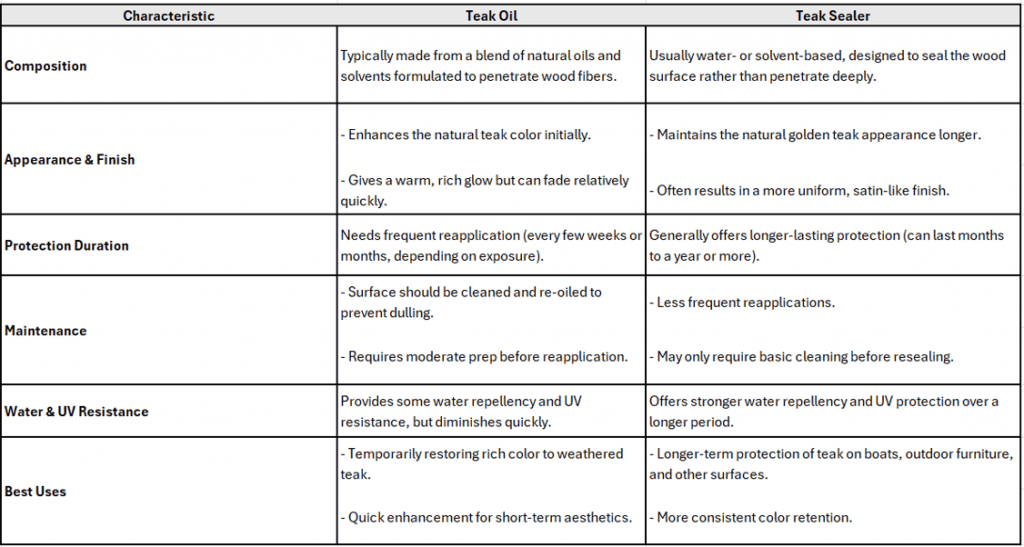
Teak oil is designed to penetrate teak wood and enhance its natural color, giving it a warm, rich appearance. Teak sealer is designed to protect the surface longer by helping block moisture, dirt, stains, UV exposure, and oxidation. Teak oil usually requires more frequent reapplication, while teak sealer generally provides longer-lasting protection with less maintenance.

For most boat owners, teak sealer is the better choice when the goal is long-term protection and easier maintenance. Teak oil is a good option when you want to quickly restore the natural look of teak and do not mind reapplying it more often.

Teak Oil vs. Teak Sealer Comparison

Feature Teak Oil Teak Sealer
Main Purpose Enhances the natural color and grain of teak. Helps protect teak from moisture, dirt, stains, UV exposure, and weathering.
Appearance Creates a warm, rich, freshly oiled look. Maintains a natural teak look while slowing fading and graying.
Protection Level Provides light protection but wears away faster. Usually provides longer-lasting protection than oil.
Maintenance Needs more frequent reapplication. Typically requires less frequent maintenance.
Best For Quick color restoration and cosmetic refreshes. Longer-term teak protection on boats and outdoor wood.
UV Resistance Limited UV protection depending on the product. Often better at slowing UV-related graying and discoloration.
Water Resistance Helps condition the wood but may not last long in harsh exposure. Helps reduce moisture absorption and surface staining.
Ease of Application Easy to wipe or brush on. Also easy to apply, but surface cleaning and prep are important.
Best Long-Term Choice Good for owners who like the oiled look and regular upkeep. Better for owners who want longer protection and less frequent upkeep.

Best Choice by Teak Project

Project or Goal Better Choice Why
Bring back rich teak color quickly Teak oil Oil darkens and enhances the natural wood grain quickly.
Protect exterior boat teak longer Teak sealer Sealer usually lasts longer and helps protect against sun, moisture, and staining.
Reduce ongoing maintenance Teak sealer Sealer generally requires fewer applications than teak oil.
Refresh interior teak Teak oil or sealer Interior teak sees less weather exposure, so either option may work depending on the desired look.
Protect swim platforms, steps, or high-use areas Teak sealer High-use areas benefit from longer-lasting protection and stain resistance.
Maintain a natural unfinished look Teak sealer or leave untreated Some sealers help maintain a natural look without the darker appearance of oil.
Let teak weather to silver-gray Leave untreated or clean periodically Teak naturally grays outdoors if left unfinished, though cleaning may still be needed.
Prepare teak for varnish Neither, unless product instructions allow it Oil or sealer can interfere with varnish adhesion if not compatible or fully removed.

What to Consider Before Choosing Teak Oil or Teak Sealer

Before choosing between teak oil and teak sealer, consider where the teak is located, how much sun and water it receives, and how often you want to maintain it. Exterior teak on boats is exposed to UV rays, saltwater, rain, foot traffic, and cleaning, so it usually needs more protection than interior teak.

If you like the deep, warm appearance of freshly oiled teak and do not mind frequent upkeep, teak oil can be a good choice. If you want longer-lasting protection and less frequent maintenance, teak sealer is often the more practical option.

Basic Teak Care Steps

Step What to Do Why It Matters
1. Clean the teak Remove dirt, salt, stains, mildew, old oil, and weathered residue. Oil or sealer bonds and performs better on clean wood.
2. Let the wood dry Allow teak to dry fully before applying any finish. Trapped moisture can reduce performance and affect appearance.
3. Lightly sand if needed Sand rough or raised grain areas according to product instructions. A smooth, even surface helps create a better-looking finish.
4. Apply teak oil or sealer Use thin, even coats and follow the product directions. Over-application can leave sticky residue or uneven color.
5. Wipe excess material Remove excess oil or sealer as directed by the manufacturer. Excess product can attract dirt, stay tacky, or create blotchy areas.
6. Maintain as needed Reapply when the teak begins to fade, dry out, stain, or lose protection. Regular maintenance prevents bigger restoration work later.

Common Questions About Teak Oil and Teak Sealer

Is teak oil the same as teak sealer?

No. Teak oil is mainly used to enhance the color and grain of teak, while teak sealer is used to provide longer-lasting surface protection. Oil usually needs to be reapplied more often, while sealer is typically better for reducing maintenance.

Which is better, teak oil or teak sealer?

Teak sealer is usually better if you want longer protection and less frequent maintenance. Teak oil is better if your main goal is to quickly restore a warm, rich teak appearance and you do not mind applying it more often.

Does teak oil protect wood?

Teak oil provides some protection and helps enhance the appearance of the wood, but it usually does not last as long as teak sealer in harsh marine conditions. Exterior boat teak exposed to sun, salt, and water often needs more frequent reapplication when oil is used.

Does teak sealer waterproof teak?

Teak sealer helps reduce moisture absorption and surface staining, but it should not be viewed as making teak completely waterproof forever. Teak still needs cleaning, inspection, and maintenance, especially in marine environments.

Can you put teak sealer over teak oil?

Teak sealer should usually be applied to clean, dry teak, not directly over a fresh or oily surface. Old teak oil may need to be cleaned or removed before sealing so the sealer can bond properly. Always follow the sealer manufacturer’s instructions.

Can you put teak oil over teak sealer?

Teak oil may not penetrate properly over an existing sealer. If the teak has been sealed, the sealer may need to wear away or be removed before oiling. Mixing systems can lead to uneven appearance or poor performance.

How often should teak oil be reapplied?

Teak oil often needs frequent reapplication, especially on exterior boat teak exposed to sun, saltwater, and rain. The exact timing depends on the product, exposure, use, and the look you want to maintain.

How long does teak sealer last?

Teak sealer usually lasts longer than teak oil, but durability depends on sun exposure, saltwater, cleaning, foot traffic, and product quality. Exterior teak should be inspected regularly and resealed when it begins to fade or lose protection.

Should teak be left untreated?

Teak can be left untreated and will naturally weather to a silver-gray color. This is a valid choice for some boat owners, but untreated teak can still collect dirt, stains, mildew, and surface weathering, so periodic cleaning may still be needed.

What is best for teak on a boat?

For most exterior boat teak, teak sealer is often the best balance of appearance, protection, and maintenance. Teak oil works well for a rich, freshly treated look, while varnish may be used when a glossy, coated brightwork finish is desired.

Recommended Teak Care Products and Supplies

Bottom Paint Store carries teak cleaners, teak brighteners, teak oils, teak sealers, marine varnishes, brushes, sandpaper, wiping cloths, and related wood care supplies. The right product depends on whether you want a natural oiled look, longer-lasting sealed protection, a silver-gray weathered finish, or a glossy varnished appearance.

Quick Insight: Teak Oil vs. Teak Sealer

Teak oil is designed to penetrate teak wood and enhance its natural color, giving it a warm, rich appearance. Teak sealer is designed to protect the surface longer by helping block moisture, dirt, stains, UV exposure, and oxidation. Teak oil usually requires more frequent reapplication, while teak sealer generally provides longer-lasting protection with less maintenance.

For most boat owners, teak sealer is the better choice when the goal is long-term protection and easier maintenance. Teak oil is a good option when you want to quickly restore the natural look of teak and do not mind reapplying it more often.

Teak Oil vs. Teak Sealer Comparison

Feature Teak Oil Teak Sealer
Main Purpose Enhances the natural color and grain of teak. Helps protect teak from moisture, dirt, stains, UV exposure, and weathering.
Appearance Creates a warm, rich, freshly oiled look. Maintains a natural teak look while slowing fading and graying.
Protection Level Provides light protection but wears away faster. Usually provides longer-lasting protection than oil.
Maintenance Needs more frequent reapplication. Typically requires less frequent maintenance.
Best For Quick color restoration and cosmetic refreshes. Longer-term teak protection on boats and outdoor wood.
UV Resistance Limited UV protection depending on the product. Often better at slowing UV-related graying and discoloration.
Water Resistance Helps condition the wood but may not last long in harsh exposure. Helps reduce moisture absorption and surface staining.
Ease of Application Easy to wipe or brush on. Also easy to apply, but surface cleaning and prep are important.
Best Long-Term Choice Good for owners who like the oiled look and regular upkeep. Better for owners who want longer protection and less frequent upkeep.

Best Choice by Teak Project

Project or Goal Better Choice Why
Bring back rich teak color quickly Teak oil Oil darkens and enhances the natural wood grain quickly.
Protect exterior boat teak longer Teak sealer Sealer usually lasts longer and helps protect against sun, moisture, and staining.
Reduce ongoing maintenance Teak sealer Sealer generally requires fewer applications than teak oil.
Refresh interior teak Teak oil or sealer Interior teak sees less weather exposure, so either option may work depending on the desired look.
Protect swim platforms, steps, or high-use areas Teak sealer High-use areas benefit from longer-lasting protection and stain resistance.
Maintain a natural unfinished look Teak sealer or leave untreated Some sealers help maintain a natural look without the darker appearance of oil.
Let teak weather to silver-gray Leave untreated or clean periodically Teak naturally grays outdoors if left unfinished, though cleaning may still be needed.
Prepare teak for varnish Neither, unless product instructions allow it Oil or sealer can interfere with varnish adhesion if not compatible or fully removed.

What to Consider Before Choosing Teak Oil or Teak Sealer

Before choosing between teak oil and teak sealer, consider where the teak is located, how much sun and water it receives, and how often you want to maintain it. Exterior teak on boats is exposed to UV rays, saltwater, rain, foot traffic, and cleaning, so it usually needs more protection than interior teak.

If you like the deep, warm appearance of freshly oiled teak and do not mind frequent upkeep, teak oil can be a good choice. If you want longer-lasting protection and less frequent maintenance, teak sealer is often the more practical option.

Basic Teak Care Steps

Step What to Do Why It Matters
1. Clean the teak Remove dirt, salt, stains, mildew, old oil, and weathered residue. Oil or sealer bonds and performs better on clean wood.
2. Let the wood dry Allow teak to dry fully before applying any finish. Trapped moisture can reduce performance and affect appearance.
3. Lightly sand if needed Sand rough or raised grain areas according to product instructions. A smooth, even surface helps create a better-looking finish.
4. Apply teak oil or sealer Use thin, even coats and follow the product directions. Over-application can leave sticky residue or uneven color.
5. Wipe excess material Remove excess oil or sealer as directed by the manufacturer. Excess product can attract dirt, stay tacky, or create blotchy areas.
6. Maintain as needed Reapply when the teak begins to fade, dry out, stain, or lose protection. Regular maintenance prevents bigger restoration work later.

Common Questions About Teak Oil and Teak Sealer

Is teak oil the same as teak sealer?

No. Teak oil is mainly used to enhance the color and grain of teak, while teak sealer is used to provide longer-lasting surface protection. Oil usually needs to be reapplied more often, while sealer is typically better for reducing maintenance.

Which is better, teak oil or teak sealer?

Teak sealer is usually better if you want longer protection and less frequent maintenance. Teak oil is better if your main goal is to quickly restore a warm, rich teak appearance and you do not mind applying it more often.

Does teak oil protect wood?

Teak oil provides some protection and helps enhance the appearance of the wood, but it usually does not last as long as teak sealer in harsh marine conditions. Exterior boat teak exposed to sun, salt, and water often needs more frequent reapplication when oil is used.

Does teak sealer waterproof teak?

Teak sealer helps reduce moisture absorption and surface staining, but it should not be viewed as making teak completely waterproof forever. Teak still needs cleaning, inspection, and maintenance, especially in marine environments.

Can you put teak sealer over teak oil?

Teak sealer should usually be applied to clean, dry teak, not directly over a fresh or oily surface. Old teak oil may need to be cleaned or removed before sealing so the sealer can bond properly. Always follow the sealer manufacturer’s instructions.

Can you put teak oil over teak sealer?

Teak oil may not penetrate properly over an existing sealer. If the teak has been sealed, the sealer may need to wear away or be removed before oiling. Mixing systems can lead to uneven appearance or poor performance.

How often should teak oil be reapplied?

Teak oil often needs frequent reapplication, especially on exterior boat teak exposed to sun, saltwater, and rain. The exact timing depends on the product, exposure, use, and the look you want to maintain.

How long does teak sealer last?

Teak sealer usually lasts longer than teak oil, but durability depends on sun exposure, saltwater, cleaning, foot traffic, and product quality. Exterior teak should be inspected regularly and resealed when it begins to fade or lose protection.

Should teak be left untreated?

Teak can be left untreated and will naturally weather to a silver-gray color. This is a valid choice for some boat owners, but untreated teak can still collect dirt, stains, mildew, and surface weathering, so periodic cleaning may still be needed.

What is best for teak on a boat?

For most exterior boat teak, teak sealer is often the best balance of appearance, protection, and maintenance. Teak oil works well for a rich, freshly treated look, while varnish may be used when a glossy, coated brightwork finish is desired.

Recommended Teak Care Products and Supplies

Bottom Paint Store carries teak cleaners, teak brighteners, teak oils, teak sealers, marine varnishes, brushes, sandpaper, wiping cloths, and related wood care supplies. The right product depends on whether you want a natural oiled look, longer-lasting sealed protection, a silver-gray weathered finish, or a glossy varnished appearance.

What is teak oil?

Marine teak oil has been used on boats and teak wood furniture for many years. Teak oils are usually made of tung oil or linseed oil with extra additives mixed in. The oil “feeds” the wood, in a sense, and accentuates the grain and color. Thus, applying oil to the teak gives it a warm and rich look. Many people choose to oil their teak because they like the beauty that oil can bring back. However, teak oil is very high maintenance. Teak Oil does not protect the wood, but it merely recovers the rich appearance that teak wood can offer. This method requires multiple coats of oil and the beautiful finish does not last long. Sunlight and UV rays carbonize the oils, turning the wood finish dark and gray over time. Gradually, the bright and warm look that you worked so hard to attain is lost once again.

What is teak sealer?

Another method of caring for teak wood is using a teak sealer. Marine teak sealers are different from oils because they do not “feed” the wood more oils or resins. Instead, they seal in the oils and resins that the existing wood contains while at the same time preventing contaminants and moisture from harming it. Sealer does need to be reapplied nearly as often as oil. It is best to keep a nice coating of teak sealer on the wood by reapplying every year.


Which teak sealer product should I use?

JustTeak™ is a marine-grade teak cleaning system that quickly and easily rejuvenates your teak. It will clean, brighten, and (using a sealer) protect your teak decking and outdoor teak furniture.

Part 1: Teak Cleaner

Renews your valuable teak, removing stains, greying and old coatings, whilst being gentle on your teak.

Part 2: Teak Brightener

Removes light stains and greying. Brightens teak when used in combination with JustTeak™ Teak Cleaner.

Part 3: Teak Sealer

Ensures a beautiful, natural finish that protects your teak from sun, rain, and stains. You will also prolong your teak from turning grey. Teak Sealer can be easily removed with JustTeak™ Teak Cleaner and Teak Brightener when it is time to re-apply.


Save 10% on our Teak Sealer Restoration Kits

Teak Oil or Teak Sealer Selection Checklist

  • Decide whether you want a rich oiled look or longer-lasting protection
  • Check whether the teak is interior, exterior, or exposed to heavy weather
  • Clean and dry the teak before applying oil or sealer
  • Remove old oil, sealer, dirt, mildew, and stains when needed
  • Test the product in a small area before treating the full surface
  • Use thin, even coats and wipe away excess product
  • Follow the manufacturer’s dry time and recoat instructions
  • Reapply when the teak begins to fade, dry out, or lose protection

What to Use on the Deck of My Boat?

Last Updated: March 2, 2026


Quick Recommendation

What Should You Use on the Deck of Your Boat?

  • For aluminum decks: Use a marine-grade primer for aluminum followed by a durable non-skid topside paint.
  • For fiberglass decks: Apply non-skid polyurethane or deck coating for grip and UV resistance.
  • For wood decks: Use marine varnish, paint, or non-skid coatings depending on desired appearance and traction.
  • Bottom line: The best deck coating depends on the deck material, exposure to traffic, and need for non-slip safety.

Tip: Always choose a finish with UV resistance and proper traction—deck safety and durability matter more than appearance alone.


Over the lifetime of any boat there will come a time when the deck needs to be renewed. You have a choice of non-skid additives, or paints that already contain a nonskid compound.  A non skid boat deck helps protect the surface as well as the occupants.

When looking for a non-skid surface you have many options. If your boat floor is currently gelcoat, you can re-gelcoat the surface with or without a non-skid additive. More information about gelcoat application can be found here. Gelcoat is more durable than paint and once a gelcoat surface is painted gelcoat will not adhere.

If paint is desired, non-skid can be added to our marine paints by Duralux and Awlgrip. Often an exact match can be found to your hull paint color. Find more topside paint options available and detailed instructions on adding non skid found in our how to section.

Customers painting the floor of a jon boat, frequently use the Aluma Hawk aluminum paint with a non skid additive. This paint serves as a paint and primer in one for your aluminum surface.

Interdeck boat deck paint is a non-skid deck paint by Interlux and offers an excellent slip resistant finish. It contains a fine aggregate and will apply easily on substrates. Its low sheen finish prevents dazzling that can be reflected by sunlight off decks. Interdeck is also easy to apply and available in numerous colors. The tough polyurethane resin protects decks against everyday wear and tear.

Depending on your paint choices, follow the manufacturers application instructions whether applying to aluminum, fiberglass, or wood to ensure best adhesion and slip resistance.

For cleaning the teak on your boat deck, JustTeak™ is a marine-grade teak cleaning system is designed to rejuvenate your teak quickly and easily. JustTeak™ will clean, brighten, and once sealed protect your teak decking. We have an application instructions video How to clean and protect the teak on your boat.

Antifouling Paint or Prop Glide for Outdrives?

Which method of protective propeller coating is best for your boat? While there is no right or wrong solution, there are a few things to consider before making your decision.

Important questions to ask:

  1. Do you haul and repaint your boat every year?
  2. Does the prop see regular use?

Antifouling Paint – If you answered NO to the second question, you will likely be better off with traditional antifouling paint protecting your outdrive. Slick film coatings need to see regular use in order to repel fouling successfully. And if you answered YES to the first question, the additional cost of slick film coatings may not be worth it for you.

Which antifouling products are recommended for outdrives? Here are two good options.

Option 1 – Apply Tuff Stuff epoxy primer (or similar primer) direct to the metal. Paint over with a copper free bottom paint such as Colorkote. (It is very important to only use a copper-free bottom paint. Copper-based paints on underwater metals will experience galvanic corrosion.) This option guarantees the best protection and longest lasting coverage, but the paint will need to be recoated each season depending on prop usage.

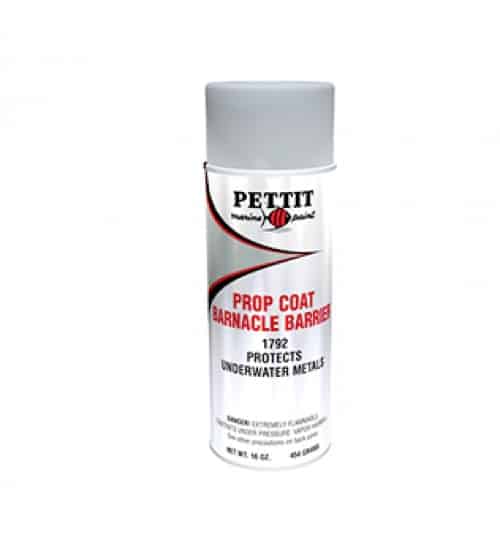
Option 2 – Apply an aerosol underwater metal coating such as Barnacle Blocker or Pettit Barnacle Barrier. These are relatively inexpensive coatings that could provide a large amount of pay off.

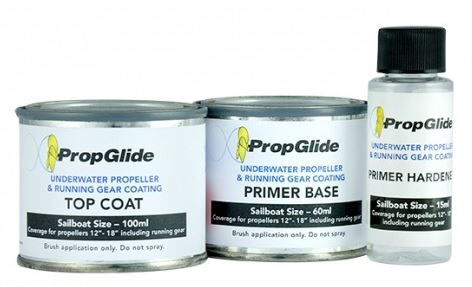
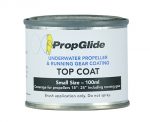
PropGlide™ Propeller and Running Gear Coatings – If you answered YES to the second question above then you may want to give foul-release systems a try. These are non-toxic, slick coatings that prevent growth from attaching itself to the prop and running gear, thus improving your boat speed and fuel efficiency. It is important to note that for PropGlide to keep its slick quality and repel fouling, the prop needs to see regular use. Without the pesticide coatings of traditional bottom paint, a stationary prop is an easy target for barnacles and other organisms. While slick film coatings may not be the solution for all boaters, many have tried it and had great success. Note what some PropGlide users have stated below.

“For over a year, we at the Big Boat Shed ship repair and storage yard for vessels up to 60ft have been trialing out PropGlide. We have found it very user friendly and has a better finish when compared to its competitors. With our tropical humid conditions we could not have asked for a better drying time then what PropGlide offers. This allows us to plan prepare and execute any prop coating task with PropGlide such a breeze. PropGlide is now our main recommended brand for propeller and running gear antifouling coatings.” 3/8/2017

“We applied PropGlide to the propellers and rudders on our 42′ power catamaran in March 2016. We have found excellent results so far with very little growth appearing on the running gear. We have been able to maintain great boat speed, excellent economy and no vibrations unlike previous years with using other products. Our Applicator has even commentated how much easier PropGlide is to apply compared to its competitors.” Mick Malone 9/28/2016

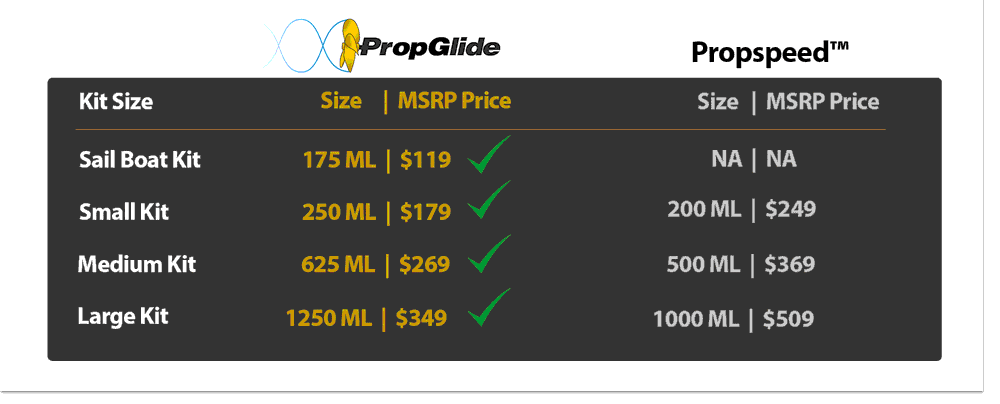
Click this link to compare the price of Propspeed kits and PropGlide™ Propeller Paint Kits.
Click this link to read about Painting an Aluminum Outdrive

What Products Do I Use to Paint a Livewell?

A livewell is a tank found on many fishing boats that is used to keep bait and caught fish alive. It works by pumping fresh water from the surrounding body into the tank, as well as keeping the water aerated.

Most live wells on boats are made of fiberglass and usually coated with gelcoat. For more information on applying gelcoat see our How to Apply Gelcoat article.

In the case that your live well is aluminum you can apply Aluma Hawk, available in white, blue, grey, black, sand and jon boat green to the aluminum surface.

How To Mark Your Waterline for Bottom Paint

Last Updated: February 10, 2026

Quick Recommendation

How to Mark Your Waterline for Bottom Paint

  • Mark the true waterline: Load the boat as it’s normally used and mark the natural waterline before hauling.
  • Raise the paint line slightly: Add 1–2 inches above the true waterline to account for load changes and wake action.
  • Use level reference points: Transfer marks using a laser level, water level, or tape line for accuracy.
  • Bottom line: A properly marked waterline prevents unsightly scum lines and exposed gelcoat once the boat is back in the water.

Tip: When in doubt, paint slightly higher—painting too low is far more noticeable than painting too high.


The waterline can also refer to anyline on a ship’s hull that is parallel to the water’s surface when the ship is afloat in a normal position. There are many reasons a waterline needs to be marked, it is a new vessel, the old paint has been blasted off for a new finish, or you’ve loaded it up with more stuff the original marking is off. Marking the waterline is often met with dread and getting the correct line for your bottom paint will provide stunning results. Getting it wrong, especially when paired with a boot stripe, will stand out like a sore thumb.

If your boat is new, the waterline should be marked on the designer’s drawing, if that is available. If not, you can take the measurements from a similar boat. If the boat has been in the water, even a few days, there may be some slight staining along the waterline (or just float the boat) that can be marked with a grease marker (best if it is full with fuel). Others have advised to throw sawdust in the water around the boat. Haul the boat and see where the sawdust has stuck to the wet hull.

Fine-line masking tape is ideal for this because it has some stretch and conforms very well to hull shape, especially if the hull has a lot of reverse turns. Don’t press the tape too firmly yet – you may need to peel it back for small adjustments. Once you’re happy with the whole line, press the tape firmly against the hull. Since the boat is already level, all you have to do for the second side is to set the level at the correct height and mark the stern with a piece of tape or transpose the wax crayon mark.

When the boat is aligned athwartships, set up the laser tripod, the exact spot is not critical providing the laser beam can see the whole side of the boat (if you can see it, so can the laser beam). Turn on the laser and adjust the height of the beam until it touches the marks you made at the bow and the stern. If it touches the mark on the bow but the stern is too high, lower the jack-stands at the stern or raise those at the bow—vice versa if the stern is low. Double-check the spirit level in the cockpit to make sure you’re not tilting the boat.


Can I change the color or tint my paint?

For most paints, in order to guarantee efficacy, the only way we recommend changing the color of  paints is to mix like paints, ie. Mixing Aluma Hawk with Aluma Hawk. We do not recommend addition of “universal” tints or pigments into our products. Many customers desire an antifouling paint in a deep, dark blue and this can be achieved by mixing blue and black.

Gel coats and resins can have a tint added, no more than 1 oz per quart, which can limit the effect. Another option is to mix two gelcoat colors, such as white and red for pink.

Application of Topside Mega Gloss by Blue Water

Learn how to apply Mega Gloss Gold and Mega Gloss by Blue Water Marine Paints

Prepping & priming for topside work
Mega Gloss by Blue Water Paint provides a beautiful aesthetic finish, and also provides protection against – sea, rain, wind and sun.
Blistering UV rays will degrade the surface of fiberglass and prematurely age your vessel. Moisture can also cause as many problems for wooden vessels and metal boats.

  • Clean and prepare the hull by first washing with soap and water and finish with fresh water. Then wipe the surface with a rag that has been dampened with Naptha.
  • After preparing the surface, sand with 220-320 grit wet-or-dry sandpaper. Remove sanding residue by wiping with a rag that has been dampened with Naptha.
  • Apply 1-2 coats of Mega Gloss Primer and 2-3 coats of Finish Paint. Sand between coats with 320-400 grit. If the paint is peeling, cracking or generally showing signs of separations over the whole area, you need to remove the coating.

Applying topside paint
• Stir the paint thoroughly using a stir stick. Stir the can occasionally during work.
• Application methods for all paints include brush,roller or spray.
• It is best to paint on warm dry mornings – cold weather retards the drying of paint and dampness will spoil the gloss.
Brush – Long flexible bristles are best for gloss paints. Apply by brush, spreading with horizontal strokes before finishing with light vertical strokes. To minimize brush marks, hold the brush at a 45° angle.
Roller – A good gloss can be obtained using a high density / small cell foam roller. This will minimize the formation of bubbles in the surface. It is best to roll in one direction and tip off in another direction.
Thinners can be added as you work to maintain working viscosity.
• Pour the amount you expect to use in 30 minutes into a separate container.
• Once topcoat painting is complete, it should be kept dry for at least 24 hours, and 7–10 days should be allowed for full curing to take place.
• Do NOT use or incorporate any flow control agents like Penetrol®.

Topside paint hints / tricks
Mega Gloss™ can be made to be a non-skid texture for decks by the addition of Non Skid, by adding to the paint and applying 2 coats.

Application of a topside primer will provide additional depth of color, adhesion and durability.

  • The best method is to apply with a roller, and then tip off with a large brush with long flexible bristles.
  • Use a diagonal brushing method at 45 degrees, followed by horizontal and then vertical strokes.
  • The best roller is a solvent resistant foam roller, which will reduce bubbles.
  • Use a top quality fine line masking tape for good crisp lines and no residual glue left on the hull.

Why do the majority of boaters paint with 1-part paint?
Alkyd enamels, and modifications of alkyd enamel technology, have been the work horse products in the marine industry for approximately fifty years. Generally, they dry reasonably fast, are easy to apply and have very good weathering characteristics. More alkyd enamels are still used than any other enamel type.

Can topside paints be applied to below water surfaces?
Most topside coating systems if constantly immersed or kept wet will tend to blister. It would be best to use a water-barrier primer and bottom paint if the surface will be submerged. 

What’s the best way to get a good finish with topsides paints?
You must lightly sand the surface and then use a good roller or brush. Thin when needed for proper flow and performance

Where to buy polyurethane paint? The Bottom Paint Store has several polyurethane paints available to choose from. If you need technical assistance please contact our technical team via Live Chat or by calling 888-505-2313.
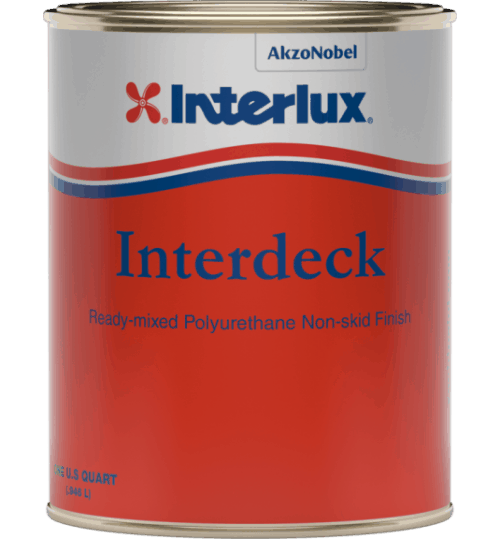
What Equipment is Needed to do a Proper Application of Antifouling Bottom Paint?

Antifouling bottom paint is needed if you store your boat in the water. If left in the water without protection, marine growth may attach to your boat’s exposed hull. Marine growth slows a boat down and increases fuel consumption. Here are the items that you will need in addition to the bottom paint for the proper anti-fouling bottom paint application.

60–100 grit – Suitable for the removal of paint or to sand gel coat prior to the application of antifouling paint.
• After sanding remove sanding residue by wiping with a cloth that has been dampened with the proper solvent.
Masking Tape – When it is necessary to mask off areas use a high quality clean edge masking tape, especially when the masking tape will be left on the surface for a long time.
• Brushes – For antifouling paints use a natural bristle brush but not necessarily one of as good quality as you would use to apply topside finishes.
• Rollers – Most solvent resistant rollers will have a phenolic core and will say that they are for use with oil based paints or epoxies. For antifouling paint and epoxy primers, use a 3/8”-1/2” nap roller.

Ideal Temperatures for Applying Paints and Gelcoats

Last Updated: February 10, 2026

Quick Recommendation

Ideal Temperatures for Applying Paints and Gelcoats

  • Best temperature range: Most marine paints and gelcoats apply best between 50°F and 85°F, with optimal results around 65–80°F.
  • Avoid cold conditions: Low temperatures slow curing and can cause poor adhesion or soft finishes.
  • Avoid excessive heat: High temperatures can cause rapid solvent flash-off, roller marks, and poor leveling.
  • Bottom line: Proper temperature—and stable conditions during curing—are critical for durability, appearance, and full cure.

Tip: Always consider surface temperature and overnight lows, not just daytime air temperature, before applying coatings.

When applying coatings in cooler temperatures it is important that you meet the minimum temperature requirements. This information can typically be found in the products technical data sheet, or on the can label.

As a general rule, coatings should be applied in good weather when air and surface temperatures are above 50°F (10°C) for most paints and 60°F (16°C) for epoxy, resin, and gelcoats . Surface temperature must be a least 50°F (10°C) above dew point. For optimum application properties, bring material to 70-80°F (21-27°C) temperature range prior to mixing and application.

Tips:

  • Make sure to store the coatings inside to keep the temperature in the optimal range prior to application.
  • Do not let coatings freeze, as this may alter the chemical integrity of the products.
  • In warm (hot) conditions be sure to keep the coatings out of direct sunlight exposure.

Coatings such as resins and gelcoats that require MEKp to be added for curing will require more MEKp in cooler conditions, and less MEKp in warmer conditions. See the guide below, but refer to the specific coating’s technical data sheet for detailed information:

MEPk Levels

MEkp Concentration Levels


PropOne Vs. PropGlide

It is widely accepted that a build up of marine life on the surface of a boat’s propeller and drive shaft negatively impacts engine efficiency and performance. Even if the prop has a thin layer of growth on it’s surface area, fuel efficiency is reduced by a significant amount. To counter this problem, engineers have turned to developing “super-slick” coatings. When the drive is engaged, and the prop begins to move, any organisms attempting to adhere to the prop simply slide right off! No chemicals are used to poison or kill the organisms in the environment.

How do PropOne* and PropGlide compare?

Which coating gives you the most bang for your buck?

PropGlide is much newer to the market than PropOne, but has been in development for over ten years. Being new to the slick coating market, PropGlide appears to be able to avoid slipping into the same ruts that their competitors have. The biggest obstacle for PropOne is the cost. Comparing the two products at price point, PropGlide is about 30% less expensive and offers 25% more product. That’s 2 strikes for PropOne right off the bat. PropOne is available in the following sizes: 1000mL, 500mL, and 250mL. On the other hand PropGlide offers a size larger than PropOne’s 1000mL and still manages a lower cost. Also PropGlide offers a size smaller than PropOne’s 250mL for sailboat owners who don’t need the larger quantities of product. (For more information on choosing the right size of PropGlide, see this Coverage Chart.)

In terms of performance, both slick coatings are equally good. They do the job and do it well. It is too early to say which product will outlast the other in the minds of consumers. But for right now, we recommend PropGlide as opposed to PropOne. The savings alone makes PropGlide worth every penny.


*PropOne was formerly known as PropGold. It is essentially the same product, just a different brand name.

**This PropOne review and PropGlide review is the sole opinion of BottomPaintStore.com

***Above PropOne prices and PropGlide Prices are based on internet web search December 2016.

PROPGLIDE TECHNICAL DATA & APPLICATION GUIDE

PropGlide is an environmentally friendly foul release coating for boat propellers and running gear which prevents the attachment of marine growth by low critical surface tension. PropGlide does not contain cuprous oxide or TBT compounds or any other toxic substances which might cause environmental pollution. PropGlide is sold in 4 size kits. Sailboat, Small, Medium and Large. For the best size kit for your application see: Which PropGlide Kit Size Do You Need?

Each PropGlide Kit contains various sizes of Primer Base (Part 1), Primer Hardener (Part 2), and a Clear Top Coat.

  • propglide foul release coatingSailboat Kit 175ML Kit (#PCK-175) Contents: 60ML Primer Base, 15ML Primer Hardener, 100ML Clear Topcoat
  • Small Kit 250ML Kit (#PCK-250) Contents: 120ML Primer Base, 30ML Primer Hardener, 100ML Clear Topcoat
  • Medium Kit 625ML Kit (#PCK-625) Contents: 300ML Primer Base, 75ML Primer Hardener, 250ML Clear Topcoat
  • Large Kit 1125ML Kit (#PCK-1125) Contents: 2-300ML Primer Base, 2-75ML Primer Hardener, 2-250ML Clear Topcoat

This PropGlide Technical Data & Application Guide will detail how to apply any size kit of PropGlide by detailing the best preparation of the surface and application of the etching primer, and the final application of the Clear Topcoat.

Preparation of the Surface

The preparation of the surfaces to be coated with PropGlide is the key for the product to work effectively.

1. Remove previous coatings, fouling organisms/marine growth from metal surfaces. All substrates that are to be coated with PropGlide must be bare metal. These areas should be machine sanded with a Dual Action sander fitted with a soft pad and 60-80 grit abrasive discs sandpaper. Sanding the surface by hand is recommended at hard-to-reach areas where the dual action sander cannot reach. Use 60 – 80 grit wet/dry sandpaper, with water as a lubricant. Make sure the sand paper is changed frequently to ensure the necessary profile is achieved. Hand sanding these hard-to-reach areas is required to ensure the surface is properly abraded. The shaft should be done with hand sanding rather than using a machine. From this point forward, there shouldn’t be any direct hand contact to areas which are to be coated with PropGlide. It is advisable to wear latex gloves as it will ensure the areas to be painted remain clean and sound.

2. Once the surface sanding process is completed, wash all the areas with clean fresh water and wipe with clean, lintfree cotton rags soaked in water to wipe off sanding residue. Continue doing this until the rags don’t show any sign of residue, contaminants or discoloration.

3. After cleansing with water is completed, use a rag soaked in acetone or denatured alcohol to remove water on the sanded surface.

Continue to use the rag until it becomes dry from evaporation of the acetone or denatured alcohol. Use one or more rags as required, until the rag looks white clean, as there will be no contaminants when the rag is white clean. Again, care should be taken not to touch cleaned surfaces with bare hands. This is because fingers and hands contain oils which can transfer to the cleaned surfaces and therefore would inhibit the adhesion of the coatings.

Apply the Etching Primer

There is a Primer Base (Part 1) and a Primer Hardener (Part 2) to activate the primer base. This two-component etching primer dries chemically by reaction of the mixed components and provides protection against corrosion and increases the adhesive property of the subsequent coats. It may be used as a pre-treatment primer on non-ferrous metals such as bronze and aluminum as well as zinc and galvanised iron. May also be used as pre-treatment primer on blast-cleaned steel plates.

Temperature Limitations: Primer and Topcoat should be brought to 70-80°F (21-27°C) temperature range prior to mixing and application. Apply in good weather conditions when air and surface temperatures are above 50°F (10°C). Surface temperature must be a least 50°F (10°C).

PropGlide Etching Primer Physical Properties

  • Mixing Ratio: Primer Base (Part 1) : Primer Hardener (Part 2) = 4 : 1 by volume
  • Colour: Primer Base (Part 1) : Yellow, Primer Hardener (Part 2) : Clear
  • Dry Film Thickness: 8 microns
  • Drying Time: 5-15 minutes touch dry (temperature dependent)- 1 hour hard dry @ 20°C/68°F

Painting Interval: Apply PropGlide Clear TopCoat when Etching Primer is just touch dry Pot Life: 8 hrs @ 20°C/68°F

1. Agitate the Primer Base (Part 1) contents by scraping the bottom and sides of the can, as there will be settling. Mix contents of primer until the settled parts are incorporated back into solution and uniformly blended. Do not strain material, even if particles are present.

2. Stir Primer Hardener (Part 2) then add entire contents to the Primer Base (Part 1) container. Mix primer base and hardener for 30 seconds and apply mixture to sanded surface immediately after mixing.

3. Application of the Primer Base/Hardener mixture should be thin. The film should be thin enough, so that it is barely coating the surface, yet it does not provide sections or lines on the sanded surface that are not coated. Do not touch the primer mixture as it dries. The method of application of the primer may be done by using either a natural bristle brush or foam roller. 4. Apply a second coat of Primer Base/Hardener mixture after the first coat dries.

Apply the Clear Top Coat

The Clear Top Coat that should be applied to the last coat of Etching Primer within 5-15 minutes. The Clear Top Coat serves as a slick finish that will inhibit marine growth from attaching to the surface.

PropGlide Clear Top Coat Physical Properties:

  • Binder type: Silicone Polymer
  • Solvent: Xylene
  • Colour: Clear coating
  • Finish: Glossy
  • Dry time: 45 minutes touch dry ; 8 hours hard dry @ 20°C
  • Recommended film build: 75 microns per coat
  • Thinning: N/A
  • Clean up: Acetone
  • Shelf life: 12 months

1. After 5 to 15 minutes (depending on temperature) of applying the 2nd coat of Primer/Hardener mixture promptly apply the Top Coat. Application of Top Coat should be thicker than Primer/Hardener mixture, yet not thick enough so that the Top Coat produces runs. The Top Coat is to be applied with brush only, NO foam applicators are to be used.

2. Let the Top Coat dry overnight before launching.

Propspeed Vs. PropGlide

Propspeed ReviewFoul Release Systems Like Propspeed and PropGlide provide the best solution to keeping growth of your props and running gear. While these are not antifouling prop paints, they do keep the growth off buy creating a super slippery surface that the marine growth cannot stick to. Propspeed recommends that their kits by applied by a professional Propspeed applicator. On the other hand, PropGlide is available for any DIY applicator and is 30%+ less and more product for the money. If you want to apply this yourself, be sure to follow the details in the respective application manuals.   You can find these on any of the Propeller Foul Release Kit listed on our website.
PropGlide is newer to the market, but been in development for over ten years, while Propspeed  has been available for many years and is the leading brand name in the market place. The biggest issue with Propspeed is the cost. Very expensive!  PropGlide is also expensive but 30% less than Propspeed. In addition, you get 25% more product with PropGlide , so be sure to get the right size. You might be able to use a smaller size kit with PropGlide  which could then save you over 50%! You can find the comparison on PropGlide’s web site: Propspeed Compared


Performance of both coatings has been comparable, with much fewer complaints about PropGlide   Either they are just newer in the market with less complaints, or they truly have improved performance. Time will tell. At this point we recommend trying PropGlide  as a Propspeed alternative – since there is comparable performance with Propspeed, the cost savings alone is worth it! And PropGlide offers a sailboat size kit making it affordable now for sailboat owners.

This Propspeed review and PropGlide review is the sole opinion of BottomPaintStore.com

Note: Propspeed™ is a registered trademark of Oceanmax. Bottom Paint Store is not affiliated with Propspeed or Oceanmax in anyway. Above Propspeed prices and PropGlide prices are based on internet web search October 2016 .

PropGlide Frequently Asked Questions

logo-200x43 How does PropGlide work? PropGlide is a coating system that is applied to the props and underwater running gear of any vessel. Once applied, the PropGlide system reduces friction to the metal surface which greatly improves efficiency by not allowing growth to stick to the underwater metals. The result is an improvement in prop speed and fuel efficiency.

Is PropGlide toxic? Not at all. PropGlide contains no toxic biocides. It works be creating a super slippery surface not allowing growth to attach to the props and underwater metal.

Does PropGlide prevent barnacles and zebra mussels? No. It does not prevent from occurring. Barnacles and Zebra mussels will still grow. However, they will NOT attach. As soon as the vessel starts moving, the growth slides off with ease!

What can I expect after applying PropGlide to my props and running gear? You should expect growth not to stick to the properly prepared and kept surface while experiencing greater fuel efficiency and speed.

Can PropGlide be used in salt water and fresh water? Yes, PropGlide may be used in any type of water, including fresh water, salt water and brackish water conditions.

propglide foul release coatingHow long does it take to apply Propglide? The application time varies by the size of the prop(s) and running gear that you are covering, but typical application can be done in a few hours. Please see our application guidelines for detailed information. Note: Remember to wait overnight before launching your vessel!

Who can apply PropGlide? Unlike many other foul release coatings, you may apply PropGlide yourself by following the application guide, or you can contact a local boatyard or dealer in your area to apply it for you.

If I haul my boat after I have applied Propglide, will it still work after leaving the boat of the water? Yes, PropGlide can be left out of the water without affecting any performance of the system.

How long will PropGlide last? There are many factors that can affect the longevity of PropGlide including number of hours and kilometers traveled, various environmental factors including water temperature and purity. PropGlide will last 1-2 years depending on the above factors.

Can I recoat PropGlide during my next haul out? You must remove all of the old PropGlide by sandblasting, sanding, scraping, wire wheel or grinder. After all old PropGlide is removed down to the metal surface, clean the area to be primed with Xylol or Acetone. Recoat PropGlide using the application guidelines.