Which Non-Antifouling Paint is Recommended for Wood?

Last Updated: February 17, 2026

Quick Recommendation

Which Non-Antifouling Paint Is Recommended for Wood?

  • Above the waterline: Use a marine topside polyurethane or enamel designed for wood for durability and UV resistance.
  • Prime first: Apply a marine wood primer or epoxy sealer to improve adhesion and protect against moisture.
  • Flexible coatings matter: Wood expands and contracts—choose paints formulated to handle movement.
  • Bottom line: The best non-antifouling paint for wood is a marine-grade topside system applied over proper wood prep and priming.

Tip: If the wood will remain submerged for extended periods, non-antifouling paint is not appropriate—consider a compatible bottom paint system instead.

sailboat-1149519_640Painting a wooden boat on your own can be a daunting task. The amount of information about the correct way to paint a boat is staggering! First-time boat owners may be at a loss when trying to make a plan for their first project. The Bottom Paint Store’s aim is to make this process as stress-free as possible so you can enjoy working on your boat and ultimately, enjoy the fruits of your labor!

If your boat stays in the water and growth is a concern you’ll want to use an antifouling paint for below the waterline and follow the manufacturers specs for application to a wood hull. See application instructions of ablative antifouling:

Step 1 – CLEAN SURFACE
Surface must be clean, dry and free of contaminants.
Step 2 – SAND & CLEAN
Sand to a uniformly frosty, dull looking surface with 80-100 grit (no finer)
sandpaper; remove any residue.
Step 3 – APPLY ANTIFOULANT
Apply two coats of Sea Hawk antifouling by brush, roller or spray.
Apply first coat thinned 20% and let dry overnight. Apply two more
coats of bottom paint allowing 3 to 6 hours between coats and a
minimum overnight dry.*

Other Paint Products for Single Day Use

Here are some other products that are not recommended for long-term submersion but can be applied to wood-hulled boats.

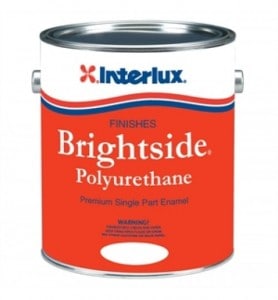
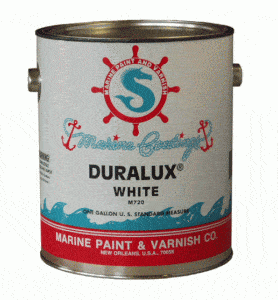
interlux-brightside-polyurethane-28238-500x539duralux-topside-marine-enamel-high-gloss-gallon-10799-500x539Duralux Topside Marine Enamel

Interlux Pre-Kote and Interlux Brightside

For other Helpful “How To” Articles about Topside Boat Paint, Click one of the links below.

How to Apply Propspeed

Propspeed ReviewPropspeed is a coating system designed and proven to increase vessels’ speed and fuel efficiency and greatly reduce marine growth from bonding to metal surfaces below the waterline. Propspeed works because it’s slick, not because it’s toxic.

The Propspeed system can be applied to any metal surface below the waterline, including propellers, shafts, bow thrusters, rudders, trim tabs, struts, stabilizers, sea chests, sea strainers, keel coolers and through hull fittings. The Clear Top Coat without the use of the etching primer can be used on plastic based items such as underwater lights, composite propellers and plastic bow thrusters.

Propspeed System Limitationspropspeed application
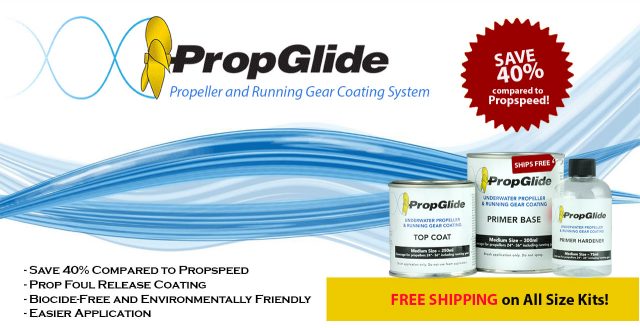
The Propspeed  system has been developed over many years of trial and error and has been refined to give exceptional performance throughout the world.

• The preparation and application instructions should be followed to ensure you get a satisfactory result. Taking shortcuts will reduce the durability and longevity of the system.

• Propspeed should only be applied by a qualified applicator.

• As with any coating systems, environmental influences will vary the cure rate of the coatings and this needs to be taken into account by the applicator.

• We recommend a minimum application temperature of 5°C or 40°F with recommended humidity not exceeding 85%.

• Electrolysis of a vessel or even a vessel moored nearby can adversely affect the coating system of the running gear. Marinas with 400 volt supply to vessels are more prone to neighbors’ vessels being affected.

• Propspeed clear coat is a soft coating and is easily damaged by mechanical abrasion, fi shing tackle or ropes around the running gear. Vessels used in shallow, sandy areas are also prone to mechanical abrasion of the clear coat.

• Vessel owners using a dive service should inform their diver that Propspeed has been applied to the running gear, and any other areas, so that the diver can use proper cleaning methods to avoid damaging the Prospeed system.

• The Propspeed system is not recommended nor approved for use in aquaculture or contact with food products.

Propspeed Application Process

The Propspeed  application is a simple process, involving surface preparation, metal conditioning and a catalyzed etching primer, followed by a silicone based topcoat.

The process to apply Propspeed to your running gear isn’t difficult, but the process must be strictly adhered to in order to get a superior result. For this reason we strongly recommend using a Propspeed approved applicator, or an experienced marine painter.

Propspeed doesn’t require any special equipment in its application. All you need is: a dual action sander, some 80 grit sandpaper, both wet and dry, plenty of rags, plastic mixing containers, disposable brushes, disposable foam rollers, disposable plastic paint trays, mixing sticks, paper paint suits, disposable gloves, eye protection and dust sanding mask.

The application of Propspeed  can be broken down into five separate stages:

1. Metal surface preparation – sanding the surface or using Propstrip

2. Initial clean – using Propclean

3. Metal conditioning – using Propprep

4. Metal etching primer

5. Clear coat top coat

—————————————-

1. Metal surface preparation – sanding the surface or using Propstrip

As is the case with all surface coatings the preparation of the surface to be coated for the application of Propspeed is key. The old Propspeed coating needs to be removed completely before the new system can be applied.

Any previously applied Propspeed on propellers, rudders and drive shafts should be high pressure cleaned, removing all marine foul from surfaces, then be allowed sufficient time to thoroughly dry.

Propspeed can be removed by sanding using 80-grit sandpaper. A dual action or air driven sander can be used and difficult areas wet sanded by hand.

Propstrip Option

New to our range is the revolutionary Propstrip. This is a safe, low toxicity remover that is totally water neutralized. The product can reduce the labour cost to remove Propspeed by up to 70%, as well as reducing dust and noise in the boat yard, and cutting the expense of abrasives.

For yards without a water catchment process, this system also enables all of the waste and removed product to be captured and processed to a waste container. For this process we recommend the use of hessian or burlap sacking placed under the area, so the removed product washes off onto the sacking. The water will drain through the hessian sacking, capturing the old Propspeed, and the hessian sacking can be rolled up and all waste placed in the waste container.

Good work practice is always recommended with the wearing of protective hand and eyewear.

Mask off any surface of the vessel that the Propstrip could splash or drip onto.

Propstrip does the hard work for you. It’s easy to apply and easy to remove following these simple instructions:

• Make sure the area you are working with is totally dry: Propstrip DOES NOT like any moisture. Water de-activates the Propstrip completely.

• Ensure any areas that are not being treated are adequately protected from Propstrip.

• Dependent on the remaining wear layer of the silicone topcoat the Propspeed may first need to be abraded with 80 grit sandpaper. This enables the Propstrip to work more effectively by penetrating the silicone faster.

• Apply Propstrip liberally with a brush ensuring there is a thick coating on 100% of the surface being treated allowing for complete saturation of the part.

• In cold conditions, 10-15°C or 50-60°F, it could take up to 3 hours to release the old Propspeed or if colder, it may take longer than 3 hours.

• In hot conditions above 35°C or 95°F it may be necessary to ensure the treated area is in shade to prevent the application from drying out while performing its action. The product works faster in hot conditons, so within 1 to 3 hours you should begin to visually observe the discoloration of the old Propspeed.

• When the product has started to bubble and change colour, this is a good sign that it is doing its job. Test a small area with a scraper to see if it will freely release from the substrate. Once ready, wash with a hose or a bucket of water and a Scotch-Brite pad.

• Any remaining product is removed using a wet Scotch-Brite pad or wet/dry sandpaper.

2. Initial clean – using Propclean

Once the surface to be coated has had the old Propspeed chemically or mechanically removed its now time to clean the surface with the Propclean solution.

From this stage of the application forward there should be no direct hand contact with the areas that are to be coated with Propspeed. The reason for this is that the oils on your fingers and hands will be transferred to the surface that is to be coated and this may cause the coating to fail. Plastic or latex gloves should be worn at all times. If you need to change  gloves frequently then do so. Make sure you have an abundance of rags on hand for the next two steps.

Clean the surface with Propclean. Immediately wipe the surface with a clean dry rag. Repeat until there is no residue left.

3. Metal conditioning – using Propprep

Apply Propprep solution liberally with a clean rag or use the Propprep wipes. Immediately wipe the surface with a clean dry rag to ensure no residue is left.

Propprep is essential in the chemical preparation of the metal substrate to be coated with Propspeed. It contains ingredients that react with the metal creating a surface porous layer. This porous layer is key to ensuring penetration and completion of the self etching reaction of the primer to the metal substrate. Propprep also ensures that no free alkalinity, as a result of various soap/detergent washing, is present to interfere with the self etching primer reaction and adhesion to the metal substrate.

4. Metal Etching Primer

Ambient temperature has an effect on the application of Propspeed and the drying times of the Metal Etching Primer and the Clear Top Coat. We recommend a minimum temperature of 5°C or 40°F.

It is recommended to avoid applying the product in direct sunlight or humidity above 85%.

Open the can of etching primer. The yellow pigment in the bottom of the can must be thoroughly

mixed before adding the etching primer hardener. This can be done quite easily using a mixing stick or Propspeed Paint Stir Wheels. This usually takes no more than two or three minutes.

Note: Failure to thoroughly mix the etching primer base, as described above, may lead to premature hardening, inconsistencies and short life expectancy of the final coating system.

Once the etching primer base has been thoroughly stirred and there are no solids left in the bottom of the can you can now add the etching primer hardener to the etching primer base. The mixing ratio of etching primer base to etching primer hardener is four parts base to one part hardener. However we recommend that you mix the etching primer hardener right into the etching primer base container thereby ensuring an accurate measurement. Once mixed together, use immediately. Any product not being used immediately can be left in the sealed can in the shade for up to six hours. You can apply your primer with brushes and or foam rollers. For spray applications, please consult your Propspeed Technical Representative regarding specialized projects such as keel coolers and sea strainers.

The application process must be well planned due to times in between coats and may require two applicators. The timing of each coat is essential to enable the required chemical bond between coats.

The Propspeed system requires two generous coats of etching primer. To access all parts of the propeller and shaft we recommend turning the prop using a brush, wooden stick, or gloved hands. Once you have applied the first coat of etching primer wait approximately 3 to 5 minutes before applying the next coat.

To test if it is ready use the dry-to-touch test method.

If you take your index finger in a glove and touch the wet etching primer and it leaves a small print on the primed surface but no etching primer transfers to your fingertip of your glove, then you can begin applying the next coat. The wait between coats of etching primer is very important and must be adhered to. Make sure you have some idea of how time is progressing.

Using 27°C or 80°F as a benchmark you have 3 to 5 minutes from the start of applying the fi rst coat of etching primer to the start of applying the second.

Cooler temperatures will slow down the recoat time between the two coats, as will warmer temperatures and windy conditions speed-up the recoat time between the two.

5. Clear Top Coat

Before applying the clear coat take another paint stick and stir the clear coat so you have a smooth, homogeneous mixture in the can. The 3 to 5 minute wait between coats applies here too – use the dry to touch test to check if the etching primer has dried suffi ciently before applying the clear coat. Apply the clear coat with a brush only, NO foam roller application is to be used here. The clear coat is applied and brushed much like conventional varnish. As with the etching primer to access all parts of the propeller and shaft we recommend turning the prop using a brush, wooden stick or gloved hands.

Make sure there are no heavy runs or sags in the clear coat. You’ll have anywhere from 5 to 10 minutes to touch these up. Any drips that harden on the edges of the propeller blades can be carefully cut off the following day.

Make sure the surface is completely coated with clear coat. Any missed areas will appear dull in luster.

When you have fi nished coating the entire propeller with clear coat, give the propeller one more visual inspection just to make sure there are no areas that you might have missed and to check again that there are no runs in the clear coat.

Once the running gear has been coated clean up the contaminated waste products and dispose of as required by your local council or marine laws.

Propspeed requires a minimum of eight hours to dry before launching. In cold conditions, 5-13°C / 40-60°F, we recommend at least 24 hours drying before launching. Unlike traditional bottom paints Propspeed’s effectiveness is not adversely affected by sitting out of the water for extended periods of time in warm or cold climates. Any coated areas will need to be protected from damage.

Propspeed Tips

• Application of Propspeed requires planning so make sure you have all of the required application equipment and thoroughly understand the process.

• Wear protective respiratory, eye and skin protection.

• Remember to remove all of the solids at the bottom of the primer container and stir it into a homogeneous mixture before applying the primer hardener.

• Be sure to keep track of time between etching primer coats and the clear coat. The 3 to 5 minute re-coat windows are critical and subject to your ambient application temperature.

• Be sure and brush out sags or drips in the etching primer before applying the clear coat.

• Install all zincs or tape off areas where zinc anodes will be placed before applying Propspeed. Be sure to carefully remove any tape that has been applied before the Prospeed is fully cured.

• When coating the blades of the propeller remember to start in the hub area and work your way out to the end of the blade.

• The Propprep solution does not contain corrosive inhibitors so the treated surface should be primed and coated with the clear coat as soon as possible after being treated, and defi nitely within 4 hours.

• When applying the clear coat be sure to stretch the material out just as you would on the last coat of varnish on any bright work.

• We highly recommend two people work together on each application.

• After completing the application of the clear coat, visually observe all areas, ensuring there are no misses or gaps. The clear coat will dry to a glossy fi nish, helping the applicator fi nd any uncoated areas.

• During cleaning of your hull only use a soft cloth on the Propspeed. If the wiping cloth collects shells remove them before proceeding with the wipe down so as not to damage the Propspeed. Avoid any abrasive cleaning materials or direct high-pressure water.

• When hauling your vessel assess the Propspeed condition and reapply if necessary. Most owners reapply Propspeed at the same time as antifoul.

Propspeed Frequently Asked Questions

How does Propspeed work? Propspeed’s unique “foul release” formulation produces a surface that does not allow marine growth to permanently attach.

• What are the benefits of Propspeed? Propspeed will keep your running gear free from marine growth and will increase your vessel’s speed and reduce your fuel consumption.

• Is Propspeed environmentally friendly? Yes. Propspeed contains no tin, copper, biocides or pesticides.

• Is Propspeed good value? Absolutely! For years boaters have asked for a coating to keep their running gear free of marine growth. Propspeed not only delivers a coating that answers this call, but will deliver higher speeds and fuel savings, when compared with unprotected running gear.

• How long should Propspeed last on my vessel? Propspeed should last at least one year but many customers report up to two years of service.

• Do I need anything to maintain my Propspeed application? Propspeed’s unique “foul release” formulation is self-cleaning. However, it is acceptable if your diver gently wipes Propspeed with a non-abrasive cloth, rinsing frequently to avoid collecting shells.

• Can I haul my vessel multiple times without having to re-apply Propspeed? Yes. Propspeed can be hauled and launched multiple times without affecting its performance.

• Who should apply Propspeed to my vessel? We recommend that you have a certified applicator apply Propspeed to your vessel.

• Can I use Propspeed on my Kiwi Props? Yes you can. Preparation is similar to any other Propspeed application, except you do not need to apply the etching primer, just apply the Clear Coat after normal preparation.

• Can I spray Propspeed? We do not recommend the spraying of the clear top coat as it is a silicone based product which can easily contaminate other vessels in the yard if not handled correctly.

• Where can I find the Safety Data Sheets and the Technical Data Sheets on Propspeed products? See the links below.

The above information was obtained via the Propspeed Application Manual and updated 8/29/2016. For the most up-to-date information please review the Propspeed OceanMax website.

Helpful Links:

Propspeed Application Guidelines

Propspeed Coverate Rates

Propspeed Technical Data:

Propspeed Etching Primer Techincal Data Sheet

Propspeed Clear Coat Techincal Data Sheet

Propspeed Safety Data

Propspeed Etching Primer SDS (MSDS)

Propspeed Clear Coat SDS (MSDS)

Note: Propspeed™ is a registered trademark of Oceanmax. Bottom Paint Store is not affiliated with Propspeed or Oceanmax in anyway. Above Propspeed prices and PropGlide Prices are based on internet web search October 2016 .


How to Prevent Growth on Boat Propellers and Running Gear

Last Updated: February 10, 2026

Quick Recommendation

How to Prevent Growth on Boat Propellers and Running Gear

  • Use metal-safe antifouling: Apply a propeller-specific, copper-free coating designed for underwater metals to prevent fouling without causing corrosion.
  • Prep matters most: Clean to bare metal, remove oxidation, and follow the coating system’s exact primer and application steps.
  • Keep it smooth: Smooth, well-applied coatings reduce drag and make it harder for growth to attach.
  • Bottom line: The best results come from a metal-compatible coating system applied over meticulous surface prep.

Tip: Avoid standard hull bottom paints on props and shafts—they often fail quickly and can increase corrosion risk.

So you have gone to the expense of applying bottom paint to your boat, and now you have to ask the question “what about propeller paint and running gear paint? Just like the rest of the bottom of the boat, marine growth will cover the props and running gear if left unprotected. This will lead to loss of power and speed. With severe growth, you can even lose the ability to get the boat on plane.

There are a few options for keeping growth off your propellers and running gear and we will explore advantages and disadvantages for applying various coatings to your propellers and running gear. Keep in mind that when you paint props and running gear they are under extreme conditions with speed, cavitation, electrolysis and environmental conditions ( like running through sand or hitting ground or objects). These can cause the same result as sandblasting your running gear – something you will want to avoid after you choose a coating!

Foul release coatings are very smooth, extremely low friction coatings typically based on silicone or fluoropolymers. The combination of low friction and low surface energy is the physical mechanism behind its fouling release. In addition to preventing biofouling, they increase fuel efficiency  by providing more efficiencies to the engine and therefore less fuel is burned resulting in cost savings.

1. PropGlide Foul Release Coating | The Best Solution for Preventing Growth on Props and Running Gear

Advantages: Best adhesion, best performance, actual increase in speed, lowest risk of electrolysis issues, non-toxic
Disadvantages: Higher Cost, Environmental Variables (sand, running aground), Detailed application

Foul Release Systems provide the best solution to keeping growth of your props and running gear. While these are not antifouling prop paints, they do keep the growth off buy creating a super slippery surface that the marine growth cannot stick to. Propspeed recommends that their kits by applied by a professional Propspeed applicator. On the other hand, PropGlide is available for any DIY applicator and is less costly and more product for the money. If you want to apply this yourself, be sure to follow the details in the respective application manuals.   You can find these on any of the Propeller Foul Release Kit listed on our website.

PropGlide and Propspeed are foul release systems that are applied to underwater metals including props and running gears. These foul release coatings are sold in kits ranging from 175ML, 200ML, 500ML, and 1000ML Kits. You can view the all of our Foul Release Coatings to determine which kit size if right for you.

2. Paint the Props and Running Gear with Bottom Paint

Advantages: Lower cost option
Disadvantages: Trouble staying on, electrolysis concerns, Environmental Variables (sand, running aground)

Applying bottom paint to your underwater gear is a little tricky because there are additional steps that must be taken before applying the bottom paint. Especially if you have a fiberglass boat. Most bottom paints contain copper that act as a biocide and prevent growth. However, when applying bottom paint (with copper) to metal, you create a battery effect with the metal on metal. This leads to electrolysis and pitting of your props and running gear. Follow these basic steps before going with this option.

Basic Steps

  1. Prep: Make sure to remove all prior coatings and contaminants prior to applying any coatings. The should be done by a sandblasting, soda blasting, or a good ole fashioned sanding. The recommended grit and profile should be 80 grit. This will provide a efficient surface for the new coating to adhere.
  2. Tuff Stuff Marine Epoxy PrimerPrimer: Apply a two part high build epoxy primer that is designed to prevent corrosion and enhance adhesion. The best we have found is Sea Hawk Tuff Stuff High Build Epoxy Primer. It is easy to use and works extremely well. Apply two coats!
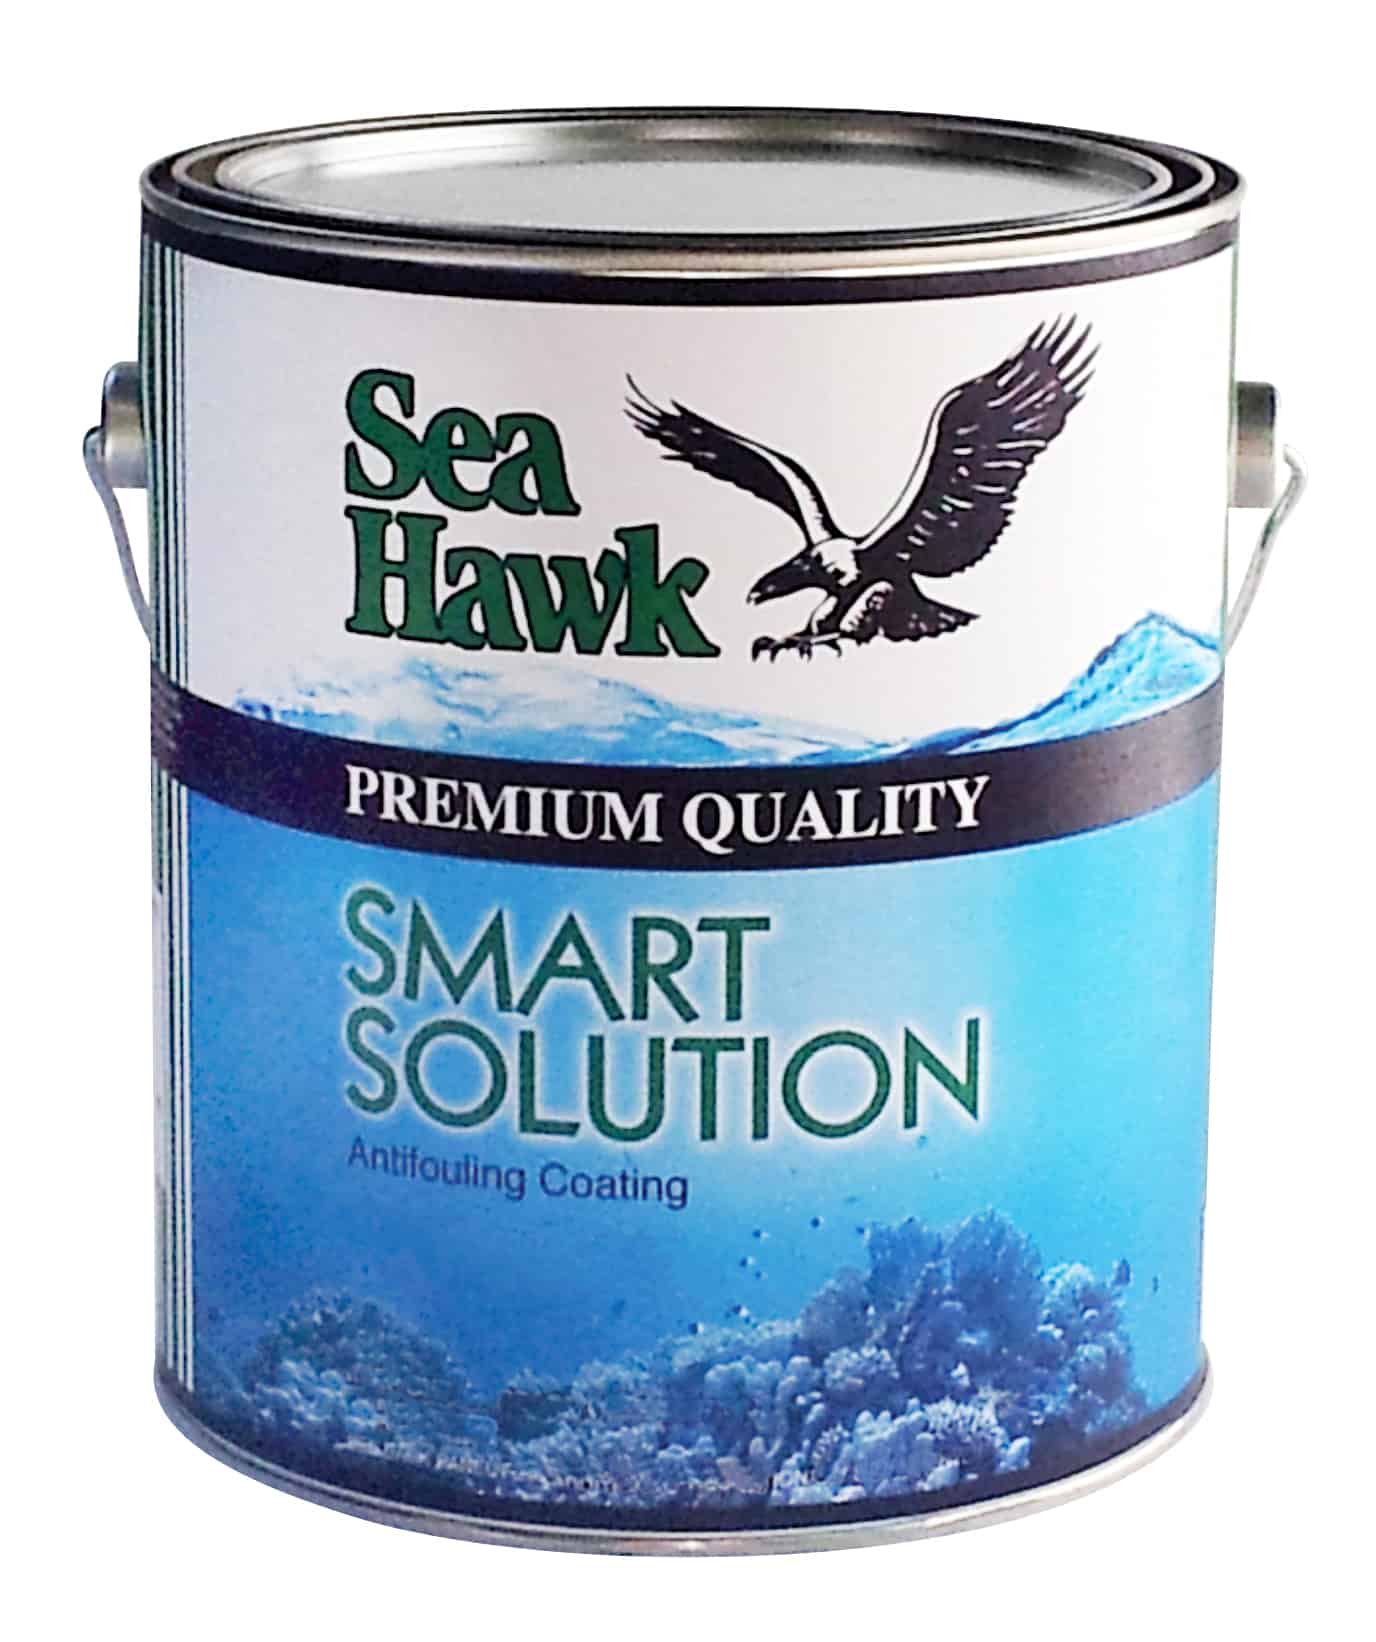
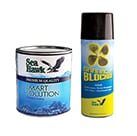
  3. Bottom Paint: Apply a hard modified epoxy bottom paint with not too high a load of copper. Sea Hawk Sharkskin hard paint is a great choice! The epoxy primer will insulate the copper bottom paint from the metal of the props and Sea Hawk Smart Solution Outdrive Paintrunning gear (remember the battery effect!) If you are concerned about electrolysis or already have some issues, then you should use a copper free bottom paint. The only true metal free bottom paint that we found and that still is effective in preventing growth is Sea Hawk Smart Solution. Either way, be sure to apply the first coat of bottom paint the same day as the 2nd coat of epoxy primer. If you don’t, it will not stick!
3. Aerosol Sprays

Advantages: Lowest cost option
Disadvantages: Trouble staying on, ineffective antifouling performance, electrolysis concerns if copper based, Environmental Variables (sand, running aground).

There are a few aerosol spray systems that can be used, but these are generally ineffective for props and running gear, and are reserved for outdrive applications. These include Interlux Trilux 33 and Primocon, Pettit Alumaspray and Prop Coat Barnacle Barrier, and the Sea Hawk Premium Outdrive Kit that contains Smart Solution (brush on Pint) and Barnacle Blocker. Our advice is to save your money before applying these to props and running gear.

Note: Propspeed™ is a registered trademark of Oceanmax. Bottom Paint Store is not affiliated with Propspeed or Oceanmax in anyway. Above Propspeed prices and PropGlide Prices are based on internet web search October 2016 .

How To Patch a Hole in a Fiberglass Boat

Last Updated: February 17, 2026


Quick Recommendation

How to Patch a Hole in a Fiberglass Boat

  • Assess the damage: Small holes can be repaired with epoxy and filler, while larger holes require fiberglass cloth and resin reinforcement.
  • Prepare properly: Grind and bevel the damaged area, remove loose material, and ensure the surface is clean and dry.
  • Rebuild in layers: Apply fiberglass and resin in stages, then fair smooth and finish with gelcoat or paint.
  • Bottom line: Strong fiberglass repairs depend on structural reinforcement first, cosmetic finishing second.

Tip: If the surrounding fiberglass feels soft or waterlogged, address moisture issues before sealing the repair.

A fiberglass boat is a great investment. They are durable and can last for years with proper care. But like anything else, they are not indestructible and will eventually need to be repaired. One of the most common repairs is patching a hole in the hull. Fortunately, this is a relatively easy repair that can be done by anyone with basic fiberglass repair skills.

The first step is to clean the area around the hole. This will remove any dirt or debris that could prevent the patch from adhering properly. Next, cut a piece of fiberglass cloth that is slightly larger than the hole. Apply a generous amount of fiberglass resin to the cloth and then place it over the hole. Use a roller or brush to smooth out the cloth and remove any air bubbles. Allow the resin to cure for 24 hours before sanding down the area and painting over it. With a little time and effort, you can have your fiberglass boat looking like new again.

A major fiberglass repair, such as patching a hole, can be a daunting task. Watching a professional do the job can help you get on the right track and be confident in doing the repair yourself. This step-by-step video tutorial produced by Sea Hawk Paints will show exactly what needs to be done when patching a hole in your fiberglass boat.

Note: Before attempting a repair by yourself, get a professional opinion. Always wears Personal Protective Equipment when sanding or working with chemical compounds! Respirator, safety glasses and gloves are always recommended.

Here is a list of products you will need for the repair:

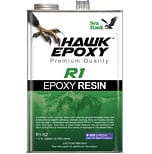
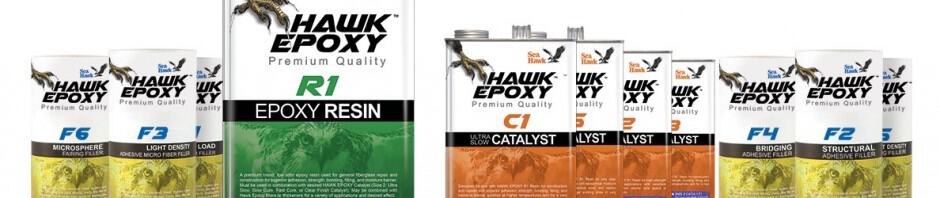
  1. Hawk Epoxy Resin Kit – It contains the epoxy resin, catalyst and filler for the job.
  2. F5 Light Density Filler
  3. Biaxial Fiberglass matting
  4. 50 grit, 80 grit, and 100 grit sandpaper or grinding pads

Hawk Epoxy Video Tutorial

For more information see these other How To Articles:

Filling a Hole in Fiberglass

How Do I Choose Hawk Epoxy Catalyst and Fillers?

How to Mix Hawk Epoxy Resin Properly

Fairing Hull Imperfections


How to Get Strong Hardware Adhesion with Hawk Epoxy

Last Updated: February 17, 2026

Quick Recommendation

How to Get Strong Hardware Adhesion with Hawk Epoxy

  • Prep the surface properly: Clean thoroughly, remove old sealant, and sand to create a strong mechanical bond.
  • Dry-fit hardware first: Confirm alignment before mixing epoxy to avoid rushed adjustments.
  • Seal fastener holes: Over-drill, fill with epoxy, and re-drill to prevent moisture intrusion into the core.
  • Bottom line: Long-lasting hardware adhesion depends on proper surface prep, moisture control, and correct epoxy application.

Tip: Allow full cure time before loading hardware—premature stress can weaken the bond.

epoxy repair kitWhat is the best way to achieve maximum adhesion when replacing your boat’s hardware? This How To article will give you the basic knowledge you need to get your repair done correctly.
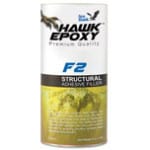
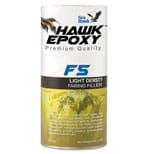
Note: Before attempting a repair by yourself, get a professional opinion. Always wears Personal Protective Equipment when sanding or working with chemical compounds!

Here are some simple steps to follow when bonding hardware to your boat:

  1. Sand both the surface and the hardware to get maximum adhesion.
  2. Wet out the surface with Hawk Epoxy.f2-filler-large-may-2014-150x150
  3. Wait a few minutes for it to soak in.
  4. Wet out the Hardware base with Hawk Epoxy.
  5. Mix another batch of Hawk Epoxy with F2 Structural Adhesive Filler.
  6. Coat the hardware base, screw threads, and surface mount with the epoxy/filler compound.
  7. Tighten hardware bolts until some epoxy mixture squeezes out.
  8. Use your finger to fillet the excess mixture around the hardware base for extra strength.
  9. Before using the hardware, allow the bond to cure overnight.

Hawk Epoxy Video Tutorial

For more information see these other How To Articles:

How Do I Choose Hawk Epoxy Catalyst and Fillers?

How to Mix Hawk Epoxy Resin Properly

Filling a Hole in Fiberglass

Fairing Hull Imperfections

Fairing Hull Imperfections

hawk-epoxy-Large-May-20141What is Fairing?

Fairing is process of smoothing out and restoring the damaged surface of the hull. A fairing compound such as Epoxy resin can be used to fill in divots or gouges and then be sanded to a smooth finish. This restores the surface to its original shape and also prepares it for painting.

Note: Before attempting a repair by yourself, get a professional opinion. Always wears Personal Protective Equipment when sanding or working with chemical compounds!

Here are some guidelines to fairing out imperfections in your hull:

  1. Sand all loose surface debris and hard edges.f5-filler-large-may-2014
  2. Rid surface of debris with clean cloth.
  3. Wet out surface with Hawk Epoxy.
  4. Mix another batch of Hawk Epoxy with F5 Light Density Filler and apply to repair area.
  5. Use long strokes to spread out filler compound over the damaged hull. Apply until the mixture is slightly raised above the hull surface. Make sure the compound extends beyond the repair area.
  6. Let cure 6 hours.
  7. Add skim coat of F5 Filler / Epoxy compound to achieve a very smooth surface. Let cure.
  8. Sand the repair to the desired shape with 80 grit sandpaper.
  9. Finish by applying another 2 or 3 layers of Hawk Epoxy Resin.
  10. The surface is ready to be painted!

Hawk Epoxy Video Tutorial

For more information see these other How To Articles:

How Do I Choose Hawk Epoxy Catalyst and Fillers?

How to Mix Hawk Epoxy Resin Properly

Filling a Hole in Fiberglass

How to Get Strong Hardware Adhesion with Hawk Epoxy


How to Mix Hawk Epoxy Resin Properly

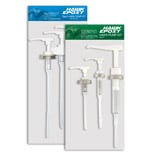
Sea Hawk’s Epoxy Pump Kit makes it easier than ever to measure the Resin to Catalyst ratio very accurately, and get the same result every single time! But how are the pumps intended to be used?

hawk-epoxy-pump-kit-large-152x154The Pump Kits come in two sizes, one kit accommodating the Size 1 and 2 Resin and Catalysts, and one kit accommodating the Size 3 Resin and Catalysts. Be sure to get the right size kit for the amount of resin and catalyst you plan on using. The Kit contains a total of 3 pumps; one for R1 Resin, one for C2 & C3 Catalyst, and one for C1 & C5 Catalyst.
The Hawk Pump Kit User Manual and instructional video explain how to use the pumps for accurate measuring, how to prime the pumps, pump cleaning and storage, and how to use the pumps with various Hawk Epoxy System Sizes.

Click here for Hawk Epoxy Size 1 and 2 User Manual

Click here for Hawk Epoxy Size 3 User Manual

Hawk Epoxy Video Tutorial

Which Bottom Paint is Best for Freshwater Lakes?

Last Updated: February 10, 2026

Quick Recommendation

Which Bottom Paint Is Best for Freshwater Lakes?

  • Choose freshwater-specific bottom paint formulated to control slime and algae rather than heavy barnacle growth.
  • Ablative paints are ideal for most lake boats because they self-polish, reduce buildup, and handle seasonal haul-outs well.
  • Copper-free options may be required on certain lakes—always check local regulations.
  • Bottom line: For freshwater lakes, lighter-duty antifouling matched to algae control, trailering habits, and local rules delivers the best results.

Tip: Using heavy saltwater paint in freshwater is usually unnecessary and can increase cost, buildup, and maintenance.

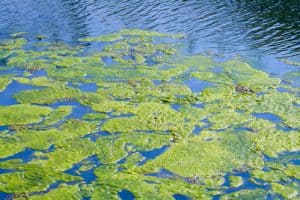
algaeMost Antifouling Bottom Paint is marketed toward the harsh conditions of the Caribbean. But which Antifouling Bottom Paint will work best in Freshwater Lakes?
The short answer is this: Antifouling Bottom Paint that works well in the harsh conditions of the Caribbean will be more than enough protection for boats in freshwater lakes. The real trick is choosing the paint that will fit your situation the best. Choosing a bottom paint with more biocide (usually cuprous oxide) will be more potent and fight off growth more successfully. Sometimes you don’t need to purchase the strongest and the greatest. A paint with just the right amount of biocide will do nicely and can also save a few bucks.

Here are some basic guidelines to help you decide which paint is best for your boat.

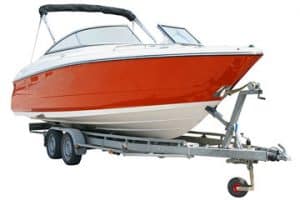
boat-trailer-360If the boat comes out of the water periodically, such as on a lift or trailer, Ablative Bottom Paint is the correct choice. When in fresh water, slime and algae tend to be the most concerning. Sea Hawk’s AF-33 or Talon and Blue Water Marine’s Copper Shield 25 perform really well with these conditions, especially with the manufacturers boosters added, see below.
If the boat never comes out of the water except to be repainted, a Hard Epoxy Bottom Paint will keep away the algae. Sea Hawk Sharkskin is a mid strength Hard Bottom Paint that fits a tighter budget.

What about Bottom Paint Additives?

Sea Hawk bottom paint produces a paint additive called Bio Cop TF to help fight against algae and soft growth. This product will boost the effectiveness of your paint’s ability to keep the hull free of growth. **NOTE: Biocop TF Pint may only be used as a bottom paint additive in the following products: AF-33, Cukote, Sharkskin, Talon, and Tropikote. A booster has restrictions to paint added to and you should stick with the same manufacturer.

If you still aren’t sure what is needed for your boat, check out these other How To Articles:

Do I Need Bottom Paint on My Boat?

What is the Best Paint for My Boat?

Choosing the Right Boat Paint

How to Apply Bottom Paint Over Existing Bottom Paint

Can Aluma Hawk Paint be used with Tuff Stuff Epoxy Primer?

https://www.bottompaintstore.com/topside-boat-paint-aluminum-boat-paint-c-13630_14141.htmlThe direct answer is Yes.

Sea Hawk Tuff Stuff Epoxy Primeraluma-hawk-boat-paint-by-sea-hawk-paints-28288-1000x1078 is an effective water barrier and universal primer. When applied to metal hulled boats it can serve as corrosion protection below the waterline. Therefore many boaters want to have that sort of protection on their Jon boat and apply Aluma Hawk Boat Paint on top. Aluma Hawk is an aluminum boat paint that is one of the easiest and most popular paints for aluminum boats. It is a quick-dry, high-solids, corrosion-inhibiting coating designed for use on https://www.bottompaintstore.com/blog/aluminum-application/can-tuff-stuff-epoxy-primer-be-used-with-aluma-hawk-paint/an aluminum surface without the need for additional primers. It is chromate-free and may be used above or below the waterline in fresh or saltwater environments. You can paint Aluma Hawk with a brush, roller, or spray. Apply 2 coats following the proper dry time requirements. No sanding is necessary between coats of Aluma Hawk if less than 48 hours between coats. Thinning: thin if necessary with MEK.

When over-coating Tuff Stuff Epoxy Primer it is important to meet the required over-coating times in order to achieve the best adhesion because temperature and humidity have a direct impact on dry times. QUICK and EASY RULE: When the coating is dry to the touch, yet still has some tack, it is ready to be over-coated. Your thumb will leave a print without lifting any epoxy. This is called hot-coating. However, if the coating is completely cured (or after 24 hours) it needs to be thoroughly sanded with 80 grit sandpaper to remove the shine, or you must apply another coat of Tuff Stuff within 6 days. Then you have an additional 24-hour maximum window to overcoat with paint.

Tuff Stuff Marine Epoxy Primer

These two products are great on their own, but they can do so much more when working in conjunction with each other.


How to Paint a Boot Stripe

What is a Boot Stripe?

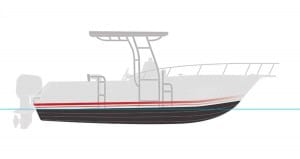
The Boot Stripe is a narrow stripe that runs the length of the boat and is usually positioned a few inches above the waterline. The stripe provides an aesthetic touch and creates an optical illusion that makes the boat appear to be longer. It also gives the boat a nice “finished” appearance that many boaters take pride in. Boot stripes also define the separation between anti-fouling paint (below) and the topside paint (above). Vinyl boot stripe tape is available in different widths, colors, and designs, but unless the boat has a flat, slab side this will make the boat appear to sag or squat in the water. Painting the boot stripe on the hull allows the width to change with the geometry of the boat and give the finished stripe a uniform look. Repainting an existing Boot Stripe will be easier than starting from scratch since you won’t have to mark and score the stripe.

Find and mark the Boot Stripe. The boot stripes of many fiberglass hulls are cast into the hull from the mold by the manufacturer. They can only be removed if you sand down to the fiberglass.

If there is no stripe on your hull you will need to mark the waterline on your boat and transcribe it up to the desired height of your stripe. This can be done by applying successive layers of masking tape along the waterline curve. There are other numerous methods worth investigating online. Also, consult a professional and ask them questions about your specific boat.

Mask off the stripe with tape and get within 1/32nd in. to the edges of the old stripe. This will allow you to sand to the very edge of the old stripe, and avoid damaging the surrounding gel coat.

bootstripeinstallDe-wax the stripe area using a de-waxing solution and a rag.
Sand only the stripe area with 220 grit sandpaper. Once sanding is complete, remove the masking tape and wipe the area with acetone. This will remove any remaining adhesive and sanding remnants. Sacrificing the first mask will contribute to a sharper finish. It is possible that the first application of tape can transfer sanding residue to the paint and result in a poor finish. Mask twice and you will only have to paint once! Be sure to take your time with the second masking. Remember: If the stripe doesn’t look good in tape, it will look even worse once painted. Now you’re ready to paint!

What type of paint should I use?

There are many different varieties of topside paint suitable for painting a boot stripe, but we have narrowed it down to just a few options for you.

Good: Duralux Marine Enamel – Easy to use and economically viable. When applying this marine enamel to fiberglass, no primer is needed. Simply wipe the surface with acetone before and after sanding, then apply your paint. For aluminum, apply one coat of primer and follow with 2 coats of paint. This high gloss enamel will create a bright and colorful boot stripe on any vessel.

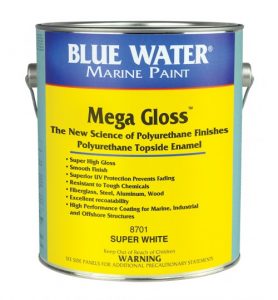
interlux-brightside-polyurethane-28238-500x539Better: Interlux Brightside or Blue Water Mega Gloss– These are a one part Polyurethane with a crisp, high gloss appearance. More durable than regular enamels, but just as easy to apply! If you are applying Brightside or Mega Gloss to fiberglass, make sure the surface is clean and in good condition.  Application of Mega Gloss Water: blast surface to remove all loose paint, dirt, oils and grease. Abrade with 240 grit dry sandpaper or equivalent. Solvent wipe down to remove all sanding residue. Prime with Mega Gloss Primer for best results.  For Brightside, remove wax and other contaminants using Fiberglass Solvent Wash 202 and then sand with 220-320 grit paper. Apply Pre-Kote. Brightside offers excellent flow and gloss retention especially for painting a boot stripe.


Search Our How To Articles….

Here you will be able to find valuable information in “How To” articles. We have 100’s of articles written by our staff on various topics from choosing the right bottom paint to learning how to descale your outboard engine. You will find the Articles Categories on the right hand side of any page. Each article includes helpful links to the products mentioned in the articles. Just look for the bold and underlined words for the links!

Problems with Paint Application Q & A

Insufficient Adhesion

Symptoms: The coating adheres insufficiently to the substrate or previous coats.

Cause: Unsuitable primer applied Wrong product Damp substrate during painting Contaminated substrate (not cleaned or degreased) Weathered timber not removed before coating Previous Coating Unstable Solution

Coating layers that are not sound should be removed. Substrate problem should be addressed (cleaning, degreasing, sanding etc.). Apply a new, suitable coating system.

Insufficient Flexibility

Symptoms: A crackle effect or cracking appears.

Cause: Different paint systems intermixed Too brittle paint system caused by ageing Applied product cannot follow the movements of the substrate and/or underlying paint layers Solution

Remove all coating and apply a new, suitable coating system.

Peeling of Coating

Symptoms: Total/local loss of adhesion of paint system.

Cause: Internal tension in paint films Deformation of substrate Humidity or gas formation Wrong paint sytem Several layers are applied which are not compatible with each other Insufficient flexibility of applied paint Cracking originating from substrate Paint system applied to damp substrate or one with a high moisture content. Solution

Paint layers that are not sound should be removed. After the appropriate pretreatment, a new system should be applied. Touch up bare spots with primer/undercoat and finish with topcoat.

Saponification

Symptoms: The coating is not resistant to alkali. Blisters appear, paint softens and flakes off.

Cause: Incorrect use of product Application of alkyd based topcoat to alkaline material (e.g. concrete or cement) Humidity problems Caustic stripped surface not neutralised Solution

Remove all paint layers and apply a new alkali resistent system. Prevent water penetration. Apply an alkali resistent system.

Soft Paint Film

Symptoms: The dry film has a soft and weak character.

Cause: Paint applied too thickly Painted during impossible working conditions With two-component products the wrong mixing ratio is used Solution

Paint layers that are not sound should be completely removed. Apply a suitable protection system and allow a longer drying time to improve the conditions under which it is painted.

Floating / Flooding

Symptoms: Multi colored effect.

Cause: One of the pigments used floats to the surface causing a multi colored effect (happens mostly with blue, green and violet pigments) Solution

Sand after drying. Apply a further top coat which doesn’t ‘float’.

Salt Efflorescence

Symptoms: A white salt deposit appears, usually on plywood or brickwork.

Cause: Occurs with some plywoods Excess salts migrate to surface through coating Solution

Clean down. May re-occur. Apply freshen up coats if necessary.

Haziness (Blooming)

Symptoms: At the surface a greyish haze appears which gives the paint a dull glow.

Cause: Fog and/or humidity during drying Insufficient ventilation Coating over-thinned Solution

Sand and apply a new top coat.

Yellowing

Symptoms: The applied pale color turns yellow.

Cause: With an alkyd based topcoat this is intrinsic to the binder.

Solution: Sand and clean. Often solved by altering the chosen color to a grayish option, which makes the problem less visible. Apply waterbased paints, which are less prone to yellowing.

Lifting

Symptoms: A wrinkling effect immediately after painting.

Cause: The applied coat contains aggressive components which will dissolve the undercoat Softening, swelling or separation from the substrate of a dry coat as the result of the application of a subsequent coat Solution

Apply another type of paint as topcoat or remove old paint layers and apply a new paint system. Use compatible paint products.

Algae Growth

Symptoms: The coating surface shows a green growth, usually on north facing timbers.

Cause: Plants, bushes and trees in close proximity to coating system. High humidity of surroundings and/or moisture content of substrate Solution

Remove / kill algae/mold and clean substrate. Treat with a fungicidal (or diluted bleach) solution. Scrub dead spores loose, rinse clean and allow to dry fully. Where necessary, redecorate with suitable coating.

Sagging

Symptoms: Localized “drips” and “tears” appear.

Cause: Paint not applied evenly over the surface Coats applied too heavily Paint doesn’t have the right consistency (incorrect thinning) Solution

Remove by sanding after thorough drying is completed. Apply the coatings thoroughly and and evenly. Apply at the proper viscosity and the recommended wet film thickness.

Blistering

Symptoms: Large or small blisters, possibly only in topcoats of the system.

Generally only local loss of adhesion of paint system.

Cause: Application over localized contamination (e.g. grease, oil, resin) Humidity or gas vapour formation from the substrate Solvent could be trapped between coats of the paint system if the primer or mid coat has not been allowed to dry fully. Incorrect coating system, e.g. quick drying top coat, at which the contained organic solvent causes blisters. Solution

Coating layers that are not sound should be removed. After the right pre-treatment against moisture penetration, a new system should be applied. Touch up bare spots with primer and finish with finish topcoat.

Bleeding

Symptoms: The bleeding through of contents of the substrate through existing paint layers or systems.

Cause: Certain timbers such as Western Red Cedar, Oak, Meranti or Idigbo are prone to bleeding Chemicals within timbers prone to bleeding (i.e. timbers with a high natural extractive content) are mobilized by water Colors from previous coatings such as bitumen or creosote can bleed through Problem more prevalent with water-borne coatings. Solution

Clean the coating surface to make sure that the bleeding components have been removed and apply a fresh coating system. Apply sufficient layer thickness to prevent water from dissolving the bleeding wood content. Apply a full primer. Finish with one or two coats of finish.

Chalking

Symptoms: The paint system shows a powdery surface.

Cause: Normal ageing effect Insufficient outdoor durability of product Product property (high extender content/pigment content/based on epoxy resin) Solution

Remove powder at the surface. Clean and sand substrate. Touch up bare spots. Finish with one or two coats.

Craters

Symptoms: Contamination of the substrate (e.g. silicone, grease, wax) causes surface defects . This results in areas where the coating does not form a complete film over the substrate.

Cause: Often a silicone or wax contamination Surface not cleaned sufficiently before application When spray-applied: poor film formation Open pored timber Solution

Clean surface with a suitable emulsion cleaner or silicone remover where appropriate. It may be necessary to remove affected coatings. Primer or base stain should be worked/brushed well into open pored timbers.

Fish Eyes

Symptoms: Contamination of the substrate (e.g. silicone, grease, wax) causes surface defects This results in areas where the coating does not form a complete film over the substrate.

Cause: Usually a (silicone) contamination Insufficiently cleaned substrate When spray-applied: poor film formation solution.

Sand thoroughly. Clean surface thoroughly with a suitable emulsion cleaner or silicone remover. Finish with one or more topcoats.

Brushmarks

Brush marks, orange peel poor leveling etc.

Cause: The open time of the product is too short Incorrect dilution Unsuitable brush or roller Application conditions too hot or too cold Solution

Sand thoroughly and apply a further coat to a better standard. Use a good quality brush (synthetic for water-borne coatings

Blushing

Symptoms: When humidity is trapped in wood stains or varnishes, white spots/patches may appear.

Cause: Damp substrate or humid atmosphere when coating was applied or during drying Porous varnish/stain type Water getting in (moisture ingress) Insufficient coats applied, or coats applied too thinly Solution

Remove old varnish/stain layers; if necessary treat with wood bleach, which will restore the original wood color. Consequently treat with a new system.

Cracking

Symptoms: The coating system shows localized cracking, which results in loss of adhesion and flaking.

Cause: Internal stresses of coating system Deformation or breakdown of the substrate e.g. joints opening, splits in the timber Unsuitable coating system Several layers are applied which are not compatible Insufficient flexibility of applied paint Cracking originating from substrate Moisture on substrate at application Solution

Coating layers that are not sound should be removed. After the right pretreatment, a new system should be applied. Touch up bare spots with primer and finish.

Crackle Formation

Symptoms: A crackle effect appears, random cracks all over the surface

Cause: Coating system too brittle for the substrate Layers applied too thickly Coatings applied at too low temperature and/or too high relative humidity Applied product cannot follow the movements of the substrate Contamination between layers Solution

Coating layers that are not sound should be removed. After the right pre-treatment, a new system should be applied.

Flaking

Symptoms: Loss of adhesion of coating system on substrate or loss of intercoat adhesion.

Cause: Insufficient cleaning / degreasing Unsuitable system Insufficiently sanded Damp substrate or high moisture content Condensation on substrate at application Solution Coating layers that are not sound shall be removed. After the correct pretreatment, a new system should be applied. Apply suitable primer/base stain and top coat(s).

Paint Problem Solver


PAINT BLISTERING:
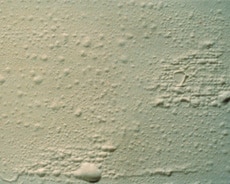
blisteringBubbles may be seen resulting from localized loss of adhesion, and lifting of the paint film from the underlying surface.
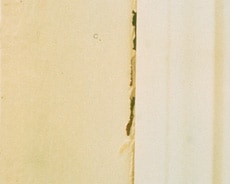
POSSIBLE CAUSES: Applying solvent-based paint over a damp or wet surface. Moisture seeping into the substrate from the outside (less likely with water-based paint). Exposure to high to high humidity or moisture during application or shortly after paint has dried, especially if there was inadequate surface preparation. Entrapment of air in the pores of the substrate being painted. Entrapment of solvents which is commonly caused when paint is over coated before the solvents have sufficiently released.
SOLUTION: If blisters do not go all the way down to the substrate: Remove blisters by scraping, and sanding, and repaint. Be sure to apply when humidity is below 75% and with good ventilation. If blisters go down to the substrate: Remove the source of moisture. Repair loose coatings; install vents or exhaust fans where possible. Remove blisters as above, remembering to prime before applying the top coat. Seal porous substrates  before priming or painting. This will prevent air from being trapped under the paint causing blisters or moisture intrusion.
NOTE: Always test for moisture and humidity to confirm the substrate is ready to prime or paint. Never overcoat paint that is still releasing solvents.

BLOCKING:
blockingUndesirable sticking together of two painted surfaces when pressed together (e.g., a door sticking to the jamb).

POSSIBLE CAUSES: Not allowing sufficient dry time for the coating before closing doors or windows. Use of low quality satin or gloss paints.
SOLUTION: Use top quality satin or gloss acrylic water-based paint. Low quality water-based paints can have poor block resistance, especially in warm, damp conditions. Follow paint label instructions regarding dry times. Acrylic water-based paints generally have better early block resistance than vinyl acetate co-polymer based paints or solvent-based paints; however, solvent-based paints develop superior block resistance over time. Application of talcum powder can relieve persistent blocking.

BURNISHING:
burnishIncrease in gloss or sheen of paint film when subjected to rubbing, scrubbing or having an object brush up against it.
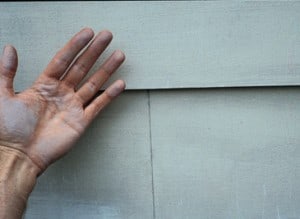
POSSIBLE CAUSES: Use of matte paint in high traffic areas, where a higher sheen level would be desirable. Frequent washing and spot cleaning. Objects (furniture, for example) rubbing against the walls. Use of lower grades of paint with poor stain and scrub resistance (see Poor Stain Resistance and Poor Scrub Resistance).
SOLUTION: Paint heavy wear areas that require regular cleaning (e.g., doors, window sills and trim) with a top quality water-based paint, because this type of paint offers both durability and easier cleaning capability. In high traffic areas, choose a satin or gloss rather than a matt sheen level. Clean painted surfaces with a soft cloth or sponge and non-abrasive cleansers; rinse with clean water.

CHALKING:
chalkingFormation of fine powder on the surface of the paint film during weathering which can cause color fading. Although some degree of chalking is a normal, desirable way for a paint film to wear, excessive film erosion can result from heavy chalking.
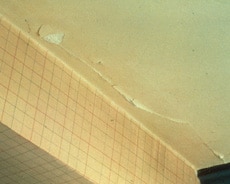
POSSIBLE CAUSES: Use of a low-grade, highly pigmented paint. Use of an interior paint for an outdoor application.
SOLUTION: First, remove as much of the chalk residue as possible, scrubbing with a stiff bristle brush (or wire brush on masonry) and then rinse thoroughly; or use power washing equipment. Check for any remaining chalk by running a hand over the surface after it dries. If noticeable chalk is still present, apply a quality oil-based or acrylic latex primer (or comparable sealer for masonry), then repaint with a quality exterior coating; if little or no chalk remains and the old paint is sound, no priming is necessary.

CRACKING / FLAKING:
cracking_flakingThe splitting of a dry paint film through at least one coat as a result of aging, which ultimately will lead to complete failure of the paint. In its early stages, the problem appears as hairline cracks; in its later stages, flaking occurs.
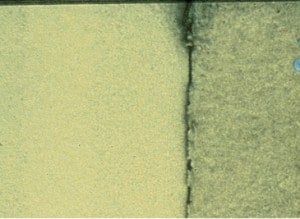
POSSIBLE CAUSES: Use of lower quality paint that has inadequate adhesion and flexibility. Over thinning or overspreading the paint. Inadequate surface preparation, or applying the paint to bare wood without first applying a primer. Excessive hardening of solvent-based paint as the paint job ages.
SOLUTION: Remove loose and flaking paint with a scraper or wire brush, sanding the surface and feathering the edges. If the flaking occurs in multiple layers of paint, use of a face filler may be necessary. Prime bare wood areas before repainting. Use of a top quality primer and top coat should prevent a recurrence of the problem.

DIRT PICK UP:
dirtpickupAccumulation of dirt, dust particles and/or other debris on the paint film; may resemble mildew.

POSSIBLE CAUSES: Use of a low quality paint, especially lower grades of satin or semi-gloss. Soil splashing onto siding. Air pollution, car exhaust and flying dust collecting on house body and horizontal trim.
SOLUTION: Wash off all surface dirt before priming and painting, using a scrub brush and detergent solution, followed by a thorough rinsing with a garden hose. Heavier dirt accumulations may require the use of a power washer. While dirt pickup can’t be eliminated entirely, top quality exterior latex paints typically offer superior dirt pickup resistance and wash-ability. Also, higher gloss paints are more resistant to dirt pickup than flat paints, which are more porous and can more easily entrap dirt.

FOAMING / CRATERING:
foamingFormation of bubbles (foaming) and resulting small, round concave depressions (cratering) when bubbles break in a paint film, during paint application and drying.
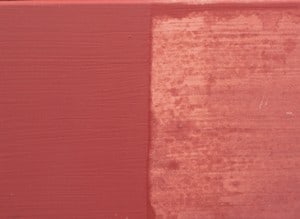
POSSIBLE CAUSES: Shaking a partially filled can of paint. Use of low quality paint or very old water based paints. Applying (especially rolling) paint too rapidly. Use of a roller cover with wrong nap length. Excessive rolling or brushing of the paint. Applying a gloss or satin paint over a porous surface.
SOLUTION: All paints will foam to some degree during application; however, higher quality paints are formulated so the bubbles break while the paint is still wet, allowing for good flow and appearance. Avoid excessive rolling or brushing of the paint or using paint that is more than a year old. Apply gloss and satin paints with a short nap roller, and apply an appropriate sealer or primer before using such paint over a porous surface. Problem areas should be sanded before repainting.

FROSTING:
frostingA white, salt-like substance on the paint surface. Frosting can occur on any paint color, but it is less noticeable on white paint or lighter tints. On masonry, it can be mistaken for efflorescence (see Efflorescence and Mottling).
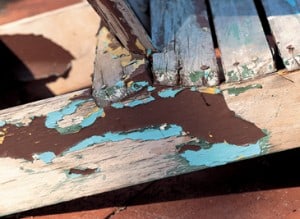
POSSIBLE CAUSES: Forms mostly in protected areas (such as under eaves and on porch ceilings) that do not receive the cleansing action of rain, dew and other moisture. Use of dark-colored paints that have been formulated with calcium carbonate extender.
Application of a dark-colored paint over a paint or primer containing calcium carbonate extender.
SOLUTION: Frosting can be a stubborn problem. It often cannot be washed off readily. Moreover, the condition can recur even as a bleed-through when a new top coat is applied. In extreme cases, it can interfere with adhesion. The best remedy is to remove the frosting by wire brushing masonry or sanding wood surfaces; rinse, then apply an alkyd-based primer before adding a coat of high quality exterior paint.

INCOMPATIBILITY:
incompatibilityLoss of adhesion where many old coats of alkyd or oil-based paint receive a latex top coat.

POSSIBLE CAUSES: Use of water-based latex paint over more than three or four coats of old alkyd or oil-based paint may cause the old paint to “lift off” the substrate.
SOLUTION: Repaint using another coat of alkyd or oil-based paint. Or completely remove the existing paint and prepare the surface – cleaning, sanding and spot-priming where necessary – before repainting with a top quality latex exterior paint.

LAPPING:
InteriorLapping_thumbAppearance of a denser color or increased gloss where wet and dry layers overlap during paint application.
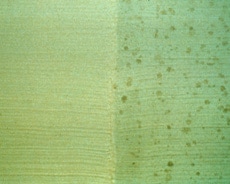
POSSIBLE CAUSES: Failure to maintain a “wet edge” when painting. Use of a low solids “economy” paint.
SOLUTION: Maintain a wet edge when painting by applying paint toward the unpainted area and then back into the just painted surface. This technique (brushing or rolling from “wet to dry” rather than vice versa) will produce a smooth uniform appearance. It is also wise to work in manageable size areas; plan for interruptions at a natural break, such as a window, door or corner. Using a top quality acrylic water based paint makes it easier to avoid lapping problems because higher solids (pigments and binder) content makes lapped areas less noticeable. If substrate is very porous, it may need a primer/sealer to
prevent paint form drying too quickly and reducing wet edge time. Solvent-based paints generally have superior wet edge properties.

FUNGAL CONTAMINATION:
Black, grey or brown spots or areas on the surface of paint or sealant.
POSSIBLE CAUSES: Forms most often on areas that tend to be damp, or receive little or no direct sunlight (e.g., bathrooms, kitchens and utility rooms). Use of a solvent-based paint, or lower quality water-based paint. Failure to prime bare wood surface before applying the paint. Painting over a substrate or coating on which fungal contamination has not been removed.
SOLUTION: Test for fungus by applying a few drops of household bleach to the area; if it is bleached away, the dis-colorant is probably fungus. Remove all fungus from the surface by scrubbing with a diluted household bleach solution (one part bleach, three parts water) or a fungicidal wash, while wearing rubber gloves and eye protection. Rinse thoroughly. To protect against fungal contamination, use a top quality water-based paint, and clean when necessary with bleach/detergent solution. Consider installing an exhaust fan (which is connected to a light switch) in high moisture areas. Some products, with fungicidal claims are available, which you may consider.

MOLD/MILDEW:
mildewinBlack, gray or brown spots or areas on the surface of paint or caulk.
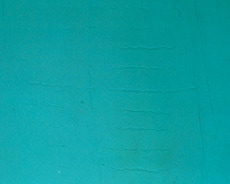
POSSIBLE CAUSES: Forms most often on areas that tend to be damp, or receive little or no direct sunlight (e.g., bathrooms, kitchens and laundry rooms). Use of an alkyd or oil-based paint, or lower quality latex paint. Failure to prime bare wood surface before applying the paint. Painting over a substrate or coating on which mildew has not been removed.
SOLUTION: Test for mildew by applying a few drops of household bleach to the area; if it is bleached away, the dis-colorant is probably mildew. Remove all mildew from the surface by scrubbing with a diluted household bleach solution (one part bleach, three parts water), while wearing rubber gloves and eye protection. Rinse thoroughly. To protect against mildew, use a top quality latex paint, and clean when necessary with bleach/detergent solution. Consider installing an exhaust fan in high moisture areas.

MUD CRACKING:
mud_crackDeep, irregular cracks resembling dried mud in dry paint film.
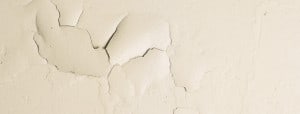
POSSIBLE CAUSES: Paint applied too thickly, usually over a porous surface. Paint applied too thickly, to improve inherent poor hiding (coverage) of a lower quality paint. Paint is allowed to build up in corners upon application.
SOLUTION: Remove coating by scraping and sanding. Prime and repaint, using a top quality water-based paint. Mud-cracked areas can also be repaired by sanding the surface smooth before repainting with a top quality water-based paint. This type of paint is likely to prevent recurrence of mud cracking, because it is relatively more flexible than solvent-based paint, and ordinary water-based paint. Quality paints have a higher solids content, which reduces the tendency to mud crack. They also have very good application and hiding properties, which minimize the tendency to apply too thick a coat of paint.

PEELING:
peelingLoss of paint due to poor adhesion. Where there is a primer and top coat, or multiple coats of paint, peeling may involve some or all coats.
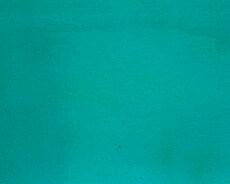
POSSIBLE CAUSES: Seepage of moisture through un-caulked joints, worn caulk or leaks in roof or walls. Moisture in the form of water, rain, dew or high humidity allowed on surface before it has fully cured. Excess moisture escaping through exterior walls (more likely if paint is oil-based). Inadequate surface preparation. Applying paint over a wet or contaminated surface. Improper application techniques. Earlier blistering of paint (see Blistering).
SOLUTION: Always make moisture assessment and planning part of paint preparation and application. Carefully schedule interior and exterior paint work during an acceptable weather window. Identify and eliminate moisture sources in advance. Prepare surface by removing all loose paint, contaminates and moisture. Strictly adhere to manufacturers application guidelines. Use paint and primer according to application instructions and standard industry practices. Thoroughly remove corrupted peeling paint, repaint with a top quality paint products.

PICTURE FRAMING:
picture_framingAn effect of non uniform color that can appear when a wall is painted with a roller, but is brushed at the corners, architraves and cornices. The brushed areas generally appear darker, resembling the “frame” of a “picture”. Also, sprayed areas may be darker than neighboring sections that are brushed or rolled. Picture framing can also refer to sheen effects.
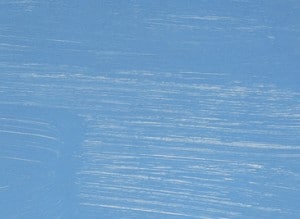
POSSIBLE CAUSES: Usually a hiding (coverage) effect. Brushing will generally result in lower spread rates than rolling, producing a thicker film and more hiding. Adding colorant to a non-tintable paint or using the wrong type or level of colorant, resulting in variation in color, depending on method of application.
SOLUTION: Make sure that spread rates with brushes and rollers are similar. Don’t cut in the entire room before roller coating. Work in smaller sections of the room to maintain a “wet edge.” With tinted paints, be sure the correct colorant-base combinations are used.

POOR FLOW / LEVELING:
poor flowFailure of paint to dry to a smooth film, resulting in unsightly brush and roller marks after the paint dries.
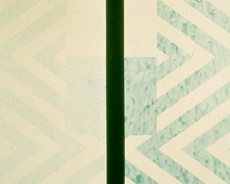
POSSIBLE CAUSES: Use of lower quality paint. Application of additional paint to “touch up” partially dried painted areas. Re-brushing or re-rolling partially dried painted areas. Use of the wrong type of roller cover or poor quality brush.
SOLUTION: Use top quality water-based paints, which are generally formulated with ingredients that enhance paint flow. Brush and roller marks thus tend to “flow out” and form a smooth film. When using a roller, be sure to use a cover with the recommended nap length for the type of paint being used. Use of a high quality brush is important; a poor brush can result in bad flow and leveling with any paint.

POOR HIDE:
poor_hidingFailure of dried paint to obscure or “hide” the surface to which it is applied.
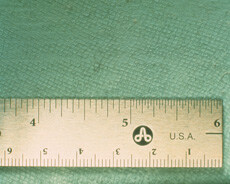
POSSIBLE CAUSES: Use of low quality paint. Use of low quality tools/wrong roller cover. Use of an improper combination of tinting base and tinting color. Poor flow and leveling (see Poor Flow/Leveling). Use of a paint that is much lighter in color than the substrate, or that primarily contains low-hiding organic pigments such as yellows, reds and blues. Application of paint at a higher spread rate than recommended.                                                                                             SOLUTION: If the substrate is significantly darker or is a patterned wallpaper, it should be primed before applying a top coat. Use a top quality paint for better hiding and flow. Use quality tools; use the recommended roller nap, if rolling. Follow manufacturer’s recommendation on spread rate; if using tinted paint, use the correct tinting base. Where a low-hiding organic color must be used, apply a primer first.

POOR IMPRINT RESISTANCE:
poor_printThe tendency of paint film to take on the imprint of an object that is placed on it (e.g., a shelf, table, window sill or counter-top with books, dishes and other objects on them).
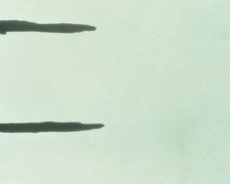
POSSIBLE CAUSES: Use of low quality satin or gloss paint. Putting a painted surface back into use before paint has fully dried.
SOLUTION: Use top quality acrylic satin or gloss water-based paint. Low quality water-based satin and gloss paints can have poor print resistance, especially in warm, damp conditions. Acrylic water-based paints generally have better print resistance than vinyl acetate co polymer type paints. Fully cured solvent-based paints also have excellent print resistance. Make sure the recommended “cure” time is allowed for the paint before it is put into service. Cool or humid conditions require more curing time.

POOR SCRUB RESISTANCE:
poor_scrubWearing away or removal of the paint film when scrubbed with a brush, sponge, or cloth.
POSSIBLE CAUSES: Choosing the wrong sheen for the area. Use of a lower quality paint. Use of an overly aggressive scrub medium (see Burnishing). Inadequate dry time allowed after application of the paint before washing it.
SOLUTION: Areas that need frequent cleaning require a high quality paint formulated to provide such performance. High traffic areas may require a satin or gloss paint rather than a matte paint to provide good scrub resistance. Allow adequate dry time, as scrub resistance will not fully develop until the paint is thoroughly cured. Typically, this will be one week. Try washing the painted surface with the least abrasive material and mildest detergent first.

POOR SHEEN UNIFORMITY:
poor_sheenShiny spots or dull spots on a painted surface; uneven gloss.

POSSIBLE CAUSES: Uneven spread rate. Failure to properly prime a porous surface, or surface with varying degrees of porosity. Poor application resulting in lapping (see Lapping).
SOLUTION: New substrates should be primed/sealed before applying the top coat to ensure a uniformly porous surface. Without the use of a primer or sealer, a second coat of paint will more likely be needed. Make sure to apply paint from “wet to dry” to prevent lapping. Often, applying an additional coat will even out sheen irregularities.

POOR STAIN RESISTANCE:
poor_stainFailure of the paint to resist absorption of dirt and stains.
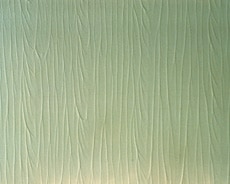
POSSIBLE CAUSES: Use of lower quality paint that is porous in nature. Application of paint to unprimed substrate.
SOLUTION: Higher quality water-based paints contain more binder, which helps prevent stains from penetrating the painted surface, allowing for easy removal. Priming new surfaces provides maximum film thickness of a premium top coat, providing very good stain removability.

“STIPPLE” / ROLLER MARKS:
roller_marksUnintentional textured pattern left in the paint by the roller.

POSSIBLE CAUSES: Use of incorrect roller cover. Use of lower grades of paint. Use of low quality roller. Use of incorrect rolling technique.
SOLUTION: Use the proper roller cover; avoid too long a nap for the paint and the substrate. Use quality roller to ensure adequate film thickness and uniformity. High quality paints tend to roll on more evenly due to their higher solids content and leveling properties. Pre-dampen roller covers used with water-based paint; shake out excess water. Don’t let paint build up at roller ends. Begin rolling at a corner near the ceiling and work down the wall in sections. Spread the paint in a zigzag “M” or “W” pattern, beginning with an upward stroke to minimize spatter; then, without lifting the roller from the surface, fill in the zigzag pattern with even, parallel strokes. On doors, if rolled, lay off with a brush.

SPLATTER:
Interior_Roller_Spattering_thumbTendency of a roller to throw off small droplets of paint during application.

POSSIBLE CAUSES: Use of exterior paint on an interior surface. Use of lower grades of water-based paints.
SOLUTION: Higher quality paints are formulated to minimize splattering. Using high quality rollers which have proper resiliency further reduce splattering. In some cases, a quality wall paint may be preferred for ceiling work, for maximum splatter resistance. Overloading the roller with paint will result in excess splatter, as will overworking the paint once it is applied to a substrate. Working in sections, applying the paint in a zigzag “M” or “W” pattern and then filling in the pattern will also lessen the likelihood of splattering.

SAGGING / RUNNING:
saggingDownward “drooping” movement of the paint film immediately after application, resulting in an uneven coating.
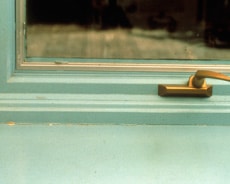
POSSIBLE CAUSES: Application of a heavy coat of paint. Application in excessively humid and/or cool conditions. Application of over thinned paint. Airless spraying with the gun too close to the substrate being painted.
SOLUTION: If the paint is still wet, immediately brush out or re-roll to redistribute the excess evenly. If the paint has dried, sand, and reapply a new coat of top quality paint. Correct any unfavorable conditions: Do not thin the paint; avoid cool or humid conditions; sand glossy surfaces. Paint should be applied at its recommended spread rate; avoid “heaping on” the paint. Two coats of paint at the recommended spread rate are better than one heavy coat, which can also lead to sagging. Consider removing doors to paint them supported horizontally.

SEALANT FAILURES:
caulk_failLoss of sealant’s initial adhesion and flexibility, causing it to crack and/or pull away from the surfaces to which it has been applied.
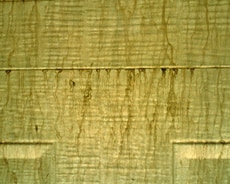
POSSIBLE CAUSES: Use of lower quality sealant. Use of wrong type of sealant for a particular application. Substrate not dry.
SOLUTION: Use a top quality water-based pure acrylic or silicon acrylic sealant if prolonged contact with water is not anticipated. These sealants are flexible enough to adapt to minor fluctuations in the substrate, stretching in gaps that widen slightly over time. They also adhere to a wide range of interior and exterior building materials, including wood, ceramic tile, concrete, plaster, bare aluminum, brick and
plastic. With glass as the substrate silicon sealants are most suitable.
NOTE: Silicone sealant should not be painted.

SURFACTANT LEACHING:
surfactantConcentration of water-soluble ingredients on the surface of a water-based paint, typically on a ceiling surface in rooms that have high humidity (e.g., shower, bathroom, kitchen); may be evident as tan or  brown spots or areas, and can sometimes be glossy, soapy or sticky.
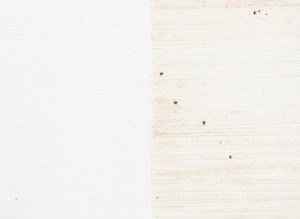
POSSIBLE CAUSES: All water-based paint formulas will exhibit this tendency to some extent if applied in areas that become humid (bathrooms, for example), especially in ceiling areas.
SOLUTION: Wash the affected area with soap and water, and rinse. Problem may occur once or twice again before leaching material is completely removed. When paint is applied in a bathroom, it is helpful to have it dry thoroughly before using the shower. Remove all staining before repainting.

TANNIN STAINING:
tannin stainingBrownish or tan discoloration on the paint surface due to migration of tannins from the substrate through the paint film. Typically occurs on “staining woods,” such as redwood, cedar and mahogany, or over painted knots in certain other wood species.
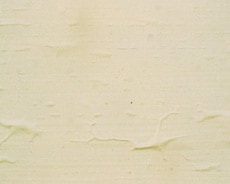
POSSIBLE CAUSES: Failure to adequately prime and seal the surface before applying the paint. Use of a primer that is not sufficiently stain-resistant. Excess moisture escaping through the exterior walls, which can carry the stain to the paint surface.
SOLUTION: Correct any possible sources of excess moisture (see Efflorescence and Mottling). After thoroughly cleaning the surface, apply a high quality stain- resistant oil-based or acrylic latex primer. Oil based stain-resistant primers are the best type to use on severely staining boards. In extreme cases, a second coat of primer can be applied after the first has dried thoroughly. Finish with a top quality latex paint.

WRINKLING:
wrinklingA rough, crinkled paint surface, which occurs when uncured paint forms a “skin”.
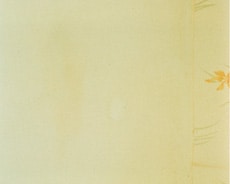
POSSIBLE CAUSES: Paint applied too thickly (more likely when using solvent-based paints). Painting during extremely hot weather or cool damp weather, which causes the paint film to dry faster on top than on the bottom. Exposing uncured paint to high humidity levels. Painting over a contaminated surface (e.g., dirt or wax).
SOLUTION: Scrape or sand substrate to remove wrinkled coating. If using a primer, allow it to dry completely before applying top coat. Repaint (avoiding temperature/humidity extremes), applying an even coat of top quality interior paint.

YELLOWING:
yellowingDevelopment of a yellow cast in aging paint; most noticeable in the dried films of white paints or clear varnishes.
POSSIBLE CAUSES: Oxidation of solvent-based paint or varnish. Heat from ovens, radiators and heating ducts. Lack of light (e.g., behind pictures or appliances, inside cupboards, etc.).
SOLUTION: Top quality water-based paints do not tend to yellow, nor does non-yellowing varnish. Solvent-based paints, because of their curing mechanism, do tend to yellow, particularly in areas that are protected from sunlight.

Apply Paint Over Polyethylene, Polypropylene, ABS, and PET/PBT Blends

Last Updated: January 26, 2026

Quick Recommendation

How to Apply Paint to Polyethylene, Polypropylene & Plastic Blends

  • Identify the plastic first: Polyethylene (PE) and polypropylene (PP) are low-surface-energy plastics and require special prep to hold paint.
  • Use adhesion promoters: Apply a plastic adhesion promoter or flame-treat the surface before priming.
  • Choose compatible coatings: Use paints specifically labeled for plastics or flexible substrates; standard marine paints may not bond.
  • Bottom line: These plastics can be painted successfully only with proper surface activation and compatible primers—skipping prep leads to peeling.

Tip: If paint scratches off easily with a fingernail after curing, the surface wasn’t properly activated or primed.

You can apply paint over Polyethylene, Polypropylene, ABS, and PET/PBT Blends with proper surface preparation and primer.

1. First wipes down the surface with a 50/50 Isopropyl Alcohol such as Denatured Alcohol to remove any contaminants prior to sanding.

2. Sand the surface with 60-80 grit sandpaper.

3. Wipe down the surface again with 50/50 Isopropyl Alcohol ( Denatured Alcohol ) to remove all sanding residue.

4. Apply 3M Tape Primer over a small section.M23929

5. Apply a small test section of the desired Topcoat paint. Since there are so many type of paints, it is recommended to perform an adhesion test on the small area painted. Once the paint has dried perform a hatch test. Use a razor blade to cut into the paint and the primer and draw a 2-3 inch line. You should follow this at least 3 more parallel lines about 1cm apart. Then cut 4 more perpendicular line again about 1cm apart. It should like a large tic-tac-toe game. Finally, apply duct tape firmly and then pull the tape off quickly. If you have any paint or primer on the tape the adhesion is poor. If there is no paint or primer on the tape then it is safe to apply the primer and paint over the entire surface.

Quick Answer: Can You Paint Polyethylene, Polypropylene, ABS, and PET/PBT Plastics?

Yes, some plastics can be painted, but the surface preparation and primer choice are critical. ABS is usually easier to paint than polyethylene or polypropylene. Polyethylene and polypropylene are low-surface-energy plastics, which means paint does not naturally stick well without special preparation, adhesion promoter, flame treatment, or a compatible plastic primer.

PET and PBT blends can often be painted when the surface is cleaned, sanded, and primed correctly, but compatibility depends on the exact plastic blend and coating system. Before painting any plastic part, test adhesion in a small area and follow the paint or primer manufacturer’s instructions.

Plastic Paintability Comparison

Plastic Type Paintability Recommended Prep
Polyethylene Difficult Clean thoroughly, abrade if appropriate, and use a compatible adhesion promoter or specialty primer designed for polyethylene.
Polypropylene Difficult Clean thoroughly and use a plastic adhesion promoter or primer made for low-surface-energy plastics.
ABS Moderate to good Clean, lightly sand, remove dust, and use a compatible plastic primer before applying paint.
PET/PBT Blends Moderate Clean, sand, test adhesion, and use a primer recommended for the specific plastic blend and coating system.
Unknown Plastic Varies Identify the plastic if possible, test in a hidden area, and perform an adhesion test before coating the full part.

Best Paint Prep Method by Plastic Type

Plastic Surface Best Approach Why It Matters
Polyethylene tanks, lids, panels, or molded parts Use specialty adhesion promoter or primer after cleaning and proper surface preparation Polyethylene is hard to bond to, so ordinary paint may peel without a compatible bonding system.
Polypropylene trim, covers, or flexible molded parts Use a primer or adhesion promoter designed for polypropylene Polypropylene has poor natural paint adhesion and often needs chemical or surface treatment.
ABS plastic parts Clean, scuff sand, prime, and paint ABS usually accepts coatings better than polyethylene or polypropylene when properly prepared.
PET/PBT blend parts Clean, abrade, prime, and test adhesion before full application Blend composition can affect how well primer and paint bond to the surface.
Glossy or slick plastic Degrease, dull the surface, and use plastic primer Paint needs a clean, dull, compatible surface to improve adhesion.
Flexible plastic Use flexible coating or additive if recommended A rigid coating may crack or peel if the plastic flexes during use.
Plastic exposed to water, sun, or abrasion Use a durable coating system and test carefully Outdoor and marine exposure increases the risk of coating failure if prep or primer is wrong.

Basic Steps for Painting Plastic

Step What to Do Why It Matters
1. Identify the plastic Look for a recycling code, manufacturer mark, product label, or material information. Different plastics require different primers and preparation methods.
2. Clean the surface Remove dirt, oil, wax, grease, mold release, silicone, salt, and other contaminants. Paint and primer will not bond well to a contaminated surface.
3. Sand or scuff when appropriate Lightly abrade the plastic if the product instructions allow it. A dull, abraded surface can improve mechanical adhesion.
4. Remove dust and residue Wipe the surface clean after sanding and allow it to dry completely. Dust and residue can interfere with primer and paint adhesion.
5. Apply adhesion promoter or plastic primer Use a primer specifically recommended for the plastic type. The primer is often the difference between a coating that bonds and one that peels.
6. Apply compatible paint Use thin, even coats and follow recoat times, dry times, and application instructions. Heavy coats can run, wrinkle, or fail to bond properly.
7. Allow full cure Let the coating cure fully before heavy handling, water exposure, or abrasion. Paint may feel dry before it has reached full hardness and adhesion.
8. Test adhesion Test a small coated area before committing to the full project. Some plastic blends reject coatings even after careful preparation.

What to Consider Before Painting Plastic

Before painting polyethylene, polypropylene, ABS, or PET/PBT blends, consider whether the part is flexible, exposed to sunlight, submerged, handled frequently, or subject to abrasion. A plastic part that bends, flexes, or gets wet may need a more specialized coating system than a rigid indoor part.

Compatibility is especially important with polyethylene and polypropylene. These plastics are often used because they resist chemicals and moisture, but that same resistance can make them difficult to paint. When long-term adhesion matters, surface preparation and primer selection are more important than the paint color or topcoat alone.

Common Questions About Painting Polyethylene, Polypropylene, ABS, and PET/PBT

Can you paint polyethylene?

Polyethylene can be painted only with the right preparation and compatible adhesion system. Standard paint usually does not stick well to polyethylene because it has low surface energy. A specialty adhesion promoter, plastic primer, or surface treatment is usually needed.

Can you paint polypropylene?

Polypropylene is difficult to paint because it naturally resists adhesion. For best results, clean the surface thoroughly and use an adhesion promoter or primer specifically designed for polypropylene or low-surface-energy plastics.

Can you paint ABS plastic?

Yes, ABS plastic is usually easier to paint than polyethylene or polypropylene. Clean the surface, lightly sand or scuff it, apply a compatible plastic primer, and then use a coating recommended for ABS or plastic surfaces.

Can you paint PET or PBT plastic blends?

PET and PBT blends can often be painted when properly cleaned, sanded, and primed, but the exact blend affects adhesion. Always test the coating system first and follow the primer and paint manufacturer’s compatibility recommendations.

Why does paint peel off plastic?

Paint often peels off plastic because the surface was contaminated, too glossy, too flexible, or incompatible with the coating. Low-surface-energy plastics like polyethylene and polypropylene are especially prone to peeling if painted without the correct adhesion promoter or primer.

Do you need primer before painting plastic?

In most cases, yes. A compatible plastic primer or adhesion promoter helps paint bond to the surface. This is especially important on polyethylene, polypropylene, PET/PBT blends, glossy plastics, flexible plastics, and parts exposed to outdoor or marine conditions.

Should plastic be sanded before painting?

Plastic is often lightly sanded or scuffed before painting to improve adhesion, but the correct method depends on the plastic type and coating system. Sanding alone is usually not enough for polyethylene or polypropylene; those plastics often need a specialty adhesion promoter.

What is the hardest plastic to paint?

Polyethylene and polypropylene are among the hardest common plastics to paint because they have low surface energy and resist bonding. ABS is generally easier to paint. PET/PBT blends fall somewhere in between, depending on the exact formulation.

Can marine paint be used on plastic?

Marine paint may be used on some plastic surfaces if the surface is properly prepared and the coating system is compatible. However, marine exposure makes adhesion more demanding, so primer selection, surface preparation, and testing are essential.

How do I know if paint will stick to plastic?

The best way to know is to identify the plastic, follow the coating manufacturer’s instructions, and test adhesion in a small area before painting the full part. If the coating scratches off easily, lifts, bubbles, or peels, the surface preparation or primer system is not adequate.

Recommended Plastic Painting Products and Supplies

Bottom Paint Store carries primers, adhesion promoters, marine paints, sandpaper, cleaners, solvents, brushes, rollers, spray supplies, and related coating products for many marine and repair applications. The right product depends on the plastic type, surface condition, exposure level, and whether the part is rigid, flexible, indoor, outdoor, or marine-exposed.

This application and test can be used for topside paints and bottom paints.

Can You Paint Polyethylene, Polypropylene, ABS, and PET/PBT Plastics?

Yes, some plastics can be painted, but the surface preparation and primer choice are critical. ABS is usually easier to paint than polyethylene or polypropylene. Polyethylene and polypropylene are low-surface-energy plastics, which means paint does not naturally stick well without special preparation, adhesion promoter, flame treatment, or a compatible plastic primer.

PET and PBT blends can often be painted when the surface is cleaned, sanded, and primed correctly, but compatibility depends on the exact plastic blend and coating system. Before painting any plastic part, test adhesion in a small area and follow the paint or primer manufacturer’s instructions.

Plastic Paintability Comparison

Plastic Type Paintability Recommended Prep
Polyethylene Difficult Clean thoroughly, abrade if appropriate, and use a compatible adhesion promoter or specialty primer designed for polyethylene.
Polypropylene Difficult Requires careful cleaning and usually a plastic adhesion promoter or primer made for low-surface-energy plastics.
ABS Moderate to good Clean, lightly sand, remove dust, and use a compatible plastic primer before applying paint.
PET/PBT Blends Moderate Clean, sand, test adhesion, and use a primer recommended for the specific plastic blend and coating system.
Unknown Plastic Varies Identify the plastic if possible, test in a hidden area, and use an adhesion test before coating the full part.

Best Paint Prep Method by Plastic Type

Plastic Surface Best Approach Why It Matters
Polyethylene tanks, lids, panels, or molded parts Use specialty adhesion promoter or primer after cleaning and proper surface preparation Polyethylene is hard to bond to, so ordinary paint may peel without a compatible bonding system.
Polypropylene trim, covers, or flexible molded parts Use a primer or adhesion promoter designed for polypropylene Polypropylene has poor natural paint adhesion and often needs chemical or surface treatment.
ABS plastic parts Clean, scuff sand, prime, and paint ABS usually accepts coatings better than polyethylene or polypropylene when properly prepared.
PET/PBT blend parts Clean, abrade, prime, and test adhesion before full application Blend composition can affect how well primer and paint bond to the surface.
Glossy or slick plastic Degrease, dull the surface, and use plastic primer Paint needs a clean, dull, compatible surface to improve adhesion.
Flexible plastic Use flexible coating or additive if recommended A rigid coating may crack or peel if the plastic flexes during use.
Plastic exposed to water, sun, or abrasion Use a durable coating system and test carefully Outdoor and marine exposure increases the risk of coating failure if prep or primer is wrong.

Basic Steps for Painting Plastic

Step What to Do Why It Matters
1. Identify the plastic Look for a recycling code, manufacturer mark, product label, or material information. Different plastics require different primers and preparation methods.
2. Clean the surface Remove dirt, oil, wax, grease, mold release, silicone, salt, and other contaminants. Paint and primer will not bond well to a contaminated surface.
3. Sand or scuff when appropriate Lightly abrade the plastic if the product instructions allow it. A dull, abraded surface can improve mechanical adhesion.
4. Remove dust and residue Wipe the surface clean after sanding and allow it to dry completely. Dust and residue can interfere with primer and paint adhesion.
5. Apply adhesion promoter or plastic primer Use a primer specifically recommended for the plastic type. The primer is often the difference between a coating that bonds and one that peels.
6. Apply compatible paint Use thin, even coats and follow recoat times, dry times, and application instructions. Heavy coats can run, wrinkle, or fail to bond properly.
7. Allow full cure Let the coating cure fully before heavy handling, water exposure, or abrasion. Paint may feel dry before it has reached full hardness and adhesion.
8. Test adhesion Test a small coated area before committing to the full project. Some plastic blends reject coatings even after careful preparation.

What to Consider Before Painting Plastic

Before painting polyethylene, polypropylene, ABS, or PET/PBT blends, consider whether the part is flexible, exposed to sunlight, submerged, handled frequently, or subject to abrasion. A plastic part that bends, flexes, or gets wet may need a more specialized coating system than a rigid indoor part.

Compatibility is especially important with polyethylene and polypropylene. These plastics are often used because they resist chemicals and moisture, but that same resistance can make them difficult to paint. When long-term adhesion matters, surface preparation and primer selection are more important than the paint color or topcoat alone.

Common Questions About Painting Polyethylene, Polypropylene, ABS, and PET/PBT

Can you paint polyethylene?

Polyethylene can be painted only with the right preparation and compatible adhesion system. Standard paint usually does not stick well to polyethylene because it has low surface energy. A specialty adhesion promoter, plastic primer, or surface treatment is usually needed.

Can you paint polypropylene?

Polypropylene is difficult to paint because it naturally resists adhesion. For best results, clean the surface thoroughly and use an adhesion promoter or primer specifically designed for polypropylene or low-surface-energy plastics.

Can you paint ABS plastic?

Yes, ABS plastic is usually easier to paint than polyethylene or polypropylene. Clean the surface, lightly sand or scuff it, apply a compatible plastic primer, and then use a coating recommended for ABS or plastic surfaces.

Can you paint PET or PBT plastic blends?

PET and PBT blends can often be painted when properly cleaned, sanded, and primed, but the exact blend affects adhesion. Always test the coating system first and follow the primer and paint manufacturer’s compatibility recommendations.

Why does paint peel off plastic?

Paint often peels off plastic because the surface was contaminated, too glossy, too flexible, or incompatible with the coating. Low-surface-energy plastics like polyethylene and polypropylene are especially prone to peeling if they are painted without the correct adhesion promoter or primer.

Do you need primer before painting plastic?

In most cases, yes. A compatible plastic primer or adhesion promoter helps paint bond to the surface. This is especially important on polyethylene, polypropylene, PET/PBT blends, glossy plastics, flexible plastics, and parts exposed to outdoor or marine conditions.

Should plastic be sanded before painting?

Plastic is often lightly sanded or scuffed before painting to improve adhesion, but the correct method depends on the plastic type and coating system. Sanding alone is usually not enough for polyethylene or polypropylene; those plastics often need a specialty adhesion promoter.

What is the hardest plastic to paint?

Polyethylene and polypropylene are among the hardest common plastics to paint because they have low surface energy and resist bonding. ABS is generally easier to paint. PET/PBT blends fall somewhere in between, depending on the exact formulation.

Can marine paint be used on plastic?

Marine paint may be used on some plastic surfaces if the surface is properly prepared and the coating system is compatible. However, marine exposure makes adhesion more demanding, so primer selection, surface preparation, and testing are essential.

How do I know if paint will stick to plastic?

The best way to know is to identify the plastic, follow the coating manufacturer’s instructions, and test adhesion in a small area before painting the full part. If the coating scratches off easily, lifts, bubbles, or peels, the surface preparation or primer system is not adequate.

Recommended Plastic Painting Products and Supplies

Bottom Paint Store carries primers, adhesion promoters, marine paints, sandpaper, cleaners, solvents, brushes, rollers, spray supplies, and related coating products for many marine and repair applications. The right product depends on the plastic type, surface condition, exposure level, and whether the part is rigid, flexible, indoor, outdoor, or marine-exposed.

Plastic Painting Supply Checklist

  • Plastic cleaner, dewaxer, or surface prep solvent recommended for the coating system
  • Sandpaper or abrasive pad for scuffing when appropriate
  • Plastic adhesion promoter or primer
  • Paint compatible with the plastic and exposure conditions
  • Masking tape and protective coverings
  • Clean lint-free wiping cloths
  • Brush, roller, or spray equipment
  • Gloves, eye protection, and proper ventilation
  • Small test area for checking adhesion before full application

Filling a Hole in Fiberglass

Last Updated: February 16, 2026

Quick Recommendation

How to Fill a Hole in Fiberglass

  • Small holes (screw/bolt size): Use marine epoxy with filler to seal and restore strength.
  • Larger holes: Rebuild with fiberglass cloth and resin in layers before fairing and finishing.
  • Prep properly: Grind or bevel the edges, clean thoroughly, and ensure the surface is dry before applying resin.
  • Bottom line: Structural repairs require fiberglass reinforcement first, then fairing and finishing with gelcoat or paint.

Tip: If the surrounding fiberglass feels soft or wet, address moisture issues before sealing the repair.

When you are trying to repair a small hole in fiberglass, the best type of product to use is a premium epoxy. This will insure a proper repair and will not allow for shrinking of the material and create a water tight seal.

We recommend the Hawk Epoxy Kit. It contains the epoxy resin, catalyst and filler for the job. Watch the video below to see the steps needed to perform a small hole repair.


How to sand fiberglass for paint

Whether you’re trying to give your boat a new paint job or just touched up a few scratches, properly sanding fiberglass is an important step to ensure a smooth, even finish. Here’s a quick guide on how to sand fiberglass for paint:

  1. Start with a coarse grit paper (40-60) to remove any existing paint or surface imperfections.
  2. Progress to a medium grit paper (80-100) to smooth out the surface.
  3. Finally, use a fine grit paper (200+) to achieve a glass-like finish.
  4. For best results, wet sanding is recommended – simply soak the sandpaper in water for 10-15 minutes before use. This will help to prevent deep scratches and gouges.

How to prep fiberglass for paint

One way to do that is to make sure the fiberglass is properly prepared for painting. Here are some tips for prepping fiberglass for paint:

First, wash the area with boat soap and a soft brush. This will remove any dirt or grime that could prevent the paint from adhering properly.

Next, sand the area with fine-grit sandpaper. This will create a smooth surface for the paint to adhere to.

Finally, wipe down the area with a tack cloth to remove any dust from sanding.

If you have additional questions feel free to reach out to the Botton Paint Store technical team 888-505-2313.

medical kit

Build an ‘Abandon Ship’ Ditch Bag

Any boat cruising off shore needs an emergency ditch bag for unplanned situations. Being prepared means never assuming that rescue will come before you would need things in a bag, one can never predict circumstances or weather. Having a life raft or kit that comes with your vessel may not have everything you want or need as minimal gear is all that is included so building your own insures your needs are met.

The bag should be water resistant to insure it doesn’t fill immediately with water and sink. Purchase one that is yellow or international orange and you can attach reflector strips for added visibility with a flashlight. A throw bag can be back up as needed.

Clearly label the bag so everyone on board knows what it is keep it in a handy place.

Rescue items can include:

  • Functioning EPIRB (emergency position indication rescue beacon)
  • Handheld VHF radio (in sealed pouch with extra batteries)
  • Flares, water dyes, and/or smoke signals
  • Strobe Light/flashlight
  • Whistle/horn
  • Signal mirror

Survival Items can include:

  • Water (sealed packets better than jug)

    medical kit

    medical kit

  • Food rations (high calorie bars or squeeze packets)
  • First aid kit
  • Extra medications
  • Patch kit for dinghy or life raft/ inflatable repair
  • Knife
  • Matches

Other items depending on space:

  • Handheld GPS
  • Solar blanket
  • Fishing gear
  • Sunscreen
  • Sunglasses
  • Binoculars
  • Life vest/inflatable PFD

Check your bag every season and before a long voyage for charged items and batteries needed. For added information on boat safety, please see the available DVD’s.

How to Apply Awlgrip Topcoat to an Aluminum Hull

Awlgip Marine PaintsFirst Identify the paint that is there. Is it compatible?
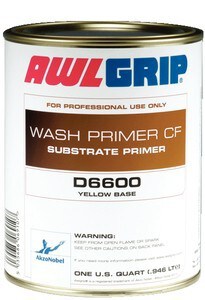
If yes – Sand, Primer, Paint

If no – the previous coating needs to be taken down. Sand with 80 grit paper until the coating is gone. Sand blasting is not recommended because it takes away the aluminum itself.

How do you know if previous paint is compatible with Awlgrip? Perform this test:

  1. Need a rag and some Lacquer thinner
  2. Sand the surface with 80 grit sand paper
  3. Apply lacquer thinner to the rag and hold it on the sanded area.
  4. Put a piece of plastic on to to hold the rag so the Lacquer thinner doesn’t evaporate.
  5. Hold rag for 35-45 min.
  6. Remove rag slowly. Is surface bubbling or lifting? If no, scrape surface with the blade of a knife. If the paint comes off with the blade or the paint feels rubbery you have identified an acrylic based paint. Awlgrip may be applied on top of it. If the surface was bubbling or lifting, the paint is not compatible and must be removed.

D6600 CF WashII. Apply Awl-Wash Primer CF (Mix Part A and Part B) within 4 hours of cleaning the surface. This provides excellent adhesion to the aluminum surface. Awl-Wash CF can be overcoated with primers after 1 hour of application. Maximum recoat time without sanding is 6 months.

III. Apply a Primer to the Awl-Wash Primer CF. There are 2 main choices.

  1. 545 Epoxy Primer – Thin, building primer. Usually applied when there is no need to fill scrapes or gouges.
  2. Awlquick – a medium build, primer/surfacer. Applied to a surface that needs to be filled where there are scrapes or gouges. Awlquick Base + Converter.

IV.  Apply a topcoat.

  1. Awlgrip – may be brush rolled or sprayed – usually lasts 7-10 years.
  2. Awlcraft – must be sprayed only – usually lasts 4-6 years.

For more information on Awlgrip vs. Awlcraft, click this link.

Awlgrip Color Chart

Awlgrip Application Guide

Painting an Aluminum Hull with Non Antifouling Paint

Last Updated: February 9, 2026

Quick Recommendation

Painting an Aluminum Hull with Non-Antifouling Paint

  • Use non-antifouling paint if the boat is trailered or stored dry and doesn’t remain in the water long enough to foul.
  • Prep aluminum correctly: Degrease, remove oxidation, and lightly abrade; apply an etching or epoxy primer made for aluminum.
  • Choose aluminum-compatible coatings: Use topside or industrial marine paints approved for aluminum—avoid copper-containing products.
  • Bottom line: Non-antifouling paint works on aluminum hulls when paired with the proper aluminum primer and dry-storage use.

Tip: If the boat will stay in the water for extended periods, switch to a copper-free antifouling system designed for aluminum.

When painting a boat used for hunting/fishing, such as a Jon Boat, typically a flat finish is desired so you’ll want to use one of our camouflage paints. A primer coat is used to help the paint adhere to the aluminum surface and provides an extra layer of protection from corrosion. You may also use  Aluma Hawk, which is a paint and primer in one.

The Aluminum Boat Paint or Aluma Hawk (available in Black, Jon Boat Green, Blue, Sand, White or Aluminum Grey), will serve as paint and primer in one so no need to purchase a primer! Aluma Hawk is one of the easiest and most popular paints for your aluminum boat, and available in (white, blue, Jon boat green, black, aluminum grey, and sand). These are both a paint/primer in one that can be applied to most surfaces with little preparation needed. For more application details see our ‘how to paint an aluminum Jon Boat’ article.

How do you paint Aluma Hawk on a boat?

You can use a brush, roller, or spray gun. Most applications will need 2 coats of Aluma Hawk following the proper dry time requirements. No sanding is necessary between coats of Aluma Hawk if less than 48 hours between applying coats. If needed, MEK (Methyl Ethly Ketone) can be used for thinning, as well as clean up.

If you desire a gloss finish, look to the Mega Gloss by Blue Water, available in quarts and gallons, is affordable, easy to apply, and only recommended for above the waterline. This topside paint works best in very thin coats and can be used on fiberglass, wood, aluminum, and steel; see the prep recommendations found on the product page on the “how to use” tab. The Mega Gloss Primer is recommended when applied to bare metal, if you have concerns about sealing your aluminum, see the Bottom Protect by Blue Water for a barrier coat. See here for more application tips.

You have many options when painting aluminum. Your use of the boat, the allotted budget, and the amount of time you want to spend on the project may help determine the right paint for you. For more information see our ‘topside boat paint options’.

West System to Hawk Epoxy Cross Reference Guide

Hawk EpoxyBelow shows the comparison of the West System products to the Hawk Epoxy products. Hawk Epoxy is comparable to the West System with how it works and its uses. West System epoxy is known for A/B/C/D selection system size (Size A resin with Size A hardener) the Hawk Epoxy uses 1/2/3/4 (Size 1 resin with Size 1 catalyst). The pumps are sold separate with West System and Hawk Epoxy, this works where 1 pump of resin is mixed with 1 pump of catalyst, or more depending on instructions. West SystemThis is just to make it easier and less chance for error for the customer and it doesn’t mean a 1 to 1 ratio because the pumps are calibrated differently and each pump size can distribute different amounts.

Please Note: This chart simply shows the likely equivalent product by brand. It is not recommended to mix the products brands.

CLICK HERE: West System to Hawk Epoxy Cross Reference Guide.

West System and Hawk Epoxy are trade marks of Gougeon Brothers, and New Nautical Coatings, respectively.

Hawk Epoxy System

How do I choose Hawk Epoxy Catalyst and Fillers?

R1 Epoxy Resin – a smooth, low-viscosity liquid epoxy resin. With a variety of Hawk Epoxy Catalysts, it can be cured under a wide range of temperatures and environmental conditions to form a high strength plastic with superior moisture barrier characteristics. Hawk Epoxy repair kit is available in four system sizes color coded on each label. Note: Mix ratios vary by catalyst. For optimal product utilization, be sure to choose the same Size for both the resin and catalyst. I.e Size 1 Resin with Size 1 Catalyst.

ChooseCatalyst

C1 ULTRA SLOW CURE CATALYST: Designed for use with HAWK EPOXY R1 Resin for construction and repairs with superior adhesion, strength, bonding, filling, and moisture barrier qualities at higher temperatures and for an ultra slow cure. Do not use under Sea Hawk marine wood varnish.

C2 SLOW CURE CATALYST: Designed for use with HAWK EPOXY R1 Resin for construction and repairs with superior adhesion, strength, bonding, filling, and moisture barrier qualities at higher temperatures and for a slow cure. Do not use under Sea Hawk marine wood varnish.

C3 FAST CURE CATALYST: Designed for use with HAWK EPOXY R1 Resin for construction and repairs with superior adhesion, strength, bonding, filling, and moisture barrier qualities at cooler temperatures and for a fast cure. Do not use under Sea Hawk marine wood varnish.

C5 CLEAR FINISH CATALYST: Designed  for use with HAWK EPOXY R1 Resin for very clear fiberglass cloth and coating applications with exceptional moisture barrier characteristics. Perfect for natural wood and carbon fiber clear coats with no blush. Longer working times in very warm temperatures. May be used under Sea Hawk marine wood varnish.

TIP* For easy accurate measuring be sure to use the Hawk Epoxy Pumps that are calibrated to dispense the correct amount of resin and catalyst. This is much easier and leave little room for mistakes.

Next choose the best Hawk Epoxy Filler depending on the application:


Choose Hawk Epoxy FIller

F1 High Load Adhesive Fiber Filler – Thickens to a light grey color creating an easy to use adhesive designed for bonding hardware and other applications with dissimilar materials. This mixture will maximize bond strength for anticipated high loads.

F2 Structural Adhesive Filler – Thickens to an off white color, creating a general purpose thickening additive for bonding, gap filling and filleting. Mix to a workable consistency allowing sag-free and easy flow properties for vertical and overhead applications.

F-3 Light Density Adhesive Micro Fiber Filler – Thickens to an off white color. Great for bonding many substrates, especially wood. The mixture also creates a multipurpose adhesive for many other substrates in addition to providing excellent substrate wetting and penetrating characteristics. Increases impact and abrasion resistance.

F4 Bridging Adhesive Filler – Thickens to a brown color, creating an easy to use adhesive with excellent gap filling and filleting qualities. This mixture blends with many different types of wood to allow for a natural looking fillet or gap fill.

F5 Light Density Fairing Filler – Thickens to a reddish brown color, achieving an easy to sand and carve fairing compound while still remaining strong and light weight.

F6 MicroSphere Fairing Filler – Thickens to a white color, creating a lightweight fairing compound for small to large areas. This product holds a feathered edge very well and is suitable for nearly every substrate. This closed celled structure can also be used for increased acoustic and thermal insulation.

For the easiest way to choose your system, view our Hawk Epoxy Size 1 Kit

Aluminum Hull Repairs and More

Last Updated: January 23, 2026

Quick Recommendation

Best Products for Aluminum Hull Repairs

  • For small leaks, pits, or corrosion: Use marine-grade aluminum epoxy designed to bond securely to bare aluminum.
  • For dents or structural damage: Repair with welded aluminum patches or reinforced epoxy systems before applying coatings.
  • Always prep the surface: Degrease thoroughly, remove oxidation, and lightly abrade the aluminum for proper adhesion.
  • Bottom line: Successful aluminum hull repairs depend on using aluminum-compatible repair products and proper surface preparation.

Tip: Never use standard fiberglass fillers or copper-containing products on aluminum—they can cause adhesion failure and corrosion.

jonboatHow to Fix a Leaking Seam or Rivet on Aluminum Boat
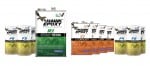
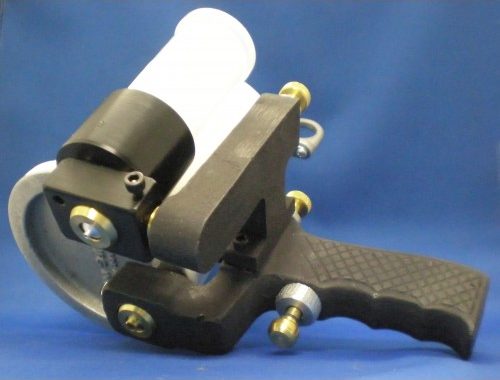
As aluminum boats age they show various signs of wear and tear. One of these signs may be a leaking seam or rivet. Over time, rivets can stretched and loosen, causing a gap in the hull integrity and this results in a leak. The solution to this problem is fairly simple and may be fixed at home using just a few tools and know-how. So, how should this problem be addressed?

Locate the Leaking Rivet or Seam

The first step is to find the exact seam or rivet that needs repair. To do this, put the boat in water and observe carefully. You could also put water inside the boat and see where it allows the water to escape from.

Assess the Damage

The second step is assessing the extent of damage to the rivet or seam. If the seam is too wide to be filled or caulked, it will need additional rivets in combination with a sealant product. If the damage is easily visible a sealant or caulk will be sufficient.

Choose a Sealant or Epoxy Product

There are hundreds of products out there that claim to fix leaks and seal cracks. How do you know which to choose? The Bottom Paint Store has done most of the hard work for you and can confidently recommend 2 products that really work.

If your hull is bare aluminum you can cover the entire surface with a high build epoxy primer to help seal and protect it such as Tuff Stuff. For application details see our link for application of a marine epoxy.

Hawk Epoxy KitHawk Epoxy is an excellent product to repair aluminum hulls. We recommend getting one of the Hawk Epoxy Kits that will contain everything you need for filling in the aluminum. Hawk Epoxy is a versatile product that can be used for many other application too. Everyone should own this kit! See video for mixing and selecting fillers.

WEST SYSTEM 105 Epoxy Resin is a low viscosity, solvent-free epoxy resin. It is designed to wet-out and bond with wood, fiberglass, reinforcing fabrics and a variety of metals. It is an excellent adhesive that can bridge gaps and fill voids when modified with WEST SYSTEM fillers. The cured mixture can be sanded and shaped. WEST SYSTEM Epoxy Resin and hardeners can be used for everything from basic, long-lasting repairs to the construction of high-performance composite.

Another option is G/Flex 650 Epoxy made by West System. This liquid epoxy is more flexible and versatile than regular epoxies and will adhere to almost any surface. The bond that it creates can absorb shock, vibration, expansions and contractions. It will fully cure in 24 hours. Also, West System has created a detailed and comprehensive set of instructions for a wide variety of applications. They can be found at this link and below:

Fix leaking seams and rivets

Patch holes in aluminum hulls

Repair pitted or pin holed surfaces

Now that your leaky rivets and seams have been repaired, you are ready to paint! Check out this How To Article for more information on how to paint your aluminum vessel. Aluma Hawk is a great option or any of our antifouling copper free paint for aluminum.


How to Select a Spray Gun Nozzle Tip Size

Last Updated: January 19, 2026

Quick Recommendation

How to Select the Right Spray Gun Nozzle Tip Size

  • Match the tip size to the coating thickness: Thicker materials like gelcoat and high-build primers require larger tips, while thinner paints need smaller tips.
  • Follow manufacturer guidance first: Always start with the recommended nozzle range listed on the product data sheet.
  • Adjust for spray method: HVLP guns typically use larger tips than conventional spray guns for the same material.
  • Bottom line: Choosing the correct nozzle tip size ensures proper atomization, even coverage, and fewer defects.

Tip: If the material sprays dry, sputters, or requires excessive thinning, the nozzle tip is likely too small.

What Size Spray Gun Tip Is Best for Gelcoat?

Best Gelcoat Spray Gun Tip Sizes (Quick Answer)

• Most gelcoat applications: 2.0–2.5 mm
• Thick gelcoat or no thinning: 2.5–3.0 mm
• Thinned gelcoat: 1.8–2.0 mm
• Touch-ups / detail work: 1.4–1.8 mm

If you just want the right starting point: most gelcoat sprays best through a
2.0–2.5 mm tip/nozzle. Use the quick guide below to match your gelcoat thickness and the finish you want.

Gelcoat Tip Size Cheat Sheet

  • Most gelcoat applications: 2.0–2.5 mm
  • Thick gelcoat / minimal thinning: 2.5–3.0 mm
  • Thinned gelcoat (better atomization): 1.8–2.2 mm
  • Small repairs / detail work: 1.4–1.8 mm
  • Heavy flake gelcoat (if applicable): 2.8–3.5 mm

Pro tip: If your gelcoat is spitting, orange-peeling badly, or clogging the gun,
your tip is often too small (or the gelcoat is too thick). If you’re getting runs/sags, you may be over-applying
or using too large a tip for your material and technique.

Next: Use the chart below to dial in your tip size by use case and application style.

There are three main factors to consider when determining the size tip that will produce the best results.

1. First, examine the coating that will be sprayed. Put simply, heavier coatings will require a larger orifice size than lighter ones. For example, primers are usually thicker than the accompanying paint so you should use a 1.7 or 1.8 mm tip to prime most surfaces. Most painters will stay in the range of 1.2 to 2.0 mm unless the paint being applied is specialized. (See chart below.)

2. The next thing to consider is your project surface area. This determines the appropriate fan width that your sprayer will produce, that is, the shape in which the product will leave the gun nozzle. Airless spray guns have more control over the fan width than conventional spray guns because the coating is forced through the tip without being atomized by air. This causes the tip to have a large impact on the fan width and shape. Most boat projects consist of large surfaces and so a wide fan will increase the spray coverage and also provide the ability to spray close to the surface without too much build up. Smaller surfaces will require a small fan width to reduce overspray. This also makes it possible to spray further away from the surface without too much falloff because the fan is more focused.

3. Lastly, consider the spray gun that is being used. Make sure that the spray tip you plan on using will be supported by the gun. Most spray gun manufacturers will provide this information in their product overview. The Bottom Paint Store distributes ES Manufacturing Gelcoat Spray Guns. The ES G830 gun will support a range of 0.8 – 2.0 mm. The ES G100 and G200 gelcoat spray guns support a range of 0.8 – 7.1 mm tips. If you aren’t sure about your gun’s supported sizes, check with the gun manufacturer.Spray Gun Nozzles For G830 Spray Gun

Nozzle Tip Size by Coating Type

Selecting the correct spray gun nozzle tip size depends on the viscosity and build of the coating being applied. Use the table below as a general guideline, and always confirm with the manufacturer’s technical data sheet.

Gelcoat Spray Nozzle Tip Size Chart

Gelcoat Type Recommended Tip Size Spray Method Notes
Standard Gelcoat 2.0 – 2.5 mm HVLP / Gravity Feed Gun Common for most repairs and recoats. Requires thinning only if specified by manufacturer.
Tooling Gelcoat 2.5 – 3.0 mm Pressure Pot / HVLP Thicker, harder formula. Larger tip reduces clogging and ensures proper film build.
Gelcoat with Metal Flake 2.5 – 3.5 mm Pressure Pot / Specialized Flake Gun Flake can clog smaller tips. Stir constantly and maintain strong airflow.
Waxed Gelcoat 2.0 – 2.5 mm HVLP / Gravity Feed Gun Applies similar to standard gelcoat. Final coat only — cures tack-free.
Unwaxed Gelcoat 2.0 – 2.5 mm HVLP / Gravity Feed Gun Leaves tacky surface for recoating. Often followed by waxed topcoat.
Thickened / Patch Gelcoat 2.0 – 2.7 mm HVLP / Gravity Feed Gun Used for scratch and chip repairs. Usually brushed or dabbed, but can be sprayed with larger tips.

Common Spray Tip Sizes and Their UsesTip size (mm)Commonly Used for0.8Parting Films – PVA – very fine mist1.2Clear Coats – super fine finishes1.4All Around Tip – clears, base coat, single stage paints1.6General Purpose – light to heavy viscosity materials1.8Primers – will apply primer quickly2.2 -2.5Gel Coats and Resins – for thick resins and not paintsApplication Tips

  • Air Pressure: Most HVLP guns need 35–65 PSI at the gun. Always check the spray gun’s manual.

  • Film Thickness: Aim for 18–22 mils total build (multiple passes of ~6–8 mils each).

  • Thinning: Only thin if specified — usually 5–10% with acetone or proprietary reducer. Too much thinning = runs + reduced durability.

  • Test First: Spray a test panel to confirm atomization before applying to your project.

Frequently Asked Questions (FAQ)

  • Why is selecting the right nozzle tip size important when applying gelcoat?
    The nozzle tip size plays a crucial role in achieving a smooth and even finish when applying gelcoat. If the nozzle is too large or too small, it can cause uneven application, overspray, or a finish that is too thick or too thin. Selecting the right size ensures better control and optimal results.
  • What happens if I use the wrong nozzle tip size?
    Using the wrong nozzle size can lead to several issues, such as poor gelcoat coverage, inconsistent texture, overspray, or excessive wastage. A nozzle that is too small may cause clogging or slow application, while one that is too large can result in an uneven layer of gelcoat.
  • How do I determine the right nozzle tip size for my gelcoat application?
    The right nozzle tip size depends on factors such as the type of gelcoat, the thickness of the coating, and the specific spraying equipment you’re using. A general rule of thumb is that a 1.4mm to 1.8mm nozzle works well for most gelcoat applications. However, it’s essential to consult the manufacturer’s recommendations and consider your equipment specifications.
  • Can I use the same nozzle tip size for different types of gelcoat?
    While you can use the same nozzle size for various gelcoats, some formulations might require adjustments. Thicker gelcoats may need a larger nozzle, while thinner ones may perform better with a smaller tip. Always test the setup before starting a large project to ensure a smooth application.
  • Should I use a different nozzle for each layer of gelcoat?
    For some projects, especially those involving multiple layers of gelcoat, it may be helpful to use a different nozzle for each layer. A larger nozzle can be used for the base layer, while a smaller one may be better for final touch-ups and detailing. Always check the viscosity of the gelcoat before selecting the nozzle.
  • Can nozzle tip size affect the finish quality of my gelcoat project?
    Yes, nozzle tip size can directly impact the finish quality. A nozzle that is too large may lead to excessive gelcoat application, while one that is too small may result in a patchy finish. For the best results, selecting the appropriate nozzle size ensures an even and smooth coat.
  • How do I clean my nozzle tip after using gelcoat?
    Proper cleaning of the nozzle is essential to maintain performance and extend the life of your equipment. After each use, make sure to thoroughly clean the nozzle with the recommended solvent or cleaning solution to remove any leftover gelcoat or debris. Regular maintenance prevents clogs and ensures consistent application.
  • Can I use airless sprayers for gelcoat applications?
    Yes, airless sprayers are commonly used for applying gelcoat, especially in large projects. When using an airless sprayer, make sure to select the appropriate nozzle size, as recommended by the sprayer’s manufacturer or based on your gelcoat thickness.
  • How can I avoid overspray when selecting a nozzle tip size?
    To reduce overspray, select a nozzle that provides the correct spray pattern and pressure for your gelcoat. Using a smaller tip and lower pressure settings can help prevent excess spray. Additionally, consider using a spray shield or mask to control overspray during application.
  • Where can I find nozzle tips for gelcoat spraying?
    Bottom Paint Store has them. You can find them here: https://www.bottompaintstore.com/fiberglass-and-gel-coat-repair-gel-coat-spray-gun-and-tools-c-13581_13592.html

By considering these five factors, you can ensure you select the appropriate spray gun nozzle tip size for each job. If you have any questions or need additional guidance on selecting the right size, the experts at the Bottom Paint Store are here to help.Bibliography Research Datahttp://boatpaintguide.com/gelcoat-spray-gun-the-right-tool-for-a-great-job/#.U_80dfldVWghttp://esmfg.com/aspnet_client/g860_hvlp_gelcoat_spray_gun.htmlhttp://www.finishsystems.com/qanda.htmlhttp://www.international-marine.com/paintguides/mpg_paintapplication.pdfhttp://magnum.graco.com/products/M_Pages.nsf/Webpages/0Spray_Tip_Infohttp://www.carcraft.com/howto/ccrp_0511_paint_spray_gun/#ixzz3Bheyr89Z

Clear Coat My Bass Boat

Typically the clear coat on a bass boat is meant to protect the metalflake. You can choose a clear paint or clear gelcoat.

Clear gelcoat is typically what bass boats use at the factory for UV protection over metalflake but gelcoat isn’t as easy to use as paint. Gelcoat typically covers 48 sq feet applied at 18 mils thick per gallon.

We are often asked if you can you gelcoat over gelcoat? If the surface is already covered with gelcoat, or if the surface is a fiberglass, or polyester resin, then you can. It is relatively easy to to apply gelcoat on top of gelcoat if you follow the instructions. If the surface is paint, then the paint would have to be removed before applying the gelcoat. It is important to remember not to completely rely on gelcoat as it you may still need to make repairs to your bass boat after applying gelcoat.

How to Apply Gelcoat 

Topside Boat Paint Options: What are your choices?


Boat Blister Repair

Has your boat developed a blister or two? Don’t worry too much! A blister is not a serious issue. Blisters very rarely get so bad that they cannot be repaired. You can even repair them yourself!

Needed materials: Acetone, sanding block, Hawk Epoxy, acid safe disposable brushes.

Hawk Epoxy KitMake sure the blisters are thoroughly drained and grind them deep enough to remove any damaged material beneath the gelcoat. Increase size of ground area as needed until all the laminate around the blister is sound. Clean the entire area and allow it time to dry.
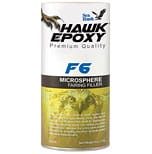
f6-filler-large-may-2014The filler recommended for blister repair is F6 MicroSphere Fairing Filler. F6 MicroSphere Fairing Filler thickens to a white lightweight fairing compound for small to large areas.This creates an easy to sand putty that will help fill in transitions and hull imperfections.  Apply using a putty knife, spatula or trowel. Spread smoothly on the surface in a 1/8″ – 1/4″ layer using heavy hand pressure to displace air bubbles/voids. Try to force the material into holes or joints and smooth to the thickness needed.
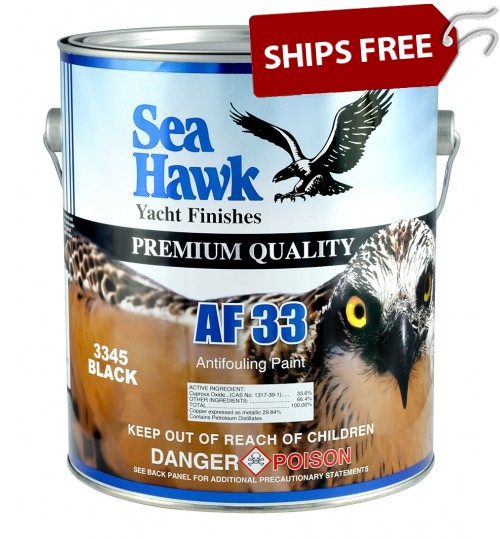
Before applying the Hawk Epoxy, the hull must be very dry. Make sure the hull moisture is under 15% by using a moisture meter. Wipe down the entire area with clean rags and acetone. This will remove any remaining contaminants on the hull.

Hawk Epoxy is a low viscosity epoxy system that makes fiberglass repair easy for everyone! Equipped with a wide variety of Catalysts and fillers, you can mix up the exact epoxy batch needed for almost any job. For more information on how to mix Hawk Epoxy, click this link. Mix only enough Hawk Epoxy to use in 5-10 minutes. Apply the Hawk Epoxy to the hull using the Roll and Tip method. Use a roller to apply the epoxy and then use the tip of a high quality brush to smooth the epoxy evenly. The roller should be lint free and non-wicking. Any fibers that get in to the epoxy could compromise the integrity of the seal.

Apply the second coat when the first coat is tacky to the touch. Your finger should leave an imprint but not lift any of the epoxy coating. Allow the second coat to dry fully. Once it is completely cured, wash the repaired area with soap and water. The repair is now ready to be sanded and painted with Sea Hawk bottom paint. If redoing the hull apply Tuff Stuff primer, followed by bottom paint.

If the blister has damaged the fiberglass, that will need to be repaired with fiberglass cloth cut to match damaged area.

The video below is from Sea Hawk Paints and demonstrates how to seal a fiberglass hull using the Hawk Epoxy System.

What Varnish to Choose?

Last Updated: February 16, 2026

Quick Recommendation

What Varnish Should You Choose?

  • Traditional spar varnish: Best for a classic warm gloss finish with good UV protection and flexibility for exterior wood.
  • High-build varnish: Ideal if you want fewer coats and faster film thickness on brightwork.
  • Two-part (urethane) varnish: Offers maximum durability and chemical resistance, but requires more precise application.
  • Bottom line: Choose varnish based on durability needs, maintenance expectations, and desired finish appearance.

Tip: For exterior marine use, always select a varnish with strong UV inhibitors to protect wood from sun damage.

Typically a varnish is what is used to protect wood that exposed to the elements for long periods of time (think teak wood on boats).

Here are the links to our varnish choices to check as well.

Awl-Spar Classic Spar Varnish (with reducer) is the highest quality classic spar varnish with state of the art ultraviolet inhibitors and absorbers used for brightwork protection against water and weather. It has excellent durability, and is fast dry, fast recoat for quick build up. For above waterline use only.

Cetol® Marine Gloss with Next Wave™ UV-absorbing technology is a durable clear gloss protective wood finish, developed as a topcoat for Cetol Marine, Cetol Marine Light and Cetol Marine Natural Teak.  Next Wave technology is the next generation of Cetol Marine from Sikkens with a unique UV-absorbing package, which is specialty resins and advanced UV absorbers that provide greater protection, durability and longevity.  Cetol Marine Gloss provides a high gloss, hard wearing, UV protection and an easy to clean finish.  It can be used where a gloss appearance is preferred on top of Cetol Marine, Cetol Marine Light and Cetol Marine Natural Teak.  Do not use on decks.

Marine Spar Varnish is a super clear, high gloss varnish for exterior and interior use on new or previously varnished surfaces subject to abuse from parching sun, fresh or salt water, severe weather conditions or abrasion. Formulated with an ultra violet screening agent, Marine Spar Varnish will hold its gloss on exterior surfaces far better than conventional varnishes. Excellent for use on boats doors, furniture, porches, bar tops, or any other surface where a durable clear gloss finish is desired.