Category Archives: Gelcoat

Polyurethane vs. Gelcoat vs. Epoxy — Which Should You Use? (Boat Owner’s Guide)

Choosing the right marine coating can be confusing. Polyurethane, gelcoat, and epoxy each serve different purposes, and selecting the wrong system can lead to peeling, chalking, poor adhesion, or early failure. This guide clearly explains the strengths and weaknesses of each coating so you can choose the best option for your boat project.

If you’re still exploring paint systems in general, see our Marine Paint & Coatings Overview for primers, topside paint, antifouling, and specialty finishes.

What Is Polyurethane?

Marine polyurethane topside paint is a high-gloss, durable finish ideal for above-waterline surfaces. It offers outstanding UV resistance, long-term gloss retention, and a professional yacht-grade appearance.

  • Highly flexible and weather resistant
  • Exceptional color and gloss retention
  • Easy to clean and maintain

Best for: topsides, decks, trim, masts, metalwork, and refinishing aged gelcoat.

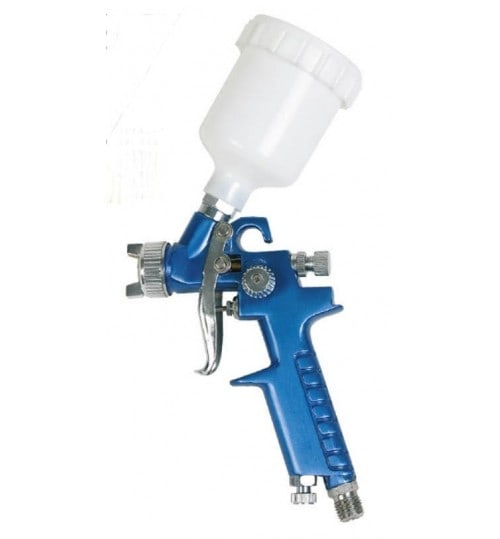
If you’re applying polyurethane for the first time, read our step-by-step guide: How to Apply Marine Polyurethane Without Brush Marks.

What Is Epoxy Paint?

Epoxy primers and epoxy barrier coats are extremely strong and adhesive coatings used as a base layer or waterproofing system. They bond exceptionally well to fiberglass, metal, and wood.

  • Superior adhesion and structural strength
  • Excellent waterproofing for blister prevention
  • Ideal as a base for polyurethane or antifouling coatings

Best for: fiberglass repairs, underwater protection, and hull barrier coat systems.

What Is Gelcoat?

Gelcoat is the high-build coating used in fiberglass boat construction. It creates a thick, durable surface when applied in a mold or during repairs.

  • High build and sandable
  • Buffs to a glossy shine
  • Less UV stable unless regularly maintained

Best for: new fiberglass work, mold repairs, and OEM-style finishes.

For localized repairs (not full refinishing), consider Gelcoat Repair Kits.

Comparison Chart

Feature Polyurethane Epoxy Gelcoat
UV Resistance ★★★★★ ★★★☆☆ ★★☆☆☆
Gloss Level ★★★★★ ★★☆☆☆ ★★★☆☆
Chemical Resistance High Very High Medium
Application Difficulty Moderate Moderate High
Best Use Topsides & Trim Primers & Underwater OEM Repairs

When to Choose Polyurethane

  • You want a yacht-grade glossy topside finish
  • Your gelcoat is faded or thinning
  • You need maximum UV and gloss retention

For more examples, see our guide: Top 10 Marine Uses for Polyurethane Paints & Coatings.

When to Choose Epoxy

  • You are rebuilding or repairing fiberglass
  • You need the strongest possible primer layer
  • You are protecting the hull with a moisture barrier

When to Choose Gelcoat

  • You are restoring or repairing molded fiberglass
  • You want an OEM-thick finish
  • You prefer a sandable and buffable finish

Which Coating Lasts Longest?

  1. Epoxy – best structural durability and waterproofing (must be topcoated)
  2. Polyurethane – best UV and weathering performance above the waterline
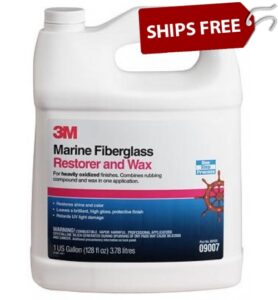
  3. Gelcoat – durable but prone to oxidation and chalking over time

FAQs

Can polyurethane go over gelcoat?

Yes. Sand the gelcoat to a uniform, dull finish, repair defects, and apply a compatible primer before polyurethane. Proper surface prep is essential for adhesion.

Is epoxy waterproof?

Yes. Epoxy forms an excellent moisture barrier and is commonly used as a hull barrier coat beneath antifouling or polyurethane paint.

Should I use gelcoat to refinish an old boat?

For full topside restoration, polyurethane paint is typically easier and offers better long-term UV resistance than rebuilding with gelcoat.

Can I use polyurethane below the waterline?

No. Polyurethane is not recommended for constant immersion. Use an epoxy barrier coat and a compatible antifouling paint instead.


Related Guides

Gelcoat Did Not Cure – What Caused It and What’s Next?

Gelcoat Not Curing? Causes, Fixes, and Prevention Tips

Applying gelcoat can feel intimidating, even for experienced do-it-yourselfers. Unlike paint, gelcoat involves a precise chemical reaction that requires careful measuring and preparation. When it stays tacky or won’t harden at all, it can be one of the most frustrating issues in fiberglass repair. Don’t worry—uncured gelcoat is a common problem with clear, fixable causes.

This guide explains the most common reasons why gelcoat fails to cure, how to fix it, and how to prevent it from happening again.

Common Reasons Gelcoat Does Not Cure

1. Incorrect Surface Preparation

Gelcoat adheres only to fiberglass, cured gelcoat, or polyester resin. It will not stick to paint, epoxy, or any protective coating. Always remove existing paint completely before applying new gelcoat.

  • Sanding: Use 40–80 grit sandpaper for heavy removal or shaping and 220–330 grit for feathering edges of the repair. A rubber sanding block helps maintain flat surfaces.
  • Cleaning: Wipe the surface with acetone to remove grease, wax, or dust. The surface must be completely clean and dry before applying gelcoat.
  • Recommended Tools: 3M abrasives and clean lint-free cloths provide the best bond.

Skipping or rushing surface prep is one of the most common reasons gelcoat remains tacky or peels later.

2. Incorrect Catalyst Ratio (MEKP)

Gelcoat requires a precise mix of MEKP catalyst to harden correctly. Most products need 1.5%–2.0% by volume, with 1.8% @ 77°F being ideal (about 12 drops per ounce of gelcoat).

  • Too little catalyst: The gelcoat won’t “kick,” leaving a sticky, soft surface.
  • Too much catalyst: The mixture can overheat and harden in the can or while applying.

Always mix small batches—no more than one pint at a time—and stir thoroughly.

Temperature (°F) Recommended Catalyst % Notes
60–65°F 2.0% Cooler temps require more MEKP
70–80°F 1.8% Ideal range for most applications
85–90°F 1.5% Reduce catalyst in warm weather

Pro Tip: Keep gelcoat at room temperature before use. For the most consistent cure, pour the mixed gelcoat into a clean second container before brushing or spraying. This ensures no uncatalyzed material remains on the sides of the pot.

3. Missing Wax Additive (Surfacing Agent)

Oxygen in the air prevents gelcoat from curing tack-free. The final coat must include a wax additive sanding aid to seal out oxygen and allow full cure. Use 1 oz wax per quart of gelcoat. The first coat usually doesn’t need wax, but the last coat does.

All gelcoats from the Bottom Paint Store include both MEKP catalyst and wax additive, but extra additives are available if needed.

4. Too Thin of a Coat

Gelcoat must be applied thick enough to generate heat for the curing reaction. The proper wet film thickness is about 25 mils, resulting in a cured thickness of 18–22 mils.

Use a wet film thickness gauge to confirm coverage. Press the edge of the gauge into the gelcoat until it contacts the surface below. The highest numbered tooth with gelcoat on it and the next higher tooth without gelcoat indicate the wet film thickness.

Example: If the 15-mil tooth is coated and the 20-mil tooth is clean, the film thickness is between 15 and 20 mils—too thin for proper curing.

What to Do If Your Gelcoat Didn’t Cure

Can I Apply More Gelcoat Over It?

No. Adding new gelcoat over an uncured layer will not make the first coat cure. The underlying gelcoat must be removed and reapplied.

Will It Cure With More Time?

Sometimes. If the mixture or temperature was slightly off, it may cure after a few days. However, if it’s still soft or tacky after 72 hours, it needs to be removed.

How to Remove Uncured Gelcoat

  • Wipe the surface with acetone to soften the uncured gelcoat.
  • Use a plastic putty knife to scrape off the material carefully.
  • Re-sand the area and clean thoroughly before reapplying gelcoat with the correct catalyst ratio and wax additive.

How to Prevent Gelcoat Cure Problems

  • Store and mix gelcoat at room temperature (70–80°F).
  • Measure catalyst with graduated mixing cups for accuracy.
  • Use wax additive in your final coat to achieve a hard, sandable surface.
  • Apply multiple thin coats instead of one heavy coat.
  • Verify wet film thickness (25 mils) with a gauge.

Shop Gelcoat Repair KitsBuy Wax Additive Sanding Aid

Frequently Asked Questions

Can I Apply Gelcoat Over Epoxy?

No. Gelcoat will not adhere directly to epoxy. You must apply a compatible barrier coat or primer first.

Why Is My Gelcoat Sticky After 24 Hours?

It’s usually caused by too little catalyst or forgetting the wax additive in the final coat.

How Long Should Gelcoat Take to Cure?

At 77°F, most gelcoats will be tack-free in 2–4 hours and fully cured within 24 hours.

Pro Tip
1 mL = 1 cc If using wood mixing stick, place stick in resin before adding catalyst so the wood doesn’t absorb catalyst. Only catalyze slightly more than needed. Resin that cures still in the mixing pot is unusable.

MEPk Levels
Note the size and temperature variables.
For Darker Colors – use 2% MEKp


Can I apply more gelcoat over uncured gelcoat? No. Applying more gelcoat will not help the first layer cure. Most likely it will need to be removed and reapplied.

What can I try to get the gelcoat to cure? Allow more time. If something wasn’t exactly right, the gelcoat may just take a few days to harden. If it’s not rock-solid in a few days, though, you may have to scrape it off and reapply it.

How can I remove the uncured gelcoat? Acetone on a rag can be used to break down the gelcoat. Use a plastic putty knife to scrape the uncured gelcoat away.

Read More:

Click this link to read How to Apply Gelcoat

Click this link to read Clear Coat My Bass Boat

When to use Gelcoat vs Epoxy for Boat Repairs and Maintenance

Maintaining a boat involves more than just keeping it clean and stocked with gear—it’s about protecting your investment from the harsh marine environment. Two of the most common materials used in boat repair and maintenance are gelcoat and epoxy resin. While both serve vital roles in fiberglass boat construction and restoration, they are not interchangeable.

In this guide, we’ll break down the differences between gelcoat and epoxy, explain when to use each, and help you make informed decisions that will keep your boat seaworthy and looking sharp.

Let’s start with an understanding of the basics

What is Gelcoat?

Gelcoat is a pigmented polyester or vinyl ester resin used as the outer layer of most fiberglass boats. It provides a smooth, glossy finish and helps protect the underlying fiberglass laminate from UV rays, water, and minor abrasions.

  • Primary Purpose: Aesthetic finish and surface protection
  • Application: Typically applied in a mold during boat construction or used later for cosmetic repairs

Our products are formulated to provide superior resistance to UV rays and meet the stringent requirements of the boating industry.

What is Epoxy?

Epoxy resin is a two-part adhesive consisting of a resin and a hardener. When mixed, it forms a strong, durable material ideal for structural repairs and bonding various surfaces, including fiberglass, wood, and metal.

  • Primary Purpose: Structural repairs, strong bonding, waterproofing
  • Application: Used in layups, laminating, filling, or as a base layer for barrier coats

Tuff Stuff is designed as a high-build two-part epoxy primer, making it ideal for barrier coats, especially below the waterline. It’s specifically engineered to prevent water absorption and osmotic blistering in fiberglass hulls—a core strength of marine-grade epoxies.

Gelcoat vs. Epoxy: Key Differences

Feature Gelcoat Epoxy Resin
Primary Use Surface finish, color, UV protection Structural repairs, bonding, sealing
Strength Less strong, brittle under stress Extremely strong, flexible under stress
UV Resistance Excellent Poor – requires UV-resistant topcoat
Water Resistance Good Excellent
Adhesion Best on cured polyester/fiberglass Bonds to wood, metal, fiberglass, epoxy
Ease of Use Faster to apply, but less forgiving Longer cure time, requires precision


When to Use Gelcoat

Gelcoat is your best choice when the goal is cosmetic restoration of your boat’s surface—particularly fiberglass. It’s ideal for:

  • Repairing surface scratches and chips in the existing gelcoat
  • Restoring faded or oxidized areas
  • Matching the boat’s original finish and color
  • Protecting from UV damage and surface wear

However, gelcoat does not bond well to epoxy or non-polyester surfaces unless properly prepped. Also, it’s not suitable for deep repairs or structural issues.

Best Time to Use Gelcoat:

  • Restoring surface shine on fiberglass
  • Filling shallow scratches, dings, and UV damage
  • Matching original boat color (especially white, because, well… everything’s white)
  • Cosmetic touch-ups above and below the waterline

Tip: Always sand and clean the surface thoroughly before applying gelcoat. If applying over epoxy, ensure the epoxy is fully cured and properly sanded to create a mechanical bond.

When to Use Epoxy

Epoxy is the material of choice when strength, durability, and waterproofing are the priorities. It excels in situations like:

  • Repairing delaminated fiberglass
  • Fixing holes, cracks, or structural damage
  • Bonding dissimilar materials like wood to fiberglass or metal
  • Sealing bare fiberglass or wood to prevent water intrusion
  • Creating a barrier coat to prevent blistering (osmosis)

Epoxy is more chemically resistant than polyester resins and has superior adhesive qualities. However, it requires a UV-resistant topcoat, such as topside boat paint or gelcoat, to protect it from sunlight degradation.

Best Time to Use Epoxy:

  • Repairing structural damage like cracks, holes, or delamination
  • Sealing bare fiberglass to prevent water intrusion
  • Adhering materials (wood, metal, composite) with confidence
  • Filling deep gouges or rebuilding missing chunks
  • Barrier coats to prevent osmotic blistering

Can You Use Gelcoat Over Epoxy?

Yes, but with preparation. Since gelcoat does not naturally adhere well to epoxy, the epoxy must be fully cured, sanded with 80–120 grit, and cleaned thoroughly to allow for mechanical bonding. Some professionals recommend applying a tie-coat primer to improve adhesion.

Choosing the Right Product 

  • Use Gelcoat when:
    You’re doing surface-level cosmetic work on fiberglass and want a UV-resistant, glossy finish.
  • Use Epoxy when:
    You’re repairing structural damage, bonding materials, or sealing surfaces below the waterline.

Final Thoughts

Whether you’re restoring your hull’s shine or reinforcing a damaged section, knowing when to use gelcoat vs epoxy ensures your boat stays safe, seaworthy, and beautiful. Each material serves a distinct purpose—gelcoat for finishing and appearance, epoxy for strength and structural integrity.

By understanding their properties and correct applications, you’ll be able to tackle any repair with confidence—and save time and money in the long run.

Ready to tackle your next boat project like a pro?

Stock up on top-rated gelcoat and epoxy products at Bottom Paint Store and cruise into your next DIY with confidence. Need help? We are only a phone call 888-505-2313 or live chat away.

10 Things You Must Do To Get Good Results From Gelcoat for Your Boat

We hear from our customers all the time that gelcoat is one of the trickiest substances to work with. This is due to its unique requirements for proper curing, surface preparation, and application. Most bad outcomes can be eliminated by having a thorough plan and following it before charging ahead. In this guide we will walk you through 10 steps to take to ensure you get a great result. Let’s go!

  1. Thorough Surface Preparation

Any successful gelcoat application starts with cleaning and prepping the surface. Remove dirt, grease, salts, oils, and loose paint by washing the area with a strong boat cleaner or solvent. Once washed, rinse thoroughly and allow the surface to dry completely. Properly preparing the substrate ensures a strong bond between the gelcoat and the boat’s surface.

  1. Sanding and Fairing

After cleaning, sand the surface thoroughly to provide a consistent and slightly rough texture that gelcoat can adhere to. For repairs or badly worn surfaces, you may need to fill low spots with a marine-grade filler or fairing compound. Use progressively finer grit papers—starting around 80-100 grit for heavy material removal and moving up to 220-320 grit for the final finish.

  1. Choose High-Quality Materials

Not all gelcoat products are created equal. Invest in premium gelcoat, catalysts (typically MEKP), and thinners or additives recommended by your chosen gelcoat manufacturer. Look for established marine brands known for durability, UV stability, and ease of application.


For over 50 years Fiberglass Coatings has been an industry leader in resin and coatings.

  1. Carefully Measure and Mix

Accurate measuring of catalyst is critical for proper curing. Follow the recommended mixing ratio from the gelcoat manufacturer—too little catalyst may lead to incomplete curing, while too much can cause the gelcoat to harden too quickly or become brittle. Mix slowly but thoroughly, ensuring the catalyst is fully incorporated without introducing excess air.

  1. Control Application Conditions

Gelcoat application is sensitive to temperature and humidity:

  • Temperature: Aim for 60–80°F (15–27°C). Below 60°F, curing slows; above 80°F, gelcoat can cure too quickly.
  • Humidity: High humidity can affect curing and lead to surface issues. If possible, apply gelcoat in a controlled environment or choose a time of day with optimal conditions.
  1. Proper Application Tools

Decide whether to apply with a spray gun or a brush/roller. For larger areas or new builds, a specialized spray gun designed for gelcoat can achieve a smoother finish. However, for smaller patches or tight spaces, high-quality brushes or rollers are perfectly effective. Be sure to use tools designed for resin-based coatings to reduce bristle shedding or roller fuzz. Bottom Paint Store only sells sprayable gelcoat.


  1. Build in Layers

Applying gelcoat in multiple thin layers helps you avoid sags, runs, and air pockets. For spraying, use steady, even passes with a 50% overlap. If brushing or rolling, use smooth, consistent strokes, allowing each thin coat to cure to a tacky state before adding the next. This layering approach promotes a uniform finish and proper thickness.

  1. Allow for Correct Cure Times

Each layer of gelcoat requires sufficient time to set before proceeding. If you apply the next layer too soon, you risk trapping solvents or causing an improper bond. Follow the manufacturer’s recommended recoat window. When in doubt, err on the side of slightly longer cure times, especially under cooler or more humid conditions.

  1. Sand and Polish for Final Finish

After your last gelcoat layer has fully cured, lightly sand the surface with progressively finer grits (e.g., 400 → 600 → 800 → 1000, etc.). This process removes minor imperfections and levels the surface. Once the sanding scratches are gone, move on to polishing compounds to restore gloss and smoothness. Carefully buff the area, then clean away any polishing residue.

  1. Seal and Protect

A final protective wax or sealant can help protect the gelcoat from UV damage and staining. Choose a high-quality marine wax or polymer sealant suitable for fiberglass boats. Reapply it regularly to maintain protection and keep your gelcoat surface looking fresh and glossy.

By following these 10 key steps—covering everything from surface prep and mixing ratios to proper application and finishing—you’ll be well on your way to a boat surface that looks professional and stands the test of time. Quality materials, attention to detail, and patience are the cornerstones of a successful gelcoat application.


Changing the Color of Your Boat’s Gelcoat

When changing the color of your boat’s gelcoat, using pigment agents effectively is crucial to achieving the desired shade. 

Here’s how you can use these agents to customize your boat’s appearance:

Choose the Right Pigment Agents: Select pigment agents that are specifically formulated for use with gelcoat. These pigments are designed to blend seamlessly and maintain the durability and UV resistance of the gelcoat. For a variety of pigment options and specific products, check out our Pigments For Gel Coats And Resins 

Test Color Mixes:

Before applying the pigment to the entire boat, it’s wise to test the color mixture on a small scale. Mix a small amount of gelcoat with your chosen pigment according to the guidelines provided. This test will help you adjust the color intensity and ensure that it meets your expectations before full application.

Bright Yellow, Yellow Oxide, Lead Free Orange


Measure Precisely:

For consistent color throughout your gelcoat, measure the pigment and gelcoat precisely. Consider using a digital scale for accuracy, and follow the manufacturer’s recommendations for pigment-to-gelcoat ratios. Typically, a small amount of pigment goes a long way.

Mix Thoroughly:

To avoid any color inconsistencies, mix the pigment thoroughly with the gelcoat. Ensure that there are no streaks or clumps of pigment. A mechanical mixer can be very effective in achieving a homogeneous mixture.

Apply a Test Patch:

Apply a small amount of the colored gelcoat to a part of the boat that is less visible. Allow it to cure fully according to the gelcoat’s curing instructions. This will give you a real sense of how the color looks when applied and finished.

Adjust if Necessary:

If the test patch isn’t to your satisfaction, adjust the pigment ratio as needed. Adding more pigment will deepen the color, while adding more gelcoat will lighten it.

Apply to the Boat:

Once you are satisfied with the color mix, apply the pigmented gelcoat to the boat using your chosen application method (brush and roller or spraying). Ensure even coverage to avoid blotchy areas.

By carefully selecting, testing, and applying pigment agents, you can achieve a professional and personalized appearance for your boat’s gelcoat. If you need assistance selecting pigments for your gelcoat contact the customer support team at Bottom Paint Store 888-505-2313 or via live chat found at bottompaintstore.com

Routine Maintenance Tips to Prolong the Life of Your Boat’s Gel Coat

Maintaining the gel coat on your boat is essential to keep it looking its best and protecting the underlying fiberglass from the elements. Regular upkeep not only enhances the appearance of your boat but also extends the lifespan of the gel coat. We hope these practical tips help you maintain your gel coat effectively so that it lasts as long as possible.

Wash Regularly

The simplest and most effective way to maintain your boat’s gel coat is by washing it regularly. Saltwater, bird droppings, and dirt can cause significant damage if left unchecked. Use a mild marine soap and a soft brush or sponge to gently clean the surface. Avoid household detergents as they can strip away waxes and potentially damage the gel coat.

Apply a Quality Marine Wax

After washing, applying a high-quality marine wax is crucial. Wax provides a protective barrier against UV rays, salt, and pollutants. Apply wax at least twice a year—more often if your boat is exposed to harsh conditions regularly. Ensure the gel coat is completely dry and free of contaminants before applying wax in a circular motion using a soft cloth or buffer.

Designed to remove HEAVY oxidation, chalking, fading, minor scratches, rust and exhaust stains; plus provide protection on fiberglass/gelcoat.

Address Stains Immediately

Stains from leaves, bird droppings, and other natural elements can penetrate the gel coat if not removed promptly. For tough stains, use a specially formulated gel coat stain remover. Always test any cleaning solution on a small, inconspicuous area first to ensure it doesn’t harm the finish.

Inspect and Repair Any Chips or Scratches

Regular inspections can catch minor chips and scratches before they develop into larger issues. Small imperfections in the gel coat can be repaired using a gel coat repair kit. Clean the area thoroughly, apply the gel coat, and sand it down once cured to ensure it matches the level and smoothness of the surrounding area.

If you are wondering how to repair fiberglass or gelcoat on a boat then this Gelcoat Putty is the product to use, and the easiest way to fix it.

Avoid Long-Term Sun Exposure

Prolonged exposure to the sun can lead to fading and weakening of the gel coat. Whenever possible, store your boat under a cover or in a shaded area when not in use. If indoor storage isn’t an option, consider using a quality boat cover or tarp to protect against UV damage.

Regularly Check for Osmotic Blisters

Osmotic blisters can occur when water infiltrates the gel coat, leading to larger structural issues if left untreated. Inspect your boat regularly for any signs of blistering. Early stages can often be managed by drying out the area and repairing with a fresh application of gel coat.

By following these routine maintenance tips, you can keep your boat’s gel coat in pristine condition, ensuring your vessel remains both beautiful and seaworthy for years to come. Regular care not only preserves the integrity and aesthetics of your boat but also enhances its long-term value and performance on the water. If you have any questions or need help selecting a product to help maintain your gel coat please give the Bottom Paint Store customer support team a call 888.505.2313.

A Comprehensive Guide to Gel Coat Spray Guns

We get asked a lot of questions about applying gel coat so we thought we would offer this guide as a way to help you understand one of the best methods, gel coat spray guns. Gel coat spray guns are invaluable tools for achieving professional finishes in gel coating projects. Whether you’re a seasoned pro or a DIY enthusiast, understanding how these spray guns work and how to choose the right one can make a significant difference in your project’s outcome. In this guide, we’ll cover everything you need to know about gel coat spray guns, from their types and benefits to safety precautions and maintenance tips.

What is a Gel Coat Spray Gun?

Let’s start off by explaining that a gel coat spray gun is a specialized tool designed for applying gel coat, a type of resinous material, onto surfaces to create a smooth and durable finish. These guns atomize the gel coat, breaking it down into tiny droplets that are then sprayed evenly onto the surface, ensuring an even coating.


Types of Gel Coat Spray Guns

There are two main types of gel coat spray guns: conventional and HVLP (High Volume Low Pressure). Conventional spray guns use high pressure to atomize the gel coat, while HVLP guns use lower pressure, resulting in less overspray and a more efficient use of material.

Benefits of Using a Gel Coat Spray Gun

Gel coat spray guns allow for quick and efficient application, saving time and effort. The atomized spray creates a smooth and uniform coating, reducing the need for sanding and polishing. They also use less material compared to traditional methods, saving money in the long run.

Choosing the Right Gel Coat Spray Gun

When deciding which one is right for you, consider the size of your project, the type of gel coat you’re using, and your budget. It’s also important to choose one that is compatible with your compressor and other equipment.

Safety Precautions

Always wear protective gear, such as a respirator, goggles, and gloves, to protect yourself from fumes and overspray. Work in a well-ventilated area and follow the manufacturer’s instructions for proper use.

Using a Gel Coat Spray Gun

We’re often asked if it is difficult to use a gel coat spray gun. It really depends, it can be challenging for beginners, but with practice and proper technique, it becomes easier over time. Here are a few factors that can affect the difficulty level:

  • Skill level: If you’re new to spray painting or using spray guns in general, there will be a learning curve. Familiarizing yourself with the equipment and practicing on scrap materials can help improve your skills.
  • Adjusting settings: Gel coat spray guns typically have adjustable settings for things like air pressure, fluid flow, and fan pattern. Learning how to properly adjust these settings for your specific project and materials is crucial for achieving desired results. Again, practice before applying on your boat. You’ll be glad you did.


Cleaning and Maintenance

To keep your gel coat spray gun in good condition, clean it thoroughly after each use. Use a solvent recommended by the manufacturer to remove any gel coat residue. Regularly inspect the gun for signs of wear and tear and replace any damaged parts as needed.

As you can tell, gel coat spray guns are essential tools for achieving professional finishes in gel coating projects. By understanding how they work and following best practices for their use and maintenance, you can ensure a smooth and durable finish for your projects. If you have any questions about gel coat for boats contact our technical services team via Live Chat or by calling 888-505-2313.

The Magic of Gel Coat Repair Kits

Gel coat repair kits play a vital role in ensuring that boat owners can easily maintain the impeccable appearance of their vessels. These kits are specifically designed for simplicity and effectiveness, making them accessible even to individuals with limited experience in boat maintenance.

Comprehensive in nature, gel coat repair kits typically include a variety of components. These components often consist of gel coat in different colors to match the boat’s original finish, along with hardener for curing and application tools like brushes or syringes. With these kits, boat owners can address minor damages in a convenient and hassle-free manner. Whether it’s a small scratch, chip, or a more significant gouge, the right tools can be found within the kit to effectively address the specific issue at hand.

The application process of gel coat repair kits is designed to be straightforward, generally accompanied by clear instructions. Users can easily mix the components, apply the gel coat mixture to the damaged area, and allow it to cure. As a result, a seamless integration with the existing surface is achieved, creating a durable and smooth finish. This not only restores the gel coat’s integrity but also prevents further deterioration, ensuring the long-term protection of the boat.

From a financial perspective, gel coat repair kits offer a cost-effective solution for maintaining a boat’s appearance. By proactively addressing minor damages, boat owners can avoid more extensive and expensive repairs in the future. This empowers boat enthusiasts to navigate the seas with a sense of pride, knowing they have a reliable solution on board to keep their vessel looking as good as new.

In summary, gel coat repair kits are essential tools for boat owners. They provide an easy and effective solution for maintaining the appearance of boats, regardless of the owner’s level of experience. With their comprehensive nature and straightforward application process, these kits enable boat enthusiasts to address minor damages promptly and cost-effectively. By using gel coat repair kits, boat owners can maintain the integrity of their vessel’s finish, enhance its longevity, and navigate the waters with confidence.

boat paint vs gelcoat

Gelcoat vs Boat Paint: Which One Is Right for You?

When it comes to boat repair and maintenance, choosing the right kind of coating is crucial to ensure the longevity and overall aesthetics of your vessel. Gelcoat and boat paint are two of the most used coatings for boats, but what are their differences? Which one should you use? In this blog post, we’ll explore and compare the features of gelcoat and boat paint to help you make an informed decision.

First, let’s define what gelcoat and boat paint are.

Gelcoat is a protective layer that’s applied directly to the boat’s fiberglass, while boat paint is a coating that can be applied over gelcoat, or directly to other materials like wood or aluminum. Gelcoat is known for its durability and resistance to water, UV rays, and harsh weather conditions. However, it can scratch and crack over time if it is not maintained properly. On the other hand, boat paint offers more flexibility in terms of colors and finish, however it may require more maintenance and upkeep.

Composition and Application

Gelcoat is a resin-based coating that is applied directly to the fiberglass surface of a boat during the manufacturing process. It is typically thick and durable, with a glossy finish that can be easily polished. Gelcoat can be pigmented to match different colors and styles, but it is usually white.

When it comes to application, gelcoat is best applied using a gelcoat spray gun or roller, while boat paint can be applied using a spray gun, roller, or brush. Gelcoat can be easily repaired by sanding the damaged area and reapplying the gelcoat, while boat paint repairs may require sanding, filling, and repainting the entire affected area for a seamless finish.

In terms of durability, gelcoat is known for its strength and can last for many years, while boat paint may require repainting every five to ten years, depending on the quality of the paint and the maintenance of the vessel. Gelcoat also blends into the fiberglass, providing a smoother finish that can hide minor imperfections, while boat paint may highlight any dents, cracks, or other irregularities on the surface.

When it comes to cost, gelcoat is generally less expensive than boat paint. However, depending on the quality and extent of the repair or maintenance needed, the cost can vary for both coatings. Gelcoat repairs can range from a few hundred dollars to thousands of dollars, while boat paint jobs can cost from a few thousand dollars to tens of thousands of dollars.

In conclusion, choosing between gelcoat and boat bottom paint depends on your preferences, needs, and budget. If you’re looking for a durable, low-maintenance coating that can blend into the fiberglass and withstand harsh weather conditions, gelcoat may be the better option for you. On the other hand, if you want more flexibility in terms of colors and finish, don’t mind the extra maintenance required, and can afford the cost, boat paint may be the way to go. Ultimately, it’s important to consult with a professional boat service provider to help you make the right decision for your vessel.


How to Repair a Fiberglass Boat: A Step by Step Guide

If you’re a boat enthusiast, you know that there’s nothing quite like the feeling of cruising out on the open water. But what do you do when your beloved vessel starts to show signs of wear and tear? If you have a fiberglass boat, you’re in luck. In this blog post, we’ll walk you through everything you need to know about repairing your fiberglass boat, from small cracks to large holes. So, whether you’re a seasoned pro or a complete novice, read on for our step-by-step guide on how to repair a fiberglass boat.

KEY TAKEWAYS

  1. Clean the Area
    The first step in boat fiberglass repair is to clean the area that needs to be repaired. This step is important because it will allow the repair materials to bond properly with the existing fiberglass. Use a mild soap and water solution to clean the area and then dry it thoroughly with a clean cloth.
  2. Cut Out the Damaged Area
    Once the area is clean, use a sharp knife or razor blade to cut out the damaged area. Be sure to cut away any loose or damaged fiberglass so that you have a clean, smooth surface to work with.
  3. Apply the Repair Material
    There are a variety of repair materials that can be used for fiberglass boat repair. The type of material you use will depend on the size and severity of the damage. For small repairs, you can use a fiberglass repair kit; for larger repairs, you may need to use a sheet of fiberglass cloth and some resin. Follow the instructions that come with your chosen repair material to apply it to the damaged area.

Repairing Small Cracks and Scratches

One of the most common problems that boat owners face is small cracks and scratches in the hull. While these may not seem like a big deal at first, they can quickly turn into larger problems if left unaddressed. The good news is that small cracks and scratches are relatively easy to fix with some basic supplies.

Polyester Resin is a great choice for fiberglass repairs

Here’s what you’ll need:

-Fiberglass cloth
-Resin
-Hardener
-Sandpaper
-Putty knife or spreader
-Measuring cup
-Gloves
-Eye protection

Once you have all of your supplies, follow these steps to repair small cracks and scratches in your fiberglass boat:

  1. Clean the area around the crack or scratch with sandpaper to rough up the surface and allow the resin to adhere better.
  2. Cut a piece of fiberglass cloth to size and lay it over the crack or scratch.
  3. Mix together the resin and hardener in a measuring cup, according to the application guidelines.
  4. Use a putty knife or spreader to apply the resin mixture over the fiberglass cloth, making sure to work it into any crevices.
  5. Allow the resin to cure for 24 hours before sanding down any excess material.
  6. Your fiberglass boat is as good as new!

Fixing Large Holes in Fiberglass Boats

While small cracks and scratches are relatively easy to fix, large holes can be much more challenging—but not impossible! With some patience and elbow grease, you can patch up even the biggest holes in your fiberglass boat hull. Here’s what you’ll need:

-Fiberglass cloth
-Resin mixture (resin and hardener)
-Putty knife or spreader -Sandpaper -Measuring cup -Gloves -Eye protection -Plywood (optional)

Follow these steps to repair large holes in your fiberglass boat hull:

  1. If necessary, use plywood to create a temporary patch for the hole until the resin has cured. This will help keep water out of the hole while you’re working on it.
  2. Cut a piece of fiberglass cloth to size and lay it over the hole.
  3. Use a putty knife or spreader to apply the resin mixture over the fiberglass cloth, making sure to work it into any crevices.
  4. Allow the resin to cure for 24 hours before sanding down any excess material and removing any plywood patches.
  5. Your fiberglass boat is as good as new!


How to Repair a Fiberglass Boat Chart

Performing each step carefully—from inspection to final finishing—ensures a strong, durable fiberglass repair and restores your boat’s structural integrity and appearance.

Conclusion:

No matter how experienced you are as a boat owner, sooner or later you’re going to need to make some repairs—and if you have a fiberglass boat, that means getting familiar with some basic repair techniques. In this blog post, we’ve walked you through everything you need to know about repairing small cracks and scratches, as well as large holes in your hull. So, whether you’re dealing with cosmetic damage or something more serious, now you know how to fix it!

If you have any questions about how to repair your fiberglass boat, please feel free to reach out to the Bottom Paint Store technical assistance team by phone at 888-505-2313, or via Live Chat found on the website. We have a wide selection of fiberglass and gelcoat putties, resins, restoration solutions, repair kits, and tools/materials.

How to Apply Gelcoat by Brush and Roller

Professional Grade Exterior Gelcoat can be applied either by Spraying, Brushing or Rolling. This article will discuss how to apply the gelcoat with the brush and roller method. For a more comprehensive guide on How to Apply Gelcoat, please read this article. We will assume you have already read the article to learn about prepping the surface, sanding, and finishing the gelcoat.

Catalyzing Gelcoat with MEKP

All gelcoats MUST be catalyzed with MEKP to cure. This should be added after all other additives just prior to application. We suggest 1-1/4% to 1-1/2% by volume, i.e. 13-15 cc per quart. We do NOT recommend mixing more than 1 quart at a time. Darker colors need a little more catalyst for the same reaction, so you can catalyze those up to 2%. All Gelcoats purchased from the Bottom Paint Store come with MEKP. Refer to the catalyst chart located on the product page, the product label, or the one below.

One gallon of polyester resin weighs approximately 9.2 lbs. One gallon of gelcoat weighs approximately 10.5 lbs.
The weight of MEKP 925 is 1.125 grams per cc. 30 drops is approximately equal to one cc.

cc = cubic centimeter. Oz = fluid ounce
Note: Using drops for catalyst measurement is only an estimate. In critical applications MEKP should be measured  using cc’s or fluid oz’s which are volume measurements.
The percentages in the chart: 1% thru 2%, are percentages of resin or gelcoat by weight. The cc and oz values in the chart have been converted from weights of MEKP to volumes of MEKP.

NOTE:  The catalyst level (MEKP) should not exceed 3.0% or fall below 1.2 for proper cure. Ideal range is 1.8% @ 77°F. Gel time at 1.8% MEKP is 10-17 minutes. This time element is dependent on material temperature, room temperature, humidity, air movement, and catalyst concentration. Gelcoat should not be used when temperature conditions are below 60°F, as curing may be adversely affected.

Be sure to have a good strategy when applying your gelcoat. Once you mix and catalyze, you have about 15 minutes to apply the gelcoat before it starts getting hard or starts to “gel.” The actual working time depends on the amount of catalyst and how hot the working conditions are. Anything below 60 degrees, and your gelcoat will not cure, but as you get warmer and warmer, your working time will decrease rapidly. At 70 degrees, you get 15 minutes, but at 90 degrees, you only get 5 minutes.

TIP: If you need more time to work, sit the can in some cold ice water to cool it down to 60 degrees to allow a little more working time.

Application

Brushing: Use a solvent resistant brush. The chemicals in the gelcoat can be harsh on materials not designed to withstand them. Using a solvent resistant brush should stop any brush materials from getting in the finished product.

TIP: Choose a natural bristle brush with tapered bristles that are not too stiff.

Apply gelcoat quickly using long brush strokes to help achieve an even thickness and to help remove trapped air pockets.  Load the brush fully with gelcoat each time. Applying the gelcoat quickly will help you apply it to the correct thickness. Gelcoat applied too thin will not cure properly. Remember, this gelcoat has been catalyzed and the clock is ticking. Also, large amounts of gelcoat left in the container allows a buildup of exotherm and causes the gelcoat to cure too quickly.  Once all the gelcoat is out of container and on the surface then you can spend time tidying up with the brush strokes.

TIP: Try to finish vertical areas with an upward brush stroke. This will help reduce sag.

Rolling: Use a solvent resistant 1/8 or 1/4 inch nap roller. Be sure not to use foam rollers; they tend to leave bubbles. Wrap the roller in painters’ tape and rip the tape off to remove loose fibers from the roller. Apply the gelcoat to the surface quickly. Remember, this gelcoat has been catalyzed and the clock is ticking. After wetting out a small area with the roller, use the tip of a brush to smooth out the stipple left by the roller. Move the brush in smooth strokes perpendicular to the direction that the roller moved. Be careful to not apply too much pressure during this step. Ask a friend to assist with the tipping to speed things along. When rolling or brushing on the second coat be sure to apply in the opposite direction from the previous coat. This allows for a uniform finish.

Overview

The 1st coat will consist of gelcoat and hardener only. Wait a half hour for the gelcoat to set. It should be tacky. It will not be fully cured yet.

The 2nd coat will consist of gelcoat, hardener, and wax additive sanding aid. 1 oz of sanding aid per quart or 4 oz per gallon. Sanding aid seals the surface from oxygen, causing the surface to dry tack free.

A wax additive is NOT used with HI UV Clear. You should only use a wax additive in the final application coat or if you are planning on applying only one coat.

If you followed all the steps correctly you should have a beautiful application of gelcoat! If you’re using our Professional Grade Exterior Gelcoat, you’ll be ready to sand and buff your freshly gelcoated surface after about 1- 3 hours.

How to gelcoat a jet ski

If your jet ski or waverunner hull is made of fiberglass then gelcoat can be an excellent restoration option. Gel coating a jet ski is a great way to keep it looking new and protect the surface from scratches and dings. It’s also a relatively easy process that most people can do in a few hours. In this blog post, we’ll walk you through the steps of how to gelcoat a jet ski. We’ll also provide some tips on how to make the process go as smoothly as possible.

What is gelcoat and what does it do

Gelcoat is a type of resin that is used as a protective coating on many boats, jet skis, and wave runners. It is applied to the hull of the vessel in order to provide a shiny, smooth finish. In addition to its aesthetic benefits, gelcoat also helps to protect the hull from UV damage, scratches, and other types of wear and tear. In some cases, gelcoat can even help to repair minor damage to the hull. As a result, gelcoat is an essential part of any boat or jet ski owner’s arsenal. While gelcoat can help extend the life of your jet ski or wave runner, it is not indestructible. Over time, it can become dulled or scratched, and it may eventually need to be replaced.

How to clean and prep the jet ski surface before you start

To clean the jet ski, you’ll need a mild soap, a soft cloth, and a jet ski brush. Start by mixing the soap and warm water in a bucket. Then Wet the jet ski with the soapy water and use the brush to scrub away any dirt or grime. Rinse the jet ski off with clean water and dry it with a soft cloth. For tough grease and dirt spots you can use a degreaser. This will remove any dirt, grime or grease that could prevent the paint from adhering properly.

Finally, inspect the jet ski for any cracks, chips or other damage. If you notice any of these, make sure to get them repaired before applying gelcoat. Use a fine-grit sandpaper to smooth out any rough spots. Gel coat repair kits, scratch patch kits, gel coat paste, fiberglass repair kits come with everything you need for small repairs.

Applying the gelcoat to your jet ski, wave runner

Applying gelcoat to a jet ski is a great way to protect your investment. Gelcoat is a clear or colored coating that is applied to the surface of a jet ski to protect it from the elements. It is also used to give the jet ski a high gloss finish. Gelcoat is available in both spray and brush-on versions. The brush-on version is generally easier to apply, but the spray version will give you a more even coverage. When applying gelcoat, be sure to follow the manufacturer’s instructions carefully. In general, you will want to apply several thin coats rather than one thick coat. Be sure to allow each coat to dry completely before applying the next one. Once the gelcoat has been applied, you will need to buff it out to achieve a high gloss finish. Once the final coat of gelcoat has been applied, the jet ski should be allowed to cure for 24 hours before being launched.

It’s important to choose the right gelcoat. There are dozens of different formulations on the market, so it’s important to do your homework and consult your owner’s manual. Once you’ve selected the right gelcoat, the next step is to apply it correctly. One common mistake is to apply too much gelcoat, which can lead to runs and sagging. It’s important to apply a thin, even coat and then allow it to cure properly before sanding or buffing.

With these tips in mind, your gelcoat project should be easier. Just remember to take your time and follow all instructions carefully, and you’ll soon be enjoying your jet ski on the open water. If you have any questions about selecting the right gel coat for your watercraft, please call the Bottom Paint Store customer support team 888.505.2313.

Filler Options for Gelcoats and Resins

There are many common fillers used with gelcoat and resin and here we’ll help you pick the one that is right for you.

When using putty, a good rule is not to go higher than 1/8″ thick without adding a layer of glass to prevent any issues. With the various fillers, for the right working consistency, you’ll want about 60-70% mix to resin ratio.

Milled Fibers: Finer than chopped glass, makes a harder putty that is strong and coarse.

Walnut Shells: Brown in color and preferred for wood putty or nonskid since it has large particles. Good Strength and darker pigment.

Phenolic Microballons

Microballoons or Microspheres: Phenolic spheres are generally plastic or glass and hollow, intact spheres that are lightweight. This is ideal for making fairing compounds. The Microballoons are a more expensive option for filler.

Fumed Silica: Also known as Cabosil FIller or Aerosil Filler. This is a hydrophilic fumed silica. Fumed Silica provides little change to weight, color, or physical properties after cure, used in resins and gelcoats to make them hang on vertical surfaces, (too much can cause porosity.)

Cotton Flock: Made from pieces of cotton and thickens to an off-white color. Great for bonding many substrates, especially wood. The mixture also creates a multipurpose adhesive for many other substrates in addition to providing excellent substrate wetting and penetrating characteristics. Increases impact and abrasion resistance.

Chopped Glass Fibers

Chopped Glass: These are the biggest pieces of fillers and are most popular for use with resin putty. Perfect for corners, crack resistant, and doesn’t affect pigmented gelcoat. 1/4″ glass fibers make the strongest glass reinforced putty.

How Can Gelcoat Be Used to Repair Fiberglass Surfaces?

It’s no secret that fiberglass surfaces can be extremely fragile and susceptible to damage. Even the smallest nick or crack can quickly become a larger problem, leading to an unsightly and potentially hazardous mess. Fortunately, there is a fix for most common fiberglass issues – gelcoat! This article will explain what gelcoat is, how it can be used to repair fiberglass surfaces, and some of its benefits. Keep reading to learn more!

What is gel coat?

Gelcoat is a specialized resin and is popular as a surface coating in the fabrication and repair of fiberglass-based products and can also be used to patch existing gel coat, fiberglass repairs, and new construction and repair projects. Gelcoat is extremely durable and provides a high-quality finish to visible surfaces making it a popular solution for damages to fiberglass surfaces such as covering up blemishes, patching small holes, filling cracks, and renewing surface shine. Gelcoat is often referred to as a one-stop solution for almost all types of damages on fiberglass surfaces such as, boats, jet skis, wave runners, swimming pools, hot tubs, showers and more.

Gelcoat for Swimming Pools

If you have a fiberglass pool then its surface is made of gelcoat, a liquid-colored resin that is applied to the pool shell. Gelcoat is the considered one of the most durable pool surfaces, typically lasting several decades, depending on maintenance, wear and tear, and the quality of the surface. Concrete pools need to be refinished about every ten years or so.

One of the more common areas of a fiberglass pool that needs to be refinished over time are the pool steps which can fade after exposure to pool chemicals, weather and UV rays. For more information please refer to our How to Gelcoat your Fiberglass Pool Steps article.

Gelcoat for Shower Stalls, Bathtubs, and Hot tubs

Cracks, holes, chips, and stains in showers and tubs made from fiberglass can be repaired with gelcoat. A common rule of thumb is if the hole is smaller than 1/2 inch, you should be able to make the repairs yourself; if it is a larger hole, then it may require the replacement of the surface or unit.

Fixing the damaged area requires applying two-part epoxy that hardens to the strength of the surrounding surface.

Gelcoat for a Fiberglass Deck

Applying gelcoat to a fiberglass deck is a great way to protect the surface from UV damage and environmental elements. Gelcoat is a clear or tinted resin that is applied to the surface of the deck, creating a protective barrier. The gelcoat will need to be reapplied every few years in order to maintain its effectiveness. When applying gelcoat, it is important to use a natural bristle brush in order to avoid damaging the fibers of the deck. In addition, gelcoat should be applied in thin coats in order to avoid runs and sags. With proper application, gelcoat can provide many years of protection for your fiberglass deck.

One of the most common ways to refinish a fiberglass deck is with a two-part polyurethane, as the results will provide a finish that will look as good as and should last at as long as the original gelcoat.

Re-gelcoating a Boat Fiberglass Hull

Regularly waxed gelcoat can last up to 15 years, depending on how well you take care of your boats hull and exposure to UV rays. If your hull is showing signs of damage such as cracking or is no longer retaining its gloss, and has chalky white powder on the surface, then it is time to re-gelcoat your hull. Dewaxer is perfect for dewaxing the hull and effectively cleaning up paint supplies.

Repairing a Fiberglass Boat

Repairing a fiberglass boat is not as difficult as it may seem. In fact, with the right materials and some basic knowledge, you can easily repair gelcoat cracks and holes. The first step is to clean the area around the crack or hole. This will help to ensure that the repair area is free of debris and dirt. Next, use a gelcoat patch kit to apply a thin layer of gelcoat to the damaged area. Once the gelcoat has cured, sand it down until it is flush with the surrounding area. Finally, apply a fresh coat of paint to protect the gelcoat from UV rays and weathering. With some patience and attention to detail, you can easily repair gelcoat cracks and holes yourself.

Be Prepared for your Gelcoat Project

Using gelcoat can be an excellent solution for repairing and renewing fiberglass-based surfaces. Gelcoat is sometimes referred to as marine paint for fiberglass, however it is not a paint, so if you are unfamiliar with applying gelcoat, please see our numerous how to articles as it can be difficult to apply and achieve optimal results for first time users. You can also contact Bottom Paint Store’s technical team from 8:30-5:00pm EST Monday through Friday.

Using Webbing Solution

Webbing Solution is a clear liquid added to gelcoat to obtain spatter or cobweb effects. It is mixed with a gelcoat of one color and sprayed onto a contrasting colored surface.

Decorative effects produced by the webbing mixture will vary, and relate directly to techniques or gun adjustments. A fine hairline spider web pattern results from plenty of air and scanty material flow. Coarse and splotchy patterns are created by fuller material flow and decreased air volume. While our webbing solution is only tested with gelcoat, customers do use with paint achieving similar results.

The manufacturer suggests on the initial coat you add the wax and while gelcoat is still tacky before it comes to a full air cure, you apply the contrast color of webbing (which should have the wax added too).

If you are applying webbing over a fully cured gelcoat, sand with 150 grit, clean with acetone, and then apply the webbing.

Mix 2 parts gelcoat to 1 part webbing.
Mix proper amount MEK-P for the amount of gelcoat.
Shoot at 10 to 12 PSI.

Add to colored gelcoat to obtain desired webbing effect. Test in an inconspicuous area to determine satisfactory results

Gelcoat Putty – Repair Spider Cracks And Fill Gouges!

Gelcoat putty is an indispensable part of any boat owner’s toolkit, providing a simple way to make quick and reliable repairs on any gelcoat surface. Perfect for fixing anything from spider cracks to fill in gouges and scratches, and is an easy-to-use solution that leaves a smooth finish and every application has the potential to restore gelcoat surfaces and make them look like new again. This dependable material is simple enough even novice motorboat and sailboat owners can use it without having to take their vessels out of the water for professional repair. Gelcoat putty can help anyone keep their boats looking shipshape with minimal effort.

There are many ways to repair spider cracks in boats, using our Gelcoat Repair Putty is an easy and fast way of doing it!

First, you will need to determine your spider cracks are only that, spider cracks. To do so, you will need to inspect the area for any sign of broken support. If the surface is steady and looks solid, then you have spider cracks.

In order to properly fix any spider cracks, you will have to open the cracks to fill them up correctly. This can be done by using a Dremel. Once the crack is open and it has a good size you can sand and clean the area. For cleaning, you may use acetone or soap and water.

Now, you are ready to use the Gelcoat Putty. Mix in a 1-1/2% ratio of MEK-P Catalyst into the putty and mix it properly. Use a putty knife to fill in the spider cracks. Once dry, sand the surface to a smooth finish.

For filling gauges and cracks, some tips:

This product uses MEKP, just like gelcoat so your working time is 8-18 minutes, depending on temperature. If catalyzed at 1% and it is in perfect conditions (77 F) you have a longer work time. To extend work time cool product down before use.

If filling holes, fill a little high to allow for shrinkage. Once it dries you can easily smooth it out with sandpaper. Recommended thickness at 1/4″.

Tip: You can apply gelcoat to match the color of your boat over the repair, or you can use our pigments to tint the gelcoat putty and complete the repair all at once!

Thinning Gelcoat and Using PVA

Gelcoat does not fully cure without first supplementing it with a surfacing agent or wax additive sanding aid. Gelcoat may be thinned for use in a Portable Preval Sprayer with styrene monomer. You can spray it with polyvinyl alcohol (PVA) before gelcoat reaches its gel stage (5-10 min.), or add 1oz per quart of a wax additive sanding aid.

PVA or Partall Film #10 is a release agent that helps with removing parts from a mold or can be used as a surfacing agent when using gelcoat without a wax additive (sanding aid).

PVA is soluble in water making it easy to wash off. Applying can be achieved by spraying or wiping the green liquid on with a sponge. It will foam slightly but dry to a clear, glossy shine. It can take 15-30 minutes depending on temperature.

For spraying gelcoat our FGCI brand does not recommend thinning.

Generally, you should not add more than 10% Styrene by volume. Patch Booster is an additive that will thin out gelcoat and not affect colors. Follow manufacturers instructions as added Mekp may be needed.

Another thinning alternative is the Duratec High Gloss Additive. This is used with gelcoat for many reasons. Mixed at a 50/50 ratio this will produce a high gloss finish and will serve as a thinner for your gelcoat, that is why this is commonly used when spraying gelcoat. In addition, you’ll omit any additional sanding aid. After waiting a full 24 hours you can buff when cured, for a hi-gloss use 600 or higher grit paper and buff with Aqua Buff 2000 compound. Follow the manufacturer’s technical data sheet as an extra hardener may be needed. Some customers use Styrene for thinning but the manufacturer warns it can affect the gelcoat colors although this is the most cost-effective option and doesn’t have the added wax.

Aqua Buff 1000-W and Aqua Buff 2000

If you are looking to remove some unwanted scratches on your boat or to bring back shine into your gelcoat, Aqua Buff is for you!

Aqua Buff is a polishing compound that we offer in two variations: Aqua Buff 1000-W and Aqua Buff 2000. It is mainly used as a way to remove heavy oxidation, sanding scratches, and swirl marks from gelcoat. There are no oils or polymers in Aqua Buff, so the surface you see is the true surface.

The Aqua Buff 1000-W is used for deep scratches and heavy oxidation. It has a blue-green color which is why is not recommended for white hulls. Use Aqua Buff 1000-F on white surfaces. Aqua Buff 1000-W removes 320 – 600 grit scratches.

Aqua Buff 2000 is used for finer scratches, swirl marks, and light oxidation. Use it to remove 1000 grit scratches and higher. Cleans and removes scratches from Fiber-Reinforced-Plastic parts, metals, and painted surfaces. It is strong enough for most uses and provides a shiny finish.

Application Instructions

  1. Apply a small portion of Aqua–Buff 1000-W or 2000 on the surface using a brush or microfiber cloth (stick to a small area)
  2. Use a spray bottle to mist the surface with water. Only use about a coin-size amount of compound per square foot.
  3. Immediately machine buff* with a clean, damp, compound pad.
    Use wool or wool/blend pads only.

*Use machine buffers that generate at least 2500 rpm for best results.

For the best techniques and tips on how to apply Aqua Buff please watch the video below.

How to Gelcoat your Fiberglass Pool Steps

The finish of your fiberglass pool steps can fade after years of use and exposure to pool chemicals and the weather. If you notice that your pool steps are looking tacky it might be time for you to reapply gelcoat to them.

You can use Gel Coat if your pool steps currently have gelcoat or bare fiberglass for pool use. 

See the article How to Apply Gelcoat’ for more details on how to use gelcoat.


What to Use on the Deck of My Boat?

Over the lifetime of any boat there will come a time when the deck needs to be renewed. You have a choice of non-skid additives, or paints that already contain a nonskid compound.  A non skid boat deck helps protect the surface as well as the occupants.

When looking for a non-skid surface you have many options. If your boat floor is currently gelcoat, you can re-gelcoat the surface with or without a non-skid additive. More information about gelcoat application can be found here. Gelcoat is more durable than paint and once a gelcoat surface is painted gelcoat will not adhere.

If paint is desired, non-skid can be added to our marine paints by Duralux and Awlgrip. Often an exact match can be found to your hull paint color. Find more topside paint options available and detailed instructions on adding non skid found in our how to section.

Customers painting the floor of a jon boat, frequently use the Aluma Hawk aluminum paint with a non skid additive. This paint serves as a paint and primer in one for your aluminum surface.

Interdeck boat deck paint is a non-skid deck paint by Interlux and offers an excellent slip resistant finish. It contains a fine aggregate and will apply easily on substrates. Its low sheen finish prevents dazzling that can be reflected by sunlight off decks. Interdeck is also easy to apply and available in numerous colors. The tough polyurethane resin protects decks against everyday wear and tear.

Depending on your paint choices, follow the manufacturers application instructions whether applying to aluminum, fiberglass, or wood to ensure best adhesion and slip resistance.

For cleaning the teak on your boat deck, JustTeak™ is a marine-grade teak cleaning system is designed to rejuvenate your teak quickly and easily. JustTeak™ will clean, brighten, and once sealed protect your teak decking. We have an application instructions video How to clean and protect the teak on your boat.

What Products Do I Use to Paint a Livewell?

A livewell is a tank found on many fishing boats that is used to keep bait and caught fish alive. It works by pumping fresh water from the surrounding body into the tank, as well as keeping the water aerated.

Most live wells on boats are made of fiberglass and usually coated with gelcoat. For more information on applying gelcoat see our How to Apply Gelcoat article.

In the case that your live well is aluminum you can apply Aluma Hawk, available in white, blue, grey, black, sand and jon boat green to the aluminum surface.

Can I change the color or tint my paint?

For most paints, in order to guarantee efficacy, the only way we recommend changing the color of  paints is to mix like paints, ie. Mixing Aluma Hawk with Aluma Hawk. We do not recommend addition of “universal” tints or pigments into our products. Many customers desire an antifouling paint in a deep, dark blue and this can be achieved by mixing blue and black.

Gel coats and resins can have a tint added, no more than 1 oz per quart, which can limit the effect. Another option is to mix two gelcoat colors, such as white and red for pink.

Ideal Temperatures for Applying Paints and Gelcoats

When applying coatings in cooler temperatures it is important that you meet the minimum temperature requirements. This information can typically be found in the products technical data sheet, or on the can label.

As a general rule, coatings should be applied in good weather when air and surface temperatures are above 50°F (10°C) for most paints and 60°F (16°C) for epoxy, resin, and gelcoats . Surface temperature must be a least 50°F (10°C) above dew point. For optimum application properties, bring material to 70-80°F (21-27°C) temperature range prior to mixing and application.

Tips:

  • Make sure to store the coatings inside to keep the temperature in the optimal range prior to application.
  • Do not let coatings freeze, as this may alter the chemical integrity of the products.
  • In warm (hot) conditions be sure to keep the coatings out of direct sunlight exposure.

Coatings such as resins and gelcoats that require MEKp to be added for curing will require more MEKp in cooler conditions, and less MEKp in warmer conditions. See the guide below, but refer to the specific coating’s technical data sheet for detailed information:

MEPk Levels

MEkp Concentration Levels


How to Select a Spray Gun Nozzle Tip Size

What Size Spray Gun Tip Is Best for Gelcoat?

Best Gelcoat Spray Gun Tip Sizes (Quick Answer)

• Most gelcoat applications: 2.0–2.5 mm
• Thick gelcoat or no thinning: 2.5–3.0 mm
• Thinned gelcoat: 1.8–2.0 mm
• Touch-ups / detail work: 1.4–1.8 mm

If you just want the right starting point: most gelcoat sprays best through a
2.0–2.5 mm tip/nozzle. Use the quick guide below to match your gelcoat thickness and the finish you want.

Gelcoat Tip Size Cheat Sheet

  • Most gelcoat applications: 2.0–2.5 mm
  • Thick gelcoat / minimal thinning: 2.5–3.0 mm
  • Thinned gelcoat (better atomization): 1.8–2.2 mm
  • Small repairs / detail work: 1.4–1.8 mm
  • Heavy flake gelcoat (if applicable): 2.8–3.5 mm

Pro tip: If your gelcoat is spitting, orange-peeling badly, or clogging the gun,
your tip is often too small (or the gelcoat is too thick). If you’re getting runs/sags, you may be over-applying
or using too large a tip for your material and technique.

Next: Use the chart below to dial in your tip size by use case and application style.

There are three main factors to consider when determining the size tip that will produce the best results.

    1. First, examine the coating that will be sprayed. Put simply, heavier coatings will require a larger orifice size than lighter ones. For example, primers are usually thicker than the accompanying paint so you should use a 1.7 or 1.8 mm tip to prime most surfaces. Most painters will stay in the range of 1.2 to 2.0 mm unless the paint being applied is specialized. (See chart below.)

2. The next thing to consider is your project surface area. This determines the appropriate fan width that your sprayer will produce, that is, the shape in which the product will leave the gun nozzle. Airless spray guns have more control over the fan width than conventional spray guns because the coating is forced through the tip without being atomized by air. This causes the tip to have a large impact on the fan width and shape. Most boat projects consist of large surfaces and so a wide fan will increase the spray coverage and also provide the ability to spray close to the surface without too much build up. Smaller surfaces will require a small fan width to reduce overspray. This also makes it possible to spray further away from the surface without too much falloff because the fan is more focused.

3. Lastly, consider the spray gun that is being used. Make sure that the spray tip you plan on using will be supported by the gun. Most spray gun manufacturers will provide this information in their product overview. The Bottom Paint Store distributes ES Manufacturing Gelcoat Spray Guns. The ES G830 gun will support a range of 0.8 – 2.0 mm. The ES G100 and G200 gelcoat spray guns support a range of 0.8 – 7.1 mm tips. If you aren’t sure about your gun’s supported sizes, check with the gun manufacturer.Spray Gun Nozzles For G830 Spray Gun


Gelcoat Spray Nozzle Tip Size Chart

Gelcoat Type Recommended Tip Size Spray Method Notes
Standard Gelcoat 2.0 – 2.5 mm HVLP / Gravity Feed Gun Common for most repairs and recoats. Requires thinning only if specified by manufacturer.
Tooling Gelcoat 2.5 – 3.0 mm Pressure Pot / HVLP Thicker, harder formula. Larger tip reduces clogging and ensures proper film build.
Gelcoat with Metal Flake 2.5 – 3.5 mm Pressure Pot / Specialized Flake Gun Flake can clog smaller tips. Stir constantly and maintain strong airflow.
Waxed Gelcoat 2.0 – 2.5 mm HVLP / Gravity Feed Gun Applies similar to standard gelcoat. Final coat only — cures tack-free.
Unwaxed Gelcoat 2.0 – 2.5 mm HVLP / Gravity Feed Gun Leaves tacky surface for recoating. Often followed by waxed topcoat.
Thickened / Patch Gelcoat 2.0 – 2.7 mm HVLP / Gravity Feed Gun Used for scratch and chip repairs. Usually brushed or dabbed, but can be sprayed with larger tips.


Common Spray Tip Sizes and Their Uses
Tip size (mm) Commonly Used for
0.8 Parting Films – PVA – very fine mist
1.2 Clear Coats – super fine finishes
1.4 All Around Tip – clears, base coat, single stage paints
1.6 General Purpose – light to heavy viscosity materials
1.8 Primers – will apply primer quickly
2.2 -2.5 Gel Coats and Resins – for thick resins and not paints

Application Tips

  • Air Pressure: Most HVLP guns need 35–65 PSI at the gun. Always check the spray gun’s manual.

  • Film Thickness: Aim for 18–22 mils total build (multiple passes of ~6–8 mils each).

  • Thinning: Only thin if specified — usually 5–10% with acetone or proprietary reducer. Too much thinning = runs + reduced durability.

  • Test First: Spray a test panel to confirm atomization before applying to your project.


Frequently Asked Questions (FAQ)

  1. Why is selecting the right nozzle tip size important when applying gelcoat?
    The nozzle tip size plays a crucial role in achieving a smooth and even finish when applying gelcoat. If the nozzle is too large or too small, it can cause uneven application, overspray, or a finish that is too thick or too thin. Selecting the right size ensures better control and optimal results.
  1. What happens if I use the wrong nozzle tip size?
    Using the wrong nozzle size can lead to several issues, such as poor gelcoat coverage, inconsistent texture, overspray, or excessive wastage. A nozzle that is too small may cause clogging or slow application, while one that is too large can result in an uneven layer of gelcoat.
  1. How do I determine the right nozzle tip size for my gelcoat application?
    The right nozzle tip size depends on factors such as the type of gelcoat, the thickness of the coating, and the specific spraying equipment you’re using. A general rule of thumb is that a 1.4mm to 1.8mm nozzle works well for most gelcoat applications. However, it’s essential to consult the manufacturer’s recommendations and consider your equipment specifications.
  1. Can I use the same nozzle tip size for different types of gelcoat?
    While you can use the same nozzle size for various gelcoats, some formulations might require adjustments. Thicker gelcoats may need a larger nozzle, while thinner ones may perform better with a smaller tip. Always test the setup before starting a large project to ensure a smooth application.
  1. Should I use a different nozzle for each layer of gelcoat?
    For some projects, especially those involving multiple layers of gelcoat, it may be helpful to use a different nozzle for each layer. A larger nozzle can be used for the base layer, while a smaller one may be better for final touch-ups and detailing. Always check the viscosity of the gelcoat before selecting the nozzle.
  1. Can nozzle tip size affect the finish quality of my gelcoat project?
    Yes, nozzle tip size can directly impact the finish quality. A nozzle that is too large may lead to excessive gelcoat application, while one that is too small may result in a patchy finish. For the best results, selecting the appropriate nozzle size ensures an even and smooth coat.
  1. How do I clean my nozzle tip after using gelcoat?
    Proper cleaning of the nozzle is essential to maintain performance and extend the life of your equipment. After each use, make sure to thoroughly clean the nozzle with the recommended solvent or cleaning solution to remove any leftover gelcoat or debris. Regular maintenance prevents clogs and ensures consistent application.
  1. Can I use airless sprayers for gelcoat applications?
    Yes, airless sprayers are commonly used for applying gelcoat, especially in large projects. When using an airless sprayer, make sure to select the appropriate nozzle size, as recommended by the sprayer’s manufacturer or based on your gelcoat thickness.
  1. How can I avoid overspray when selecting a nozzle tip size?
    To reduce overspray, select a nozzle that provides the correct spray pattern and pressure for your gelcoat. Using a smaller tip and lower pressure settings can help prevent excess spray. Additionally, consider using a spray shield or mask to control overspray during application.
  1. Where can I find nozzle tips for gelcoat spraying?
    Bottom Paint Store has them. You can find them here: https://www.bottompaintstore.com/fiberglass-and-gel-coat-repair-gel-coat-spray-gun-and-tools-c-13581_13592.html

By considering these five factors, you can ensure you select the appropriate spray gun nozzle tip size for each job. If you have any questions or need additional guidance on selecting the right size, the experts at the Bottom Paint Store are here to help.

Bibliography Research Data

http://boatpaintguide.com/gelcoat-spray-gun-the-right-tool-for-a-great-job/#.U_80dfldVWg

http://esmfg.com/aspnet_client/g860_hvlp_gelcoat_spray_gun.html

http://www.finishsystems.com/qanda.html

http://www.international-marine.com/paintguides/mpg_paintapplication.pdf

http://magnum.graco.com/products/M_Pages.nsf/Webpages/0Spray_Tip_Info

http://www.carcraft.com/howto/ccrp_0511_paint_spray_gun/#ixzz3Bheyr89Z


Clear Coat My Bass Boat

Typically the clear coat on a bass boat is meant to protect the metalflake. You can choose a clear paint or clear gelcoat.

Clear gelcoat is typically what bass boats use at the factory for UV protection over metalflake but gelcoat isn’t as easy to use as paint. Gelcoat typically covers 48 sq feet applied at 18 mils thick per gallon.

We are often asked if you can you gelcoat over gelcoat? If the surface is already covered with gelcoat, or if the surface is a fiberglass, or polyester resin, then you can. It is relatively easy to to apply gelcoat on top of gelcoat if you follow the instructions. If the surface is paint, then the paint would have to be removed before applying the gelcoat. It is important to remember not to completely rely on gelcoat as it you may still need to make repairs to your bass boat after applying gelcoat.

How to Apply Gelcoat 

Topside Boat Paint Options: What are your choices?